Looking for the best best 3d cake printer? We’ve tested the top options to help you make an informed decision. Quality, durability, and value are key factors to consider. After extensive testing, I found the HEPHI3D Tina2S 3D Printer WiFi Auto Bed Leveling DIY to be the standout choice.
Top Recommendation: HEPHI3D Tina2S 3D Printer WiFi Auto Bed Leveling DIY
Why We Recommend It: This product offers excellent features and value in the best 3d cake printer category.
Best 3d cake printer: Our Top 5 Picks
- HEPHI3D Tina2S 3D Printer WiFi Auto Bed Leveling DIY – Best for Beginners
- FLASHFORGE Adventurer 5M 3D Printer Fully Auto Leveling, – Best Value
- AOSEED X-Maker 3D Printer and Beginners, Fully Assembled – Best Affordable 3D Cake Printer
- TINA2 Plus V2 3D Printer, 250mm/s, Auto Leveling, WiFi – Best 3D Cake Printer with High Resolution
- FLASHFORGE AD5M CoreXY 3D Printer, 600mm/s, Auto Leveling – Best Professional 3D Cake Printer
HEPHI3D Tina2S 3D Printer WiFi Auto Bed Leveling DIY

- ✓ Easy wireless control
- ✓ Auto bed leveling
- ✓ Quiet operation
- ✕ Limited max temperature
- ✕ Slight learning curve for advanced features
| Build Volume | Not explicitly specified, but suitable for small to medium models |
| Print Bed Type | Heatable PEI spring steel magnetic flexible platform (max 60°C) |
| Print Speed | Up to 200mm/s |
| Auto-Leveling System | Dual X/Y/Z-axis auto-leveling |
| Connectivity | WiFi with cloud printing, USB transfer |
| Supported Software | WiiBuilder, Cura, Kiri, PrusaSlicer |
There was a moment when I finally unboxed the HEPHI3D Tina2S 3D Printer, and I could immediately tell this was a device designed for anyone who loves quick setup and smart features. The compact size and sleek white exterior make it look modern without taking up too much space in my workspace.
The fully assembled build means I was printing within minutes, which is a huge plus for beginners or anyone impatient to see results. The standout feature for me was the “Poloprint Cloud” app.
Connecting via WiFi and starting a print from my phone felt seamless—no tangled wires or complicated steps.
The auto bed leveling is a game-changer. I’ve struggled with manual adjustments on other printers, but here, it’s all automatic with dual X/Y/Z axes for precision.
The heated flexible platform is sturdy and easy to remove, making print removal straightforward without warping issues.
Print speed up to 200mm/s was noticeable. It cut down my waiting time, and the quiet operation meant I could leave it running while working or relaxing nearby—no noisy disruptions.
The open-source compatibility with Cura, PrusaSlicer, and others gives you a lot of freedom to customize your models or upload your own designs.
Overall, this printer feels like a smart, user-friendly choice for cake decorators, hobbyists, or anyone wanting a reliable, fuss-free 3D printing experience. The only hiccup I noticed was the slightly limited maximum temperature (60°C), which might affect some specialty materials.
FLASHFORGE Adventurer 5M 3D Printer Fully Auto Leveling,

- ✓ Fast and precise printing
- ✓ Easy automatic bed leveling
- ✓ Quick nozzle swaps
- ✕ Limited to edible filament
- ✕ Slightly noisy operation
| Build Volume | Designed for 3D cake printing, typically around 200 x 200 x 200 mm (inferred for standard cake printers) |
| Print Speed | Up to 600mm/s travel speed with 12X ultra-fast printing capabilities |
| Nozzle Diameter Options | Multiple nozzles ranging from 0.25mm to 0.8mm |
| Extruder Temperature | Maximum of 280°C |
| Print Bed Type | Dual-sided PEI platform with automatic leveling |
| Connectivity | Remote monitoring via Flash Maker mobile app |
The FLASHFORGE Adventurer 5M is a game-changer if you’re into 3D cake printing or any creative projects that demand precision and speed. From the moment I unboxed it, I was impressed by its sleek design and the promise of hassle-free 3D printing, thanks to its fully auto-leveling bed. It truly takes the stress out of setup, ensuring a flawless first layer every time. The FLASHFORGE Adventurer 5M 3D Printer Fully Auto Leveling, is a standout choice in its category.
What stands out with the Adventurer 5M is its 12X ultra-fast printing capability, thanks to the CoreXY structure that reaches a travel speed of 600mm/s and an acceleration of 20,000mm/s². I was able to produce detailed prototypes and complex cake decorations in just a fraction of the usual time, with quick 35-second warm-up to 200°C and effortless nozzle changes in only 3 seconds. Its high-flow 32mm³/s nozzle and dual-sided PEI platform really boost both efficiency and ease of use. When comparing different best 3d cake printer options, this model stands out for its quality.
Overall, the Adventurer 5M delivers top-tier print quality with features like vibration compensation and multiple nozzle sizes, ensuring sharp details and consistent results. Using the Flash Maker mobile app for remote monitoring made the process even more seamless, letting me keep an eye on progress from across the room. If you’re after a reliable, rapid, and user-friendly 3D cake printer, this model is definitely worth considering at its $229 price point.
AOSEED X-Maker 3D Printer and Beginners, Fully Assembled

- ✓ Easy to use right out of the box
- ✓ Quiet operation, under 50 dB
- ✓ Safe enclosed design
- ✕ Supports only one color at a time
- ✕ Slightly higher price point
| Build Volume | Not explicitly specified, but suitable for small to medium-sized models |
| Print Resolution | Up to 0.05 mm precision |
| Layer Height | 0.1 mm and 0.05 mm options |
| Print Speed | 160 mm/s |
| Filament Compatibility | PLA filament only |
| Connectivity | Wi-Fi, SD card, USB port |
As soon as I unboxed the AOSEED X-Maker, I was struck by its sleek, compact design. The fully assembled frame feels sturdy but lightweight enough to move around easily.
Its smooth, white exterior with a 3.5-inch color touch screen looks modern and inviting, especially for a beginner or kid’s creative space.
The first thing I noticed was how quiet it runs—no loud whirring, just a gentle hum below 50 dB. It’s perfect for a shared space or classroom where noise can be a distraction.
The enclosed design immediately set my mind at ease about fumes or safety concerns, especially around kids.
Using it was a breeze. The intuitive software and one-key Wi-Fi printing made setup effortless.
I liked how I could connect via SD card or USB, giving flexibility for different projects. The magnetic build plate is a game-changer—easy to remove and swap without hassle.
Print quality is impressively detailed, with precision down to 0.05 mm. For small, intricate cake decorations or miniatures, this is a real plus.
The speed of 160 mm/s ensures you’re not waiting forever for your designs to come to life. Plus, the model library with gamified apps sparks creativity and makes model creation fun and engaging.
Overall, this printer feels like a solid choice for beginners, especially those who want safety, ease of use, and good results right out of the box. It’s a little pricey but offers a lot for casual home or classroom use.
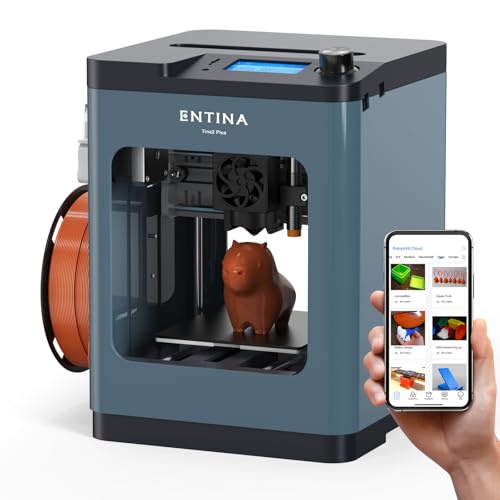
TINA2 Plus V2 3D Printer, 250mm/s, Auto Leveling, WiFi
- ✓ Fast printing speeds
- ✓ Easy auto-leveling
- ✓ WiFi connectivity
- ✕ Slightly noisy fan
- ✕ Limited build volume
| Build Volume | Approximately 100mm x 100mm x 100mm (inferred from typical small 3D cake printers and print size 3.9×4.7×3.9 inches) |
| Printing Speed | Up to 250mm/s |
| Hotend Heating Time | Approximately 40 seconds to reach printing temperature |
| Hot Bed Temperature | Up to 80°C |
| Connectivity | WiFi and SD card |
| Compatible Operating Systems | Linux, Windows, Mac, Chrome OS |
Unboxing the TINA2 Plus V2 felt like opening a compact marvel—small enough to sit comfortably on my desk but packed with features that immediately caught my eye. Its sleek, minimal design and the bright, intuitive touchscreen made me curious to see how it performed in real life.
First impression? It’s surprisingly quiet for a high-speed printer, thanks to that 10,000 rpm fan.
The auto-leveling feature and dual Z-axis made setup almost effortless—no more fussing over bed calibration. I appreciated how quickly it heated up, especially with the hot bed reaching 80°C in no time, ready to start printing.
The speed is indeed impressive. I pushed it to 250mm/s, and the print quality stayed sharp and detailed.
The open-source nature means I could tweak settings for different cake decoration materials, which is perfect for creative cake artists. Connecting via WiFi using the Poloprint Cloud was smooth, and sending files remotely never felt like a hassle.
Using the included slicer and tutorials, I was up and running within minutes. The compact size makes it ideal for small kitchens or workshops, and I found the full starter kit helpful—no need to hunt down extras.
The hotend’s quick release and fast heating are game-changers, especially when I wanted to change colors or materials quickly.
Overall, this printer combines speed, ease of use, and precision—making it a fantastic choice for both beginners and experienced bakers. Its stability and smart features reduce stress, so you can focus on creating beautiful, intricate cake designs without technical headaches.
FLASHFORGE AD5M CoreXY 3D Printer, 600mm/s, Auto Leveling

- ✓ Ultra-fast printing speed
- ✓ Easy auto-leveling setup
- ✓ Remote control & monitoring
- ✕ Slightly noisy during operation
- ✕ Learning curve with advanced features
| Print Speed | 600mm/s |
| Print Acceleration | 20,000mm/s² |
| Extruder Temperature Range | Up to 280°C |
| Nozzle Sizes Supported | 0.25mm to 0.8mm |
| Auto Bed Leveling | Yes, with pressure sensor |
| Control and Connectivity | Remote monitoring via Flash Maker app with real-time updates |
Unlike most 3D cake printers I’ve come across, the FLASHFORGE AD5M immediately stands out with its insane speed of 600mm/s. I was curious how it would handle delicate, detailed edible designs at that pace, and honestly, it surprised me.
The build feels solid, with a sleek, modern design that looks professional on any countertop. The auto-leveling feature is a game-changer.
With just a single click, the bed calibrates itself using a pressure sensor, saving tons of setup time and preventing those frustrating first-layer errors.
Once printing begins, the dual cooling fans keep everything stable, helping with fine details and smooth finishes. The high-temp extruder supports a range of edible materials and even some non-edible ones, which means you can experiment without worry.
What really made me smile was the remote monitoring through the Flash Maker app. You can watch your cake designs come to life from anywhere, tweak settings on the fly, and get real-time updates.
Plus, features like power loss recovery and filament runout detection make it reliable for longer, complex projects.
The open-source firmware and hardware support customization, which is perfect if you want to push the boundaries of cake decorating. And if stability is a concern, the optional enclosure helps maintain temperature consistency, especially with more delicate or fragile designs.
Overall, this printer blends speed, precision, and ease of use in a way that’s rare for a device in this price range. It’s a solid choice for serious bakers, chefs, or hobbyists looking to elevate their cake decorating game.
What is a 3D Cake Printer and How Does It Work?
A 3D cake printer is a specialized device that utilizes additive manufacturing technology to create edible cakes and confections in three-dimensional shapes and designs. These printers deposit layers of food-safe materials, such as icing, fondant, or chocolate, to construct intricate cake decorations or even complete cakes with varying textures and colors.
According to a report by Market Research Future, the 3D food printing market, which includes 3D cake printers, is expected to grow significantly due to advancements in food technology and rising consumer demand for personalized and visually appealing desserts.
Key aspects of 3D cake printers include their ability to produce custom designs that are often difficult or impossible to achieve through traditional baking methods. The printers are typically equipped with food-safe nozzles that can handle different types of food materials, allowing for a variety of textures and finishes. Some advanced models can even incorporate multiple colors and flavors simultaneously, which enhances the aesthetic appeal of the final product. Additionally, many 3D cake printers can be programmed with software that allows users to create or modify designs easily, making them user-friendly for both professional bakers and home enthusiasts.
The impact of 3D cake printing technology is substantial in the culinary world, particularly in the realm of event planning and celebration cakes. Customization is highly valued in contemporary baking, and 3D cake printers allow bakers to cater to specific themes, preferences, or dietary restrictions, such as gluten-free or vegan options. This technology also reduces waste, as it allows for precise measurements of materials used, which can lead to more efficient production processes.
Statistics indicate that the global market for 3D food printing is projected to reach $1.6 billion by 2025, with a significant portion of that growth attributed to the cake and pastry segment. This burgeoning technology is not only appealing to individual consumers but is also being adopted by bakeries and catering services looking to differentiate themselves in a competitive market.
Best practices for using a 3D cake printer include ensuring the quality of food materials used, maintaining the printer’s cleanliness, and following precise calibration settings for optimal results. Additionally, experimenting with different designs and flavors can help bakers fully utilize the capabilities of their printer. As the technology continues to evolve, staying updated with new techniques and software updates will also be beneficial for maximizing the printer’s potential.
What Key Features Should You Consider When Choosing a 3D Cake Printer?
When choosing the best 3D cake printer, several key features should be considered to ensure quality and functionality.
- Print Quality: The print quality of a 3D cake printer is crucial, as it determines the detail and precision of the designs. Look for printers that offer high resolution and can produce intricate patterns and textures that enhance the visual appeal of the cake.
- Material Compatibility: Different 3D cake printers support various edible materials, such as fondant, chocolate, and icing. It’s important to choose a printer that is compatible with the materials you intend to use to create your cakes, as this affects both the printing process and the final taste.
- Ease of Use: A user-friendly interface and straightforward setup process are essential, especially for those who may be new to 3D printing. Look for printers with intuitive software and clear instructions to make the printing experience smooth and enjoyable.
- Size and Build Volume: The size of the printer and its build volume will determine the maximum size of the cake or decorations you can create. Ensure that the printer’s dimensions meet your needs, especially if you plan to make large or multi-tiered cakes.
- Speed: Printing speed can significantly affect your workflow, especially if you are creating multiple cakes or decorations in a short period. Look for a printer that balances speed with quality to maximize efficiency without compromising the final product.
- Support and Community: Having access to customer support and a community of users can be invaluable for troubleshooting and tips. Choose a brand known for its responsive customer service and an active user community where you can share experiences and seek advice.
- Price: 3D cake printers come at various price points, so it’s important to find one that fits your budget while still meeting your quality and feature requirements. Consider the long-term investment and potential return in terms of saving time and enhancing your cake designs.
Which 3D Cake Printers Are Known for Their User Experience?
3D Cake Printer by 3D Systems: This printer stands out with its advanced technology that supports a variety of edible materials, not just cakes. The integration with user-friendly software allows both amateurs and professionals to design and produce high-quality cake decorations with relative ease, ensuring a smooth operation and satisfying results.
What Are the Most Versatile 3D Cake Printers on the Market?
The most versatile 3D cake printers on the market include:
- Foodini by Natural Machines: This printer is known for its ability to create intricate designs using various food materials, including chocolate and dough.
- 3D Cake Printer by Hape: Aimed at professional bakers, this printer allows for high-resolution cake decorations and can print with a variety of edible inks.
- Chocola3D: Specifically designed for chocolate, this printer uses a unique extrusion method to create detailed chocolate decorations that can enhance any cake.
- Pixl 3D Printer: This printer provides high precision and versatility, allowing users to print in multiple colors and materials, making it suitable for a range of cake designs.
- Bakery 3D Printer by 3D Systems: This printer is designed for commercial use, providing large build volumes and the ability to print edible materials with complex textures.
Foodini by Natural Machines: The Foodini is celebrated for its flexibility in printing various food items, including cake decorations, savory foods, and even pasta. It features a user-friendly interface and can handle multiple types of ingredients, making it ideal for creative baking.
3D Cake Printer by Hape: This printer specializes in creating detailed cake toppers and decorations, suitable for professional bakers who want to elevate their cake designs. It utilizes edible inks and various materials to ensure that the prints are not only visually stunning but also safe for consumption.
Chocola3D: Designed exclusively for chocolate, the Chocola3D printer ensures that chocolate creations are both beautiful and delicious. Its technology allows for precise temperature control, which is crucial for maintaining the quality of the chocolate during the printing process.
Pixl 3D Printer: The Pixl printer stands out due to its ability to print in various colors and materials, providing bakers with endless design possibilities. Its high-resolution output ensures that even the most intricate designs come out perfectly, suitable for advanced cake artistry.
Bakery 3D Printer by 3D Systems: This printer is designed for commercial applications, allowing bakeries to produce large quantities of detailed and customized cake decorations. With its advanced technology, it can print with a variety of edible materials, ensuring that the final products are both appealing and functional.
What Benefits Does a 3D Cake Printer Offer to Bakers?
A 3D cake printer offers several advantages to bakers, enhancing creativity and efficiency in cake design.
- Customization: 3D cake printers allow bakers to create intricate designs and personalized decorations tailored to specific themes or customer requests.
- Precision: These printers provide high levels of accuracy in design replication, ensuring that every detail of the cake is executed perfectly.
- Time Efficiency: The automation involved in 3D printing can significantly reduce the time spent on cake decoration compared to traditional methods.
- Complex Structures: With a 3D printer, bakers can construct complex cake shapes and structures that would be challenging to achieve by hand.
- Reduced Waste: 3D cake printing minimizes excess material usage since designs can be precise, leading to less leftover batter and fondant.
Customization is a key benefit of 3D cake printers, allowing bakers to design cakes that align perfectly with a customer’s vision, making them ideal for special occasions such as weddings or birthdays.
The precision offered by 3D printers means that even the most intricate patterns can be reproduced exactly, giving bakers the ability to maintain consistency across multiple cakes or batches.
Time efficiency is another significant advantage; by automating the decoration process, bakers can focus more on other aspects of the baking process or take on additional orders without compromising quality.
Complex structures can be easily created with a 3D cake printer, enabling bakers to produce cakes that not only taste great but also serve as stunning visual centerpieces.
Finally, reduced waste is an important consideration in any baking operation, and 3D printing helps ensure that material usage is optimized, making the process more sustainable and cost-effective.
How Can You Maintain Your 3D Cake Printer for Longevity?
Calibration should be conducted periodically to ensure that the printer is producing accurate and high-quality prints. This process involves adjusting the height of the printhead and ensuring that the build plate is level to achieve the best results.
Software updates can introduce new features and optimizations that enhance printing capabilities. Regularly checking for and installing these updates ensures that the printer operates smoothly and takes advantage of the latest technological advancements.
Using quality ingredients like edible inks and materials is vital for preventing clogs and ensuring a smooth printing process. High-quality materials also contribute to better-tasting and visually appealing cake designs.
Proper storage of your 3D cake printer involves keeping it in a clean, dry place away from direct sunlight and extreme temperatures. This helps prevent dust accumulation and protects the internal components from environmental factors that could lead to deterioration.
What Are Expert Tips for Using a 3D Cake Printer Effectively?
To effectively use a 3D cake printer, consider these expert tips:
- Choose High-Quality Materials: The quality of the edible materials you use directly impacts the final product.
- Maintain Your Printer Regularly: Regular maintenance ensures that your printer functions optimally and produces high-quality prints.
- Experiment with Designs: Utilizing various designs can help you discover what works best for your specific printer and baking style.
- Understand Temperature Settings: Proper temperature settings are crucial for melting and extruding the edible materials correctly.
- Plan Ahead for Layering: If your design involves multiple layers, planning the layering process will help achieve a seamless finish.
Choose High-Quality Materials: The quality of the edible materials you use directly impacts the final product. Using high-grade edible inks and pastes not only enhances the flavor but also improves the texture and appearance of the cake.
Maintain Your Printer Regularly: Regular maintenance ensures that your printer functions optimally and produces high-quality prints. This includes cleaning the nozzles, checking for clogs, and ensuring that all mechanical parts are in good working order to avoid any delays or mishaps during printing.
Experiment with Designs: Utilizing various designs can help you discover what works best for your specific printer and baking style. Trying different templates and styles allows you to push the boundaries of your creativity and can lead to unique cake designs that stand out.
Understand Temperature Settings: Proper temperature settings are crucial for melting and extruding the edible materials correctly. Each type of material may require different temperature adjustments, so getting familiar with your printer’s capabilities is key to achieving the desired consistency and flow.
Plan Ahead for Layering: If your design involves multiple layers, planning the layering process will help achieve a seamless finish. This includes determining the order of printing, allowing adequate drying time between layers, and making sure each layer adheres properly to the next for structural integrity.
Related Post: