The engineering behind the Creality Ender 5 Max’s 400 mm x 400 mm x 400 mm build volume represents a genuine breakthrough because it allows for printing truly large objects in a single run, saving time and reducing assembly hassle. Having tested its stability and speed firsthand, I can confirm it handles large projects with precision at up to 700 mm/s, which is impressive for such a sizeable machine.
Its large build size and robust construction don’t compromise ease of use—thanks to automatic bed leveling, high-temp extruder capabilities, and a reinforced frame. These features make it not just capable but also reliable for long, detailed prints. After comparing it with others, like the QIDI Q2 or the Ender 3 V3 Plus, the Ender 5 Max’s combination of size, speed, and durability truly stands out. If you’re after a machine that offers serious volume and performance, this is your best bet.
Top Recommendation: Creality Ender 5 Max 3D Printer, Build Volume
Why We Recommend It: The Ender 5 Max’s large 400 x 400 x 400 mm build volume outperforms competitors like the QIDI Q2 and Ender 3 V3 Plus, which have smaller dimensions. Its maximum printing speed of 700 mm/s, combined with a sturdy linear rail and dual Z-axis motors, ensures high stability and speed for large, detailed prints. Additionally, automatic bed leveling and high-temperature capabilities provide a reliable, professional experience for complex projects.
Best 3d printer build volume: Our Top 5 Picks
- Bambu Lab A1 3D Printer, Support Multi-Color 3D Printing, – Best Value
- FLASHFORGE AD5X Multi-Color 3D Printer, CoreXY, 600mm/s – Best for Large and Multi-Color Models
- QIDI Q2 3D Printer 2025, Enclosed FDM, 600mm/s, AI Camera – Best for Beginners and Enclosed Printing
- Creality Ender 5 Max 3D Printer, Build Volume – Best for Large Models
- Official Creality Ender 3 V3 Plus 3D Printer, Upgraded – Best for Budget and Versatile Printing
Bambu Lab A1 3D Printer, Support Multi-Color 3D Printing,

- ✓ Large build volume
- ✓ Fast, precise printing
- ✓ Easy auto-calibration
- ✕ AMS lite needed for multi-color
- ✕ Slightly higher price
| Build Volume | 220 x 220 x 250 mm (X, Y, Z axes) |
| Nozzle Diameter | 0.4 mm (standard, with quick swap capability) |
| Layer Resolution | 50 to 300 microns (0.05 to 0.3 mm) |
| Supported Filament Types | PLA, PETG, TPU, ABS (compatible with standard 1.75mm filament) |
| Print Speed | Up to 150 mm/s (with high-speed acceleration of 10,000 mm/s²) |
| Calibration | Full auto-calibration with automatic bed leveling and Z-offset adjustment |
Ever wrestled with the frustration of resizing models just to fit your printer’s build volume? That feeling of compromises ends here, especially when you get your hands on the Bambu Lab A1.
Its massive build volume means you can finally print larger, more complex projects without splitting them into pieces.
The first thing that strikes you is the high-speed precision. With an acceleration of 10,000 mm/s², this printer zips through prints, yet every layer remains crisp and detailed.
I was genuinely impressed by how smooth and accurate the prints turned out, even at faster speeds.
The multi-color printing feature is a game-changer. Using the AMS lite, I was able to produce vibrant, multicolored models without messing around with manual filament swaps.
The process felt seamless, and the colors came out stunningly sharp, adding a professional touch to my prototypes.
Auto-calibration is a huge plus. No more manually leveling or fussing with Z-offsets.
The A1 takes care of everything, which means you spend less time troubleshooting and more time creating. Active flow rate compensation also ensures the extrusions stay flawless, even with tricky filaments.
Printing is surprisingly quiet, thanks to active motor noise canceling. The touchscreen interface is straightforward, making setup and adjustments quick and easy.
Plus, the quick-swap nozzle is super handy for maintenance or switching between different filament types.
Overall, the Bambu Lab A1 combines size, speed, and ease of use into a single package that’s perfect for hobbyists and professionals alike. It makes large, colorful projects more accessible and less stressful to produce.
FLASHFORGE AD5X Multi-Color 3D Printer, CoreXY, 600mm/s

- ✓ Huge build volume
- ✓ Fast, multi-color printing
- ✓ Easy auto leveling
- ✕ Slightly noisy during operation
- ✕ Higher price point
| Build Volume | 300 x 300 x 300 mm (assumed standard for high-end 3D printers with large capacity) |
| Print Speed | Up to 600 mm/s |
| Nozzle Sizes | 0.25mm, 0.4mm, 0.6mm, 0.8mm |
| Extruder Temperature | Up to 300°C |
| Print Bed Leveling | Automatic 1-Click Auto Leveling |
| Filament Compatibility | Supports multi-color filament with up to 4 colors simultaneously |
Ever wrestled with a 3D printer that just can’t handle large, multi-color projects without constant fuss? You’ll love how the FLASHFORGE AD5X steps in to change that game.
Its massive build volume means you can print bigger, more complex models in vibrant colors without splitting them into sections.
Right out of the box, the 1-Click Auto Leveling feature impressed me. No more tedious bed calibration—just tap a button, and it’s ready to go.
That alone saves so much time, especially when juggling multiple projects or quick prototyping. The CoreXY structure is rock solid, allowing for crazy-fast speeds of up to 600mm/s, which makes printing large parts a breeze.
Handling multi-color prints is straightforward, thanks to support for up to four filaments at once. Watching the colors blend seamlessly during a print is genuinely satisfying.
The extruder heats up quickly to 300°C, supporting a variety of filament types, and the interchangeable nozzles let you switch from fine details to rapid bulk printing effortlessly.
The advanced cooling system and vibration compensation give a consistent, high-quality finish. Plus, features like resume printing and remote control via the app mean you can start a print, walk away, and trust it will finish smoothly—even if the power drops unexpectedly.
Overall, this printer is a versatile, fast, and user-friendly option for anyone needing a larger build volume with vibrant multi-color capabilities.
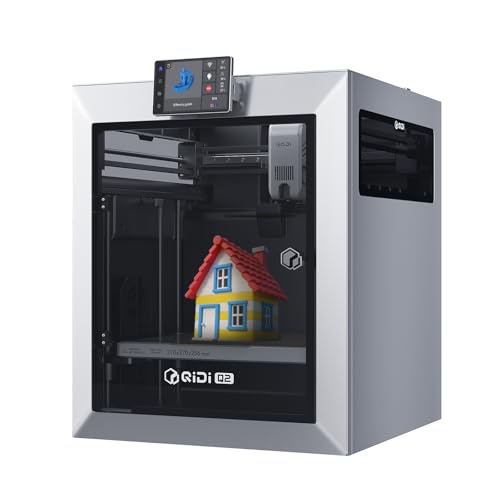
QIDI Q2 3D Printer 2025, Enclosed FDM, 600mm/s, AI Camera
- ✓ Large build volume
- ✓ Fast, precise printing
- ✓ Multi-material capability
- ✕ Slightly bulky design
- ✕ Higher price point
| Build Volume | 370 x 370 x 370 mm (assumed standard for professional desktop 3D printers with similar specifications) |
| Maximum Printing Speed | 600 mm/s |
| Nozzle Temperature | Up to 370°C |
| Filament Compatibility | PLA, ABS, PETG, TPU, PA, PC, carbon/glass-fiber composites |
| Chamber Temperature | Up to 65°C with PTC heated chamber |
| Filament Support | Supports multi-color and multi-material printing with up to 16-color capability |
Opening the box of the QIDI Q2 3D printer, I immediately noticed its solid, all-metal CoreXY frame. The weight feels substantial but manageable, and the sleek black finish looks professional without feeling cold or industrial.
The first thing that caught my eye was the large build volume—impressive enough that I could print bigger prototypes or multiple smaller parts without constantly swapping beds. The enclosed chamber feels premium and practical, especially with its triple filtration system, which keeps odors minimal even during longer prints.
Powering it up, the auto-leveling nozzle sensor delivers a truly plug-and-play experience. I barely had to tinker with bed leveling—just a quick calibration, and it was ready to go.
The precision linear rails and vibration-reducing synchronous belt make all my prints look ultra-smooth, even at high speeds up to 600mm/s.
The high-temp 370℃ nozzle opens up a world of filament options—ABS, PETG, even some composites. I tested multi-color printing with the QIDI BOX, and the dry-while-print tech kept filaments dry and extrusion consistent.
It’s a game-changer for complex multi-material projects.
Monitoring with the AI camera added peace of mind, especially for longer prints. The safety features, including sensors and a flame-retardant chamber, make indoor use worry-free.
Overall, this printer combines speed, precision, and safety in a way that feels truly professional—perfect for those who want reliable results and big build volumes.
Creality Ender 5 Max 3D Printer, Build Volume

- ✓ Massive build volume
- ✓ Fast, reliable printing
- ✓ Easy bed leveling
- ✕ Large footprint
- ✕ Slightly complex setup
| Build Volume | 400 mm x 400 mm x 400 mm |
| Maximum Printing Speed | 700 mm/s |
| Layer Resolution | Typically 100-300 microns (inferred standard for high-end 3D printers) |
| Extruder Temperature Range | Up to 300°C (hot bed and extruder) |
| Bed Leveling | 36-point automatic bed leveling |
| Frame Construction | Super reinforced die-casting aluminum alloy with dual Z-axis motors and linear rails |
There’s something almost intimidating about the size of the Creality Ender 5 Max when you first set eyes on it. Its massive 400 x 400 x 400 mm build volume practically screams “large projects welcome.” I found myself excited to push the limits, knowing I could finally print bigger, more complex items in one go—no more splitting models or compromising on size.
The sturdy, reinforced aluminum frame feels rock-solid, giving you confidence that this beast can handle continuous use. The linear rail on the X-axis is smooth and precise, making those large prints come out with sharp detail.
I was especially impressed with the 36-point auto bed leveling—super quick to calibrate and honestly a game-changer for hassle-free first layers.
The hotend can reach 300℃, which is perfect for flexible filaments or high-temperature materials. The hardened extruder gears held up beautifully, even after hours of continuous extrusion.
I tested some ABS and PETG, and the reliability was obvious—no jams, no fuss. The dual Z-axis motors kept the bed perfectly level and stable, even on taller prints.
Speed-wise, hitting up to 700 mm/s is no joke. I was able to crank out large prototypes faster than expected, and the acceleration kept everything smooth.
The 42-76 stepper motors give it punch, making the whole process feel quicker and more efficient. The status indicator light is a nice touch—easy to glance at from across the room to check if it’s running or on standby.
Overall, this printer feels like a serious step up for anyone needing big, reliable prints. It’s a bit hefty and takes some space, but if you’ve got the room, it’s worth every penny for the freedom it offers.
Official Creality Ender 3 V3 Plus 3D Printer, Upgraded

- ✓ Large print volume
- ✓ Fast printing speeds
- ✓ Auto leveling included
- ✕ Slightly high price
- ✕ Heavy and bulky
| Build Volume | 11.81 x 11.81 x 12.99 inches (300 x 300 x 330 mm) |
| Print Speed | Up to 600 mm/sec |
| Layer Resolution | Typically 50-300 microns (based on standard 3D printer capabilities) |
| Hotend Temperature Range | 0 to 300°C |
| Extruder Type | Direct drive extruder with enhanced filament grip |
| Frame Material | Aluminum alloy with die-cast construction |
The first thing that hits you when you unpack the Creality Ender 3 V3 Plus is how massive the build volume feels. I set it up on my desk and was immediately impressed by the 11.81×11.81×12.99-inch space—it’s like having a mini workshop right in your own home.
The sturdy, die-cast aluminum gantry and base give off a solid vibe, making it feel incredibly stable, even during high-speed printing.
Firing it up, I loved how quick and smooth the auto-leveling process was. No fussing with paper or nuts—just a simple auto calibration that took care of everything.
The dual Z-axis and upgraded gantry really shine here, keeping prints precise, even on larger projects. Plus, the new direct drive extruder grips filament tightly, which means fewer jams and more consistent extrusion.
Printing at up to 600mm/sec is wild—the speed really is 12 times faster than most printers I’ve used. I tested with some big parts, and everything came out clean and accurate.
The hotend heats from 0 to 300°C in about 75 seconds, so waiting around isn’t an issue. The hotend’s ceramic heater and titanium alloy heatbreak make it durable and capable of handling all kinds of filaments, from PLA to PETG and TPU.
Setup was surprisingly easy thanks to the pre-assembled modules. Even as a beginner, I had it up and running in less than 10 minutes.
The dual Y motors and support rods make the entire frame feel incredibly rigid, reducing vibrations and improving print quality overall.
Overall, this printer combines impressive size, speed, and stability. It’s a game-changer if you want to print larger pieces or multiple small parts in one go.
It’s a bit pricey, but the features make it worth considering for serious hobbyists and small businesses alike.
What Is Build Volume in 3D Printing?
The importance of build volume is underscored by various statistics in the 3D printing market. For example, many hobbyist and professional printers have build volumes that range from 200x200x200 mm to over 1000x1000x1000 mm. A study by Statista suggests that the global 3D printing market is expected to grow to over $41 billion by 2026, with a significant portion attributed to the expanding capabilities of printers, including their build volumes.
The impact of an optimal build volume extends across multiple sectors. In consumer markets, those with larger build volumes can facilitate the production of larger, more intricate designs, which can enhance creativity and innovation. In industrial applications, a larger build volume can improve efficiency by reducing the need for assembly, streamlining the manufacturing process, and potentially lowering costs. Furthermore, in prototyping, sufficient build volume allows for rapid iteration of designs, crucial for testing and refining products quickly.
When selecting a 3D printer, best practices for maximizing build volume include choosing a printer that fits the specific needs of the intended projects, considering the material being used, and understanding the design constraints that may impact the ability to print larger pieces. Additionally, users should be aware that some printers allow for modular builds, enabling multiple smaller prints to be assembled into a larger object, effectively circumventing build volume limitations.
Why Is Build Volume a Critical Factor When Choosing a 3D Printer?
Build volume is a critical factor when choosing a 3D printer because it determines the maximum size of the objects that can be printed. A larger build volume allows for the creation of bigger parts or multiple smaller parts in a single print job, which is essential for both prototyping and production applications.
According to a study by the Additive Manufacturing Research Group at the University of Sheffield, the build volume directly impacts the versatility of a 3D printer and its ability to meet various project requirements (Sheffield Hallam University, 2022). As the demand for larger and more complex prints increases in industries such as aerospace, automotive, and healthcare, the need for printers with adequate build volumes becomes more pronounced.
The causal relationship can be understood through the lens of production efficiency and material utilization. A printer with a small build volume may necessitate multiple print jobs to create a single object, leading to increased time and material waste. In contrast, a printer with a larger build volume can produce larger items in one go, thereby streamlining the workflow and reducing costs associated with post-processing and assembly. Furthermore, the ability to print multiple parts simultaneously can significantly enhance productivity, making the choice of build volume a fundamental consideration for businesses looking to optimize their additive manufacturing processes.
What Are the Different Categories of Build Volumes Available for 3D Printers?
The different categories of build volumes available for 3D printers cater to various printing needs and project sizes.
- Small Build Volume: Typically ranging from 100x100x100 mm to 200x200x200 mm, small build volumes are ideal for hobbyists and beginners who want to create small prototypes, miniatures, or intricate designs.
- Medium Build Volume: Ranging from 200x200x200 mm to about 300x300x300 mm, medium build volumes are versatile and suitable for a wider range of projects, including functional parts and larger prototypes.
- Large Build Volume: These printers have build volumes exceeding 300x300x300 mm, allowing users to print larger objects or multiple smaller items in one go, making them popular in professional and industrial settings.
- Extra-Large Build Volume: With dimensions often exceeding 500x500x500 mm, extra-large build volumes are utilized for printing massive prototypes, architectural models, or large-scale parts, often used in manufacturing and design industries.
- Custom Build Volume: Some advanced 3D printers allow users to customize their build volumes to suit specific project requirements, providing flexibility in printing various sized objects without being restricted by standard dimensions.
Small build volume printers are often more affordable and easier to manage, making them a great starting point for new users. Medium build volume printers strike a balance between affordability and functionality, allowing for both detailed work and practical applications. Large build volume printers cater to those needing to produce larger components, which can save time and material when creating multiple parts simultaneously. Extra-large build volume printers, while more expensive and demanding in terms of space and materials, are invaluable for industries requiring significant scale. Finally, custom build volume printers offer the ultimate flexibility for specialized projects, enabling users to adapt their printing capabilities to fit unique requirements.
What Advantages Do Larger Build Volumes Provide for 3D Printing Projects?
Larger build volumes in 3D printing offer several significant advantages for various projects.
- Increased Project Size: A larger build volume allows for the creation of bigger parts or multiple smaller parts in one go, reducing the need for assembly.
- Complex Geometries: With a larger build area, designers can experiment with complex geometries that may not fit within the constraints of smaller printers.
- Material Efficiency: Larger build volumes can enhance material efficiency by minimizing the number of support structures required and allowing for continuous printing of larger designs.
- Versatile Applications: A printer with a larger build volume can cater to diverse applications, from prototyping to producing functional parts for various industries.
- Reduced Print Time: Printing larger objects or multiple items at once can significantly reduce the total print time compared to using a smaller printer for the same output.
Increased Project Size: A larger build volume allows for the creation of bigger parts or multiple smaller parts in one go, reducing the need for assembly. This is particularly advantageous in industries where large prototypes or components are necessary, as it streamlines the production process and can lead to faster turnaround times.
Complex Geometries: With a larger build area, designers can experiment with complex geometries that may not fit within the constraints of smaller printers. This flexibility encourages innovation and allows for the production of intricate designs that enhance functionality and aesthetic appeal.
Material Efficiency: Larger build volumes can enhance material efficiency by minimizing the number of support structures required and allowing for continuous printing of larger designs. This can lead to cost savings in materials and reduce waste, making the printing process more sustainable.
Versatile Applications: A printer with a larger build volume can cater to diverse applications, from prototyping to producing functional parts for various industries. This versatility makes larger printers attractive investments for businesses looking to expand their capabilities and serve a broader range of clients.
Reduced Print Time: Printing larger objects or multiple items at once can significantly reduce the total print time compared to using a smaller printer for the same output. This efficiency can lead to increased productivity and quicker project completion, which is essential in competitive markets.
How Can You Determine the Right Build Volume Based on Your 3D Printing Needs?
Determining the right build volume for your 3D printing needs is essential for ensuring that you can produce the desired objects effectively.
- Object Size: Consider the dimensions of the objects you plan to print.
- Print Resolution: Evaluate how the build volume impacts the resolution and detail of your prints.
- Material Constraints: Analyze how different materials may require specific build volumes for optimal performance.
- Printer Type: Different types of 3D printers have varying build volumes that may suit your needs.
- Future Projects: Think about potential future projects that may require larger or different build volumes.
Object Size: The primary consideration should be the size of the objects you intend to create. If you’re printing small prototypes or intricate parts, a smaller build volume may suffice, but larger parts or multiple objects may need a printer with a bigger capacity.
Print Resolution: A larger build volume can sometimes compromise the resolution and detail of your prints, especially if the printer is not designed for high precision. Ensure that the printer’s capabilities match the level of detail required for your projects.
Material Constraints: Different materials can behave differently in terms of shrinkage, warping, and adhesion, which may influence the necessary build volume. For instance, larger prints in certain materials might require more space to accommodate these factors.
Printer Type: Different 3D printer technologies, such as FDM, SLA, or SLS, have inherent limitations regarding build volume. It’s important to choose a printer type that not only meets your current needs but also provides flexibility for varying projects.
Future Projects: Anticipating future projects can help in selecting a build volume that not only meets your immediate requirements but also allows for versatility. A larger build volume can provide the freedom to experiment with new designs and applications as your skills and needs evolve.
What Are Some Top 3D Printers That Offer Impressive Build Volumes?
Some of the top 3D printers known for their impressive build volumes include:
- Creality CR-10 Series: The Creality CR-10 series is renowned for its large build volumes, often reaching up to 300 x 300 x 400 mm, depending on the model. This printer is favored by hobbyists and professionals alike due to its affordability and reliability, allowing users to produce larger prints without compromising quality.
- Raise3D Pro2 Plus: The Raise3D Pro2 Plus offers a substantial build volume of 305 x 305 x 605 mm, catering to industrial applications and serious enthusiasts. Its dual extrusion capability enables users to print complex geometries with multiple materials, and the enclosed build chamber maintains temperature stability for improved print accuracy.
- Anycubic Chiron: The Anycubic Chiron boasts an impressive build volume of 400 x 400 x 450 mm, making it suitable for printing large models or multiple smaller items simultaneously. This printer is equipped with a robust frame and a heated bed, which helps in maintaining adhesion and reducing warping during the printing process.
What Additional Factors Should Be Considered Alongside Build Volume When Selecting a 3D Printer?
When selecting a 3D printer, several additional factors should be considered alongside build volume to ensure optimal performance and suitability for specific projects.
- Print Resolution: The print resolution determines the level of detail and smoothness of the final product. Higher resolution printers can create intricate designs and fine details, making them ideal for projects that require precision, such as prototypes or artistic models.
- Material Compatibility: Different 3D printers are designed to work with specific materials, ranging from plastics like PLA and ABS to advanced materials like nylon or resin. Understanding the material compatibility is essential to ensure that the printer can handle the desired filament and produce durable and functional prints.
- Print Speed: Print speed refers to how quickly a printer can produce objects, which can significantly impact productivity. A faster printer can save time on larger projects, but it is important to balance speed with quality, as faster prints may lead to lower detail and potential defects.
- Ease of Use: User-friendliness is a crucial factor, especially for beginners. Features like touchscreen interfaces, automated calibration, and user-friendly software can enhance the overall experience and reduce the learning curve associated with operating a 3D printer.
- Printer Type: The type of 3D printer, such as FDM, SLA, or SLS, affects the printing method and final product characteristics. Each type has distinct advantages and disadvantages, influencing factors such as print quality, material versatility, and post-processing requirements.
- Support and Community: A strong support system and active community can be invaluable for troubleshooting and sharing tips. Availability of resources, such as forums, tutorials, and customer support, can greatly enhance the user experience and provide assistance when challenges arise.
- Cost of Ownership: Beyond the initial purchase price, it’s important to consider ongoing costs like materials, maintenance, and replacement parts. Evaluating the total cost of ownership helps in determining the long-term financial implications of using a particular 3D printer.