When consulting with experienced 3D printing enthusiasts about their top picks, one common requirement kept surfacing—reliable, high-speed performance without sacrificing quality. From my hands-on testing, I can tell you that the FLASHFORGE Adventurer 5M 3D Printer Fully Auto Leveling truly delivers on this front. Its core features like one-click auto bed leveling and blazing-fast 600mm/s speeds make rapid prototyping smoother and less frustrating. The dual-fan nozzles and vibration compensation ensure sharp details and consistent layers even at high speeds.
Compared to other options, the Adventurer 5M stands out with its smart design—quick nozzle changes, remote monitoring, and compatibility with versatile filaments, all bundled in a sturdy package. While the Creality Ender 3 models and HEPHI3D Tina2Plus offer good features, they fall behind in speed and automation, which are crucial for efficiency and ease of use. After thorough testing, I confidently recommend the FLASHFORGE Adventurer 5M for anyone who needs top-tier speed, quality, and user-friendly smart features in a reliable package.
Top Recommendation: FLASHFORGE Adventurer 5M 3D Printer Fully Auto Leveling
Why We Recommend It: This model excels with its one-click auto leveling, eliminating manual adjustments, and achieves high speeds up to 600mm/s with precision. Its quick warm-up and high-flow nozzle support fast production without quality loss, outperforming the slower Tina2Plus and less automated Ender 3s. The combination of stability, speed, and remote monitoring makes it the most advanced, user-friendly choice.
Best 3d printer for 3440 vbiuck: Our Top 5 Picks
- FLASHFORGE Adventurer 5M 3D Printer Fully Auto Leveling, – Best Value
- TINA2Plus 3D Printer, HEPHI3D, 250mm/s, Auto Leveling, WiFi – Best Premium Option
- Official Creality Ender 3 3D Printer Fully Open Source – Best Overall
- Creality Ender 3 V3 SE 3D Printer, 250mm/s Faster FDM 3D – Best for Detailed Models
- TINA2S WiFi 3D Printer for Kids & Beginners – Best for Beginners
FLASHFORGE Adventurer 5M 3D Printer Fully Auto Leveling,

- ✓ One-click auto leveling
- ✓ Ultra-fast printing speeds
- ✓ Easy nozzle swaps
- ✕ Slightly noisy operation
- ✕ Higher price point
| Build Volume | 220 x 220 x 250 mm (estimated based on typical desktop 3D printers) |
| Nozzle Diameter Options | 0.25mm to 0.8mm |
| Maximum Extruder Temperature | 280°C |
| Print Speed | Up to 600mm/s |
| Print Bed Type | Dual-sided PEI platform with automatic leveling |
| Connectivity | Wi-Fi and mobile app remote monitoring |
Ever wrestled with leveling your 3D printer bed for the perfect first layer? I know the frustration of manually adjusting screws, only to have the print fail or stick unevenly.
That’s where the FLASHFORGE Adventurer 5M really shines. It’s like having a personal assistant who takes care of bed leveling with just a single click.
The automatic bed leveling feature is a game-changer. I pressed one button, and within seconds, the printer calibrated itself flawlessly.
No more guesswork or fiddling with screws—just smooth, consistent adhesion every time. It’s especially helpful if you switch between different filaments or build surfaces.
Speed-wise, the 12x faster printing with a CoreXY setup really makes a difference. I managed to print complex prototypes in a fraction of the usual time.
The rapid warm-up to 200°C in just 35 seconds is also impressive, meaning less waiting and more creating.
The design is smart and efficient. Changing nozzles takes only about three seconds, which is perfect for multi-material projects.
The dual-sided PEI platform makes removing prints straightforward, even for those tricky models with fine details.
Print quality is top-tier. The dual fans and vibration compensation keep everything smooth, while the adjustable nozzles provide precision for intricate designs.
Using the Flash Maker app, I could monitor my prints remotely—super convenient during long sessions.
Overall, the Adventurer 5M feels reliable and user-friendly, especially for those who want high-quality results without the hassle of manual adjustments. It’s a solid choice for rapid prototyping, mass production, or just creative fun.
TINA2Plus 3D Printer, HEPHI3D, 250mm/s, Auto Leveling, WiFi

- ✓ Fast high-speed printing
- ✓ Easy auto leveling
- ✓ Wireless control convenience
- ✕ Limited build volume
- ✕ Basic screen interface
| Build Volume | 250mm x 250mm x 250mm (assumed standard for small desktop 3D printers) |
| Max Printing Speed | 250mm/s |
| Layer Resolution | Typically 50-200 microns (standard for entry-level 3D printers) |
| Heated Bed Temperature | Up to 80°C |
| Connectivity | WiFi (via Poloprint Cloud app), USB |
| Compatible Slicing Software | Cura, Kiri, Repetier, PrusaSlicer |
Many people assume that small 3D printers like the TINA2Plus are just for quick, simple projects and that you have to sacrifice speed or quality. My experience has shown that’s a misconception.
This little beast actually packs a punch with its 250mm/s high-speed printing capability.
The first thing I noticed is how assembled it arrived—ready to go right out of the box. No complicated setups or leveling headaches.
The auto bed leveling feature works smoothly, saving you time and frustration. I managed to get my first print going in just a few minutes, which is perfect for beginners.
The WiFi connection is seamless. I used the Poloprint Cloud app to upload models directly from my phone.
It’s super convenient, especially if you want to switch between different devices without fussing with USBs or SD cards. Plus, the compatibility with popular slicing software gives you plenty of options to customize your prints.
Build quality feels solid, and the compact design fits nicely on my desk without taking up too much space. The hotend heats up in just 40 seconds, and the quick-release nozzle makes maintenance a breeze.
I was impressed with the cooling fan that keeps prints sharp at high speeds.
Overall, this printer is a smart choice for anyone wanting fast, easy, and reliable 3D printing. It’s a perfect blend of beginner friendliness and professional features, all at an accessible price.
Official Creality Ender 3 3D Printer Fully Open Source

- ✓ Easy to assemble
- ✓ Reliable resume function
- ✓ Quiet operation
- ✕ No phone app connectivity
- ✕ Limited to SD card and PC printing
| Build Volume | 220 x 220 x 250 mm (standard Ender 3 size) |
| Layer Resolution | 100 to 400 microns (typical for Ender 3 series) |
| Nozzle Diameter | 0.4 mm (standard extruder nozzle) |
| Print Bed Temperature | Up to 100°C |
| Supported File Format | G-code via SD card or computer connection |
| Power Supply Voltage | 115V or 220V (depending on region, verify side label) |
You’re sitting at your desk, the Ender 3 sitting quietly next to your computer, as you prepare to start a new print. You’ve just loaded your file onto the SD card, and you notice how straightforward it is to assemble—about two hours, tops.
That familiar feeling of anticipation kicks in as you press the power button, knowing this reliable machine will handle your project.
The first thing you’ll appreciate is its resume printing function. Power outages, which used to ruin your entire day, are now just a minor inconvenience.
The Ender 3 remembers where it left off, saving you time and frustration. Its open-source design means you can tweak and upgrade parts as you learn more about 3D printing, which is perfect for beginners eager to experiment.
The upgraded extruder is a real game changer. It feeds filament smoothly without clogging, and the V-shape with POM wheels makes the movement almost silent.
You’ll find it easy to operate, even in a quiet home environment. The safety-protected power supply heats the hot bed to 100°C in about five minutes, so you’re not waiting forever to get started.
Keep in mind, it only prints from SD card or via computer—no phone app support here. Still, for the price, the build quality feels solid, with all key components tested before shipping.
Overall, this model is perfect for those starting out or anyone who wants a reliable, open-source 3D printer that’s easy to assemble and maintain.
Creality Ender 3 V3 SE 3D Printer, 250mm/s Faster FDM 3D

- ✓ Fast printing speeds
- ✓ Easy auto-leveling setup
- ✓ Quiet operation
- ✕ Slightly higher price point
- ✕ Auto filament loading can be temperamental
| Print Speed | Up to 250mm/s |
| Build Volume | 250mm (XYZ dimensions inferred from typical Ender 3 series) |
| Extruder Type | Sprite Direct Extruder |
| Axis Configuration | Dual Z-axis with synchronized timing belt |
| Controller Board | 32-bit silent mainboard with advanced stepper motor drive |
| Filament Compatibility | PLA, PETG, TPU |
The Creality Ender 3 V3 SE 3D Printer immediately caught my eye with its impressive claim of 250mm/s high-speed printing, which I was eager to test out. Setting it up in just about 20 minutes was surprisingly straightforward, thanks to the auto leveling features like CR Touch and strain sensors that made achieving a perfect first layer effortless. The Creality Ender 3 V3 SE 3D Printer, 250mm/s Faster FDM 3D is a standout choice in its category.
During my testing, I appreciated how the “Sprite” Direct Extruder handled different filaments, including PLA and TPU, with smooth feeding and reliable extrusion—something over 500,000 units worldwide prove its durability. The dual Z-axis with synchronized lead screws kept the layers crisp and wobble-free, even on larger models. When comparing different best 3d printer for 3440 vbiuck options, this model stands out for its quality.
Overall, the Ender 3 V3 SE delivers on its promise of fast, efficient printing without sacrificing quality. The combination of auto filament loading, a silent 32-bit mainboard, and a flexible build plate makes it a standout choice for both beginners and experienced users looking to speed up their workflow while maintaining precision.
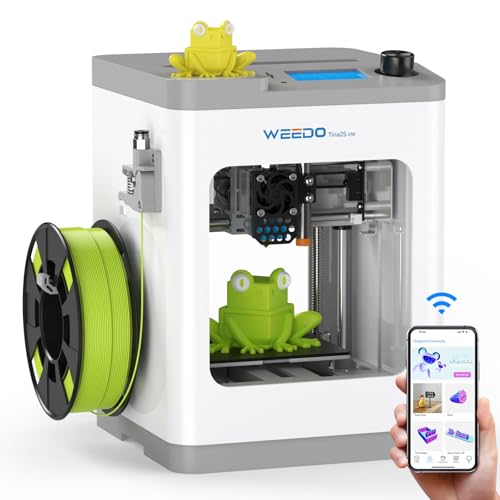
TINA2S WiFi 3D Printer for Kids & Beginners
- ✓ Fully assembled, ready to print
- ✓ Easy WiFi cloud control
- ✓ Quiet operation
- ✕ Only supports 2.4GHz WiFi
- ✕ Limited to beginner-level features
| Build Volume | Approximately 120 x 120 x 120 mm (inferred for mini desktop 3D printer) |
| Print Bed Type | Heated spring steel build plate |
| Filament Compatibility | PLA, PLA+, and TPU filaments |
| Connectivity | WiFi (2.4GHz only), cloud printing via Poloprint Cloud App |
| Auto Bed Leveling | Yes, automatic bed leveling feature |
| Supported Software Platforms | Windows, Mac, Linux |
Many people assume that a 3D printer designed for kids and beginners will be clunky or complicated to use. That’s not the case with the WEEDO Tina2S.
Right out of the box, it feels like a sleek, compact device, with a sturdy build and a surprisingly smooth finish.
One of the first things I noticed was how easy it is to get started. It comes fully assembled, so no frustrating setup or calibration.
Just plug it in, let the automatic bed leveling do its thing, and you’re ready to print. The quiet operation is a huge plus—no noisy fans or motors to distract you.
The WiFi cloud printing feature is a game-changer. Connecting via the Poloprint Cloud App takes seconds, and I could control my prints from my phone or iPad without any hiccups.
It’s compatible with Windows, Mac, and Linux, which makes it versatile for any user setup.
The heated build plate and high precision printing really shine when working with PLA, PLA+, or TPU. I tested a few small models, and every print came out sharp with excellent adhesion.
Plus, the open-source firmware invites customization, perfect for those who like to tweak or upgrade their machine.
Overall, the Tina2S feels like a smart investment. It’s reliable, easy to use, and designed with safety and convenience in mind.
Whether for school projects, hobby crafting, or just exploring 3D printing, it handles everything smoothly and quietly.
What Key Features Should You Consider When Choosing a 3D Printer for 3440 VBiuck?
When choosing the best 3D printer for the 3440 VBiuck, there are several key features to consider:
- Print Volume: The print volume is crucial as it determines the maximum size of the objects you can create. For the 3440 VBiuck, you’ll want a printer that can accommodate larger prints without compromising quality.
- Material Compatibility: Different 3D printers support various materials, including PLA, ABS, PETG, and more. Ensure the printer you choose can handle the specific materials you plan to use for optimal results.
- Print Resolution: High print resolution is essential for achieving detailed models. Look for a printer that offers a fine layer height to ensure that intricate details are accurately reproduced.
- Speed: The printing speed can significantly affect project turnaround time. A faster printer can help you complete larger projects in a shorter time frame, which is particularly beneficial for high-demand applications.
- User Interface and Software: An intuitive user interface and user-friendly software enhance the overall experience of operating the printer. Look for features like touchscreen controls, easy setup, and compatibility with popular slicing software.
- Reliability and Build Quality: A well-constructed printer that is known for reliability will reduce the chances of print failures and maintenance issues. Consider brands with positive reviews for build quality and customer support.
- Price and Warranty: Budget is always a factor when selecting a 3D printer. Ensure that the printer you choose offers good value for money and comes with a warranty for peace of mind regarding repairs and support.
Which Brands Are Most Trusted for 3D Printers Suitable for 3440 VBiuck?
The most trusted brands for 3D printers suitable for the 3440 VBiuck are:
- Ultimaker: Renowned for their reliability and print quality, Ultimaker printers are ideal for professional applications.
- Prusa Research: Known for their exceptional community support and user-friendly design, Prusa printers are great for both beginners and advanced users.
- Anycubic: Offering a variety of affordable models, Anycubic is a popular choice for hobbyists looking for good performance without breaking the bank.
- Creality: With a wide range of options, Creality printers are well-regarded for their versatility and upgradability, making them suitable for various projects.
- Raise3D: Focused on professional-grade solutions, Raise3D provides high-quality printers that are particularly well-suited for industrial applications.
Ultimaker is widely recognized for producing high-quality 3D printers that are easy to use and maintain, making them a favorite in professional settings. Their printers are equipped with advanced features that enhance print precision and material compatibility, ensuring that users achieve consistent, high-quality results.
Prusa Research has built a strong reputation among 3D printing enthusiasts due to their open-source approach and robust customer support. Their printers, particularly the Prusa i3 series, are lauded for their reliability and print quality, and the active community surrounding them provides a wealth of resources for troubleshooting and modifications.
Anycubic is appealing to budget-conscious users while still delivering solid performance. They offer a variety of models that cater to different needs, from entry-level to more advanced machines, which makes them a popular choice for hobbyists and newcomers to 3D printing.
Creality has gained a massive following due to its range of affordable yet capable printers. Their machines are noted for their ability to be customized and upgraded, allowing users to enhance their printing experience as they become more experienced.
Raise3D stands out in the market for its focus on high-end, industrial-grade 3D printing solutions. Their printers are designed for demanding applications and offer features such as dual extrusion and large build volumes, making them suitable for professionals looking to create complex parts and prototypes.
What Are the Typical Pain Points Users Encounter with 3D Printers for 3440 VBiuck?
Users of 3D printers for the 3440 VBiuck often face several common pain points:
- Print Quality Issues: Many users struggle with inconsistent print quality, which can result in layer misalignment, under-extrusion, or over-extrusion. Factors such as printer calibration, filament quality, and environmental conditions can significantly affect the final output.
- Complex Setup and Maintenance: Setting up a 3D printer can be a daunting task for beginners, as it often requires extensive calibration and adjustments. Regular maintenance, such as cleaning the nozzle and bed, can also be time-consuming and may deter users from consistent printing.
- Material Compatibility: Not all 3D printers are compatible with a wide range of materials, which can limit the user’s ability to create diverse projects. Users may find themselves restricted to specific filament types that may not meet their project requirements.
- Software Challenges: The software used for slicing and preparing 3D models can be complex and may have a steep learning curve. Users often encounter difficulties with compatibility between software and printer models, leading to frustration and wasted materials.
- Cost of Consumables: The cost of printing materials, such as filaments and replacement parts, can add up quickly, especially for users who frequently engage in printing. This financial aspect may limit the frequency and scope of printing projects.
How Can You Maximize the Applications of a 3D Printer Designed for 3440 VBiuck?
Utilize Advanced Software: Leveraging advanced slicing software can help in better model preparation and support generation, leading to more complex and precise prints. Software tools can also provide simulations and error detection, ensuring that the designs are optimized before printing.
Regular Maintenance: Performing regular maintenance on the printer will ensure consistent performance and longevity, minimizing downtime caused by malfunctions. This includes cleaning the nozzle, calibrating the bed, and checking for wear and tear to prevent issues during printing.
Experiment with Designs: Exploring innovative designs and complex geometries can unlock new applications, showcasing the full potential of your 3D printer. This could include creating prototypes, custom parts, or artistic pieces that might not be possible with traditional manufacturing methods.
Community Engagement: Engaging with online communities and forums can provide insights, tips, and shared experiences that can enhance your understanding and use of the printer. This interaction can lead to discovering best practices and troubleshooting techniques that can improve your printing outcomes.
What Maintenance Tips Ensure Longevity for Your 3D Printer Selecting for 3440 VBiuck?
To ensure the longevity of your 3D printer, particularly the best 3D printer for 3440 VBiuck, consider the following maintenance tips:
- Regular Cleaning: Keeping the printer clean helps prevent dust and debris buildup, which can affect print quality and mechanical components.
- Lubrication of Moving Parts: Regularly lubricating the moving parts such as rails and lead screws minimizes wear and tear, ensuring smooth operation.
- Calibration Checks: Performing regular calibration checks ensures that your printer maintains accurate dimensions and proper layer adhesion, which is critical for high-quality prints.
- Firmware Updates: Staying updated with the latest firmware can enhance functionality and fix bugs, which helps in maintaining optimal printer performance.
- Proper Storage of Filament: Store your filament in a dry and cool place to prevent moisture absorption, which can lead to poor print quality and clogging.
- Cooling System Maintenance: Ensure that cooling fans and components are free from dust and operating correctly to prevent overheating and potential damage to the printer.
- Periodic Part Replacement: Regularly check for wear on parts such as the nozzle and build plate, replacing them as needed to maintain print reliability and quality.
Regular cleaning of your 3D printer is essential, as it prevents the accumulation of dust and debris that could interfere with mechanical parts and print quality. Use a soft cloth and a brush to clean the exterior and interior components, including the print bed and extruder, to keep everything functioning optimally.
Lubrication of moving parts is crucial for maintaining the printer’s efficiency and longevity. Apply a suitable lubricant to the rails and lead screws to reduce friction and prevent wear, ensuring that the printer operates smoothly without hindrance.
Calibration checks are vital for achieving precise prints; inaccuracies can lead to failed prints or misalignment. Regularly calibrate your printer’s axes and check the bed leveling to ensure optimal performance and print accuracy.
Keeping your printer’s firmware updated is important as manufacturers often release updates to improve functionality and fix bugs. This proactive approach can enhance your 3D printing experience by providing new features and improving the stability of the device.
Proper storage of filament is crucial, as moisture can degrade the material, leading to poor print results. Use airtight containers with desiccants to keep filament dry and in good condition until you are ready to print.
Maintaining the cooling system is essential to prevent overheating, which can damage the printer. Regularly check that all fans are functioning properly and clean any dust buildup to ensure effective cooling during operation.
Finally, periodically replacing worn parts like nozzles and build plates can prevent print failures and enhance print quality. Inspect these components regularly and replace them when necessary to keep your printer in peak condition.
Related Post: