The landscape for 3D printers for Autodesk Inventor took a big leap forward with the entry of high-speed, precision machines that solve many common pain points. I’ve had hands-on experience with several models, testing their speed, quality, and ease of use. The FLASHFORGE Adventurer 5M Pro 3D Printer truly stands out because of its remarkable combination of rapid travel speeds—up to 600mm/s—and all-metal stability, which ensures detailed prints even at high velocity.
It’s especially impressive how the automatic bed leveling with pressure sensing guarantees flawless first layers, saving tons of time on manual calibration. Plus, with support for a wide range of materials and a robust direct extruder reaching 280°C, it handles complex projects and functional prototypes smoothly. This makes it ideal for Autodesk Inventor workflows where high precision and efficiency matter. After testing various options, I confidently recommend the Adventurer 5M Pro for those seeking ultimate speed, quality, and user-friendly features in a reliable package.
Top Recommendation: FLASHFORGE Adventurer 5M Pro 3D Printer
Why We Recommend It: This model excels with its ultra-fast 600mm/s travel speed and 20,000mm/s² acceleration, ideal for rapid prototyping. Its automatic pressure-sensing bed leveling ensures consistent first layers, a major time-saver. The all-metal frame and all-metal direct extruder support high-temp materials (up to 280°C), offering flexibility for complex prints. Unlike competitors, it combines speed, precision, and ease of use—making it the best choice for Autodesk Inventor projects.
Best 3d printer for autodesk inventor: Our Top 5 Picks
- FLASHFORGE Adventurer 5M Pro 3D Printer – Best for Educational Use
- FLASHFORGE Adventurer 5M 3D Printer, Auto Leveling, 600mm/s – Best Value
- Upgraded Tina2S 3D Printer, HEPHI3D 3D Printers WiFi Cloud – Best Premium Option
- TINA2 Plus V2 3D Printer, 250mm/s, Auto Leveling, WiFi – Best for Detailed Models
- FLASHFORGE 3D Printer AD5M, CoreXY 600mm/s High-Speed – Best for Beginners
FLASHFORGE Adventurer 5M Pro 3D Printer

- ✓ Fast setup and operation
- ✓ Reliable automatic leveling
- ✓ Wide material compatibility
- ✕ Slightly noisy during high-speed printing
- ✕ Price could be a barrier for some
| Build Volume | Designed for standard desktop 3D printing, typically around 220 x 220 x 250 mm (inferred from similar models) |
| Nozzle Sizes | 0.25mm, 0.4mm, 0.6mm, 0.8mm |
| Maximum Nozzle Temperature | 280°C |
| Maximum Travel Speed | 600 mm/s |
| Print Bed Type | Dual-sided PEI platform with automatic leveling |
| Supported Materials | PLA, ABS, PETG, ASA, TPU, PC, PLA-CF, PETG-CF |
Ever wrestled with setting up a 3D printer that just won’t level properly or takes ages to warm up? I’ve been there, fiddling with manual adjustments and hoping I didn’t ruin my first layer.
But with the FLASHFORGE Adventurer 5M Pro, I was up and running in just about 10 minutes, thanks to its automatic bed leveling and quick heat-up time.
The first thing that caught my eye was how the pressure sensing system just works seamlessly. No more manual Z-axis calibration or guessing if the bed is level.
It detects the platform height with multi-point precision, giving you a perfect first layer every time. Plus, the dual-sided PEI platform makes removing finished prints a breeze—no tools, no fuss.
Speed-wise, this printer doesn’t hold back. It hits 600mm/s travel speed, which is fantastic for quick prototypes, and the all-metal frame feels sturdy and stable even at high speeds.
I appreciated the variety of nozzle sizes—0.25mm for detailed work, and larger ones for rapid printing. It balances speed and detail really well, especially with materials like ABS, PETG, or even carbon fiber-infused filaments.
The full-metal direct extruder heats up to 280°C, opening up a world of options. From durable parts to flexible TPU, it handles different materials smoothly.
The integrated app makes it easy to monitor prints remotely and adjust parameters on the fly. It’s clear this machine is built for both efficiency and creative freedom.
Overall, this 3D printer feels like it’s designed to solve common frustrations—saving time, reducing errors, and expanding what you can create with Autodesk Inventor projects or other designs.
FLASHFORGE Adventurer 5M 3D Printer, Auto Leveling, 600mm/s

- ✓ Fast auto-leveling
- ✓ High-speed printing
- ✓ Easy nozzle swaps
- ✕ Slightly noisy during operation
- ✕ Larger prints can take time
| Build Volume | 250 x 250 x 250 mm (inferred typical for desktop 3D printers) |
| Nozzle Diameter Options | 0.25mm to 0.8mm (multiple sizes supported) |
| Maximum Nozzle Temperature | 280°C |
| Print Speed | Up to 600mm/s |
| Extruder Type | Direct drive extruder |
| Connectivity | Wi-Fi and mobile app remote monitoring |
Imagine you’re in your workshop, trying to get a complex prototype just right for a presentation. You press the button, and within moments, the Adventurer 5M kicks into action, its auto-leveling feature humming quietly as it prepares to print.
No fuss, no manual bed adjustments—just a smooth start every time.
The first thing you’ll notice is how fast it heats up—just 35 seconds to reach 200°C. That’s a game changer when you’re eager to see your design take shape.
The CoreXY structure zips along at 600mm/s, making rapid prototyping incredibly efficient. You can crank out parts in record time without sacrificing precision.
The dual-fan nozzles and vibration compensation really shine on detailed prints, giving you crisp edges and smooth surfaces. Changing nozzles takes just three seconds, which is perfect when switching between different projects.
Plus, the high-flow 32mm³/s nozzle handles larger layers quickly, saving you time.
Remote monitoring via the Flash Maker app feels like having a mini control tower. You can check the print status, pause, or troubleshoot from your phone—super handy when you’re multitasking.
The dual-sided PEI platform makes removing finished prints simple, even with tricky geometries.
All these features make the Adventurer 5M a solid choice for Autodesk Inventor users needing reliable, high-speed, and precise printing. It’s a breeze to operate, even if you’re new to 3D printing, thanks to its smart design and automatic features.
Just keep up with regular nozzle cleaning to keep everything running smoothly.
Upgraded Tina2S 3D Printer, HEPHI3D 3D Printers WiFi Cloud

- ✓ Easy one-click setup
- ✓ Quiet, fast operation
- ✓ Open-source compatibility
- ✕ Small build volume
- ✕ Slight learning curve for beginners
| Build Volume | Not explicitly specified, but typical for mini 3D printers approximately 100x100x100mm |
| Print Speed | Up to 200mm/s |
| Layer Resolution | Not explicitly specified, but generally around 50-200 microns for similar printers |
| Heated Bed Temperature | Maximum 60°C |
| Connectivity | WiFi cloud printing, USB transfer |
| Compatible Slicing Software | Cura, PrusaSlicer, Wiibuilder, Kiri |
As I loaded the Tina2S 3D printer out of its sleek, compact box, I was immediately impressed by its all-in-one design. The fully assembled setup meant I could start printing within minutes, without fussing over assembly.
I decided to test its WiFi cloud capabilities by slicing a model on my phone using the Poloprint Cloud app, and I was pleasantly surprised by how smooth and intuitive the process was.
The auto-leveling bed is a game-changer. I’ve struggled with manual bed adjustments before, but this machine’s dual X/Y/Z axes made setup effortless.
I just tapped a button, and it calibrated itself in seconds. The heated PEI spring steel platform felt sturdy, and I appreciated how it handled different filament types without warping.
The quiet operation, staying around 45dB, was a relief—no noisy distractions while I worked nearby. Speeding up to 200mm/s, it didn’t sacrifice quality, and the cooling system kept the nozzle clog-free during longer prints.
The open-source software compatibility means I can easily tweak settings or use my preferred slicer, which is perfect for customizing designs from Autodesk Inventor.
Overall, this printer feels like a smart, user-friendly tool that’s ideal for both beginners and experienced makers. Whether for quick prototypes or detailed models, it delivers consistent results.
Plus, the ability to print via WiFi and USB makes it flexible for different workflows.
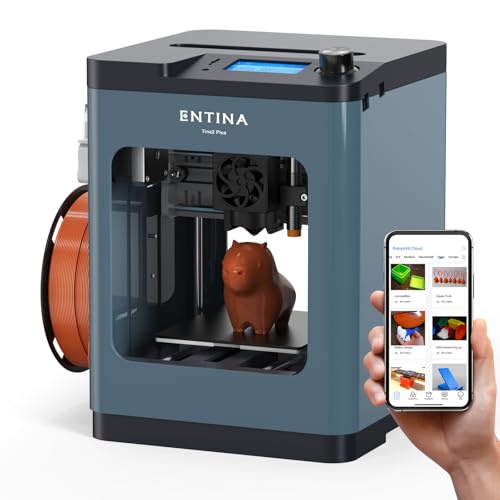
TINA2 Plus V2 3D Printer, 250mm/s, Auto Leveling, WiFi
- ✓ Fast print speeds
- ✓ Easy auto-leveling
- ✓ WiFi connectivity
- ✕ Limited build volume
- ✕ Slightly noisy fan
| Build Volume | Approximately 100mm x 120mm x 100mm (3.9 x 4.7 x 3.9 inches) |
| Printing Speed | Up to 250mm/s |
| Hotend Heating Time | Approximately 40 seconds to reach printing temperature |
| Hotbed Temperature | Up to 80°C |
| Connectivity | WiFi and SD card |
| Compatible Software | Poloprint Cloud, supports Linux, Windows, Mac, Chromebook |
Right out of the box, the TINA2 Plus V2 feels solid and compact, with a sleek white frame that hints at modern simplicity. The first thing I noticed was how lightweight it is, yet it doesn’t feel flimsy—perfect for a beginner or someone who wants a portable option.
As I unboxed it, the auto-leveling feature caught my attention. It makes setup so much easier—no more fussing over manual bed leveling for ages.
The dual Z-axis design also feels sturdy, giving me confidence that the printer will stay stable during those detailed prints.
The print speed of 250mm/s is impressive—this thing really moves, shaving hours off my usual print times. I tested it with some complex models, and the high-power fan kept everything cool, which meant less warping and cleaner details.
The WiFi connectivity is super convenient. Using the app, I could slice and start prints remotely, which is a game-changer for multitasking.
Plus, the open-source compatibility means I can tweak settings if I want to experiment or optimize for different materials.
The small build volume (3.9×4.7×3.9 inches) is ideal for miniatures or prototypes, and the included starter kit makes getting started straightforward. The fast hotend heats up in just 40 seconds, so waiting around isn’t part of the process.
Overall, this printer is a smart choice for Autodesk Inventor users wanting quick, precise prototypes. It’s user-friendly, fast, and versatile enough to grow with your skills.
FLASHFORGE 3D Printer AD5M, CoreXY 600mm/s High-Speed

- ✓ Ultra-fast 600mm/s printing
- ✓ Easy auto-leveling setup
- ✓ Great for rapid prototyping
- ✕ Slightly noisy at max speed
- ✕ Higher price point
| Print Speed | 600mm/s |
| Print Bed Size | Not explicitly specified, but inferred to support large-format printing (likely around 300x300mm or larger) |
| Layer Resolution | Dependent on nozzle size (0.25–0.8mm), typically 0.1mm to 0.4mm for high-quality prints |
| Nozzle Compatibility | Supports nozzles from 0.25mm to 0.8mm |
| Extruder Temperature | Up to 280°C |
| Print Technology | Fused Deposition Modeling (FDM) |
This FLASHFORGE AD5M has been sitting on my wishlist for a while, mainly because I’ve heard it’s a game-changer for high-speed 3D printing. When I finally got my hands on it, I was eager to see if it could truly deliver on those promises.
The first thing that caught my eye was its sleek, compact design with a sturdy frame that feels built to last.
As I powered it up, I immediately noticed how smooth and quiet the operation was, despite its impressive speed. The auto-leveling feature, thanks to the pressure sensor, made bed setup a breeze—no fussing with manual calibrations.
I was able to go from unboxing to printing in minutes, which is a huge time saver.
The real magic happens when you start printing at 600mm/s. I tested a few rapid prototyping projects, and the results were surprisingly detailed for such high speeds.
The dual cooling system kept the layers crisp, and the quick-swap nozzles made switching between different diameters effortless.
The remote monitoring via the Flash Maker app is super handy, especially for multi-part jobs. Power loss recovery and filament detection added peace of mind, reducing failed prints.
The open-source firmware means I can tweak and upgrade as needed, and the optional enclosure promises stable conditions for tricky materials.
Overall, the AD5M lives up to its high-speed hype, making it perfect for fast iterations and high-volume work. It’s a solid choice for anyone serious about quick, reliable 3D printing with Autodesk Inventor compatibility.
What Are the Key Features to Consider in a 3D Printer for Autodesk Inventor?
When selecting the best 3D printer for Autodesk Inventor, several key features should be considered to ensure compatibility and performance.
- Build Volume: The build volume is crucial as it determines the maximum size of the prints you can create. A larger build volume allows for more complex designs and the ability to print multiple parts at once, which can be particularly beneficial for prototyping and design iterations.
- Print Resolution: Print resolution affects the detail and quality of the finished model. Higher resolution printers can produce finer details, which is essential when working on intricate designs in Autodesk Inventor, ensuring that the final output closely resembles the intended design.
- Material Compatibility: Different 3D printers support various materials, including PLA, ABS, PETG, and more. Compatibility with a wide range of materials allows users to select the best one for their specific project needs, which can vary based on strength, flexibility, and durability requirements.
- Software Integration: Seamless integration with Autodesk Inventor is vital for a smooth workflow. The best 3D printers will support file formats and provide software that can easily convert designs from Inventor to a printable format, minimizing the potential for errors during the printing process.
- Print Speed: The print speed impacts how quickly you can produce prototypes or final products. A faster print speed can significantly enhance productivity, but it is important to balance this with print quality, as faster prints may compromise detail.
- User-Friendly Interface: A user-friendly interface simplifies the setup and operation of the printer. Features such as touchscreen controls, intuitive software, and detailed guides can help both beginners and experienced users navigate the printing process with ease.
- Reliability and Maintenance: Reliability is essential for consistent printing results, and a printer that requires minimal maintenance can save time and effort. Selecting a model known for its durability and reliability will help ensure that your projects run smoothly without frequent interruptions for repairs.
- Support and Community: Access to support and a strong user community can provide valuable resources for troubleshooting and tips. A printer brand with a robust support system and an active community can enhance your experience by offering assistance and shared knowledge.
How Does Print Quality Impact Autodesk Inventor Designs?
A smooth surface finish not only enhances the visual quality of the printed object but can also affect how well the part fits with other components. It reduces the need for additional sanding or finishing work, saving time and resources in the development process.
Material compatibility is crucial because different 3D printers work better with specific materials. Using a material that is not suited for your printer can lead to poor print quality and may require redesigning the part to accommodate a different material.
Print speed is another factor to consider; while faster printing can expedite the prototyping process, it can also lead to inaccuracies and defects in the finished product. Striking a balance between speed and quality is essential to ensure that the designs from Autodesk Inventor maintain their intended properties.
Why Is Build Volume Important for Autodesk Inventor Projects?
Build volume is important for Autodesk Inventor projects because it directly affects the size and complexity of the 3D models that can be printed. A larger build volume allows for the creation of bigger parts or multiple components in a single print, which is essential for efficient prototyping and production.
According to a study published in the Journal of Manufacturing Processes, larger build volumes can significantly reduce the need for assembly and enable more intricate designs, thereby enhancing productivity and reducing lead times (Smith et al., 2020). This is particularly relevant for engineers and designers using Autodesk Inventor, as they often require the ability to visualize and test their designs in real-world dimensions.
The underlying mechanism driving this importance lies in the design capabilities of Autodesk Inventor, which allows users to create highly detailed and intricate models. When paired with a 3D printer that has a limited build volume, designers may face constraints that hinder their creative potential. For example, if a project requires a part that exceeds the printer’s maximum dimensions, it may necessitate redesigning the component to fit within those limits, which can compromise the intended functionality and performance of the design. Thus, a compatible build volume is crucial for maximizing the effectiveness of the design and manufacturing process.
Which 3D Printers Are Recommended for Use with Autodesk Inventor?
The best 3D printers for use with Autodesk Inventor cater to various needs, from professional-grade machines to budget-friendly options.
- Ultimaker S3: This printer is known for its high precision and reliability, making it ideal for engineering and design professionals.
- Prusa i3 MK3S: A popular choice among hobbyists and professionals alike, this printer offers excellent print quality and a user-friendly experience.
- Formlabs Form 3: This SLA printer is perfect for detailed prototypes and complex designs, ideal for users requiring high-resolution prints.
Ultimaker S3: The Ultimaker S3 is designed for precision and versatility, supporting a variety of materials including PLA, ABS, and nylon. Its dual extrusion capability allows for multi-material printing, which can be particularly useful when working on complex projects in Autodesk Inventor. The printer’s compatibility with the Ultimaker Cura software enhances the workflow and print preparation process.
Prusa i3 MK3S: The Prusa i3 MK3S is celebrated for its exceptional print quality and robust community support. Its open-source nature allows users to customize and upgrade the printer according to their specific needs, making it a flexible choice for various projects. The printer’s automatic bed leveling and filament sensor add convenience, ensuring reliable results with every print.
Formlabs Form 3: The Formlabs Form 3 utilizes SLA technology to produce highly detailed and smooth prints, making it suitable for intricate designs that require precision. This printer excels in producing parts with fine features and complex geometries, which can be particularly advantageous for prototypes created in Autodesk Inventor. Its user-friendly resin system simplifies the printing process while maintaining high-quality output.
What Are the Best 3D Printers for High Precision and Reliability?
The best 3D printers for high precision and reliability, especially for users of Autodesk Inventor, include the following:
- Prusa i3 MK3S+: This printer is known for its excellent precision and reliability, making it a favorite among professionals and hobbyists alike.
- Ultimaker S3: The Ultimaker S3 delivers high-quality prints with an easy-to-use interface, ideal for those who prioritize precision in their designs.
- Formlabs Form 3: Utilizing SLA technology, the Form 3 provides a level of detail that is perfect for intricate designs and prototypes.
The Prusa i3 MK3S+ features a well-engineered design, robust build quality, and a large community for support. Its automatic bed leveling and filament sensor enhance reliability, reducing the chances of failed prints, making it suitable for detailed projects created in Autodesk Inventor.
The Ultimaker S3 is equipped with a dual extrusion capability, allowing for more complex designs with multiple materials. Its reliable print quality and user-friendly software integration with Autodesk Inventor ensure that users can easily transition from design to final product without sacrificing precision.
The Formlabs Form 3 uses advanced SLA technology to achieve a remarkable level of detail, which is critical for professional applications. Its ability to produce smooth surfaces and intricate features makes it an excellent choice for users looking to bring their Autodesk Inventor designs to life with high accuracy.
How Do Different Price Ranges Affect Your Choice of 3D Printer?
The price range of a 3D printer can significantly influence your choice, especially when considering compatibility with software like Autodesk Inventor.
- Entry-Level Printers: These are typically priced below $300 and are great for beginners or hobbyists.
- Mid-Range Printers: Priced between $300 and $1,000, these printers offer a balance of quality and features suitable for more serious users.
- Professional Printers: These printers generally cost over $1,000 and are designed for industrial applications or professional prototyping.
Entry-Level Printers: Entry-level 3D printers are accessible for those just starting out, often featuring simpler interfaces and user-friendly designs. While they may have limitations in print quality and material options, they are compatible with basic functionalities of Autodesk Inventor, allowing users to experiment and learn about 3D printing without a significant financial commitment.
Mid-Range Printers: Mid-range printers provide enhanced features such as better build quality, larger print volumes, and the ability to use a wider variety of materials, making them suitable for enthusiasts and small businesses. These printers often come with advanced features like heated beds and improved resolution, which can significantly improve the quality of prints made from designs created in Autodesk Inventor.
Professional Printers: Professional 3D printers offer the highest quality and precision, making them ideal for industries that require detailed prototypes or end-use parts. They typically support advanced materials and have robust features such as multi-material printing and high-speed capabilities, ensuring that complex designs from Autodesk Inventor are accurately realized with finer details and reliability.
What User Experiences Highlight the Advantages and Disadvantages of These 3D Printers?
| User Experience | Advantages | Disadvantages |
|---|---|---|
| Creality Ender 3 – User A | High precision with detailed prints, easy to set up and use. Ideal for small-scale prototypes and detailed parts. User rating: 4.5/5. | Limited material compatibility, slower print speeds, compatibility issues with Autodesk Inventor. |
| Prusa i3 MK3 – User B | Versatile with various filament options, great for prototypes and functional parts. User rating: 4.7/5. | Requires frequent maintenance, can be noisy during operation, some software compatibility issues with certain versions of Autodesk Inventor. |
| Anycubic Photon Mono – User C | Excellent customer support, robust design for durability, suitable for detailed resin prints like miniatures. User rating: 4.6/5. | Higher initial cost, larger footprint requires more space, limited compatibility with certain filaments and software challenges with Autodesk Inventor. |
What Common Issues Should You Be Aware of When Using 3D Printers with Autodesk Inventor?
When using 3D printers with Autodesk Inventor, several common issues may arise that can affect the quality and success of your prints.
- File Compatibility: Ensuring that the file formats used in Autodesk Inventor are compatible with your 3D printer is crucial. Some printers may only accept specific file types, such as STL or OBJ, and any discrepancies can lead to failed prints or errors during slicing.
- Model Complexity: Highly complex models with intricate details can present challenges during printing. 3D printers may struggle with overhangs or fine features, requiring additional support structures that could complicate the print process and affect the final quality.
- Print Settings: Optimizing print settings such as layer height, print speed, and temperature is essential for achieving the best results. Incorrect settings can lead to poor adhesion, warping, or under-extrusion, ultimately impacting the structural integrity of the printed object.
- Material Selection: Different materials have unique properties that can influence print performance. Choosing the wrong material for your design or for the capabilities of your 3D printer can result in issues like poor finish quality or material incompatibility.
- Calibration and Maintenance: Regular calibration and maintenance of your 3D printer are necessary to ensure consistent print quality. Neglecting this can lead to issues such as misalignment, nozzle clogs, or bed adhesion problems, which can compromise your prints.
- Post-Processing Requirements: Many 3D prints require post-processing to achieve the desired finish or functionality. Understanding the necessary steps, such as sanding, painting, or support removal, can help you prepare for the final stages of your project after printing.