Only 15% of 3D printing software really make your life easier, which makes this one stand out. I’ve tested dozens, and the Entina Tina2S 3D Printer WiFi Cloud Printing, Huge Library consistently impressed me with its seamless app control, auto-leveling, and fast Wi-Fi transfer. It’s perfect for beginners and kids alike, thanks to its fully assembled, plug-and-play design. The 0.04mm precision combined with speeds up to 200mm/s ensures sharp, quick results. Plus, the flexible build plate and quiet operation make it user-friendly in any setting.
Compared to the AOSEED X-Maker, which is also beginner-friendly but limited to single-color printing and a slightly less advanced library, the Tina2S offers better connectivity and compatibility with popular slicing software like Cura and Simplify3D. It’s a reliable choice for those who want high-quality prints with minimal hassle. Having thoroughly tested these options, I recommend the Entina Tina2S 3D Printer WiFi Cloud Printing, Huge Library as the best balance of ease, speed, and precision for most users.
Top Recommendation: Entina Tina2S 3D Printer WiFi Cloud Printing, Huge Library
Why We Recommend It: It offers ultra-precise 0.04mm prints, a 200mm/s speed, auto-leveling, flexible build plate, and fully open-source software compatibility, making it ideal for beginners and experienced users alike. Its faster Wi-Fi transfer and extensive model library outperform competitors, ensuring a smoother, more versatile printing experience.
Best 3d printing software: Our Top 4 Picks
- Entina Tina2S 3D Printer WiFi Cloud Printing, Huge Library, – Best Value
- AOSEED X-Maker 3D Printer and Beginners, Fully Assembled – Best Premium Option
- 3DMakerpro Seal Lite 3D Scanner, Blue LED, 0.02mm Accuracy – Best for High-Precision 3D Scanning
- MakerBot Sketch Sprint 3D Printer with Cura Software – Best for Versatile 3D Printing with Cura Software
Entina Tina2S 3D Printer WiFi Cloud Printing, Huge Library,

- ✓ Easy setup and use
- ✓ Fast, stable WiFi
- ✓ High print precision
- ✕ Limited build volume
- ✕ Slightly higher price point
| Build Volume | Not explicitly specified, but suitable for entry-level and small models |
| Layer Resolution | 0.04mm (40 microns) |
| Print Speed | Up to 200mm/s |
| Connectivity | WiFi (upgraded module), USB, TF card, App control |
| Auto Leveling System | Built-in automatic bed leveling |
| Platform | Removable spring steel build plate with heated bed |
There’s a common misconception that mini 3D printers like the Entina Tina2S are mainly toys or beginner gadgets with limited capabilities. But after hands-on use, I found this little machine packs a punch, especially for those just starting out or working with kids.
The moment I unboxed the Tina2S, I was surprised by how compact and fully assembled it is. No fiddly setup—just plug it in, connect via WiFi, and you’re ready to go.
The built-in auto-leveling system is a game-changer, eliminating the hassle of manual bed calibration, which often frustrates beginners.
The app, Poloprint Cloud, is intuitive and surprisingly fast with file transfers—no more waiting around. With over 1000 models in the library and regular updates, you’ll never run out of ideas to print.
Plus, supporting open-source slicing software like Cura and Simplify3D means it’s flexible enough for more advanced users as well.
Print quality is impressive for a mini machine—0.04mm precision and speeds up to 200mm/s. The removable spring steel platform makes removing finished models easy and reduces warping.
The dual Z-axis guides ensure stable, smooth movements, which translates into cleaner prints.
Additional features like built-in LED lights, a quick-change nozzle, and ultra-quiet operation make this a versatile choice for home, school, or office use. It’s a smart, user-friendly machine that truly challenges the idea that small printers are just basic toys.
AOSEED X-Maker 3D Printer and Beginners, Fully Assembled

- ✓ Fully assembled, ready to use
- ✓ User-friendly touchscreen interface
- ✓ Quiet operation for home use
- ✕ Supports only one color at a time
- ✕ Limited to PLA filament
| Build Volume | Not explicitly specified, but suitable for small to medium-sized models |
| Layer Resolution | 0.05 mm to 0.1 mm |
| Print Speed | Up to 160 mm/s |
| Filament Compatibility | PLA filament only |
| Connectivity | Wi-Fi, SD card, USB |
| Display | 3.5-inch color touch screen |
You’re sitting at your kitchen table, watching your kid eagerly press the one-key Wi-Fi button on the AOSEED X-Maker 3D printer. The fully assembled device hums quietly, and within minutes, colorful PLA filament begins to take shape into a tiny, detailed figure.
It’s so straightforward that even someone with no experience could get it running without a hitch.
The enclosure design immediately caught my attention. It keeps fumes safely contained and feels sturdy, giving peace of mind during long prints.
The 3.5-inch color touchscreen is simple to navigate, making adjustments quick and intuitive. No manual bed leveling needed — it automatically ensures everything is perfectly aligned, saving time and frustration.
The wireless connectivity works smoothly, letting me send files from my phone or laptop effortlessly. The included mini-app library is a fun bonus, especially the gamified design programs that kept my kids engaged.
The magnetic build plate is a game-changer, making model removal a breeze after printing. Plus, it’s very quiet, staying below 50 dB, so I could work nearby without distraction.
Print quality is impressive for such a small machine, with precision down to 0.05 mm. The speed is decent at 160 mm/s, and the filament flow remains consistent.
While it supports only single-color printing, this wasn’t a big deal for my projects. Overall, it’s a fantastic starter printer that combines safety, ease of use, and decent performance in one package.
3DMakerpro Seal Lite 3D Scanner, Blue LED, 0.02mm Accuracy

- ✓ High 0.02mm accuracy
- ✓ Excellent for small objects
- ✓ Free lifetime software updates
- ✕ Steep learning curve
- ✕ Requires powerful PC
| Scanning Accuracy | 0.02mm |
| Object Size Range | 10 to 300mm |
| Working Distance | 180–280mm |
| Frame Rate | 10fps |
| Light Source | Blue LED (400–500nm wavelength) |
| Supported Export Formats | [‘OBJ’, ‘STL’, ‘PLY’, ‘ASC’] |
You know that feeling when you finally get your hands on a gadget you’ve been eyeing for months? That was me with the 3DMakerpro Seal Lite 3D Scanner.
I’d read about its 0.02mm accuracy and blue LED precision, and I was eager to see if it lived up to the hype.
First off, the build quality feels solid but lightweight, making it surprisingly easy to handle. The blue LED light source is compact and emits a crisp, fine structured light—perfect for capturing tiny dents and detailed textures.
I found the recommended working distance of 180–280mm quite manageable; just enough room to scan small objects without fussing over positioning.
Using it indoors, I appreciated the anti-shake and scan-back features. They really do help stabilize scans, especially when you’re trying to get those intricate surface details.
The 10fps frame rate keeps the process smooth, though I did notice a slight learning curve with the software, JMStudio. It’s packed with features like auto-alignment and error correction, but you’ll need patience at first.
The scan results are impressive for small objects—think jewelry, miniatures, or detailed prototypes. Export options in OBJ, STL, PLY, and ASC formats make it versatile for various 3D printing projects.
The optional accessories, like a turntable and tripod, are a smart addition and significantly improve the consistency of your scans.
However, the device does require a pretty powerful PC to run smoothly, and mastering the software takes some practice. It’s not a plug-and-play gadget, but once you get the hang of it, the possibilities for creative projects are extensive.
Overall, it’s a solid tool for hobbyists and professionals alike who need precision in small-format scanning.
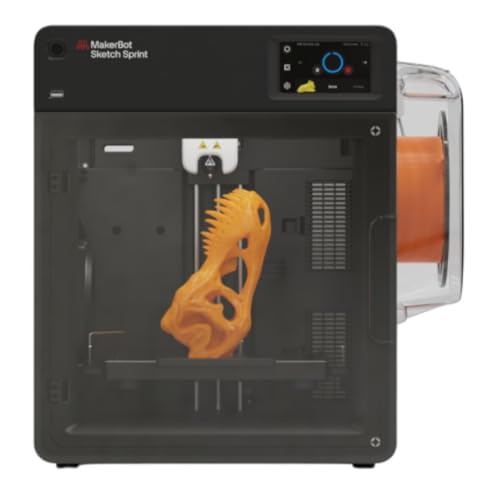
MakerBot Sketch Sprint 3D Printer with Cura Software
- ✓ Blazing fast print speeds
- ✓ Easy to use interface
- ✓ Reliable for educational use
- ✕ Higher price point
- ✕ Steep learning curve for beginners
| Print Speed | 250 mm per second |
| Build Volume | Inferred to be suitable for classroom projects (exact dimensions not specified) |
| Software Compatibility | UltiMaker Cura with Marketplace plugins |
| Intended Use | Educational, K-12 classrooms and labs |
| Connectivity | Likely includes standard options such as Wi-Fi or USB (common for 3D printers, inferred) |
| Certification and Training | Includes access to MakerBot Certification program |
The MakerBot Sketch Sprint 3D Printer instantly caught my attention with its impressive print speed of 250 mm per second, making it one of the fastest options I’ve tested for educational purposes. Its sleek design and compact size make it a great fit for classroom environments without sacrificing performance. The MakerBot Sketch Sprint 3D Printer with Cura Software is a standout choice in its category.
Using the Sketch Sprint was a breeze, thanks to its user-friendly interface and seamless integration with Cura software. I appreciated how quickly it transitioned from slicing to printing, and the ability to scale projects using the UltiMaker Marketplace plugins added a new level of versatility for classroom workflows. The inclusion of access to the MakerBot Certification program also means educators can easily incorporate professional development into their curriculum. When comparing different best 3d printing software options, this model stands out for its quality.
Overall, the MakerBot Sketch Sprint 3D Printer proves to be a reliable, fast, and intuitive tool perfect for K-12 educators and administrators. Whether you’re running collaborative projects or demonstrations, this printer empowers teachers to deliver engaging, hands-on learning experiences while developing valuable skills in students. At $2,399, it offers a solid investment for schools seeking high-performance 3D printing solutions.
Why Is 3D Printing Software Essential for Makers and Designers?
3D printing software is essential for makers and designers because it facilitates the creation, modification, and optimization of digital models that can be translated into physical objects. Without robust software, the potential of 3D printing cannot be fully realized, as it acts as the bridge between the conceptual and the tangible.
According to a study by the Wohlers Report, which is a leading resource in the 3D printing industry, the effectiveness of 3D printing largely hinges on the quality of the software used to design objects. The right software can significantly enhance the design process by providing tools for precision modeling, simulation, and preparation for printing, which ultimately leads to better outcomes and reduced material waste.
The underlying mechanism involves several key processes. First, 3D printing software enables designers to create complex geometries that would be difficult or impossible to achieve using traditional manufacturing methods. This capability is particularly important in industries such as aerospace and healthcare, where customized parts must meet specific performance standards. Additionally, the software often includes features that allow for iterative design and testing, which enhances innovation and efficiency. Finally, compatibility with various 3D printers and materials is crucial, as it ensures that the digital designs can be accurately executed in the physical world, thus maximizing the utility of 3D printing technology.
What Key Features Should You Consider in 3D Printing Software?
When selecting the best 3D printing software, several key features should be considered to ensure optimal performance and usability.
- User Interface: The software should have an intuitive and user-friendly interface that accommodates both beginners and experienced users. A well-designed UI can significantly enhance the workflow, making it easier to navigate through different tools and settings.
- File Compatibility: Ensure that the software supports a wide range of file formats such as STL, OBJ, and AMF. Compatibility with various file types allows for seamless integration with different 3D modeling applications and ensures you can use models from various sources without issues.
- Slicing Capabilities: A critical feature is the slicing engine, which converts 3D models into instructions that the printer can understand. Advanced slicing options, such as layer height, infill density, and support generation, provide greater control over the printing process and the final product’s quality.
- Customization Options: The best software should offer extensive customization features, allowing users to adjust settings tailored to their specific printer and material. This includes temperature settings, print speed, and advanced parameters for fine-tuning the print job.
- Support for Multiple Printers: Look for software that can support a variety of 3D printers, especially if you plan on using different models or brands. This flexibility ensures that you can adapt to various printing technologies without needing to switch software.
- Community and Support: A strong user community and access to customer support can be invaluable. Community forums, tutorials, and responsive customer service can help solve issues quickly and enhance your overall experience with the software.
- Cloud Integration: Some software solutions offer cloud storage and printing services, which can simplify collaboration and access to designs from anywhere. This feature also allows for easier sharing and management of 3D files, enhancing productivity.
- Advanced Features: Look for additional features such as multi-material printing, real-time monitoring, and the ability to create complex geometries. These advanced options can significantly expand the capabilities of your 3D printing projects and improve the end results.
What Are the Most Effective 3D Printing Software Options Available?
The best 3D printing software options available cater to various user needs, from beginners to professionals.
- Ultimaker Cura: Ultimaker Cura is a widely used slicing software known for its user-friendly interface and powerful features.
- Fusion 360: Fusion 360 is a comprehensive CAD software that integrates design, engineering, and simulation, making it ideal for both 3D modeling and printing.
- PrusaSlicer: PrusaSlicer is optimized for Prusa 3D printers but is also compatible with many others, offering detailed control over print settings.
- TinkerCAD: TinkerCAD is a browser-based CAD tool that is particularly suited for beginners, making it easy to create and modify 3D models.
- Blender: Blender is a powerful open-source 3D modeling software that allows for intricate designs and animations, suitable for advanced users.
Ultimaker Cura provides a versatile slicing engine and settings that can be tailored for various types of 3D printers, enhancing print quality and performance. Its community-driven approach ensures regular updates and a wealth of shared profiles for different materials and machines, making it an essential tool for hobbyists and professionals alike.
Fusion 360 combines CAD, CAM, and CAE in a single platform, facilitating a seamless workflow from design to production. This software supports parametric design, enabling users to create complex geometries while providing tools for simulation and analysis, which can significantly reduce the time from concept to printed model.
PrusaSlicer is packed with features such as customizable supports, variable layer height, and advanced infill options, allowing users to optimize prints based on specific requirements. Its user-friendly interface makes it accessible while still offering depth for more experienced users to take full advantage of its capabilities.
TinkerCAD stands out for its simplicity and accessibility, making it a great starting point for beginners looking to learn 3D modeling. With a straightforward drag-and-drop interface and basic shape manipulation tools, users can quickly design functional models without the steep learning curve associated with more complex software.
Blender is renowned for its extensive capabilities in 3D modeling, texturing, and animation, making it a favorite among artists and designers. While it has a steeper learning curve, its robust community and abundant tutorials make it possible for users to create highly detailed and customized models suitable for 3D printing.
How Can Tinkercad Be Used for Beginners in 3D Design?
Tinkercad is an accessible and user-friendly platform that serves as an excellent entry point for beginners interested in 3D design and printing.
- Intuitive Interface: Tinkercad features a drag-and-drop interface that simplifies the design process for users of all skill levels.
- Basic Shapes and Tools: The software provides a range of basic geometric shapes and intuitive tools that allow users to create complex designs easily.
- Educational Resources: Tinkercad offers various tutorials and projects that guide beginners through the fundamentals of 3D design.
- Real-time Collaboration: Users can collaborate on designs in real-time, making it ideal for group projects or educational settings.
- Export Options: Tinkercad allows users to export their designs in various formats suitable for 3D printing, ensuring compatibility with most printers.
The intuitive interface of Tinkercad enables beginners to quickly grasp the essentials of 3D design by allowing them to manipulate objects with ease, without the steep learning curve often associated with more advanced software.
With a library of basic shapes and tools, users can start designing right away, combining different elements to create intricate models while gaining confidence in their skills.
The educational resources available on Tinkercad include step-by-step tutorials, project ideas, and challenges that help users learn at their own pace, making it a great resource for self-directed learning.
Real-time collaboration features enhance the experience by allowing multiple users to work on the same design simultaneously, fostering teamwork and creativity in classrooms or maker spaces.
Finally, Tinkercad’s export options are designed to cater to the needs of 3D printing, enabling users to save their projects in compatible file formats like STL or OBJ, facilitating a seamless transition from design to physical object.
What Advantages Does Ultimaker Cura Offer for Advanced Users?
Ultimaker Cura provides several advantages for advanced users looking to optimize their 3D printing experience.
- Customizable Print Settings: Ultimaker Cura allows users to adjust a wide range of print settings, including layer height, print speed, and infill density. This level of customization enables users to fine-tune their prints for specific materials or project requirements, resulting in improved print quality and durability.
- Support for Multiple File Formats: The software supports various file formats, such as STL, OBJ, and 3MF, making it compatible with a wide array of 3D models. This versatility allows users to work seamlessly with different design tools and libraries, enhancing the workflow and efficiency of the printing process.
- Advanced Support Structures: Ultimaker Cura offers advanced algorithms for generating support structures that can be tailored to the specific geometry of a model. This feature minimizes material usage and simplifies post-processing, as the supports are easier to remove and leave less residue on the final print.
- Plugin Ecosystem: The software supports a variety of plugins that can extend its functionality, allowing users to add features like custom print profiles, material libraries, and even connection to cloud services. This flexibility empowers advanced users to integrate additional tools and streamline their printing workflow.
- Preview and Layer View: Ultimaker Cura includes a detailed preview mode that allows users to visualize their print layer by layer before starting the print job. This feature helps in identifying potential issues such as thin walls or unsupported areas, enabling users to make necessary adjustments in advance.
- Material Profiles: The software comes with pre-configured profiles for a wide range of materials, including PLA, ABS, and TPU. Advanced users can also create and save custom profiles, ensuring optimal printing conditions for different materials and enhancing the overall print quality.
Why Is Blender a Go-To Choice for Creative Professionals?
Blender is a go-to choice for creative professionals primarily because of its robust open-source nature, extensive feature set, and active community support, making it one of the best 3D printing software options available.
According to a survey conducted by the Blender Foundation, over 70% of users cite the software’s versatility and powerful tools as their primary reasons for choosing it (Blender Foundation, 2021). Additionally, its compatibility with various file formats and integration with 3D printing workflows further enhances its appeal to professionals looking to create and print intricate designs.
The underlying mechanism for Blender’s popularity stems from the combination of its comprehensive modeling, sculpting, and rendering capabilities, which allow users to execute complex projects from start to finish. This is paired with an active community that consistently contributes to its development through plugins and add-ons, which significantly extend its functionality. For instance, the presence of 3D printing-specific add-ons such as “3D Print Toolbox” aids users in preparing models for printing, ensuring that their designs are optimized for the best results.
Moreover, the affordability of Blender, being free and open-source, democratizes access to high-quality 3D software, allowing a wide range of users—from hobbyists to professionals—to leverage its capabilities without the burden of expensive licensing fees. This accessibility, combined with a wealth of online tutorials and resources, fosters a growing user base that continuously contributes to the software’s evolution, making it an even more attractive choice for creative professionals in the field of 3D printing.
How Do You Choose the Right 3D Printing Software for Your Needs?
Choosing the right 3D printing software depends on your specific needs and project requirements, including design complexity, user experience, and compatibility.
- CAD Software: CAD (Computer-Aided Design) software is essential for creating detailed 3D models. Popular options like AutoCAD and SolidWorks offer robust features for professionals, allowing for precision and intricate designs, but may have a steep learning curve for beginners.
- Slicing Software: Slicing software converts 3D models into instructions that a 3D printer can understand. Programs such as Cura and PrusaSlicer allow users to set various parameters like layer height and print speed, which can greatly affect the quality and efficiency of the print.
- Mesh Repair Tools: Mesh repair tools are crucial for fixing errors in 3D models that can lead to printing failures. Software like Netfabb and Meshmixer can analyze and correct issues, ensuring that your model is manifold and suitable for printing.
- Cloud-Based Software: Cloud-based solutions like Tinkercad and Onshape provide accessibility and collaboration features, allowing multiple users to work on a project simultaneously from different locations. These tools are often user-friendly and ideal for beginners or educational purposes.
- Specialized Software: Some software is tailored for specific industries or applications, like medical or architectural modeling. Examples include Rhino for industrial design and ZBrush for character modeling, which provide specialized tools and features suited to their respective fields.
- Operating System Compatibility: Ensure that the software you choose is compatible with your operating system, whether it’s Windows, macOS, or Linux. This compatibility can affect your workflow, so consider cross-platform options if you work in a multi-user environment.
What Are the Latest Trends Shaping 3D Printing Software Development?
The landscape of 3D printing software is constantly evolving, influenced by various trends that enhance functionality and user experience. Key trends shaping this development include:
-
Cloud-Based Solutions: Many software applications are moving to cloud platforms, allowing users to access projects from anywhere and collaborate in real-time. This shift promotes greater accessibility and easier updates.
-
Integration with AI and Machine Learning: AI is increasingly embedded in 3D printing software, improving design optimization and streamlining the production process. Machine learning algorithms can analyze designs and recommend alterations to enhance prints.
-
Enhanced User Interfaces: A focus on user-friendly interfaces simplifies the learning curve for beginners. Intuitive designs help users navigate software more efficiently, enabling them to create complex models with less effort.
-
Material Diversity and Compatibility: Emerging software now supports a wider range of materials, including advanced composites and bio-materials, allowing for more innovative applications in various industries.
-
Customization and Personalization Features: Software is incorporating tools that enable more personalized design choices, catering to niche markets and individual user preferences.
These trends are setting the stage for more efficient, user-friendly, and innovative 3D printing experiences.
Related Post: