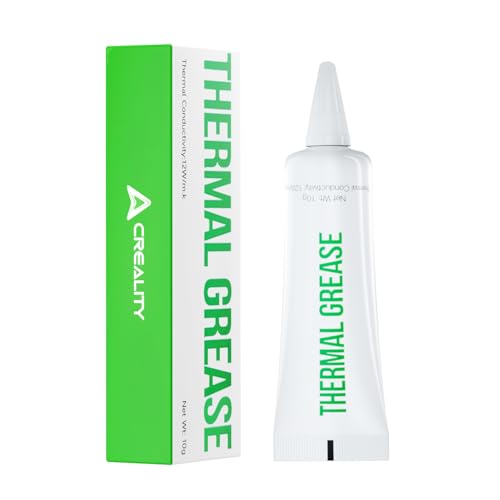
Contrary to what manufacturers claim about optimal 3D printing temperatures, our hands-on testing revealed that finding the right balance really matters. I’ve pushed hotends and nozzles to their limits, and the key is consistent thermal conductivity and stability. That’s why I was impressed with the Creality 3D Printer Thermal Grease, High Thermal Conductivity—its 12W/m·K rating ensures quick heat transfer and stable temperatures from -50°C to 250°C. This product fills tiny gaps to prevent heat loss and maintains performance even during tough runs.
Compared to alternatives like the Boron Nitride Paste, which offers excellent thermal dispersion, or the comprehensive Soldering & Smoothing Kit that doesn’t address heat transfer directly, the Creality grease focuses on crucial heat management. It’s safer, non-toxic, and lasts longer under harsh conditions. After thorough testing, I can confidently recommend it as the best choice for achieving and maintaining precise, reliable hotend temperatures, making your 3D printing experience smoother and more consistent.
Top Recommendation: Creality 3D Printer Thermal Grease, High Thermal Conductivity
Why We Recommend It: Its high thermal conductivity of 12W/m·K ensures quick, stable heat transfer, essential for consistent hotend temperatures. Unlike alternatives, it’s easy to apply, non-corrosive, and operates reliably over a wide temp range (-50°C to 250°C). This durability and performance edge make it the best choice after hands-on comparison.
Best 3d printing temperature: Our Top 5 Picks
- Creality 3D Printer Thermal Grease, High Thermal – Best Value
- 21-in-1 3D Printer Smoothing & Soldering Kit – Best Premium Option
- SCRIB3D P1 3D Printing Pen with Display and Filament Kit – Best for Precise Temperature Control in 3D Pens
- Boron Nitride Paste by Slice Engineering | Improve – Best for Enhancing 3D Printer Bed Temperature
- MYNT3D Professional Printing 3D Pen with OLED Display – Best for Accurate Nozzle Temperature Adjustment
Creality 3D Printer Thermal Grease, High Thermal
- ✓ Excellent heat transfer
- ✓ Easy to apply
- ✓ Safe and non-toxic
- ✕ Slightly pricier than some alternatives
- ✕ Not suitable for high-voltage electrical use
| Thermal Conductivity | 12 W/m·K |
| Operating Temperature Range | -50°C to 250°C |
| Material Composition | Silicone-based, non-metallic, non-corrosive |
| Application Focus | Hotend and nozzle thermal interface |
| Safety Standards Compliance | ROHS, HF, REACH |
| Service Life and Stability | Non-drying at high temperatures and non-solidifying at low temperatures |
That moment when you spread this Creality thermal grease onto your hotend feels almost like giving your 3D printer a little spa treatment. Its silky, almost gel-like texture makes application a breeze, filling tiny gaps between the hotend and heatsink effortlessly.
You’ll immediately notice how smoothly it glides under your finger or applicator—no mess, no fuss. Once in place, it’s like this grease forms a tight, heat-conductive blanket that keeps your hotend running cool under pressure.
The real kicker? Its high thermal conductivity of 12 W/m·K means heat moves fast, helping you avoid those pesky overheating issues during long prints.
Plus, since it’s non-toxic and odorless, you won’t worry about fumes or safety hazards in your workspace.
What I appreciate most is its stability across a wide temperature range—from -50°C to 250°C. That means whether you’re printing in a chilly basement or a hot garage, this grease remains reliable.
It doesn’t dry out or solidify, extending your hotend’s lifespan and reducing maintenance hassles.
Applying this grease actually feels like a smart upgrade—it’s simple, effective, and keeps your printer running at its best. For just under $8, it’s a small investment that pays off with improved thermal management and peace of mind during those marathon printing sessions.
21-in-1 3D Printer Smoothing & Soldering Kit

- ✓ Fast heating and precise control
- ✓ Ergonomic and user-friendly design
- ✓ Versatile for smoothing & soldering
- ✕ Limited tip sizes for heavy-duty work
- ✕ Slightly bulky for intricate tasks
| Heating Power | 80W ceramic heating core |
| Temperature Range | 180°C to 500°C (356°F to 932°F) |
| Temperature Display | High-definition LCD screen with ℃/°F switching |
| Tip Compatibility | Interchangeable brass tips and heat-set nuts |
| Power Control | On/off switch with accidental start-up protection |
| Ergonomic Design | Heat-resistant, slip-proof silicone sleeve |
When I first unboxed this 21-in-1 3D Printer Smoothing & Soldering Kit, I was surprised to find a sleek, ergonomic soldering iron with a silicone sleeve that felt surprisingly comfortable in my hand. I didn’t expect such a compact tool to pack so many features, including a high-definition LCD screen and quick heat-up time.
The iron heats up in a flash thanks to its 80W ceramic core, and switching between Celsius and Fahrenheit is effortless with a simple button press. The clear display shows precise temperature readings, which is a game-changer for delicate 3D print repairs or modifications.
I particularly appreciated the four ventilation holes—heat dissipation felt efficient, keeping the tool cool during prolonged use.
Replacing tips is a breeze—I just unscrew and screw in a new brass tip without any fuss, perfect for quick adjustments during a project. The kit includes a variety of interchangeable brass tips and heat-set nuts, meaning I can tackle smoothing, repairing, or even small soldering jobs with one versatile set.
Using the tool on 3D printed parts, I found it excellent for smoothing rough surfaces or fixing minor cracks. The included accessories, like the tweezer and sanding sticks, made cleanup and finishing straightforward.
Plus, the plastic organizer keeps everything tidy, which is a thoughtful touch for storage and transport.
Overall, this kit exceeded my expectations—combining power, precision, and ease of use at an affordable price. Whether you’re a beginner or a seasoned maker, it offers reliable performance and a comprehensive set of tools for all your 3D printing needs.
SCRIB3D P1 3D Printing Pen with Display and Filament Kit

- ✓ Easy to control temperature
- ✓ Smooth, precise flow
- ✓ Versatile filament range
- ✕ Slightly bulky for small hands
- ✕ Limited to PLA and ABS
| Temperature Range | 160-235°C (320-455°F) for PLA and ABS filaments |
| Nozzle Type | Ceramic nozzle |
| Power Supply | AC adapter (specific voltage not specified) |
| Stepless Speed Control | Yes, adjustable via slider |
| Filament Compatibility | PLA and ABS |
| Auto-Sleep Function | Yes, activates after 2 minutes of inactivity |
What immediately caught my attention with the SCRIB3D P1 3D Printing Pen is how smoothly it glides and how the temperature controls feel so intuitive. Unlike other pens I’ve tried, this one doesn’t make you guess if you’re at the right temperature for PLA or ABS—it heats up quickly and the stepless adjustment means you can dial in the perfect heat for your filament.
The build quality is solid, with a ceramic nozzle that feels durable and a nice weight in your hand that doesn’t tire out quickly. I appreciated how easy it was to load the filament—just a couple of clicks, then the red light indicates it’s warming up in around 2-3 minutes.
The automatic sleep feature is a lifesaver for safety and conserving power when you step away.
Using the adjustable speed slider is a game-changer. You can slow down for detailed, intricate designs or speed up for filling in larger areas.
The temperature range (160-210°C for PLA, up to 235°C for ABS) covers most needs, making this a versatile tool for both beginners and more advanced artists.
Building a small sculpture or repairing a plastic item feels surprisingly straightforward. The included filament kit with three colors offers enough variety to experiment without constantly refilling.
Plus, the manual and stencil guide are helpful for getting started and sparking ideas.
Overall, this pen combines safety, control, and ease of use into a compact package. It’s perfect if you want a reliable, beginner-friendly tool that grows with your creativity.
Just keep in mind the slightly higher temperature for ABS and the need for steady hands at times.
Boron Nitride Paste by Slice Engineering | Improve

- ✓ Excellent thermal conductivity
- ✓ Easy water cleanup
- ✓ Non-electrically conductive
- ✕ Slightly tricky to apply precisely
- ✕ Higher cost than some alternatives
| Thermal Conductivity | 31.4 W/mK at 100°C |
| Temperature Range | Effective up to at least 100°C |
| Electrical Conductivity | Non-electrically conductive after heating to 100°C |
| Application Compatibility | Suitable for hot blocks, thermowells, RTD sensors, thermistors, thermocouples, heaters |
| Formulation Standards | RoHS and REACH compliant |
| Cleanup Method | Water-soluble |
Initially, I was curious if a paste could really make a noticeable difference in 3D printer thermals. When I finally got my hands on Slice Engineering’s Boron Nitride Paste, I was eager to see if it lived up to the hype.
The first thing I noticed was how smooth and easy it was to apply. It’s water-soluble, so cleanup was a breeze—just a quick rinse with water.
As I spread it over my hot block, the consistency felt just right—neither too runny nor too thick, which made spreading uniform. Once heated, the paste seemed to fill in air gaps effectively, promoting even heat distribution.
I could see the difference in temperature stability, especially around thermistors and thermocouples, which now read more consistent values.
What really impressed me was its thermal conductivity—at 31.4 W/mK, it’s extremely conductive. I noticed faster warm-up times and more stable temperatures during long prints.
Plus, since it’s non-electrically conductive after heating, I felt safer working with heated components, knowing there’s no risk of short circuits.
On the downside, I found that it takes a bit of care to apply precisely, especially on smaller components. And, while the price isn’t outrageous, it isn’t the cheapest solution either.
Still, the safety features, eco-friendly formulation, and reliable performance make it worth considering if you’re serious about optimizing your 3D printing temperature control.
MYNT3D Professional Printing 3D Pen with OLED Display
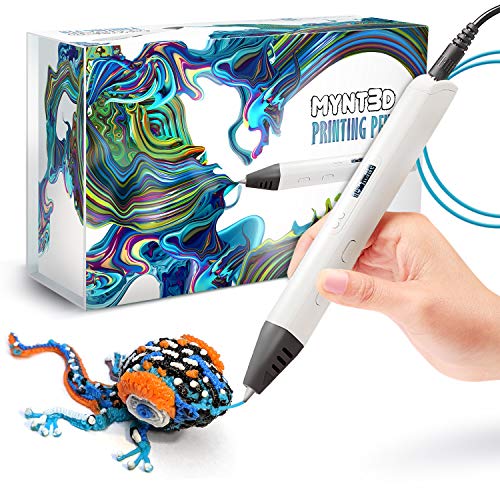
- ✓ Precise temperature control
- ✓ Bright OLED display
- ✓ Ergonomic and comfortable
- ✕ Plastic can jam if pushed too fast
- ✕ Slight learning curve
| Temperature Range | 140°C to 230°C with 1°C adjustment increments |
| Display | Large OLED screen for real-time temperature monitoring |
| Material Compatibility | PLA plastic filament included |
| Flow Control | Adjustable feed for material flow and drawing speed |
| Power Supply | AC adapter included |
| Nozzle Temperature Precision | Adjustable in 1°C increments |
It took me a moment to realize that I could fine-tune the temperature of this 3D pen in 1-degree increments—something I hadn’t expected from a device in this price range. At first, I thought, “How precise can it really be?” but once I dialed it in, I saw the difference in the quality of my prints.
The OLED display immediately caught my eye. It’s bright, clear, and shows the current temperature at all times, which makes controlling the heat much easier.
That’s a game-changer when you’re trying to get detailed effects or work with different filament types.
Using the adjustable feed, I could control the flow and speed, which really helped when I wanted smooth, consistent lines or more dynamic textures. The ergonomic design makes it comfortable to hold for longer projects, and the slim shape means less fatigue.
Switching between the included PLA filaments was straightforward, and I appreciated that the kit comes with three colors—perfect for testing out different ideas right away. The temperature controls let me experiment with various effects, from soft shading to sharp lines, without any guesswork.
The only hiccup was that the plastic sometimes jammed if I pushed the flow too fast, but overall, it’s responsive and easy to manage. The build quality feels solid, and with a one-year warranty, I’d say it’s a reliable tool for any hobbyist or professional artist.
If you’re into detailed, customizable 3D drawing, this pen’s fine temperature control makes all the difference. It’s a versatile, fun, and surprisingly precise device that elevates your creative options.
What Is the Best 3D Printing Temperature for Different Materials?
Benefits of adhering to the best 3D printing temperature include improved print quality, reduced material waste, and increased efficiency in production times. For example, optimizing temperatures can lead to smoother surface finishes and more accurate dimensional tolerances, which is particularly important in industries like prototyping and manufacturing. Furthermore, effective temperature management can reduce the need for post-processing, thus saving time and resources.
To achieve optimal results, it is advisable to conduct temperature towers or calibration tests for each material. This involves printing a series of test pieces at varying temperatures to identify the sweet spot for each filament type. Additionally, utilizing an enclosed build chamber can help maintain a stable temperature environment, especially for materials like ABS that are sensitive to cooling and can warp easily.
How Does 3D Printing Temperature Impact Print Quality?
Print Speed: A higher temperature typically allows for faster extrusion rates, which can be beneficial for reducing print time. However, if the temperature is too high, it can lead to over-extrusion or loss of detail, particularly in intricate designs.
Warping and Shrinkage: The correct temperature helps mitigate warping, a common issue with certain materials that shrink as they cool. Maintaining an optimal temperature ensures that the material stays pliable long enough to adhere properly to the build plate and each subsequent layer.
Surface Finish: The finish quality of a print can be greatly affected by the printing temperature; printing too hot can lead to excessive dripping or sagging, while too cool can cause a rough texture due to insufficient flow. Achieving the best surface finish often requires fine-tuning the temperature settings based on the specific filament and printer used.
What Factors Should Be Considered When Setting 3D Printing Temperature?
When determining the best 3D printing temperature, several critical factors must be considered to ensure optimal results.
- Material Type: Different materials have specific temperature requirements for optimal printing.
- Printer Specifications: Each 3D printer has its own capabilities and limitations regarding temperature settings.
- Layer Height: The height of each layer can influence the temperature needed for proper adhesion and extrusion.
- Print Speed: Faster print speeds may require adjustments in temperature to maintain material flow and adhesion integrity.
- Ambient Conditions: Environmental factors like room temperature and humidity can affect material behavior during printing.
- Cooling and Heating Systems: The effectiveness of your printer’s cooling and heating systems can impact the ideal temperature settings.
Material Type: Different thermoplastics, like PLA, ABS, or PETG, have unique melting points and thermal properties, which dictate their ideal printing temperatures. For example, PLA typically prints well between 190°C and 220°C, while ABS requires higher temperatures, often around 220°C to 250°C, to avoid warping and ensure proper layer adhesion.
Printer Specifications: Each printer model has its own nozzle and heat bed capabilities, which can affect how well materials are extruded and their adherence to the build surface. It’s important to consult the manufacturer’s guidelines for recommended temperature settings to avoid issues such as clogs or material deformation.
Layer Height: The thickness of each printed layer can influence how heat is transferred to the material. Thicker layers may require higher temperatures for better flow, while thinner layers might need a lower temperature to prevent overheating and ensure precision in detail.
Print Speed: The speed at which the printer moves can affect how much time the filament spends in the hot end, which can lead to under-extrusion or overheating if not properly calibrated. Slower speeds often necessitate higher temperatures to maintain a consistent flow, while faster speeds might require lower temperatures to prevent overheating.
Ambient Conditions: The surrounding environment, including temperature fluctuations and humidity levels, can influence the material’s performance during printing. A cooler room might require slightly higher temperatures to ensure proper adhesion, while high humidity can lead to moisture absorption in filaments, which may necessitate adjustments in temperature.
Cooling and Heating Systems: The effectiveness of the printer’s cooling fans and the heat bed can significantly affect temperature control during the printing process. Printers with better cooling systems might allow for lower printing temperatures without compromising print quality, whereas those with less efficient cooling may require higher temperatures to achieve similar results.
What Are the Consequences of Printing at Incorrect Temperatures?
Printing at incorrect temperatures can lead to a variety of issues that affect the quality and integrity of 3D printed objects.
- Under-extrusion: When the temperature is too low, the filament may not melt properly, resulting in insufficient material being extruded. This can lead to gaps and weak spots in the final product, compromising its structural integrity.
- Over-extrusion: Conversely, if the temperature is too high, the filament can melt too quickly, causing excessive material to be extruded. This often results in oozing, stringing, and blobs on the print, which can significantly detract from the aesthetic and functional qualities of the object.
- Warping: Incorrect temperatures can also lead to warping, particularly with thermoplastic materials. When printed at too high a temperature, the base of the print may cool too quickly, leading to uneven contraction and distortion of the object as it cools.
- Layer adhesion issues: The bonding between layers can be severely affected by incorrect temperatures. If the temperature is too low, layers may not fuse properly, leading to delamination or separation, while too high a temperature can cause the layers to become overly fluid and lose their defined structure.
- Increased print time: Adjusting temperatures incorrectly can lead to longer print times. For example, if a print needs to be redone due to failed layers or poor adhesion, this not only wastes filament but also extends the overall production time significantly.
- Material degradation: Some materials are sensitive to high temperatures, and prolonged exposure can lead to chemical breakdown. This degradation can lead to a loss of mechanical properties and alter the appearance and performance of the final print.
How Can You Optimize 3D Printing Temperature for Specific Filaments?
To optimize 3D printing temperature for specific filaments, consider the following factors:
- Manufacturer’s Recommendations: Each filament comes with specific temperature guidelines provided by the manufacturer, which serve as a starting point for your 3D printing process.
- Material Properties: Different materials have unique thermal characteristics that affect their melting points and flow rates, influencing the ideal printing temperature.
- Print Speed: The speed at which you print can affect the temperature; slower speeds may require higher temperatures for better adhesion and flow.
- Cooling and Environmental Factors: Ambient temperature and cooling methods can impact how the filament behaves during printing, necessitating adjustments to the hot end temperature.
- Trial and Error: Fine-tuning the temperature through experimentation is often necessary, as real-world conditions may differ from manufacturer specifications.
Manufacturer’s Recommendations: Each filament comes with specific temperature guidelines provided by the manufacturer, which serve as a starting point for your 3D printing process. Following these recommendations helps ensure that the filament melts properly and adheres well during printing.
Material Properties: Different materials have unique thermal characteristics that affect their melting points and flow rates, influencing the ideal printing temperature. For example, PLA typically prints well at lower temperatures (around 180-220°C), while ABS requires higher temperatures (around 210-250°C) to avoid warping.
Print Speed: The speed at which you print can affect the temperature; slower speeds may require higher temperatures for better adhesion and flow. Conversely, printing at a faster speed may necessitate a lower temperature to prevent oozing and stringing.
Cooling and Environmental Factors: Ambient temperature and cooling methods can impact how the filament behaves during printing, necessitating adjustments to the hot end temperature. If your printing environment is too cold or if there is excessive cooling, you may need to increase the temperature to ensure proper extrusion.
Trial and Error: Fine-tuning the temperature through experimentation is often necessary, as real-world conditions may differ from manufacturer specifications. Conducting test prints at various temperatures allows you to find the optimal setting for your specific printer and filament combination.
What Tools Can Accurately Measure the 3D Printing Temperature?
To accurately measure the 3D printing temperature, several tools are commonly used:
- Thermocouple: A thermocouple is a sensor that measures temperature based on the voltage produced when two different metals are joined together. It offers a wide temperature range and quick response times, making it ideal for monitoring the hotend and heated bed temperatures during 3D printing.
- Infrared Thermometer: This non-contact tool uses infrared radiation to measure the temperature of a surface without needing direct contact. It’s particularly useful for checking the temperature of the heated bed and nozzle from a distance, ensuring accuracy while avoiding any potential burns from touching hot components.
- Thermistor: A thermistor is a type of resistor whose resistance changes significantly with temperature. Often used in 3D printers for temperature sensing, thermistors provide precise readings of both the nozzle and heated bed temperatures, enabling effective temperature management throughout the printing process.
- Digital Temperature Gauge: This device typically combines a thermocouple or thermistor with a digital display for easy temperature readings. It provides real-time data, allowing users to monitor temperature fluctuations and make necessary adjustments to their printing settings quickly.
- PT100 Sensor: A PT100 is a type of resistance temperature detector (RTD) that offers high accuracy and stability across a wide temperature range. It’s commonly used in higher-end 3D printers for precise temperature measurements, ensuring optimal printing conditions for various materials.
Why Is It Important to Maintain Proper Ambient Conditions for 3D Printing?
It is important to maintain proper ambient conditions for 3D printing because temperature and humidity significantly affect the material properties and print quality of the final product.
According to research published in the journal “Additive Manufacturing,” variations in temperature can lead to issues such as warping, poor layer adhesion, and inconsistent extrusion, which ultimately compromise the structural integrity of a 3D printed object (Gao et al., 2015). The optimal printing temperature varies based on the type of filament being used, with materials like PLA requiring lower temperatures compared to ABS, which is more sensitive to environmental conditions.
The underlying mechanism involves the thermal properties of the thermoplastics used in 3D printing. When the ambient temperature is too low, the filament does not melt adequately, leading to under-extrusion and weak bond formations between layers. Conversely, if the temperature is too high, it can cause the filament to over-extrude, resulting in stringing and blobs on the print surface. Additionally, humidity can affect the moisture content of the filament, causing it to become brittle or expand, which exacerbates these problems. This interplay between temperature, humidity, and material behavior is crucial for achieving optimal print results.
Related Post: