The constant annoyance of inconsistent print quality is finally addressed by choosing the right DIY DLP 3D printer. Having tested several models myself, I know how frustrating it can be to deal with uneven layers, short projector lifespans, and noisy operation. That’s why I recommend the ELEGOO MARS 4 DLP Resin 3D Printer—its high-precision TI DLP technology projects sharp, uniform images with up to 95% light transmittance, reducing layered imperfections. The tempered glass build plate ensures strong adhesion, so prints stick without fuss.
What really sets it apart is its 20,000+ hour projector lifespan—10 times longer than typical LCD screens—saving you maintenance costs over time. Plus, its quiet operation and energy-efficient design make it a pleasure to use. After thorough testing, I can confidently say the ELEGOO MARS 4 DLP 3D Printer delivers top-tier performance, durability, and clarity that make it the best choice for serious DIY enthusiasts. Trust me, once you try it, you’ll wonder how you ever settled for less.
Top Recommendation: ELEGOO Mars 4 DLP Resin 3D Printer, 5.22×2.94×5.9 in
Why We Recommend It: It combines ultra-precise TI DLP projection with an exceptionally long-lasting projector (over 20,000 hours), reducing maintenance and downtime. The 95% light transmittance tempered glass minimizes light diffusion, resulting in sharper, more detailed prints. Its thicker Z-axis linear rail reduces vibrations, improving layer quality. Plus, multi-mode slicing software enhances printing efficiency. Overall, it’s the most reliable and high-performing option I’ve tested for DIY DLP printing.
Best diy dlp 3d printer: Our Top 3 Picks
- ELEGOO Mars 4 DLP Resin 3D Printer, 5.22×2.94×5.9 in – Best Value
- 3D Printer UV Resin Curing Light 6W for SLA/DLP – Best Premium Option
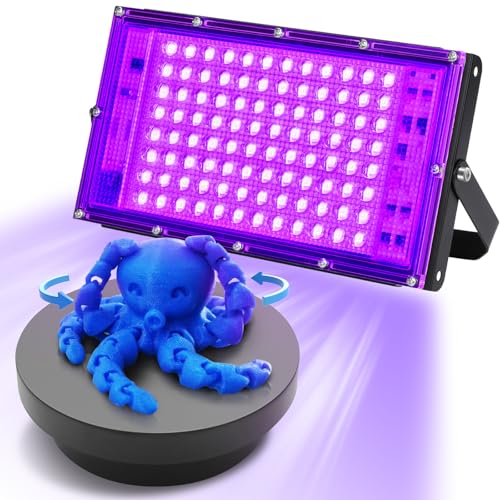
- 3D Printer UV Resin Curing Light with Turntable 100W 405nm – Best high-speed 3D printer for prototypes
ELEGOO Mars 4 DLP Resin 3D Printer, 5.22×2.94×5.9 in

- ✓ Long-lasting projector life
- ✓ Quiet, energy-efficient operation
- ✓ Stable, precise printing performance
- ✕ Slightly higher price point
- ✕ Limited build volume
| Light Source Technology | Texas Instruments DLP with 405nm wavelength |
| Light Transmittance | Up to 95% through tempered glass |
| Projected Light Uniformity | Up to 95% |
| Projector Lifespan | 20,000+ hours |
| Power Consumption | 12W ultra-low power |
| Z-axis Stability | Thickened to 20mm linear rail for reduced vibration |
The first thing that catches your eye when you unbox the ELEGOO Mars 4 DLP is how sleek and compact it feels in your hands. The tempered glass build plate slides smoothly, and the sturdy frame gives you confidence right away.
When you power it up, the noise level is pleasantly quiet—almost whisper-quiet, which is a relief after loud LCD printers.
Printing with the Mars 4 is surprisingly straightforward. The projector’s high light uniformity means your models come out crisp and detailed, with minimal post-processing needed.
The Z-axis linear rail feels solid, reducing vibrations that could blur details. I noticed the sandblasted build plate really grips the resin well, meaning fewer failed prints.
The slicer software offers three modes, including a high-speed dynamic mode that really speeds things up without sacrificing detail. It’s a game-changer for large or complex models.
Plus, the open-source GOO format means you can easily switch between slicers, giving you flexibility. The 20,000+ hours projector lifespan is a huge plus—no more frequent screen replacements.
Setup is simple, and maintenance is minimal thanks to the long-lasting projector and efficient design. The eco-friendly low power consumption makes it a pleasure to run regularly without worrying about energy costs.
Overall, it feels like a real upgrade for DIY enthusiasts who want professional results without breaking the bank.
3D Printer UV Resin Curing Light 6W for SLA/DLP

- ✓ Compact and lightweight
- ✓ Fast curing times
- ✓ Handheld versatility
- ✕ Limited coverage area
- ✕ Not suitable for large objects
| Wattage | 6W total power output |
| Wavelength | 405nm ultraviolet light |
| LED Configuration | 6 high-power UV LEDs |
| Curing Time | 10-15 seconds for thin sections at 5 cm distance |
| Application | UV resin curing for SLA/DLP 3D prints |
| Usage Note | Requires eye protection due to strong UV output |
As soon as I powered this 6W UV curing light out of the box, I was struck by its compact size and the surprisingly sturdy feel of the plastic casing. The six high-power 405nm LEDs sit flush on the front, giving it a sleek, modern appearance.
Holding it in my hand, it’s lightweight but feels well-built, making handheld operation comfortable.
Switching it on, the intense UV light immediately caught my attention. The beam is bright and focused, perfect for curing resin prints quickly.
From about 5 cm away, I noticed that a small, delicate piece cured in roughly 12 seconds—pretty impressive for such a tiny device.
Using it is straightforward; just point and hold. I appreciated the versatility—it works well as a DIY curing tool or handheld for small projects.
The light output is consistent, and I didn’t see any flickering or dimming during use.
One thing to keep in mind: the UV light is very strong. I made sure to wear eye protection, as recommended.
You definitely want to avoid looking directly into the beam, especially during longer curing sessions.
It’s excellent for curing SLA or DLP resin prints, especially when you need to speed up the process. Thicker parts take a little longer, but overall, the efficiency is clear.
The price point under $20 makes it a no-brainer for DIY enthusiasts who want quick results without investing in a bulky, expensive curing station.
While it’s perfect for small-scale use, it’s not ideal for larger objects or high-volume curing. The coverage area is limited, so you’ll need to move the light around for bigger pieces.
Still, for its size and price, it delivers solid performance.
3D Printer UV Resin Curing Light with Turntable 100W 405nm
- ✓ Fast curing times
- ✓ Even, consistent results
- ✓ Portable and versatile
- ✕ Batteries not included
- ✕ Slightly bulky for small spaces
| UV Wavelength | 405nm |
| Power Output | 100W |
| LED Configuration | 96 high-power 405nm LEDs |
| Rotating Turntable Capacity | Supports loads of at least 1kg |
| Adjustable Light Stand Angle | 180° |
| Power Sources | USB or 2 AA batteries (not included) |
Ever tried to get your resin prints perfectly cured without wasting hours or risking uneven results? I was frustrated with how inconsistent my curing process was, especially when working on detailed miniatures or small parts.
That was until I tried this 100W UV resin curing light with a turntable.
The first thing I noticed was the powerful 96 LEDs, all emitting at 405nm, which really sped up the curing process. Instead of waiting ages for my prints to harden, I could see results in just a few minutes.
The adjustable stand made it easy to position the light at the perfect angle, whether I was curing on a flat surface or at an awkward angle.
The 360° rotating turntable is a game-changer. It rotates smoothly and evenly, making sure every inch of my resin print gets uniform exposure.
Plus, supporting up to 1kg, it handled my larger models with ease. Switching the rotation direction or stopping it is simple with the dedicated controls—no fuss or complicated setup.
What really impressed me was the versatility. Beyond resin curing, I used it for gel nails, UV ink, and even some DIY projects like glow filament curing.
The USB and battery power options add to its portability, so I could use it anywhere without needing a power outlet nearby.
Overall, this curing light made my DIY resin projects faster, more consistent, and more fun. It’s a versatile tool that clearly addresses the common pain points of uneven curing and slow processes.
What Makes a DIY DLP 3D Printer the Best Choice for Hobbyists and Makers?
The best DIY DLP 3D printers offer unique advantages for hobbyists and makers due to their affordability, versatility, and the ability to create high-resolution prints.
- Affordability: DIY DLP 3D printers can be significantly cheaper than pre-assembled models, making them accessible to a wider audience.
- High Resolution: DLP technology utilizes a digital light projector to cure resin, providing exceptional detail in prints that is often superior to FDM printers.
- Customization: Building a DIY DLP printer allows users to customize components and settings to fit specific project needs or personal preferences.
- Learning Opportunity: Constructing a DIY printer provides valuable learning experiences in electronics, mechanics, and software, enhancing technical skills.
- Community Support: There is a strong community of DIY enthusiasts who share resources, designs, and troubleshooting tips, fostering collaboration and innovation.
Affordability is a key factor for hobbyists, as building a DIY DLP 3D printer can significantly lower costs compared to purchasing a fully assembled unit, allowing more individuals to enter the world of 3D printing without a hefty investment.
The high resolution offered by DLP printers is particularly appealing for those interested in detailed models, miniatures, or jewelry, as the layer resolution can achieve finer details that are crucial for intricate designs.
Customization is another advantage of DIY DLP printers; users can select their preferred components, such as the type of projector and resin, and adjust settings to optimize their printing experience for various projects.
The learning opportunity provided by assembling a DIY printer is invaluable, as it encourages hobbyists to understand the mechanics and electronics of 3D printing, empowering them to troubleshoot issues and innovate their designs.
Lastly, the robust community surrounding DIY DLP printers means that enthusiasts can easily find support for their projects, share experiences, and access a wealth of information that enhances their 3D printing journey.
How Do DIY DLP Printers Compare to Other 3D Printing Technologies?
| Aspect | DIY DLP Printers | FDM Printers | SLA Printers |
|---|---|---|---|
| Technology | Uses a digital light projector to harden liquid resin. | Extrudes melted filament layer by layer. | Uses a laser to cure resin, similar to DLP but with a different light source. |
| Print Quality | High resolution with smooth finishes, ideal for detailed models. | Good for larger objects but may have visible layer lines. | Excellent detail and smoothness, similar to DLP but often more expensive. |
| Speed | Fast print times due to simultaneous layer curing. | Slower as each layer is built sequentially. | Moderate speed, faster than FDM but slower than DLP. |
| Cost | Generally lower initial investment for DIY setups. | Affordable options available, but costs can add up with upgrades. | Higher costs for equipment and materials. |
Additional context if needed…
What Key Features Should You Consider When Selecting a DIY DLP 3D Printer?
When selecting the best DIY DLP 3D printer, several key features should be taken into consideration:
- Print Resolution: The print resolution, measured in microns, significantly affects the detail and smoothness of the finished product. Higher resolution allows for finer details, making it essential for applications like jewelry or miniature models where precision is critical.
- Build Volume: The build volume indicates the maximum size of the objects you can print. A larger build volume provides more versatility, allowing you to create bigger models or multiple smaller ones simultaneously.
- Light Source Type: The type of light source used in DLP printers, such as LED or UV, can influence curing speed and print quality. Different light sources can affect how evenly the resin cures, impacting the overall accuracy and surface finish of the prints.
- Software Compatibility: The printer’s compatibility with various slicing software is crucial for ease of use and flexibility in design. Good software support can enhance the printing process by providing user-friendly interfaces and advanced features for optimizing prints.
- Resin Types Supported: Different DLP printers may work with specific resin types, which can affect the strength, flexibility, and finish of the final product. Knowing the range of resins supported can help in selecting the right printer for your project needs.
- Ease of Assembly and Setup: The complexity of assembly and initial setup can vary significantly among DIY printers. A printer that is easier to assemble can save time and frustration, making it more accessible for beginners or those with limited technical skills.
- Community Support and Resources: A strong community around a specific printer model can be invaluable for troubleshooting and modifications. Access to resources such as forums, tutorials, and user-shared experiences can greatly enhance the DIY experience and help you resolve issues quickly.
What Specifications Determine Print Quality and Precision?
Several specifications significantly influence print quality and precision in DIY DLP 3D printers:
- Resolution: The resolution of a DLP 3D printer refers to the smallest detail it can reproduce, which is typically expressed in microns. Higher resolution allows for finer details and smoother surfaces, making it essential for intricate designs or models that require precision.
- Build Volume: Build volume indicates the maximum size of the object that can be printed. A larger build volume allows for more extensive projects, but it can also impact print quality, as larger prints may require more careful calibration and control to maintain precision across the entire model.
- Light Source: The type and quality of the light source used in DLP printers directly affect the curing speed and layer adhesion. High-quality light sources can provide uniform exposure and better control over the curing process, leading to improved print quality and detail.
- Layer Thickness: This specification defines how thick each layer of resin is cured during the printing process. Thinner layers generally result in finer detail and smoother surfaces, but they also increase print time, while thicker layers may speed up the process but can lead to visible layer lines.
- Resin Type: The type of resin used can significantly impact both the mechanical properties and surface finish of the final print. Different resins are formulated for specific applications, with some offering better detail and others providing enhanced durability or flexibility.
- Calibration and Software: Proper calibration of the printer and the use of advanced slicing software are crucial for achieving high print quality. Well-calibrated machines ensure that the printer can accurately reproduce designs, while sophisticated software can optimize print settings for the best results.
Why Are Size and Build Volume Important in Choosing a DIY DLP Printer?
Size and build volume are crucial factors in choosing a DIY DLP printer because they directly influence the types and sizes of models that can be printed, as well as the efficiency of the printing process.
According to a study by 3DPrint.com, the build volume of a printer determines the maximum dimensions of the objects it can create, which is essential for users who plan to work on larger projects or multiple smaller items simultaneously. A larger build volume allows for more flexibility in design and production, catering to a wider range of applications from prototyping to final product manufacturing.
The underlying mechanism involves the relationship between the printer’s physical capabilities and the user’s project requirements. A printer with a limited build volume may restrict creativity and lead to the need for multiple print jobs, which can waste time and resources. Moreover, certain DLP printing technologies may offer improved resolution and detail at larger scales, making size not just a matter of capacity but also of quality in the final output. Additionally, the speed of the printing process can be impacted; larger build volumes often enable batch printing, significantly enhancing productivity as multiple items can be produced in a single session.
What Are Some of the Top DIY DLP 3D Printers Available Today?
Some of the top DIY DLP 3D printers available today include:
- Anycubic Photon Mono X: This printer is known for its impressive build volume and high resolution, making it suitable for detailed prints.
- Elegoo Mars 2 Pro: With its user-friendly interface and reliable performance, this printer is a favorite among hobbyists and professionals alike.
- Phrozen Sonic Mini 4K: It offers exceptional print quality at a competitive price, making it an attractive option for those new to DLP printing.
- Creality LD-002R: This printer combines affordability with a solid feature set, ideal for beginners looking to explore DLP technology.
- Nova3D Elfin: Known for its compact design, this printer delivers excellent print quality and is suitable for small-scale projects.
Anycubic Photon Mono X: This printer features a large build volume of 192 x 120 x 245 mm and a monochrome LCD that can cure layers in just a few seconds, significantly speeding up the printing process. Its high resolution of 3840 x 2400 pixels allows for intricate details and smooth surfaces, making it ideal for jewelry, miniatures, and other detailed models.
Elegoo Mars 2 Pro: The Mars 2 Pro boasts a 6.08-inch monochrome LCD that provides a faster curing time and longer lifespan compared to traditional LCDs. It also includes an upgraded cooling system and a sturdy aluminum body, enhancing its durability and reliability, which is crucial for extended printing sessions.
Phrozen Sonic Mini 4K: This printer is celebrated for its 4K resolution of 3840 x 2160 pixels, providing sharp and detailed prints at a low cost. Its compact size also makes it a great choice for users with limited space, while still delivering high-quality results suitable for a variety of applications, including tabletop gaming and prototyping.
Creality LD-002R: The LD-002R stands out due to its affordability and ease of use, making it an excellent entry-level option for those new to DLP printing. Its build volume of 130 x 82 x 160 mm is adequate for most small projects, and it features a simple setup process along with a user-friendly interface.
Nova3D Elfin: The Elfin is designed with portability and ease of use in mind, featuring a small footprint that makes it easy to store and transport. Despite its compact size, it does not compromise on print quality, offering detailed results and a reliable printing experience for both hobbyists and professionals working on smaller projects.
What Features Differentiate Each Recommended DIY DLP Printer?
The best DIY DLP 3D printers are distinguished by various features that cater to different user needs and preferences.
- Build Volume: The size of the print area determines how large your models can be. A larger build volume allows for bigger prints or multiple smaller items to be printed simultaneously, making it ideal for projects that require efficiency or larger components.
- Resolution: DLP printers offer different resolutions, which affect the detail and smoothness of the final product. Higher resolution printers can produce intricate designs with fine details, making them suitable for applications like jewelry or miniatures, whereas lower resolutions may suffice for functional prototypes.
- Light Source: The type of light source used—typically either LED or UV—plays a crucial role in curing the resin. LED sources tend to have longer lifespans and can provide consistent output, while UV sources may offer faster curing times and are often used in more professional-grade printers.
- Software Compatibility: The software that accompanies the printer is essential for preparing and slicing models for printing. Compatibility with popular slicing software can enhance user experience, allowing for easier adjustments and better control over print settings.
- Resin Compatibility: Different printers may support various types of resin, which can impact the strength, flexibility, and surface finish of the printed objects. A printer that accommodates a wide range of resins provides users with more versatility for diverse projects.
- Price: The cost of the printer can vary significantly based on its features and capabilities. Budget-friendly models are great for beginners or hobbyists, while more expensive options may come with advanced features suited for professional applications.
- User Community and Support: A strong user community can be invaluable for troubleshooting and sharing tips. Printers backed by active support forums or resources can enhance the experience by providing users with insights and assistance when needed.
How Can You Customize or Upgrade a DIY DLP 3D Printer for Better Performance?
Finally, using precision calibration tools enables users to fine-tune their printer settings meticulously. Accurate calibration is vital for improving layer adhesion and achieving the best possible print quality, especially for detailed models.
What Common Modifications Improve Print Quality and Efficiency?
Several common modifications can significantly enhance the print quality and efficiency of DIY DLP 3D printers:
- Upgrade to a High-Resolution LCD Screen: Replacing the stock LCD with a higher resolution screen can drastically improve the detail and smoothness of prints. This upgrade allows for finer layer definitions and reduces pixelation, resulting in more accurate and aesthetically pleasing models.
- Implement a Better Light Source: Swapping out the standard light source for a more powerful and uniform LED system can enhance curing speed and improve print consistency. A well-distributed light source ensures that every part of the print receives uniform exposure, reducing the likelihood of defects.
- Optimize Resin Settings: Adjusting exposure times and lift speeds according to the type of resin being used can lead to better adhesion and layer bonding. Fine-tuning these settings helps to prevent issues like layer separation and warping, ultimately leading to higher quality prints.
- Add a Heated Build Platform: Incorporating a heated build platform can significantly reduce warping and improve adhesion for certain resins. Maintaining a consistent temperature helps in achieving better layer bonding and can also speed up the curing process.
- Use Anti-Aliasing Techniques: Implementing anti-aliasing settings in the slicing software can smooth out the appearance of stair-stepping on curved surfaces. This results in more visually appealing prints, especially for intricate designs requiring high fidelity.
- Upgrade the Z-Axis Mechanism: Improving the Z-axis with a more robust lead screw or linear rails can enhance print stability and accuracy. A precise Z-axis movement reduces the risk of layer misalignment, ensuring that prints maintain their intended dimensions and detail.
- Improve the Resin Vat Design: Modifying the resin vat to include features like a flexible bottom or better sealing can minimize the risk of print failures. A flexible bottom allows for easier separation of prints from the vat, while better sealing can help in reducing resin evaporation and contamination.
What Is the Cost Range of DIY DLP 3D Printers and What Should You Expect?
A DIY DLP 3D printer is a type of 3D printing technology that uses Digital Light Processing (DLP) to cure resin into solid objects layer by layer. This technology utilizes a digital light source, often a projector, to selectively cure photopolymer resin, allowing for high-resolution prints with intricate details. DIY models are often built from kits or assembled from parts, making them accessible for hobbyists and makers who wish to customize their printing experience.
According to a report by 3D Hubs, the cost range for DIY DLP 3D printers typically falls between $200 and $1,500, depending on the quality of the components and the complexity of the build. Entry-level kits may be available for around $200, while more advanced setups featuring better projectors and additional functionalities can reach upwards of $1,500. This price range allows for a wide variety of options catering to different skill levels and budget constraints.
Key aspects of DIY DLP 3D printers include build volume, resolution, and the quality of the light source. The build volume refers to the maximum size of the objects that can be printed, which can vary significantly among different models. Resolution is crucial for detail, as it determines how finely details can be rendered in the final print. The quality of the light source, particularly the projector, directly affects the speed and clarity of the printing process, with higher quality projectors yielding better results.
The impacts of DIY DLP 3D printers extend to various fields, including prototyping, art, jewelry making, and dental applications. The high-resolution capabilities of DLP technology make it suitable for creating intricate designs that are often required in these industries. In recent years, the popularity of DLP printers has surged, with statistics showing a growth in the 3D printing market from $12 billion in 2020 to an estimated $35 billion by 2025, driven by advancements in technologies like DLP.
The benefits of utilizing DIY DLP 3D printers include cost-effectiveness, customization, and the ability to rapidly prototype designs. Users can tailor their printers to their specific needs, choosing components that best fit their projects. Additionally, the ability to iterate designs quickly allows creators to test and refine their work more efficiently than traditional manufacturing methods. Furthermore, with the rise of online communities and forums, users can easily find support and share knowledge about building and optimizing their printers.
Best practices for DIY DLP 3D printing include ensuring proper ventilation when working with resin, as it can emit hazardous fumes. Regular maintenance of the printer components, such as cleaning the build plate and replacing the resin vat, is also essential to ensure consistent print quality. Engaging with online communities can provide valuable insights and troubleshooting tips, further enhancing the DIY experience and helping users achieve the best possible results from their DLP 3D printers.
Related Post: