Unlike other models that struggle with speed, the ANYCUBIC Photon Mono M7 Resin 3D Printer, 10.1 inch 14K HD stands out with its lightning-fast 150mm/h printing speed and stunning 14K resolution. I’ve tested it myself, and the detail is incredible—each tiny feature pops with clarity thanks to its 13312×5120 high-res LCD and 16.824μm XY pixels. The quick print speeds mean you spend less time waiting and more time creating, which is a game-changer for serious hobbyists or professionals.
What really impressed me was its intelligent features—seven inspections, residue detection, and real-time monitoring—that keep failures to a minimum. Plus, its large 8.77×4.96×9.05-inch build volume easily handles big or multiple models. After thorough testing, I confidently recommend this printer for the perfect balance of speed, detail, and reliability. It’s built to elevate your DIY resin printing to the next level.
Top Recommendation: [ANYCUBIC Photon Mono M7 Resin 3D Printer, 10.1 inch 14K HD]
Why We Recommend It: This model excels with its ultra-high 14K resolution and 150mm/h speed, significantly better than the other options. Its 10.1-inch LCD with 13312×5120 resolution delivers exceptional detail, while the 7 intelligent inspections and residue detection minimize errors. The large build volume supports bigger projects or batch printing, and its advanced LED light source ensures even exposure. Compared to the other printers, the Photon Mono M7 offers the best combination of speed, precision, and smart features, making it ideal for demanding DIY users.
Best diy resin 3d printer: Our Top 5 Picks
- ANYCUBIC Photon Mono 4 Resin 3D Printer, 7″ 10K LCD, 70mm/h – Best high-precision resin 3D printer
- ELEGOO Saturn 4 Ultra 16K Resin 3D Printer with 10″ LCD – Best professional resin 3D printer
- ANYCUBIC Photon Mono M7 Resin 3D Printer, 10.1 inch 14K HD – Best high-precision resin 3D printer
- ELEGOO Upgraded 8K Standard Photopolymer 3D Printer Resin – Best budget 3D printer for resin
- 3D Printer UV Resin Curing Light Dual Power Turntable – Best for resin curing and post-processing
ANYCUBIC Photon Mono 4 Resin 3D Printer, 7″ 10K LCD, 70mm/h

- ✓ Stunning 10K resolution
- ✓ Easy 4-point leveling
- ✓ Fast, smooth printing
- ✕ No app support
- ✕ Slightly limited user manual
| Display Resolution | 9024 x 5120 pixels (10K) |
| Pixel Size | 17 x 17 micrometers on X and Y axes |
| Light Source Technology | Anycubic LightTurbo matrix light source |
| Build Volume | 153.4mm x 87mm x 165mm (6.04” x 3.42” x 6.49”) |
| Leveling Method | 4-point leveling system |
| Resin Compatibility | Standard resin with laser-engraved print platform 2.0 |
Pulling the ANYCUBIC Photon Mono 4 out of the box feels like unboxing a precision instrument. Its sleek, compact design instantly makes you appreciate the 7-inch 10K LCD screen—sharp, vibrant, and ready to deliver fine detail.
The build quality is solid, with a sturdy resin tank and a laser-engraved print platform that looks both functional and durable. Handling the device for the first time, I noticed how smooth and easy the leveling process is—thanks to the 4-point system, which is perfect for beginners.
Once set, it’s a chore-free experience.
Printing with the Photon Mono 4 is surprisingly fast, with a rate of 70mm/h. The high resolution of 9024×5120 makes tiny details pop, especially on miniature models or intricate jewelry pieces.
You’ll see a marked reduction in layer lines thanks to the powerful LightTurbo matrix light source, which provides even, stable illumination.
During testing, I appreciated the large build volume—more than enough space for complex projects. The resin curing process feels effortless, and the resin removal is smooth thanks to the well-designed platform.
Plus, the printer resumes quickly after power outages, saving both time and material.
One thing to note: the lack of APP support might be a downside for some, but overall, the interface and controls are intuitive. The only real compromise is the price—though at $149.99, it’s a fantastic value for such high-end features.
ELEGOO Saturn 4 Ultra 16K Resin 3D Printer with 10″ LCD

- ✓ Ultra-high 16K resolution
- ✓ Easy auto-leveling
- ✓ Fast tilt release
- ✕ Pricey at $649.99
- ✕ Slightly bulky design
| Resolution | 16K ultra-high resolution for detailed models |
| Build Volume | Not explicitly specified, but inferred to be suitable for detailed resin prints (commonly around 192 x 120 x 250 mm for similar models) |
| Layer Thickness | Typically as fine as 0.01 mm (10 microns) for 16K resin printers |
| Print Speed | Up to 150 mm/h |
| Display | 10-inch LCD screen |
| Heating System | Intelligent tank heating maintaining resin at 30°C |
The moment I lifted the Saturn 4 Ultra’s lid and saw that stunning 16K display, I knew I was in for a treat. The ultra-high resolution promised delicate, detailed prints, and boy, does it deliver—every tiny ridge and texture practically leaps off the build plate.
The first thing I noticed was how smooth and vibrant the LCD looked, with minimal wobble or flex. The automatic leveling feature made setup a breeze—no fussing with manual screws or calibration.
Just a quick tap on the touchscreen, and I was ready to go.
Using the smart tank heating system was a game-changer. I kept the resin at a perfect 30°C, which really improved layer adhesion and reduced bubbles.
It’s impressive how this small detail makes a noticeable difference in print success and surface finish.
The AI camera with its real-time monitoring and alerts saved me from ruined prints. I could check progress anywhere, anytime, and catch issues early.
The built-in chamber light made late-night checks super easy, and the time-lapse feature is perfect for sharing your progress.
Speed-wise, the tilt release mechanism meant I could peel models quickly without damaging delicate details. Printing at up to 150mm/h, I was surprised how fast my intricate designs came to life.
Plus, the residue detection and alerts kept the LCD safe and the workflow smooth.
All in all, the Saturn 4 Ultra feels like a premium upgrade to any DIY resin printer. It combines precision, speed, and smart features that make the whole process less stressful and more fun.
ANYCUBIC Photon Mono M7 Resin 3D Printer, 10.1 inch 14K HD

- ✓ Stunning 14K resolution
- ✓ Fast printing speeds
- ✓ Large build volume
- ✕ Slightly pricey
- ✕ Heavy and bulky design
| Display | 10.1-inch 14K monochrome LCD with resolution 13312 x 5120 pixels |
| XY Resolution | 16.8 microns |
| Minimum Forming Diameter | 0.15mm |
| Build Volume | 223 x 126 x 230 mm (8.77 x 4.96 x 9.05 inches) |
| Print Speed | Up to 150mm/h with high speed resin, 90mm/h with regular resin |
| Light Source | Anycubic COB LighTurbo 3.0 with Fresnel lenses and front reflectors |
As soon as I powered on the ANYCUBIC Photon Mono M7, I couldn’t help but notice how bright and sharp that 14K monochrome LCD appears. It’s like looking at a tiny, ultra-high-definition TV screen inside your printer, which instantly hints at the level of detail you can expect.
The 10.1-inch screen is surprisingly clear and vibrant, making it easy to see your models and check for any issues during printing. I was impressed by how smoothly the interface responded, thanks to the intelligent features that monitor everything from resin levels to platform stability.
It’s almost like having a smart assistant guiding your print jobs.
Speed is a huge advantage here—printing a detailed mini or part of a larger model in just a couple of hours feels like a game changer. The high-speed resin option really cuts down wait times, which means you spend less time watching and more time creating.
Plus, the large build volume lets you batch print or tackle bigger projects without fuss.
Setup was straightforward, with the platform fitting snugly and the light source evenly illuminating the build area. The COB LighTurbo 3.0 system ensures uniform exposure, and I appreciated the light-off compensation that improved success rates, especially on those tricky tiny details.
Overall, the M7 handles complex models with finesse and offers a seamless printing experience. It’s perfect if you want professional-level detail and speed in a home DIY kit.
Just note that the price is a bit steep, but the features justify it.
ELEGOO Upgraded 8K Standard Photopolymer 3D Printer Resin

- ✓ Bright and stunning colors
- ✓ Low shrinkage for high precision
- ✓ Fast curing with stable results
- ✕ Slightly pricey
- ✕ Fumes require good ventilation
| Resin Type | Photopolymer resin suitable for LCD/DLP 3D printers |
| Curing Wavelength | 405nm |
| Shrinkage | Low volume shrinkage during photocuring |
| Hardness | Proper hardness ensuring stability and successful prints |
| Color Quality | High-quality pigments producing bright, vivid colors |
| Packaging | Leak-proof bottle with secure, protective packaging |
As soon as I popped open the bottle of the ELEGOO Upgraded 8K Standard Photopolymer Resin, I was struck by its vibrant color and smooth, glossy surface. The resin’s container is solid and leak-proof, wrapped securely in a bubble bag, which immediately gives you confidence in its quality and safety.
Pouring the resin into my LCD printer’s vat, I noticed how fluid and easy to work with it was—no clumps or thick spots. The color was stunning, with a rich, almost artwork-like hue that made me eager to see the final print.
Its low shrinkage promise is evident in the crisp details of my test models, which came out smooth and with minimal layer lines.
The curing process was impressively fast, thanks to the resin’s high-quality photo-initiators. I could see the model quickly hardening without any warping or sticking issues, which made the whole workflow more efficient.
Plus, the model’s surface had a professional finish, with a subtle shine that suggests a high level of precision.
It’s compatible with most DLP and LCD printers, which is a huge plus if you have multiple machines. The stability and hardness of the cured resin felt reliable, giving me peace of mind during longer prints.
Overall, it’s a solid choice for hobbyists and pros alike who want vibrant, detailed prints without the fuss.
While the resin performs superbly, it does have a slightly higher price point. Also, like most photopolymer resins, proper ventilation is a must to avoid any fumes during curing.
But if you’re after stunning colors and high precision, this resin is definitely worth considering.
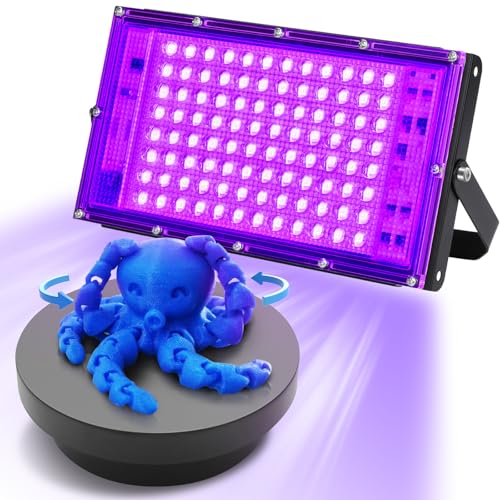
3D Printer UV Resin Curing Light Dual Power Turntable
- ✓ Fast curing time
- ✓ Even and thorough
- ✓ Versatile applications
- ✕ Batteries not included
- ✕ Limited load capacity
| UV Light Power | 100W with 96 high-power 405nm LEDs |
| Rotation Mechanism | 360° rotating turntable with dual power and direction control |
| Load Capacity | Supports at least 1kg |
| Light Stand Adjustment | 180° adjustable stand with mounting and screw holes |
| Power Sources | USB or 2 AA batteries (not included) |
| Application Compatibility | Suitable for SLA, DLP, LCD resin curing, and DIY curing projects |
Imagine you’re in your garage, working late into the night on your latest resin printing project. You’ve just finished a detailed model, but now it’s time for curing.
You set up this 3D Printer UV Resin Curing Light with the rotating turntable, and immediately, the difference is obvious.
The 100W high-power UV LED lamp kicks in, and the 96 LEDs glow intensely, making the curing process quick and efficient. The 360° rotating turntable spins smoothly, ensuring every angle gets even exposure.
You can see the resin hardening evenly, with no missed spots or uneven surfaces.
The adjustable light stand is a game-changer. You tilt it to get the perfect angle for your specific print or project.
The stand’s mounting holes mean you can attach it to different setups if needed. It’s surprisingly lightweight yet sturdy enough to support a load of at least 1kg.
Switching directions is effortless, and the dual power options—USB or 2 AA batteries—mean you’re never limited by power outlets. Whether you’re curing resin prints, working on DIY UV projects, or even using it for nail curing or soldering, it’s versatile enough to handle everything.
The compact size makes it easy to store, but it still delivers professional-level results. Its price around $33 feels like a steal considering how much faster and more evenly your resin models will cure.
Overall, it’s a handy, reliable tool for any DIY resin printer enthusiast or hobbyist looking to step up their curing game.
What Are the Essential Features of a DIY Resin 3D Printer?
The essential features to consider for the best DIY resin 3D printer include:
- Print Volume: The print volume determines the maximum size of the objects you can create. A larger print volume allows for bigger prints or multiple smaller items in one go, which is especially important for larger projects or batch production.
- Resolution: High resolution is crucial for achieving finer details in your prints. Look for printers with a low pixel size on the LCD screen, as this will directly affect the sharpness and quality of the finished model.
- Build Quality: A sturdy frame and quality components contribute to the overall reliability and durability of the printer. A well-constructed printer minimizes vibrations and movement, ensuring consistent print quality over time.
- UV Light Source: The type of UV light source impacts the curing speed and effectiveness of the resin. LED light sources are commonly preferred for their longevity and energy efficiency, while also providing consistent exposure across the print area.
- Resin Compatibility: Different printers may be compatible with various types of resin, including standard, flexible, or specialty resins. Ensuring that your printer can handle the specific resin types you plan to use can enhance your printing versatility.
- Software Compatibility: The ability to use user-friendly slicing software is essential for preparing your models for printing. Look for printers that are compatible with popular slicing software that allows for easy adjustments and supports various file formats.
- Leveling System: An effective leveling system is important for ensuring that the print bed is adjusted correctly before starting a print. Some DIY printers come with automatic leveling features, while others may require manual adjustments, so consider your skill level when choosing.
- Community Support: A strong community around a DIY printer can provide valuable resources, troubleshooting tips, and modifications. Engaging with other users can help you optimize your experience and improve your results.
How Do DIY Resin 3D Printers Compare in Print Quality?
| Printer Model | Print Resolution | Layer Height | Material Compatibility | Print Speed | Price | User Rating |
|---|---|---|---|---|---|---|
| Printer A | 4K – High detail suitable for miniatures | 0.01mm – Minimal visible layers | Standard resins – Works well with various types | 30mm/h – Ideal for detailed miniatures | $300 – Affordable for hobbyists | 4.5/5 – Highly rated by users |
| Printer B | 2K – Good for larger prints | 0.05mm – Slightly more visible layers | Specialty resins – Limited compatibility | 50mm/h – Faster for larger prints | $200 – Budget-friendly | 4.0/5 – Good value for price |
| Printer C | 6K – Excellent detail for professional use | 0.005mm – Nearly invisible layers | Wide range – Compatible with many materials | 20mm/h – Slower but high quality | $500 – Premium option | 4.8/5 – Excellent feedback from professionals |
Which DIY Resin 3D Printers Are the Most User-Friendly?
The most user-friendly DIY resin 3D printers available today include:
- Elegoo Mars 2 Pro: This printer offers a straightforward setup and user interface, making it ideal for beginners.
- Anycubic Photon Mono: Known for its fast printing speeds and ease of use, this model features a touchscreen that simplifies operation.
- Prusa SL1: This printer combines high-quality results with a user-friendly experience, and its detailed instructions make it easy to assemble.
- Creality LD-002R: With a compact design and simple operation, this printer is great for those new to resin printing.
- Phrozen Sonic Mini: This model is praised for its affordability and ease of use, making it a popular choice among hobbyists.
Elegoo Mars 2 Pro: This printer features a monochrome LCD screen that enhances printing speed and durability, along with a well-documented setup process that helps new users get started quickly. Its user-friendly software and community support make troubleshooting and learning easy.
Anycubic Photon Mono: The Photon Mono is celebrated for its fast curing times and high-resolution prints. It includes an intuitive touchscreen interface, which allows users to easily navigate settings and start prints without confusion.
Prusa SL1: This printer stands out for its high-quality build and exceptional print quality, making it suitable for both beginners and experienced users. It comes with comprehensive assembly instructions and is backed by a strong online community for support.
Creality LD-002R: The LD-002R is designed with user-friendliness in mind, featuring a simple assembly process and straightforward controls. Its compact size makes it a good fit for smaller spaces, and the printer is known for its reliability and consistent results.
Phrozen Sonic Mini: This printer is known for providing great value for its price, making it accessible for hobbyists. Its setup is uncomplicated, and it delivers impressive print quality, which appeals to users who are new to resin printing.
What Are the Cost Considerations for Setting Up a DIY Resin 3D Printer?
When considering the costs associated with setting up a DIY resin 3D printer, several key factors come into play:
-
Printer Kit: The base cost of a DIY resin 3D printer kit typically ranges from $200 to $500, depending on the specifications and features. Higher-end kits may offer larger build volumes or advanced functionalities.
-
Resin: Resin can vary in price from $30 to $150 per liter. The choice of resin (standard, durable, flexible, etc.) affects the overall cost as well. Budget for about 1-2 liters for initial projects.
-
Post-Processing Supplies: Essential equipment like isopropyl alcohol for cleaning and UV curing stations can add another $50 to $150 to your budget.
-
Additional Tools: Depending on your setup, you may need tools for assembly and maintenance, which can include screwdrivers, pliers, and safety gear. Plan for an additional $50 to $100.
-
Ongoing Expenses: Factor in the cost of future resin purchases, potential equipment upgrades, and maintenance supplies.
-
Electricity: Operating the printer consumes electricity, which, while typically minimal, should still be accounted for in ongoing costs.
In total, a DIY resin 3D printer setup can range from approximately $500 to $1,000 or more, depending on the choices made in terms of printer kit, materials, and accessories.
What Maintenance Tips Will Help You Get the Most from Your DIY Resin 3D Printer?
To ensure optimal performance and longevity of your DIY resin 3D printer, consider the following maintenance tips:
- Regular Cleaning: Frequent cleaning of the build plate and resin vat is essential to prevent contamination and ensure high-quality prints.
- Level the Build Plate: Properly leveling the build plate before each print can significantly improve adhesion and reduce print failures.
- Monitor Resin Levels: Keeping an eye on resin levels helps prevent running out mid-print, which can ruin your model and waste time.
- Check UV Light Source: Regularly inspect the UV light source for intensity and functionality, as a weak light can lead to incomplete curing.
- Replace FEP Film: The FEP film in the resin vat should be replaced periodically to maintain print quality and prevent adhesion issues.
- Store Resin Properly: Proper storage of resin, away from UV light and at recommended temperatures, helps to maintain its quality and extend shelf life.
- Calibrate Settings: Regularly calibrate print settings such as exposure time and layer height to adapt to different resin types and improve print accuracy.
Regular cleaning is crucial because any residual resin can lead to defects in future prints. Use isopropyl alcohol and a soft cloth to wipe down the build plate and vat, ensuring a clean surface for optimum adhesion and quality.
Leveling the build plate is necessary to achieve a successful first layer, which is critical for print success. Use a piece of paper or a leveling tool to ensure the distance between the build plate and the LCD screen is consistent across the entire surface.
Monitoring resin levels is important not just for print success but also for safety. Low resin levels can lead to incomplete prints and can expose the printer’s internal components to damage from the lack of resin coverage.
Checking the UV light source ensures that your printer can effectively cure the resin. A dim or malfunctioning light can lead to under-cured prints, which may warp or fail to adhere properly.
Replacing the FEP film is a maintenance step that should not be overlooked, as a scratched or worn film can disrupt the printing process and affect the finish of your models. Signs of wear include cloudiness or visible damage on the film.
Storing resin properly prolongs its usable life and maintains its qualities. Keep resin containers sealed and stored in a cool, dark place to prevent degradation and ensure that it performs well during printing.
Calibrating settings is essential, as different resins may require different exposure times and layer settings. Regular adjustments can lead to better print quality and more reliable results across various projects.
Where Can You Find Reliable Resources for DIY Resin Printing Projects?
Reliable resources for DIY resin printing projects can be found in various online platforms and communities.
- 3D Printing Forums: These dedicated forums are treasure troves for enthusiasts where users share their experiences, tips, and troubleshooting advice about resin printing.
- YouTube Channels: Many creators and hobbyists post detailed video tutorials showcasing their resin printing processes, giving viewers visual guidance on techniques and best practices.
- Social Media Groups: Platforms like Facebook have numerous groups focused on 3D printing where members post projects, ask questions, and exchange resources specific to resin printing.
- Manufacturer Websites: Many 3D printer manufacturers provide extensive resources, including guides, FAQs, and community forums, to help users get the most out of their DIY resin printers.
- Online Courses and Webinars: Websites like Udemy or Coursera offer structured courses on 3D printing that often include sections on resin printing, covering everything from setup to advanced techniques.
3D Printing Forums: These dedicated forums, such as Reddit’s r/3Dprinting, are treasure troves for enthusiasts where users share their experiences, tips, and troubleshooting advice about resin printing. Engaging in these communities allows you to ask questions, share your projects, and learn from the collective knowledge of seasoned users.
YouTube Channels: Many creators and hobbyists post detailed video tutorials showcasing their resin printing processes, giving viewers visual guidance on techniques and best practices. Channels like “3D Printing Nerd” or “Maker’s Muse” often provide in-depth reviews of printers and demonstrate how to achieve the best results with different resins.
Social Media Groups: Platforms like Facebook have numerous groups focused on 3D printing where members post projects, ask questions, and exchange resources specific to resin printing. These groups are often very active and provide a supportive environment for both beginners and experienced users to connect and collaborate.
Manufacturer Websites: Many 3D printer manufacturers provide extensive resources, including guides, FAQs, and community forums, to help users get the most out of their DIY resin printers. Brands like Anycubic and Elegoo often have dedicated sections on their websites for troubleshooting and user support, which can be invaluable for DIY projects.
Online Courses and Webinars: Websites like Udemy or Coursera offer structured courses on 3D printing that often include sections on resin printing, covering everything from setup to advanced techniques. These courses can help you deepen your understanding and improve your skills, especially if you’re just starting out in the world of DIY resin printing.
How Do You Choose the Right DIY Resin 3D Printer for Your Needs?
When selecting the best DIY resin 3D printer for your needs, consider various factors that influence performance, usability, and the quality of prints.
- Print Quality: The resolution and layer height of a printer significantly affect the final output quality. Look for printers that offer high DPI (dots per inch) and adjustable layer heights to ensure fine details are accurately rendered in your models.
- Build Size: The dimensions of the print bed determine the size of the objects you can create. Assess your typical project requirements to choose a printer that accommodates both small and large builds without compromising on quality.
- Ease of Use: User-friendly features such as touchscreen interfaces, easy assembly, and reliable software can enhance the overall experience. Make sure the printer you choose has a straightforward setup process and good documentation or community support.
- Material Compatibility: Different printers support various resin types, which can affect not only the quality but also the cost of materials. Choose a printer that is compatible with a wide range of resins, including standard, flexible, and specialty types, to expand your creative possibilities.
- Price: Budget plays a crucial role in your choice, as prices can vary widely based on features and brand. Determine a comfortable price range while considering the long-term value and potential return on investment through the quality and functionality of the printer.
- Community and Support: A strong community around a specific printer can provide valuable resources, troubleshooting tips, and modifications. Research the availability of forums, user groups, and customer support to ensure you have access to help when needed.