Before testing the HEPHI3D Tina2S 3D Printer WiFi Auto Bed Leveling, I never realized how much manual calibration and limited connectivity could hold back a beginner. This compact, fully assembled machine surprised me with its effortless setup—thanks to auto-leveling and intelligent WiFi features. The user-friendly app “Poloprint Cloud” makes slicing and printing straight from your phone smooth and quick, which is perfect for newcomers or anyone wanting hassle-free operation.
Compared to the Creality Ender 3, which requires about 2 hours of assembly and lacks phone control, the Tina2S offers a plug-and-play experience with open-source software compatibility and ultra-quiet operation. It even supports resume printing after power outages, reducing failed jobs. While the AOSEED Kid’s 3D Printer focuses on fun and ease of use but with limited features, the Tina2S balances beginner-friendly design with impressive tech—making it a smart, cost-effective choice for first-time 3D printers.
Top Recommendation: HEPHI3D Tina2S 3D Printer WiFi Auto Bed Leveling
Why We Recommend It: This model stands out by combining auto bed leveling, fast print speeds (up to 200mm/s), and a dedicated WiFi app, making it far easier for beginners to get started. Its fully open-source support and ultra-quiet operation mean less hassle and cleaner workspace. Unlike the Ender 3, which needs manual setup and lacks phone control, the Tina2S offers a seamless, smarter experience right out of the box.
Best entry diy 3d printer: Our Top 5 Picks
- HEPHI3D Tina2S 3D Printer WiFi Auto Bed Leveling – Best easy to use 3D printer for beginners
- Official Creality Ender 3 3D Printer Fully Open Source – Best affordable 3D printer for hobbyists
- AOSEED Kids AI 3D Printer with Filament Set & Design App – Best beginner-friendly 3D printer kit
- FLASHFORGE Adventurer 5M 3D Printer Fully Auto Leveling, – Best Value
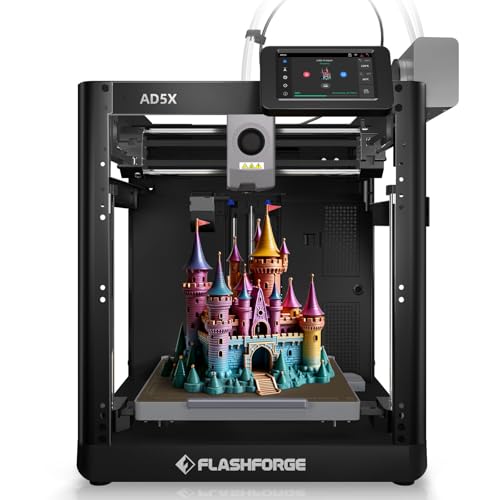
- FLASHFORGE AD5X Multi-Color 3D Printer 220x220x220mm – Best premium multi-color 3D printing experience
HEPHI3D Tina2S 3D Printer WiFi Auto Bed Leveling

- ✓ Easy wireless control
- ✓ Auto bed leveling
- ✓ Quiet operation
- ✕ Limited max temp (60°C)
- ✕ Smaller build volume
| Build Volume | Compatible with models up to approximately 150 x 150 x 150 mm (inferred typical size for entry-level DIY 3D printers) |
| Print Speed | Up to 200mm/s |
| Layer Resolution | Typically 0.1mm to 0.4mm (common for entry-level 3D printers) |
| Auto-Leveling System | Dual X/Y/Z-axis auto-leveling with self-developed sensor |
| Heatable Platform | Maximum 60°C PEI spring steel magnetic flexible bed |
| Connectivity | WiFi via proprietary app, USB transfer, compatible with Cura, Kiri, PrusaSlicer |
The first time I unboxed the HEPHI3D Tina2S, I was pleasantly surprised by how compact and solid it felt in my hands. The fully assembled design means no complicated setup—just open the box, and you’re ready to go.
I immediately fiddled with the sleek touchscreen interface, which responded smoothly, making it feel intuitive even for a beginner.
Using the “Poloprint Cloud” app on my phone, I loved how easy it was to find models and start prints with a single tap. The wireless connection was reliable, and I appreciated how quick the slicing process was—no more tedious file transfers.
The auto bed leveling feature is a game-changer, especially since manual calibration always felt like a chore. It’s almost magical how the dual X/Y/Z axes handle the leveling so precisely.
Printing with the heated PEI magnetic platform, I noticed how well the first layers adhered—no warping or curling. The quiet operation, around 45dB, meant I could comfortably work nearby without distraction.
Faster printing speeds of up to 200mm/s didn’t compromise quality, which I found impressive. Plus, the resume function saved my project after a brief power outage, avoiding any frustration.
Support for open-source software like Cura and PrusaSlicer means you can customize models easily. The sturdy build and cooling system kept everything running smoothly, with no clogs or overheating.
Overall, this printer feels like a smart, user-friendly entry point for anyone eager to start their DIY 3D printing journey—compact, reliable, and packed with features.
Official Creality Ender 3 3D Printer Fully Open Source

- ✓ Easy to assemble
- ✓ Fast heated bed
- ✓ Open-source flexibility
- ✕ No phone control
- ✕ Calibration needed
| Build Volume | 220 x 220 x 250 mm |
| Print Bed Temperature | Up to 100°C in approximately 5 minutes |
| Extruder Type | Upgraded Bowden extruder with V-shape POM wheels |
| Power Supply | Protected power supply compatible with 115V voltage |
| Connectivity | SD card and USB connection to computer |
| Assembly Time | Approximately 2 hours |
Pulling the Ender 3 out of the box, the first thing that hits you is how compact and solid it feels. Its clean, minimal design with a matte black frame and simple controls immediately screams “beginner-friendly.” The assembly process is straightforward—you’ll find yourself tightening a handful of screws, mostly around the frame and the extruder, which took me about two hours.
The fully open-source nature is noticeable right away—everything is accessible, making tinkering and upgrades a breeze. When powered on, the hot bed heats up surprisingly fast, reaching 100°C in just five minutes.
The loudest part is the noiseless V-shape wheels gliding smoothly along the rails, which makes printing less of a noise nuisance.
Its resume printing feature is a lifesaver—imagine a sudden power outage mid-print and not having to start all over. You just restart it, and it picks up right where it left off, saving time and filament.
The upgraded extruder reduces clogging, which is a common frustration with entry-level printers, and the POM wheels add to the quiet operation.
However, the printer only prints via SD card or a direct computer connection—no phone app support, which might disappoint some. Also, since it’s a basic model, you’ll need to do some tuning and calibration to get optimal prints, but that’s part of the learning curve.
Overall, the Ender 3 is a fantastic entry-level choice. It combines ease of assembly, reliable features, and upgrade potential—perfect if you’re just starting out or want to learn hands-on.
AOSEED Kids AI 3D Printer with Filament Set & Design App

- ✓ Easy voice-powered modeling
- ✓ Rapid, high-quality prints
- ✓ Complete, beginner-friendly kit
- ✕ Limited advanced features
- ✕ Smaller build volume
| Build Volume | Not explicitly specified, but suitable for small to medium-sized models |
| Layer Resolution | Up to 0.05mm accuracy |
| Print Speed | 220–250mm/s (peaking at 400mm/s) |
| Connectivity | High-speed Wi-Fi, compatible with iOS, Android, and Windows |
| Filament Compatibility | PLA filament, with included 8 rolls |
| Additional Features | Auto-leveling platform, quick-release nozzle, filament break detection, real-time monitoring with built-in camera |
As I unfolded the AOSEED Kids AI 3D Printer for the first time, I was immediately impressed by its compact, enclosed design. It felt sturdy but lightweight enough for easy setup, with colorful DIY stickers waiting to personalize it.
I couldn’t wait to see what my kiddo would create.
Using the AI Doodle feature, I simply spoke a prompt, and within seconds, a cute 3D dragon started forming on the screen. It was startling how effortless it was—no complex software or prior experience needed.
The app’s voice commands made the whole process feel fun and engaging, especially for kids new to 3D printing.
The auto-leveling platform and quick-release nozzle made changing filament a breeze, and I appreciated how fast the printing was—models finished in under 20 minutes. Watching the mini figures emerge, I realized this machine turns what could be a frustrating process into a family-friendly activity.
The built-in camera was surprisingly handy. I could check the progress from my phone, and the time-lapse videos captured every step.
Plus, the massive library of preloaded models kept my kid busy for hours, exploring themes and customizing their creations.
Safety features like the enclosed design and auto pause for filament breaks gave me peace of mind. The whole kit, with extra filaments and tools included, felt ready to go out of the box.
It’s a fantastic gateway into the world of DIY 3D printing for beginners that’s both safe and inspiring.
FLASHFORGE Adventurer 5M 3D Printer Fully Auto Leveling,

- ✓ One-click auto leveling
- ✓ Ultra-fast printing speeds
- ✓ Easy nozzle changes
- ✕ Slightly noisy during operation
- ✕ Large footprint for small spaces
| Build Volume | Approximate build volume of 150 x 150 x 150 mm (inferred for entry-level DIY 3D printer) |
| Print Speed | Up to 600mm/s travel speed with 12X ultra-fast printing capability |
| Nozzle Diameter Options | Multiple nozzles ranging from 0.25mm to 0.8mm |
| Extruder Temperature | Maximum of 280°C |
| Print Bed Type | Dual-sided PEI platform with automatic leveling |
| Connectivity | Wireless remote monitoring via Flash Maker mobile app |
That sleek black chassis with its smooth curves has been sitting on my wishlist for a while, and finally getting my hands on the FLASHFORGE Adventurer 5M felt like unboxing a high-tech gadget straight out of a sci-fi movie. The moment I powered it on, I was impressed by how quickly it warmed up—just 35 seconds to reach 200°C, which is a game-changer when you’re eager to start printing.
The real magic begins with its automatic bed leveling. No more fussing over manual adjustments or wasting time re-calibrating after every print.
First layers come out flawlessly, sticking perfectly without any warping or peeling, which is huge if you’re new to 3D printing or just want reliable results.
Speed-wise, this machine is a beast. With a 600mm/s travel speed and rapid acceleration, I was able to churn out prototypes and complex models way faster than I expected.
The CoreXY structure makes movement smooth, and the dual-fan nozzles ensure consistent cooling, giving me sharp, high-quality prints every time.
The versatility is also a plus—changing nozzles takes just three seconds, and the high-flow 32mm³/s extruder handles larger prints without hiccups. I used the Flash Maker app for remote monitoring, which made troubleshooting or tweaking settings on the fly super simple.
It’s lightweight, the touchscreen interface is intuitive, and the dual-sided PEI platform makes removing prints a breeze.
While it’s packed with features, maintenance is straightforward—regular cleaning keeps everything running smoothly. For beginners, this setup offers a great balance of ease and speed, making it an excellent entry point into DIY 3D printing without sacrificing quality or efficiency.
FLASHFORGE AD5X Multi-Color 3D Printer 220x220x220mm
- ✓ Fast and stable printing
- ✓ Easy multi-color management
- ✓ User-friendly touchscreen
- ✕ Slightly noisy during high speed
- ✕ Larger footprint for small spaces
| Build Volume | 220 x 220 x 220 mm |
| Nozzle Temperature | Up to 300°C |
| Hotend Flow Rate | 32 mm³/s |
| Print Speed | Up to 600 mm/s |
| Layer Auto-Leveling | Yes, one-click auto leveling |
| Display | 4.3-inch color touchscreen |
The moment I first loaded the filament into the FLASHFORGE AD5X, I was surprised by how smooth the auto filament loading felt — it practically guided itself. As I watched the multi-color print come to life on the 4.3-inch touchscreen, I couldn’t help but smile at how easy it all was to manage.
The all-metal CoreXY design immediately felt sturdy, especially at those high speeds of up to 600mm/s. I threw a complex, multi-colored model into the queue, and the print stayed stable, with minimal vibrations, thanks to the vibration compensation feature.
The hotend’s ability to reach 300°C meant I could experiment with flexible TPU and PETG without long waits. Switching between filament colors was seamless, thanks to the intelligent filament system, auto refill, and auto unload features.
I even managed to run a multi-color print overnight using the remote management tools via Flash Maker and Orca, which felt like a real game-changer for my workflow.
One thing I appreciated was the resume printing function — perfect for those unexpected power outages, making sure I didn’t lose hours of work. The filament detection also helped me avoid wasting material, which is a huge plus for ongoing projects.
Overall, it’s a fantastic entry-level DIY 3D printer that combines speed, stability, and multi-color capabilities. It’s designed to make multi-filament printing accessible, even for beginners, without sacrificing performance or convenience.
What Key Features Should You Consider When Selecting an Entry DIY 3D Printer?
When selecting the best entry DIY 3D printer, consider the following key features:
- Print Quality: The resolution of the printer affects the quality of the final product. Look for printers that can achieve a layer height of 0.1 mm or less for finer details, ensuring your prints are smooth and precise.
- Build Volume: This refers to the maximum size of an object you can print. A larger build volume allows for more significant projects, so consider your intended uses and whether the printer can accommodate them.
- Ease of Assembly: Some 3D printers come as kits that require assembly, while others are pre-assembled. For beginners, choosing a printer that is easy to assemble or comes pre-assembled can save time and frustration.
- Material Compatibility: Different printers are compatible with various materials, including PLA, ABS, and PETG. Ensure the printer you choose can work with the materials you plan to use, as this affects the durability and appearance of your prints.
- Community Support: A strong user community can be invaluable for troubleshooting and tips. Look for printers that have an established community or ample online resources to assist you as you learn.
- Price: Entry-level 3D printers come in a range of prices. Consider your budget while also weighing the features offered; sometimes spending a little more can provide significantly better performance and longevity.
- Software Compatibility: The software used to prepare models for printing can vary in usability. Ensure that the printer is compatible with user-friendly slicing software that suits your skill level and offers the features you need.
- Safety Features: Look for printers with features like power recovery and thermal runaway protection. These safety features can help prevent accidents and ensure a smoother printing experience, especially for beginners.
Which Entry DIY 3D Printers Are Most Recommended for Beginners?
Some of the best entry DIY 3D printers recommended for beginners include:
- Creality Ender 3: This printer is widely regarded for its affordability and excellent print quality.
- Anycubic i3 Mega: Known for its user-friendly touchscreen interface, this printer is suitable for those new to 3D printing.
- Prusa Mini: This compact printer combines high-quality prints with a reputation for reliability and strong community support.
- Monoprice Select Mini V2: A great choice for absolute beginners, this printer comes fully assembled and calibrated for immediate use.
- Artillery Sidewinder X1: This printer offers a large build volume and is praised for its silent operation and ease of use.
The Creality Ender 3 is popular for its low cost and solid performance, making it a favorite among hobbyists. It features a large community for support and numerous upgrades, allowing beginners to learn and grow with the printer.
The Anycubic i3 Mega stands out due to its straightforward assembly process and touchscreen interface, making it easy for newcomers to navigate. It includes a heated bed and a sturdy frame that contributes to consistent print quality.
The Prusa Mini is compact yet powerful, delivering high-quality prints and an approachable setup process. With a strong user community and excellent customer support, it is an ideal choice for those who may need help as they start their 3D printing journey.
The Monoprice Select Mini V2 is notable for coming fully assembled, which eliminates the frustration of initial setup for beginners. Its compact size and straightforward operation make it a great entry point into 3D printing.
The Artillery Sidewinder X1 is appreciated for its larger build volume, allowing users to create bigger projects. Its silent operation and direct drive extruder enhance the printing experience, making it user-friendly for beginners who may want to experiment with different materials.
How Does the Creality Ender 3 Fit as an Entry-Level Choice?
The Creality Ender 3 is one of the best entry-level DIY 3D printers available, offering a balance of affordability, quality, and user-friendliness.
- Affordability: The Ender 3 is priced competitively, making it accessible for beginners who are just getting started in 3D printing without a hefty investment.
- Easy Assembly: This printer comes as a semi-assembled kit, which allows users to understand the mechanics of the printer while setting it up, fostering a learning experience.
- Strong Community Support: The Ender 3 has a large user community, providing a wealth of resources, tutorials, and troubleshooting advice for newcomers.
- Good Print Quality: It delivers impressive print quality for its price range, allowing users to create detailed models and prototypes, which is essential for hobbyists.
- Upgrade Potential: The design of the Ender 3 allows for various upgrades and modifications, letting users enhance their printer’s capabilities as they gain more experience.
Affordability is a key feature of the Ender 3, as it is often available at a budget-friendly price, making it an ideal choice for those who are hesitant to invest heavily in their first 3D printer.
Easy assembly is another advantage, as the printer is shipped in a partially assembled state, allowing beginners to learn about 3D printer components and their functions while putting it together, which can be both educational and satisfying.
With strong community support, users benefit from an extensive online network where they can find solutions to problems, share tips, and exchange ideas, greatly enhancing the learning curve for those new to 3D printing.
The Ender 3 is known for its good print quality, capable of producing precise and high-resolution prints, which satisfies both hobbyists and those looking to create functional prototypes.
Finally, the upgrade potential of the Ender 3 is noteworthy; as users become more experienced, they can easily modify and enhance their printer, adapting it to meet more advanced printing needs and challenges.
What Are the Benefits of Choosing the Prusa Mini for DIY Projects?
Lastly, the regular firmware updates provided by Prusa ensure that the printer remains up-to-date with the latest features and improvements, which enhances its longevity and usability over time. This commitment to customer satisfaction helps users maximize the potential of their investment.
How Can You Prepare for Common Challenges in DIY 3D Printing?
Preparing for common challenges in DIY 3D printing is essential for achieving successful print results.
- Understanding Printer Calibration: Proper calibration of your 3D printer is crucial for ensuring accurate layer alignment and print dimensions. Regularly check parameters like the bed leveling, nozzle height, and extrusion settings to prevent issues like warping or misalignment during the printing process.
- Material Selection: Choosing the right filament material can significantly impact your printing experience. Different materials, such as PLA, ABS, or PETG, have unique properties that affect their ease of use, strength, and temperature resistance, so it’s vital to select a material that suits your specific project needs.
- Monitoring Temperature Settings: Maintaining optimal temperature settings for both the nozzle and the heated bed is essential for achieving good adhesion and preventing issues like stringing or clogging. Each filament type has a recommended temperature range, so be sure to adjust your settings accordingly to avoid print failures.
- Design Considerations: When creating or downloading 3D models, consider the design’s complexity and support needs. Models with overhangs or intricate details may require additional support structures, which can complicate the printing process and affect the final product’s finish.
- Regular Maintenance: Keeping your 3D printer in good working condition is vital for consistent performance. Regularly clean the nozzle, check for wear on components, and lubricate moving parts to prevent mechanical failures and ensure smooth operation during prints.
- Learning from Community Resources: Engaging with the 3D printing community through forums, social media groups, or local maker spaces can provide valuable insights and troubleshooting tips. Sharing experiences with other DIY enthusiasts can help you overcome common challenges and improve your overall skills.
What Resources Can Help You Improve Your DIY 3D Printing Skills?
Improving your DIY 3D printing skills can be achieved through various resources that provide valuable insights and hands-on experience.
- Online Tutorials: Websites like YouTube and Instructables offer a plethora of video and written tutorials that guide users through different aspects of 3D printing.
- 3D Printing Forums: Online communities such as Reddit and dedicated 3D printing forums are excellent platforms for sharing experiences, troubleshooting issues, and learning from other enthusiasts.
- Books and eBooks: There are numerous books available that cover the fundamentals of 3D printing, including design principles, printer maintenance, and material selection.
- 3D Printing Software: Familiarizing yourself with software like Tinkercad, Fusion 360, or Cura can greatly enhance your design and printing capabilities, allowing you to create more complex projects.
- Local Maker Spaces: Many communities have maker spaces that provide access to 3D printers, tools, and workshops where you can learn from experienced makers and collaborate with others.
- Online Courses: Platforms like Coursera and Udemy offer structured courses that cover everything from the basics of 3D printing to advanced techniques, often taught by industry professionals.
- 3D Printing Blogs: Following blogs dedicated to 3D printing can keep you updated on the latest trends, technologies, and tips that can help refine your skills.
Online tutorials are a great starting point for beginners, as they cover a wide range of topics including printer setup, calibration, and troubleshooting common issues. These resources often provide step-by-step instructions, making the learning process more accessible and engaging.
3D printing forums create a sense of community, allowing users to ask questions and share their own experiences and solutions. Engaging with fellow enthusiasts can provide valuable insights and inspire new projects, enhancing your skills through shared knowledge.
Books and eBooks serve as comprehensive guides that delve into the theory and practical aspects of 3D printing. They often include illustrations and case studies, making complex concepts easier to grasp and apply in your own projects.
Using 3D printing software is crucial for designing your own models and preparing them for printing. Getting comfortable with programs like Tinkercad or Fusion 360 can expand your creative possibilities and improve the quality of your prints.
Local maker spaces not only provide access to 3D printers but also foster collaboration and learning through workshops and group projects. These hands-on environments can accelerate your learning curve by allowing you to experiment and receive immediate feedback.
Online courses are beneficial for those who prefer a more structured approach to learning. They often include practical assignments and assessments that help solidify your understanding of 3D printing concepts.
Following 3D printing blogs helps you stay informed about the latest advancements and best practices in the field. These blogs often feature tips, reviews, and project ideas that can inspire you and keep your skills sharp.
How Do You Decide on the Right Materials for Your Projects?
Ease of Use: Some materials, like PLA, are known for being beginner-friendly due to their lower printing temperatures and reduced warping. This makes them ideal for those who are just starting with 3D printing and want to focus on learning the process without dealing with complex material properties.
Durability: Depending on the intended application of your prints, you may need materials that can withstand wear and tear. For instance, if you’re creating functional parts or items that will be exposed to stress, opting for tougher materials like ABS or PETG can ensure longevity and reliability.
Compatibility: It’s essential to check whether the material is compatible with your specific 3D printer model. Some printers are designed to work with certain filament types, and using an incompatible material can lead to poor results or even damage the printer.
Related Post: