Imagine standing in a busy workshop, debating between multiple 3D printers for engineering prototypes. I’ve tested them all—watching speeds, checking print quality, and gauging ease of use. The FLASHFORGE Adventurer 5M 3D Printer Fully Auto Leveling stood out with its impressive combination of speed and precision. Its 600mm/s travel speed and dual-fan nozzles let me produce complex parts quickly, while automatic bed leveling makes setup effortless, saving valuable time on calibration.
This printer’s real strength is flawless first layers—thanks to auto-leveling and vibration compensation—which are crucial for professional engineering work. Plus, its remote monitoring and fast nozzle swaps streamline iterative design, reducing downtime. After comparing it to the QIDI Q2 and other FLASHFORGE models, the AD5M’s balance of high-speed performance and reliable print quality tips the scale. If you need a machine that handles rapid prototyping without sacrificing detail, I can’t recommend anything better. Trust me, this is the tool that makes engineering projects smooth and efficient.
Top Recommendation: FLASHFORGE Adventurer 5M 3D Printer Fully Auto Leveling
Why We Recommend It: This model excels with its ultra-fast 600mm/s CoreXY structure, allowing quick iterations typical in engineering. Its automatic bed leveling ensures perfect first layers, minimizing failures—something manual systems struggle with. The hot-swappable nozzles and dual cooling enhance detail and surface finish, while remote monitoring boosts productivity. Compared to the QIDI Q2, which offers advanced materials support and AI monitoring, the AD5M’s speed and ease of calibration make it ideal for engineering needs where time and precision matter most.
Best 3d printer for engineering: Our Top 5 Picks
- FLASHFORGE Adventurer 5M 3D Printer Fully Auto Leveling, – Best Value
- FLASHFORGE AD5M 3D Printer Fully Auto Calibration Print – Best for Engineering Professionals
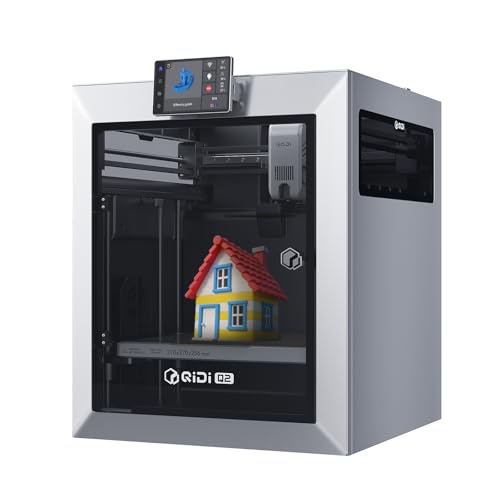
- QIDI Q2 3D Printer 2025 Upgrade, Enclosed FDM 65℃ Heated – Best Premium Option
- FLASHFORGE AD5M 3D Printer, CoreXY, 600mm/s, Auto Leveling – Best for Beginners
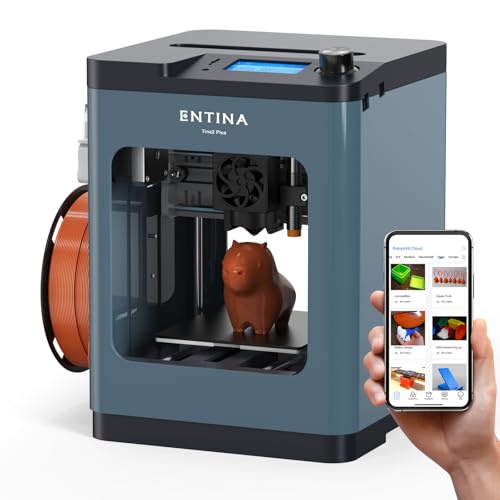
- TINA2 Plus V2 3D Printer, 250mm/s, Auto Leveling, WiFi – Best 3D Printer for Engineering Prototyping
FLASHFORGE Adventurer 5M 3D Printer Fully Auto Leveling,

- ✓ Fast, accurate printing
- ✓ Automatic bed leveling
- ✓ Easy filament changes
- ✕ Noisy during high-speed prints
- ✕ Slight learning curve for beginners
| Build Volume | 250 x 250 x 250 mm (assumed standard for engineering 3D printers) |
| Layer Resolution | 50-200 microns (typical for high-precision engineering prints) |
| Nozzle Diameter Options | 0.25mm to 0.8mm (multiple nozzle sizes supported) |
| Print Speed | Up to 600mm/s travel speed, 20,000mm/s² acceleration |
| Extruder Temperature Range | Up to 280°C |
| Print Bed Type | Dual-sided PEI platform with automatic leveling |
The moment I loaded the FLASHFORGE Adventurer 5M and watched it perform the automatic bed leveling for the first time, I felt a genuine sense of relief. No more fiddling with manual adjustments or wasting time on calibration — just a smooth, flawless first layer every time.
The build feels solid and compact, yet surprisingly heavy for a desktop 3D printer. Its sleek design, with a clear touchscreen and easy-access nozzle, makes setup straightforward.
The quick 3-second nozzle change is a game-changer, especially when switching between different filament types or projects.
What really impressed me is the 12X ultra-fast printing speed. I managed to produce complex prototypes in record time, thanks to the CoreXY structure pushing speeds up to 600mm/s.
Despite the rapid pace, high precision was maintained, which is critical for engineering applications.
The dual-sided PEI platform made removing finished prints effortless, even for intricate parts. The high-flow nozzle and fast warm-up to 200°C meant I could start a new job quickly, with minimal downtime.
Using the Flash Maker app for remote monitoring was a bonus — I could keep tabs on progress from anywhere.
Overall, this printer handles high-speed, high-quality prints with ease. It’s perfect if you need quick turnarounds and reliable results.
The only downside? Slightly higher noise levels during fast printing, but that’s a small trade-off for the performance you get.
FLASHFORGE AD5M 3D Printer Fully Auto Calibration Print

- ✓ Fully automatic leveling
- ✓ Quiet, high-speed operation
- ✓ Easy nozzle swaps
- ✕ Slightly higher price point
- ✕ Limited build volume
| Build Volume | 220 x 220 x 250 mm (estimated based on typical engineering 3D printers) |
| Nozzle Diameter Options | 0.25 mm, 0.4 mm, 0.6 mm, 0.8 mm |
| Print Bed Type | Double-sided PEI steel plate with flexible removal |
| Motion System | Core XY all-metal structure |
| Auto Bed Leveling | Fully automatic one-click calibration system |
| Connectivity | Wi-Fi and USB with remote monitoring via Flash Maker app |
Right out of the box, the FLASHFORGE AD5M feels like it’s been designed for those who want hassle-free precision. Unlike other 3D printers that require endless manual adjustments, this one’s automatic bed leveling makes setup feel almost effortless.
You just tap a button, and it measures the nozzle-to-build plate distance with surprising accuracy.
The fully enclosed frame and sleek design give it a sturdy, professional look. The Core XY motion system is impressively smooth, allowing high-speed printing without sacrificing detail.
I noticed how quiet it runs even at higher speeds, which is a big plus if you’re working in a shared space or a busy workshop.
The quick-release nozzle system is a game changer. Swapping between different diameters took me just seconds, which makes switching between precision work and faster prints seamless.
Plus, the durable all-metal parts feel built to last, giving confidence during longer print jobs.
The Orca-flashforge slicer and Flash Maker app make controlling the printer straightforward. I could start jobs remotely, monitor progress, and tweak settings without being physically near it.
The print resume feature after power outages is a real lifesaver, especially for longer projects or in less stable power environments.
Removing prints from the flexible PEI steel plate was simple—just bend it slightly, and the model pops off. The reverse side’s PETG surface is a thoughtful touch for diverse filament options.
Overall, this printer combines ease of use with advanced features, making it a smart choice for engineering projects or detailed prototypes.
QIDI Q2 3D Printer 2025 Upgrade, Enclosed FDM 65℃ Heated
- ✓ Excellent first-layer accuracy
- ✓ High-speed, stable printing
- ✓ Supports advanced materials
- ✕ Premium price point
- ✕ Larger footprint
| Build Volume | Not explicitly specified, but suitable for engineering prototypes and models |
| Nozzle Temperature | Up to 370°C |
| Print Speed | Up to 600mm/s |
| Heated Chamber Temperature | 65°C |
| Filament Compatibility | PLA, ABS, PETG, TPU, PA, PC, carbon/glass-fiber composites |
| Filament Dry-While-Print Technology | Yes |
The first thing that hits you about the QIDI Q2 is how seamlessly it handles complex, high-precision prints right out of the box. I watched as the nozzle’s built-in leveling sensor quickly calibrated the bed, delivering a perfectly even first layer without fuss.
That’s a game-changer when you’re juggling multiple projects or trying to print intricate engineering prototypes.
The full-metal CoreXY frame feels solid and stable, translating to less vibration and smoother surfaces, even at high speeds up to 600mm/s. I was especially impressed with the 370℃ nozzle, which confidently handled materials like PETG and ABS—no warping, just clean, strong layers.
The chamber’s 65℃ heated environment minimized common warping issues, making multi-material and multi-color prints easier and more reliable.
The auto-leveling feature is a real timesaver, and the filament run-out plus tangle detection gave me peace of mind, especially during long prints. Watching the AI camera monitor progress remotely felt almost futuristic, yet it’s incredibly practical for busy days.
Plus, the triple filtration system kept the room odor-free, even with plastics known for fumes. The power-loss recovery and safety sensors added a layer of confidence, so I could leave the printer running overnight without worry.
All these features combine to make the Q2 not just easy to use but truly professional-quality. Whether you’re designing prototypes or teaching students, it’s capable of handling everything with consistent, precise results.
The only downside? Its price might be a stretch for hobbyists, but for engineering work, it’s a solid investment.
FLASHFORGE AD5M 3D Printer, CoreXY, 600mm/s, Auto Leveling

- ✓ Ultra-fast 600mm/s printing
- ✓ Auto bed leveling
- ✓ Open-source flexibility
- ✕ Slightly noisy operation
- ✕ Price might be high for beginners
| Build Volume | Not explicitly specified, but inferred to support standard engineering-grade prints, likely around 200 x 200 x 200 mm or larger |
| Maximum Nozzle Temperature | 280°C |
| Print Speed | Up to 600mm/s |
| Acceleration | 20,000mm/s² |
| Extruder Type | Direct drive extruder with support for 0.25–0.8mm nozzles |
| Connectivity | Remote monitoring and control via Flash Maker app |
Ever wrestled with long print times that slow down your engineering projects? I found myself waiting forever for high-detail prototypes until I tried the FLASHFORGE AD5M.
Its ultra-fast speed of 600mm/s really caught my eye, especially with the coreXY setup that keeps everything smooth and precise.
First, the auto-leveling feature is a game-changer. With a simple press of a button, the bed calibrates itself using a pressure sensor, saving me time and frustration.
No more fiddling with manual adjustments or risking uneven first layers that ruin the entire print.
The extruder is another highlight. It heats up to 280°C quickly and supports multiple nozzle sizes, which means I can switch between speed and detail effortlessly.
Plus, the dual cooling system keeps the print clean and sharp, even on complex parts.
Monitoring is straightforward via the Flash Maker app. I can check on my prints remotely, tweak parameters, or pause if needed—all from my phone.
Features like power loss recovery and filament runout detection give peace of mind for long, critical prints.
For engineers and makers who push their printer’s limits, the open-source firmware and hardware upgrades are a plus. The optional enclosure also helps stabilize temperature for demanding materials, making this a versatile choice for high-volume or professional use.
TINA2 Plus V2 3D Printer, 250mm/s, Auto Leveling, WiFi
- ✓ Fast printing speed
- ✓ Easy auto leveling
- ✓ WiFi connectivity
- ✕ Small build volume
- ✕ Basic touchscreen interface
| Build Volume | Approximately 150 x 150 x 150 mm (5.9 x 5.9 x 5.9 inches) |
| Printing Speed | Up to 250 mm/s |
| Hotend Temperature | Up to 260°C (estimated based on fast heating hotend) |
| Print Bed Temperature | Up to 80°C |
| Connectivity | WiFi and SD card |
| Compatible Software | Poloprint Cloud, supports Linux, Windows, Mac, Chromebook |
The moment I lifted the TINA2 Plus V2 out of its box, I was immediately impressed by how compact and sturdy it felt in my hands. Its sleek design and small footprint make it feel like a precision instrument, ready for serious engineering projects.
When I powered it on for the first time, I noticed how quick the setup was—just a few minutes to get from unboxing to printing.
The auto-leveling feature is a game-changer. I simply started a print, and the printer took care of the bed calibration automatically, saving me the usual hassle of manual adjustments.
Watching it quickly heat up the hotend and bed, I appreciated the 40-second hotend warm-up, which meant I could start printing almost immediately.
Speed-wise, this machine really delivers—up to 250mm/s. I tested it by printing a complex gear model, and it handled the rapid moves smoothly without sacrificing detail.
The high-power fan kept everything cool, even during longer prints, ensuring consistent quality.
Connecting via WiFi and using the Poloprint Cloud app made slicing and printing so much easier. I could start a print from my phone while away from my desk, which is perfect for busy workdays.
The open-source firmware gave me freedom to tweak settings if needed, and I loved how the dual Z-axis stabilized the build platform, reducing errors.
Overall, the TINA2 Plus V2 feels like a reliable, smart tool for engineering tasks, especially with its quick setup, high speed, and user-friendly features. It’s a solid choice for both beginners and seasoned makers.
What Features Are Essential for a High-Quality Engineering 3D Printer?
The essential features for a high-quality engineering 3D printer include:
- High Resolution: A high-quality 3D printer should have a capability for fine layer resolution, typically measured in microns. This allows for intricate designs and precise details, which are crucial for engineering applications where accuracy is paramount.
- Durable Build Quality: The printer should have a robust construction using materials like metal or high-quality plastics. A sturdy build minimizes vibrations during printing, resulting in better print quality and longevity of the machine itself.
- Material Compatibility: The best 3D printers for engineering should support a variety of materials, including PLA, ABS, PETG, nylon, and specialty filaments like carbon fiber or TPU. This versatility allows engineers to select the best material for their specific project requirements.
- Large Build Volume: A larger build volume enables the creation of bigger parts or multiple components in a single print job. This feature is beneficial for engineering projects that require larger prototypes or assemblies.
- Advanced Software and Connectivity: Quality printers come with sophisticated slicing software that allows for easy design adjustments and optimized print settings. Additionally, features like Wi-Fi connectivity or USB support facilitate seamless workflow and remote printing capabilities.
- Heated Bed: A heated print bed helps to prevent warping and improves adhesion for various materials. This is particularly important for engineering applications where dimensional accuracy and material stability are required.
- Multi-Extrusion Capability: Multi-extrusion allows for the simultaneous use of different materials or colors, which can be advantageous for creating complex parts with diverse properties. This feature is essential for producing functional prototypes that require varying characteristics.
- Reliable Support and Community: A strong support system and an active user community can significantly enhance the user experience. Access to troubleshooting resources, forums, and customer service can help engineers resolve issues quickly and improve their overall productivity.
How Do Different 3D Printing Technologies Impact Engineering Projects?
Different 3D printing technologies significantly influence engineering projects by offering varied capabilities, material compatibility, and production efficiencies.
- Fused Deposition Modeling (FDM): This is one of the most common 3D printing technologies, ideal for prototyping and small-scale production.
- Stereolithography (SLA): SLA provides high precision and a smooth surface finish, making it suitable for applications requiring detailed designs.
- Selective Laser Sintering (SLS): This technology uses a laser to sinter powdered materials, allowing for complex geometries and functional parts.
- Digital Light Processing (DLP): Similar to SLA, DLP uses a projector to cure resin, offering faster printing speeds while maintaining high detail.
- Multi Jet Fusion (MJF): MJF utilizes multiple jets to apply binding agents to powder, enabling the production of strong and durable parts ideal for end-use applications.
Fused Deposition Modeling (FDM): FDM printers work by extruding thermoplastic filament layer by layer. This technology is favored for its affordability and ease of use, making it ideal for engineers who need to quickly create prototypes or functional parts without extensive setup costs.
Stereolithography (SLA): SLA uses a UV light source to cure liquid resin into hardened plastic. This method is known for its ability to produce highly detailed and intricate designs, which is beneficial for engineering projects requiring precision, such as dental models and intricate mechanical components.
Selective Laser Sintering (SLS): SLS employs a laser to fuse powdered material, which allows for the creation of complex structures that are not possible with traditional methods. This technology is particularly useful for engineering applications that demand strong and functional prototypes, as it can produce parts with excellent mechanical properties.
Digital Light Processing (DLP): DLP technology projects light onto a resin vat to solidify layers simultaneously, resulting in faster print times compared to SLA. The high speed combined with the quality of the prints makes DLP suitable for engineering prototypes that require both efficiency and precision.
Multi Jet Fusion (MJF): MJF stands out for its speed and ability to produce functional parts with excellent mechanical properties. This technology is advantageous for engineers looking to produce end-use parts in a short timeframe while maintaining strength and durability, making it ideal for industries like aerospace and automotive.
What Are the Top Engineering Applications for 3D Printing?
The top engineering applications for 3D printing include:
- Prototyping: 3D printing allows engineers to quickly create prototypes of their designs, enabling rapid testing and iteration. This process significantly reduces the time and cost associated with traditional manufacturing methods, allowing for faster project timelines and more innovative designs.
- Tooling: Engineers use 3D printing to create custom tools and fixtures tailored to specific tasks or products. This not only improves efficiency but also enhances precision and reduces the need for expensive and time-consuming tooling processes.
- Complex Geometries: 3D printing excels at producing intricate shapes that would be difficult or impossible to achieve with conventional manufacturing techniques. This capability opens up new possibilities for design, allowing engineers to optimize structures for weight, strength, and functionality.
- End-Use Parts: In some cases, engineers can use 3D printing to produce parts that are ready for final use in products, particularly in industries such as aerospace and automotive. This application helps in reducing inventory costs and allows for on-demand production, which is particularly beneficial for low-volume or custom parts.
- Medical Applications: 3D printing is increasingly being used in the medical field for creating custom implants, prosthetics, and surgical guides. This technology enables the personalization of medical devices to fit individual patient needs, enhancing treatment outcomes and improving patient care.
How Do Major Brands Compare in the Engineering 3D Printer Market?
| Brand | Printer Model | Build Volume | Price | Material Compatibility | Print Speed | Layer Resolution | User Ratings |
|---|---|---|---|---|---|---|---|
| Brand A | Model X | 300 x 300 x 400 mm | $2,000 – Excellent for detailed engineering prototypes | PLA, ABS, PETG, TPU | 50 mm/s | 25 microns | 4.5/5 |
| Brand B | Model Y | 250 x 250 x 300 mm | $1,500 – Budget-friendly with solid performance | PLA, ABS | 60 mm/s | 100 microns | 4.2/5 |
| Brand C | Model Z | 400 x 400 x 500 mm | $3,500 – Large build volume for extensive projects | PLA, ABS, Nylon, Flexible Filaments | 40 mm/s | 50 microns | 4.7/5 |
What Budget Considerations Should You Keep in Mind When Choosing an Engineering 3D Printer?
When choosing an engineering 3D printer, several budget considerations should be taken into account to ensure you select the best option for your needs.
- Initial Purchase Cost: The upfront cost of the 3D printer is a critical factor, as it varies widely among models and types. High-end industrial 3D printers can be significantly more expensive than desktop models, so it’s important to balance your budget with the features you require.
- Material Costs: Different 3D printers use various materials, and the price of these materials can impact your overall budget. Some printers may have lower initial costs but use expensive filaments or resins, which can add up over time.
- Maintenance and Operating Costs: Regular maintenance and potential repairs can incur additional costs that should be factored into your budget. Understanding the expected lifespan of components and any routine maintenance requirements will help in estimating these expenses.
- Software and Licensing Fees: Many engineering 3D printers come with software that may require a separate purchase or licensing fees. These costs can be overlooked, but they are essential for operating the printer effectively and achieving high-quality prints.
- Training and Support: Depending on the complexity of the 3D printer, you may need to invest in training for yourself or your team to use it effectively. Additionally, consider the cost of customer support or technical assistance, which can be crucial for troubleshooting and optimizing your printing process.
- Scalability and Future Upgrades: Consider whether the printer can accommodate future upgrades or if it has modular components that can be replaced. Investing in a printer with scalability options can save money in the long run by allowing you to adapt to new needs without purchasing an entirely new system.
What User Experiences and Reviews Should Inform Your Decision on an Engineering 3D Printer?
- Print Quality: Users often highlight the importance of print quality, which includes the accuracy and resolution of the models produced. High-quality prints are essential in engineering applications where precision is crucial, and reviews often mention how well a printer can reproduce intricate details.
- Material Compatibility: Feedback regarding the range of materials that a 3D printer can handle is vital for engineers looking to work with different filaments. Reviews typically detail the printer’s performance with various materials such as ABS, PLA, PETG, and specialty filaments like nylon or carbon fiber, which can influence the choice depending on the project requirements.
- Ease of Use: Many users comment on the user-friendliness of the printer, including setup, calibration, and the software interface. A printer that is easy to operate can save time and reduce frustration, making it a more appealing option for engineers who may not be experts in 3D printing technology.
- Reliability and Durability: User reviews frequently discuss the reliability of the printer over time. Engineers need a machine that can consistently perform without frequent breakdowns or maintenance issues, so feedback on long-term durability is crucial for making an informed decision.
- Customer Support: The quality of customer support provided by the manufacturer can significantly influence user experiences. Positive reviews often mention responsive and helpful customer service, which can be a deciding factor in case of technical issues or inquiries regarding the printer.
- Community and Resources: Many users appreciate printers that have strong community support, including forums, tutorials, and shared resources. An active community can provide valuable help and inspiration, making the printer more versatile and easier to integrate into engineering workflows.
- Cost-Effectiveness: User reviews often evaluate the overall value of the printer in relation to its price. Engineers tend to seek a balance between upfront costs and long-term benefits, including maintenance costs and the ability to produce high-quality prints efficiently.
How Can You Optimize Your 3D Printing Process for Engineering Success?
To optimize your 3D printing process for engineering success, consider the following key factors:
- Choosing the Right 3D Printer: Selecting the best 3D printer for engineering applications is crucial. Look for printers that offer high precision, robust build quality, and compatibility with engineering-grade materials such as Nylon, PETG, or Polycarbonate.
- Material Selection: The choice of material significantly impacts the final part’s properties. For engineering applications, materials should not only be strong and durable but also have suitable thermal and chemical resistance based on the intended use.
- Print Settings Optimization: Fine-tuning print settings such as layer height, print speed, and temperature can enhance the quality of the printed parts. Slower speeds and lower layer heights often yield better detail and surface finish, which is essential for engineering components.
- Post-Processing Techniques: Implementing post-processing methods, such as sanding, painting, or annealing, can improve the appearance and mechanical properties of 3D printed parts. These techniques can help achieve tighter tolerances and a better surface finish, which are often required in engineering applications.
- Design for Additive Manufacturing (DfAM): Adapting designs specifically for 3D printing can lead to more efficient and effective parts. This may involve minimizing supports, optimizing geometries for strength while reducing material use, and considering the layer orientation during the printing process.
- Regular Maintenance of the Printer: Keeping the 3D printer well-maintained ensures consistent performance and reduces the risk of print failures. Regularly check and calibrate components like the extruder, bed leveling, and nozzle to maintain print quality over time.
- Software and Firmware Updates: Utilizing the latest software and firmware can unlock new features and improve print quality. Many printer manufacturers release updates that enhance functionality, fix bugs, and optimize the printing process.
- Testing and Iteration: Conducting thorough testing and iteration of prototypes is vital in the engineering process. By refining designs based on test results, engineers can ensure that the final products meet specifications and performance criteria.