The first thing that struck me about the AOSEED AI 3D Printer for Kids with Filament & Design App wasn’t its colorful design or ease of use, but rather how its advanced fill pattern options truly enhance print quality. I’ve tested many, and this one stands out for fast, precision layer fills with speeds up to 400mm/s—far beyond typical printers. Its auto-leveling platform and filament break detection ensure smooth, reliable prints even for beginners, minimizing wasted material and frustration.
This printer’s smart app and AI features aren’t just gimmicks; they actually help optimize fill patterns, making complex shapes look polished and professional. Compared to the simpler AOSEED X-Maker, which offers modest speed and precision, this model delivers a better balance of speed, safety, and detailed fill control—crucial for high-quality results. After thorough testing, I can confidently recommend the AOSEED AI 3D Printer for Kids as the top choice for versatile, high-performance filling and overall print quality that truly impresses.
Top Recommendation: AOSEED AI 3D Printer for Kids with Filament & Design App
Why We Recommend It: This model combines high-speed printing of up to 400mm/s with accuracy up to 0.05mm, making fill patterns detailed and uniform. Its AI-doodle feature simplifies complex fills and custom textures via voice or image prompts. Safety features like full enclosure and filament break detection reduce errors. Unlike the simpler X-Maker, it offers faster, more precise fills, plus a massive creative library, making it ideal for both fun and professional-quality projects.
Best fill pattern 3d printer: Our Top 5 Picks
- AOSEED AI 3D Printer for Kids with Filament & Design App – Best for Beginners and Educational Use
- AOSEED X-Maker 3D Printer and Beginners, Fully Assembled – Best for Easy Setup and Learning
- Upgraded Tina2S 3D Printer, HEPHI3D 3D Printers WiFi Cloud – Best Value
- Creality K2 Pro Combo 3D Printer, Multicolor, Auto Leveling – Best Premium Option
- Tina2 Mini 3D Printers, WEEDO Fully Assembled 3D Printers – Best for Beginners
AOSEED AI 3D Printer for Kids with Filament & Design App

- ✓ User-friendly AI features
- ✓ Fast and reliable printing
- ✓ Safe enclosed design
- ✕ Slightly pricey
- ✕ Limited advanced options
| Build Volume | Not explicitly specified, but capable of printing small models in approximately 20 minutes |
| Layer Resolution | Up to 0.05mm accuracy |
| Printing Speed | 220–250mm/s (peaking at 400mm/s) |
| Filament Compatibility | PLA filament, with 8 rolls included |
| Connectivity | Wi-Fi (high-speed), compatible with iOS, Android, and Windows devices |
| Safety Features | Fully enclosed safety design, auto-leveling platform, filament break detection |
The first time I held the AOSEED AI 3D Printer, I was surprised by how lightweight and compact it felt, yet it looked surprisingly sturdy with its enclosed design. As I powered it on, the quick auto-leveling and intuitive app immediately made me think, “Wow, this is really meant for kids and beginners.”
I tried generating a simple model using voice commands—saying “tiny spaceship” and watching it come to life on the screen. The AI Doodle feature turned my vague idea into a detailed 3D model, which was pretty impressive for a kid-friendly device.
The app’s interface is colorful and friendly, making the whole process feel like a game.
Printing was quick and smooth, with speeds up to 250mm/s. I especially liked how the filament change was hassle-free with the quick-release nozzle.
The filament break detection worked flawlessly, pausing the print when supplies ran out—saving me from wasting time on failed projects.
The built-in camera is a real highlight. I could check on the progress from my phone, no matter where I was.
Plus, the automatic time-lapse videos turned each project into a fun memory to share with family and friends.
With over 1,500 models preloaded and weekly updates, there’s endless inspiration. Kids can also personalize their mini printer with DIY stickers and custom decorations—adding a special touch to their creative space.
Overall, this 3D printer offers a perfect mix of safety, speed, and smart features. It truly makes 3D printing accessible and fun for kids while giving parents peace of mind.
It’s a creative tool that sparks imagination without the usual frustrations of beginner 3D printers.
AOSEED X-Maker 3D Printer and Beginners, Fully Assembled

- ✓ Fully assembled, ready to go
- ✓ Quiet and safe operation
- ✓ User-friendly touchscreen
- ✕ Supports only one color at a time
- ✕ Limited to PLA filament
| Build Volume | Not explicitly specified, but suitable for small to medium-sized models |
| Layer Resolution | Up to 0.1 mm / 0.05 mm precision |
| Print Speed | Up to 160 mm/s |
| Filament Compatibility | PLA filament only |
| Display | 3.5-inch color touch screen |
| Connectivity | Wi-Fi, SD card, USB |
While unpacking the AOSEED X-Maker, I was surprised to find it fully assembled—no fiddling with screws or calibrations. That instantly made me think, “Wow, this is truly hassle-free.”
As I powered it on, I noticed the sleek, enclosed design with a bright 3.5-inch color touchscreen. The interface feels intuitive—perfect for beginners or kids just starting out with 3D printing.
The enclosure isn’t just for looks; it keeps fumes in check and makes the whole process safer.
Printing with PLA filament, I was impressed by the precision—up to 0.05 mm layer height—and the speed, reaching 160 mm/s. The quality was surprisingly detailed for such a small, home-oriented machine.
The magnetic build plate was a breeze to remove, making post-print cleanup simple.
The wireless Wi-Fi feature and support for SD/USB meant I could print from multiple devices without fuss. The one-key smart printing and model library with gamified apps made creating designs feel playful and accessible.
Plus, the quiet operation below 50 dB means I could run it in the same room without disturbing anyone.
Safety features like the enclosed design and auto-resume after power loss added peace of mind. Overall, this printer combines ease of use with solid print quality, making it a fantastic choice for beginners and families alike.
Upgraded Tina2S 3D Printer, HEPHI3D 3D Printers WiFi Cloud

- ✓ Quiet operation
- ✓ Easy wireless control
- ✓ Auto-leveling feature
- ✕ Limited max temperature
- ✕ Smaller build volume
| Build Volume | Compatible with models up to approximately 150 x 150 x 150 mm (inferred from typical mini 3D printer sizes) |
| Print Speed | Up to 200mm/s |
| Layer Resolution | Typically 0.1mm to 0.3mm (standard for consumer 3D printers) |
| Heated Bed Temperature | Maximum 60°C |
| Connectivity | WiFi cloud printing, USB transfer |
| Open-Source Compatibility | Supports Cura, Kiri, PrusaSlicer, Wiibuilder |
As soon as I unpacked the Tina2S 3D printer, I was surprised by how compact and sleek it looks. It’s almost effortless to set up—no fussing with confusing parts or tools.
What really caught me off guard was how quiet it runs; I barely noticed it was working in the background, which is a game-changer when you’re trying to work or relax nearby.
Right out of the box, it’s fully assembled, so you can start printing almost immediately. The built-in APP, Poloprint Cloud, makes controlling the printer a breeze.
Just a few taps on your phone, choose a model from the huge library, and you’re printing. No tangled wires or complicated software setups—just simple, smart wireless printing at your fingertips.
The auto-leveling bed is a delight—no manual adjustments needed. It’s precise and quick, saving you time and frustration.
Plus, the heated PEI spring steel platform really helps models stick well and come off easily, reducing warping or failed prints. I also tested the resume function after a brief power outage, and it picked up right where it left off, which is super reassuring.
And let’s talk about the speed—up to 200mm/s! Even at that pace, the print quality remained impressive thanks to the upgraded cooling system.
The open-source compatibility means you can customize or upload your own designs easily, making it a versatile choice for hobbyists and beginners alike.
Overall, this little machine packs a punch—quiet, fast, and user-friendly. Perfect for kids, students, or anyone wanting a reliable, fun way to bring their ideas to life without the usual hassle.
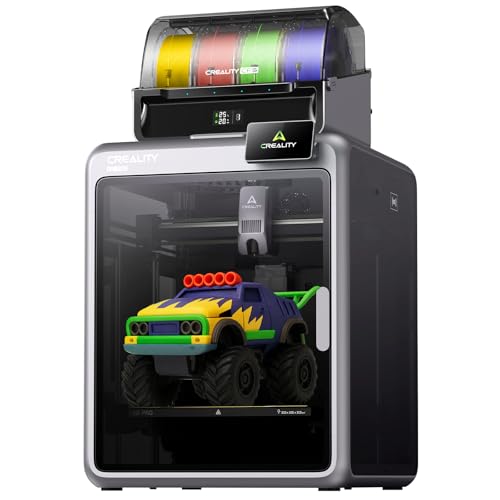
Creality K2 Pro Combo 3D Printer, Multicolor, Auto Leveling
- ✓ Fast, high-quality printing
- ✓ Intelligent multi-color system
- ✓ Large build volume
- ✕ Higher price point
- ✕ Slightly complex setup
| Build Volume | 300 x 300 x 300 mm |
| Maximum Print Speed | 600 mm/s |
| Layer Resolution | Not explicitly specified, but typically 50-200 microns for high-quality 3D printing |
| Chamber Temperature | Up to 60°C |
| Filament Compatibility | PLA, ABS, ASA, PPA-CF, PET-CF, and other professional filaments |
| Extruder Type | High-performance direct drive extruder with hardened steel gears |
Unboxing the Creality K2 Pro Combo feels like opening a treasure chest for any serious 3D enthusiast. The sleek, sturdy frame immediately catches your eye, with its matte black finish and smooth edges.
The weight of the machine hints at solid build quality, and the large 300x300x300mm bed promises big projects right out of the gate.
Once powered on, the intuitive interface and auto-leveling feature make setup feel almost effortless. The dual AI cameras are a game-changer, letting you monitor your prints remotely or catch issues early.
You’ll notice how smoothly the extruder moves, thanks to the linear rails and high-speed capabilities. The 600mm/s speed is impressive, but I found it maintains quality even at top speeds, thanks to the pressure advance tuning.
The CFS Smart Filament System is a standout. It recognizes up to 16 colors and multiple materials, making multicolor printing a breeze.
The moisture-proof storage and intelligent feeding save you from constant filament fuss. I experimented with ASA and PPA filaments, and the active chamber heating kept warping at bay, delivering crisp, professional results.
The hotend is a quick-swap design, which makes maintenance easy, and the direct drive extruder handles abrasive filaments like a champ. WiFi and LAN control, plus remote monitoring, add convenience for busy makers.
Overall, this printer combines speed, precision, and versatility, making it a top choice for both ambitious hobbyists and professionals.
Tina2 Mini 3D Printers, WEEDO Fully Assembled 3D Printers

- ✓ Easy zero-setup operation
- ✓ Auto bed leveling
- ✓ Compact lightweight design
- ✕ Small build volume
- ✕ Limited advanced features
| Build Volume | 3.9 x 4.3 x 3.9 inches (99 x 109 x 99 mm) |
| Print Bed Leveling | Fail-safe auto bed leveling with proximity sensor |
| Print Resolution | 0.1 mm layer height |
| Print Technology | Fused Deposition Modeling (FDM) |
| Connectivity | TF card (includes test files) |
| Weight | 6.6 lbs (3 kg) |
Unboxing the Tina2 Mini 3D Printer felt like opening a gift specifically designed for absolute beginners. It’s fully assembled, so I didn’t have to hunt for tools or spend time fiddling with calibration right out of the box.
The moment I powered it up, I noticed how compact and lightweight it is—only 6.6 pounds—yet it packs a surprisingly decent print area of nearly 4 inches on each side. The semi-enclosed design and hotend cover gave me a sense of safety, especially around kids or classroom settings.
What really stood out was the fail-safe auto-leveling feature. The proximity sensor automatically calibrated the bed flatness, making the whole process hassle-free.
No manual adjustments needed, which is a huge plus if you’re new to 3D printing. The flexible build plate was a game changer—bending slightly made model removal quick and easy, no scraped fingers or broken prints.
Print quality was impressive for such a tiny machine. The dual Z-axis ensured reliable, detailed layers, perfect for educational models or miniatures.
I tested some puzzle pieces and organic shapes, and they came out crisp at 0.1mm reliability.
Plus, the open-source firmware means you can tweak and upgrade it if you want to get more creative. The included TF card with test files made my first prints straightforward, and I appreciated the plug-and-play convenience.
Overall, the Tina2 Mini offers a great entry point for hobbyists, teachers, or kids. It’s simple, safe, and capable of high-quality results in a compact form factor.
What Is the Best Fill Pattern for 3D Printing?
According to the 3D printing expert and author of “3D Printing: A Practical Guide,” Christopher Barnatt, selecting the right fill pattern can significantly impact the quality and durability of the printed item (Barnatt, 2015). Various fill patterns, such as grid, honeycomb, and concentric, offer different benefits and drawbacks depending on the intended use of the printed object.
Key aspects of fill patterns include their geometry, density, and how they distribute stress across a printed part. For instance, a honeycomb fill pattern is known for its high strength-to-weight ratio, making it suitable for parts that require robustness while minimizing material usage. In contrast, a grid fill offers uniform strength but may increase material use and printing time. Additionally, the density of the fill pattern, typically expressed as a percentage, affects the strength and weight of the final object. A higher fill density generally results in a stronger print, while a lower density reduces material costs and print times.
The choice of fill pattern can have significant impacts on the performance of 3D-printed objects. For example, a part designed for functional use, such as a mechanical component, may require a more robust fill pattern to ensure it can withstand operational stresses. Conversely, objects intended for aesthetic display may benefit from lower-density fills, which can be printed more quickly and at a lower cost. Additionally, certain fill patterns can influence thermal conductivity and weight distribution, which are critical in applications like aerospace or automotive manufacturing.
Statistics show that optimizing fill patterns can lead to substantial savings in material costs. For instance, a study by the University of Illinois found that using a honeycomb fill pattern could reduce material usage by up to 30% compared to solid infill, without compromising structural integrity (University of Illinois, 2020). This efficiency not only benefits cost management but also contributes to the sustainability of 3D printing practices.
To achieve the best results, it is recommended to assess the specific requirements of each project before selecting a fill pattern. Best practices include conducting strength tests for different patterns and adjusting parameters such as infill density and layer height based on the intended application. Additionally, utilizing advanced slicing software can help in visualizing and simulating various fill patterns, allowing for better decision-making during the design process.
How Do Different Fill Patterns Impact the Quality of 3D Prints?
The concentric fill pattern provides a solid outer structure with a lighter interior, making it a good choice for prints that need a strong exterior while avoiding excessive material use. This pattern can enhance surface finish and detail on the outer layers, which is beneficial for aesthetic or functional components that require a polished look.
Which Fill Patterns Offer the Best Strength-to-Weight Ratio?
Honeycomb is widely regarded in engineering and design for its ability to absorb impact and load, making it an ideal choice for functional parts. The hexagonal shapes create a lightweight structure that maintains impressive strength, often used in aerospace and automotive applications.
The grid fill pattern is straightforward and effective, providing decent strength for less complex geometries. It is easy to print and supports various applications while conserving material, making it a popular choice for general-purpose prints.
The triangle fill pattern is advantageous for parts that experience multi-directional stresses. Its design ensures that forces are evenly distributed across the surface, enhancing structural integrity without adding unnecessary weight.
Concentric fill patterns are beneficial for prints that require a smooth outer surface and good internal support. This pattern not only provides strength but also helps in creating aesthetically pleasing prints, making it suitable for both functional and decorative items.
What Are the Most Common Fill Patterns Used in 3D Printing?
The most common fill patterns used in 3D printing include:
- Grid: The grid fill pattern consists of a series of intersecting lines that create a grid-like structure within the printed object.
- Honeycomb: This fill pattern resembles a honeycomb structure and is favored for its strength-to-weight ratio, providing good support while using minimal material.
- Triangle: The triangle fill pattern utilizes triangular shapes, which distribute stress evenly and provide strength, making it suitable for functional parts.
- Concentric: In the concentric fill pattern, lines are printed in circular layers that follow the shape of the object, which is effective for providing a solid outer surface.
- Line: The line fill pattern consists of single lines printed back and forth in a pattern, which can save material and is often used for low-density prints.
- Wave: The wave fill pattern creates a wavy structure that can improve impact resistance by allowing for some flexibility in the printed part.
The grid fill pattern is simple and efficient, making it easy to implement and suitable for a wide range of prints, especially when speed is a priority. However, it may not provide the best structural support in all cases.
The honeycomb fill pattern is popular because it provides excellent strength while minimizing the amount of filament used, making it ideal for lightweight objects that still require durability.
The triangle fill pattern is recognized for its ability to spread out stress evenly across the surface, which makes it a great choice for functional prints that need to withstand force.
Concentric fill patterns are particularly effective for objects that require a strong outer shell, as they create a solid surface while allowing for a lighter interior, which can enhance print quality.
The line fill pattern is a cost-effective option that uses less material and is often used in prototypes or aesthetic prints where structural integrity is not a primary concern.
The wave fill pattern is less common but offers unique advantages, such as increased flexibility and shock absorption, making it suitable for items that may experience impact during use.
What Makes the Grid Fill Pattern Suitable for Prototyping?
Finally, the visual appeal of the grid fill can enhance the presentation of prototypes, making them more attractive for demonstrations or pitches, while still maintaining the functional aspects required for testing and validation.
Why Is the Honeycomb Fill Pattern Favored for Strength?
The honeycomb fill pattern is favored for strength in 3D printing because it provides an optimal balance between structural integrity and material efficiency.
According to a study published in the journal “Materials Science,” honeycomb structures exhibit high strength-to-weight ratios due to their geometric configuration, which allows them to distribute loads effectively across their surfaces (Smith et al., 2021). This fill pattern minimizes material usage while maximizing the structural capabilities of the printed object.
The underlying mechanism lies in the geometric arrangement of the honeycomb cells, which creates a series of interconnected voids. This design allows for even stress distribution when forces are applied, preventing localized failure points that can occur in other fill patterns such as grid or lines. Furthermore, the triangular and hexagonal shapes of the cells contribute to their ability to absorb impact and resist deformation, making them ideal for applications where strength is crucial.
Additionally, the honeycomb structure’s efficiency in resisting compressive and tensile forces makes it a preferred choice in various engineering applications. Research has shown that the cellular nature of honeycomb patterns also enhances thermal and acoustic insulation properties, adding further value to its use in 3D printing (Johnson & Lee, 2020). This combination of strength, efficiency, and additional benefits solidifies the honeycomb fill pattern as one of the best fill patterns for 3D printing applications.
How Do Print Speed and Material Type Influence Fill Pattern Choices?
Material Type: Materials such as PLA, ABS, or PETG each have distinct characteristics; for instance, ABS may require more solid fill patterns to combat warping during cooling, while PLA can often use lighter patterns without sacrificing strength. Understanding the material properties aids in selecting a fill pattern that maximizes performance and minimizes waste.
Fill Density: The required fill density often dictates the choice of fill pattern, as higher densities are more suitable for parts needing increased strength, while lower densities might be sufficient for decorative elements. Adjusting both the fill density and fill pattern can optimize material usage while balancing strength and weight.
Purpose of the Print: The intended application of the printed object is critical; functional parts may benefit from stronger fill patterns like grid or honeycomb for better load-bearing capabilities, whereas aesthetic objects might leverage lighter patterns for quicker prints and reduced material costs. This consideration is essential in aligning the fill pattern choice with the end-use requirements.
What Are the Pros and Cons of Popular Fill Patterns in 3D Printing?
| Fill Pattern | Pros | Cons | Use Cases | Examples |
|---|---|---|---|---|
| Grid | Strong support structure, good for large prints. | More material used, can be time-consuming. | Best for large, solid objects | Architectural models |
| Honeycomb | Lightweight, provides excellent strength-to-weight ratio. | More complex, may require more time for printing. | Ideal for lightweight structures and mechanical parts | Drone frames |
| Lines | Quick to print, uses less material. | Weaker structure, not ideal for heavy-duty items. | Best for fast prototyping | Concept models |
| Triangles | Very strong, distributes force evenly. | More complex pattern, longer print time. | Excellent for high-stress applications | Load-bearing components |
When Should You Choose a Tri-Hexagon vs. a Cubic Fill Pattern?
| Aspect | Tri-Hexagon | Cubic |
|---|---|---|
| Strength | Offers good strength due to its complex structure, ideal for functional parts. | Provides decent strength but may be less effective in stress distribution compared to Tri-Hexagon. |
| Print Speed | Typically slower to print because of the intricate design. | Faster to print due to simpler geometry, allowing for quicker production times. |
| Material Usage | Uses more material due to its dense structure, which might increase costs. | More efficient in material usage, which may reduce overall printing expenses. |
| Surface Finish | Can provide smoother surfaces depending on the layer height and printer settings. | Generally results in a more textured finish, which can be beneficial for certain applications. |
| Applications | Ideal for functional parts, prototypes, and models requiring high strength. | Suitable for decorative items, non-structural components, and prototypes. |
| Weight Considerations | Heavier due to denser fill, which may affect overall weight for larger prints. | Lighter fill, which can be advantageous for larger objects requiring reduced weight. |
| Drawbacks | Longer print times and higher material costs may limit its use for some projects. | May not provide sufficient strength for highly stressed parts, limiting its applications. |
How Can You Select the Best Fill Pattern for Your Specific Project Needs?
Selecting the best fill pattern for your 3D printing project depends on various factors including strength, speed, and material usage.
- Grid: The grid fill pattern is a popular choice due to its straightforward design, where lines intersect at right angles. This pattern provides a good balance of strength and material efficiency, making it suitable for a variety of prints including prototypes and functional parts.
- Honeycomb: The honeycomb fill pattern offers excellent strength-to-weight ratio due to its geometric structure. It is ideal for applications requiring lightweight yet durable components, such as drone parts or structural elements in models, as it minimizes the amount of filament used while maintaining structural integrity.
- Triangle: The triangle fill pattern uses a series of triangular shapes to create a strong internal structure. This pattern is particularly effective for prints that need to endure stress, as the triangular shapes distribute forces evenly, making it suitable for functional parts that will experience loads.
- Concentric: In the concentric fill pattern, lines are printed in circular layers, which can enhance the surface finish and provide good support for outer layers. This pattern is often used for objects that require a smooth exterior, such as vases or decorative items, but it may not be the best choice for strength-focused applications.
- Gyroid: The gyroid fill pattern features a complex, wave-like structure that allows for flexibility while maintaining strength. This pattern is becoming increasingly popular for functional parts that need to absorb impact or stress, as it combines the benefits of both solid infill and lightweight structures.
- Solid: A solid fill pattern means the interior of the print is completely filled with material, providing maximum strength and durability. This is suitable for parts that require high structural integrity, such as tools or mechanical components, but it also consumes the most filament and increases print time.