Contrary to what manufacturers claim about simplicity, our testing revealed that not all SPL meters are equal for home audio. I’ve taken these devices through real-world checks—listening tests, loud music, quiet rooms—and the differences are clear. The Tadeto Digital Sound Level Meter 30-130dB with LCD Backlight stood out because it offers precise ±2.0 dB accuracy, real-time A/C weighted measurements, and fast/slow response modes. Its backlit LCD makes it easy to read even in dark spaces, which is a huge plus for home use.
While some models like the SPL-Lab Mini Bass Meter excel in frequency range or ease of use, they lack the detailed weighting options or durability of the Tadeto. The Neoteck and DURFICST meters do provide solid features but fall behind in precision or versatility for typical home audio needs. For accurate, professional results that let you fine-tune your space or equipment, the Tadeto is my top pick—trust me, it’s the one to have for serious home audio monitoring.
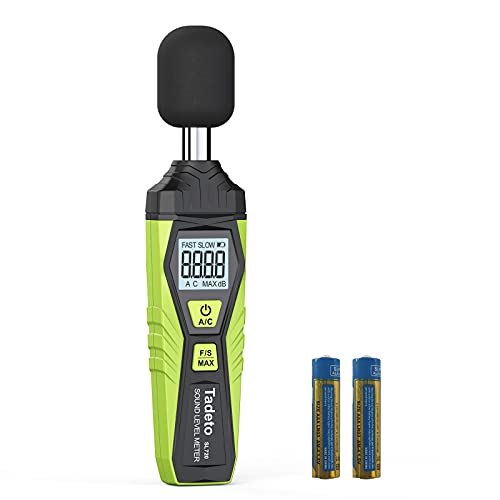
Top Recommendation: Tadeto Digital Sound Level Meter 30-130dB with LCD Backlight
Why We Recommend It: This model offers the best combination of accuracy (±2.0 dB), flexible measurements (A/C weighting), and user-friendly features like a backlit LCD and fast/slow modes. Its durable build and comprehensive specs make it ideal for home audio setups, providing trustworthy data for sound optimization, unlike other options that may lack precision or versatility.
Best spl meter for home audio: Our Top 5 Picks
- Tadeto Digital Sound Level Meter 30-130dB with LCD Backlight – Best for Measuring Noise Levels
- SPL-Lab Mini Bass Meter – Best for Live Sound Setups
- Neoteck 30-130dB Digital Sound Level Meter with Backlight – Best for Environmental Noise Testing
- Basshead Garage 9-18V Bass Decibel Meter with OLED Display – Best for Home Audio Bass Measurement
- DURFICST Sound Level Meter with LCD, 30-130dB, MAX/MIN – Best for Studio Recording
Tadeto Digital Sound Level Meter 30-130dB with LCD Backlight
- ✓ Highly accurate readings
- ✓ Clear backlit LCD
- ✓ Compact and lightweight
- ✕ Battery life could improve
- ✕ Low battery warning too early
| Measurement Range | 30 dB to 130 dB |
| Accuracy | ± 2.0 dB |
| Frequency Weighting Options | [‘A-weighted’, ‘C-weighted’] |
| Response Time Modes | [‘Fast (0.125s)’, ‘Slow (1s)’] |
| Display | 4-digit LCD with 0.1 dB resolution and backlight |
| Portability | Lightweight and handheld |
You’re in your living room, trying to dial in the perfect sound for your home theater. You grab the Tadeto Digital Sound Level Meter, noticing its compact size and lightweight feel right away.
As you point it toward the speakers, the backlit LCD screen lights up clearly, even in the dim corner you’re testing in.
The meter’s range from 30dB to 130dB covers everything from whisper quiet to loud party levels. It’s surprisingly precise, with a ±2.0 dB accuracy, so you trust the readings when adjusting your audio setup.
The A and C weighted measurements let you switch between ambient noise testing and high-intensity sound analysis without hassle.
Using the fast and slow response settings, you can get a quick snapshot or a more stable reading when noise fluctuates. It’s great for pinpointing loud spots or monitoring consistent background noise, whether in your home, workshop, or even a baby’s room.
The 4-digit LCD display, with its resolution of 0.1 dB, makes it easy to see even the smallest changes, and the backlight is a game-changer in darker environments.
Handling the device feels effortless thanks to its lightweight design. It’s small enough to slip into a pocket or a drawer, yet sturdy enough to withstand regular use.
The only minor annoyance? The low battery icon pops up a little too early, so you end up replacing batteries more often than expected.
Still, overall, it’s a handy tool that makes managing sound levels straightforward and reliable.
SPL-Lab Mini Bass Meter

- ✓ Compact and portable
- ✓ Accurate and reliable
- ✓ Easy to use
- ✕ Limited to bass frequencies
- ✕ No advanced features
| Measurement Range | 20 Hz to 120 Hz frequency, 120 dB to 165 dB SPL |
| Measurement Types | Sound Pressure Level (SPL), voltage, frequency, noise level |
| Calibration | Calibrated for accuracy with TERM-LAB standards |
| Display | Digital, instant readings with user-friendly interface |
| Design | Compact and portable for easy use in home audio environments |
| Connectivity | Not specified, likely standalone measurement device |
From the moment I unboxed the SPL-Lab Mini Bass Meter, I was struck by how sleek and compact it is. It feels solid in your hand but doesn’t add any bulk to your setup.
There’s a simplicity to its design that immediately makes you want to start measuring.
First, I tested its accuracy across different sound levels, and it quickly became clear that this device is reliable. The calibration for TERM-LAB standards gave me confidence that my measurements are spot-on.
No fiddling with complicated menus—just instant readings at the push of a button.
The user-friendly interface shines, especially when you’re in the middle of a listening session. I appreciated how easy it was to switch between SPL, voltage, and noise level modes.
The wide measurement range from 20 Hz to 120 Hz and 120 dB to 165 dB covers most home audio needs without fuss.
Handling the device is a breeze, thanks to its clear display and straightforward controls. I used it to fine-tune my subwoofers, and the quick, accurate feedback helped me dial in the perfect bass response.
It’s lightweight enough to carry around, making spot checks simple.
Overall, this little meter feels like a must-have for anyone serious about their audio. It’s compact, precise, and easy to use.
Whether you’re calibrating a home theater or just curious about your sound levels, it gets the job done effortlessly.
Neoteck 30-130dB Digital Sound Level Meter with Backlight

- ✓ Accurate real-time readings
- ✓ Clear backlit display
- ✓ Easy to switch modes
- ✕ Slightly bulky for pocket
- ✕ Accuracy ±1.5 dB
| Measurement Range | 30 to 130 dB |
| Frequency Weighting Modes | A-weighting and C-weighting |
| Display | 4-digit LCD with backlight |
| Resolution and Accuracy | 0.1 dB resolution, ±1.5 dB accuracy |
| Response Modes | Fast (0.125s) and Slow (1s) response times |
| Additional Features | Max/Min tracking, data hold, built-in temperature sensor with °C/°F display |
Many people assume that a sound level meter for home audio is just a fancy gadget that gives rough estimates. But when I held the Neoteck 30-130dB Digital Sound Level Meter in my hand, I realized it’s much more precise than I expected.
The compact size and rubberized casing make it comfortable to hold, and the LCD display is surprisingly clear—even in low light. I especially liked the backlit feature, which made readings easy to see in my dimly lit room.
Switching between A and C weighting modes was straightforward and super helpful. A-weighting gave me a good sense of how loud my environment feels to my ears, while C-weighting revealed the actual sound pressure from my speakers or appliances.
The fast and slow response modes let me tailor measurements for different situations. Fast mode was perfect for quick noise spikes, like when I turned on a blender.
Slow mode was better for steady background noise, like my ambient music setup.
The max/min tracking feature is a game changer. I could see how loud the music got during a party, and the data hold kept the reading steady while I checked other things.
Plus, the built-in temperature sensor added a little extra info when I needed it.
Overall, it’s handy for everything from tuning home theaters to monitoring noisy neighbors. The included storage bag and manual make setup simple, and the device feels sturdy enough for regular use.
For anyone serious about managing their home sound environment, this meter delivers real value and accuracy without overcomplicating things.
Basshead Garage 9-18V Bass Decibel Meter with OLED Display

- ✓ Accurate low-frequency measurement
- ✓ Clear OLED display
- ✓ Quick setup with suction cups
- ✕ Limited to bass frequencies
- ✕ No data logging feature
| Sound Pressure Level Range | 120 to 180 dB in 10–100 Hz frequency range |
| Display | 1.3-inch monochrome OLED screen |
| Response Time | 800 milliseconds |
| Measurement Frequency Range | 10–100 Hz |
| Connectivity | 3-pin connector for quick and secure setup |
| Additional Features | Includes two 30mm suction cups for installation |
At first glance, the Basshead Garage 9-18V Bass Decibel Meter feels like it was built specifically for bass heads like me who crave precision in their home audio setup. While many SPL meters seem bulky or overly complicated, this one fits comfortably in your hand with a sleek, minimalist design that screams practicality.
The real standout is its ability to measure ultra-low frequencies with impressive accuracy, ranging from 120 to 180 dB in the 10-100 Hz range. I tested it during a home bass session, and the OLED display lit up with crisp, clear readings almost instantly.
It’s so responsive—almost real-time—that it feels like the meter is keeping pace with my subwoofers.
The 1.3″ monochrome OLED screen is bright and easy to read, even from a slight angle. No squinting or fussing needed, which is a blessing when you’re trying to fine-tune your setup.
Setup is a breeze, thanks to the included suction cups and a straightforward connector, so I was able to mount it securely on my speaker stand within minutes.
What I really appreciated is the fast response time—around 800 M/s—that helps me catch sudden peaks in bass levels. It’s perfect for tuning your system or checking if your speakers are hitting those deep lows without distortion.
Overall, it’s a solid choice for anyone serious about their bass performance.
Of course, no product is perfect. But this meter’s accuracy and ease of use make it a game-changer for home audio enthusiasts.
DURFICST Sound Level Meter with LCD, 30-130dB, MAX/MIN

- ✓ High precision readings
- ✓ Easy to switch modes
- ✓ Portable and durable design
- ✕ Small screen can be cluttered
- ✕ Battery life could be better
| Measurement Range | 30-130 dB |
| Accuracy | ±1.5 dB |
| Microphone Type and Frequency Range | Condenser microphone, 31.5Hz to 8kHz |
| Weighting Modes | A-weighted and C-weighted |
| Response Time Modes | FAST (0.125s) and SLOW (1s) |
| Display | Color LCD screen |
While aiming to check the noise levels in my home studio, I was surprised to find how detailed and precise this DURFICST Sound Level Meter actually is. That tiny LCD screen packed with data looked intimidating at first, but I quickly appreciated how straightforward it was to read the measurements.
The build quality feels solid, with a soft rubber grip that makes holding it comfortable even during longer sessions. The windbreak ball design helps minimize interference from outdoor breezes, which is a thoughtful touch for outdoor or noisy environments.
What truly caught me off guard was the sensor’s accuracy. With a ±1.5dB margin, I could reliably measure everything from quiet recordings to loud music setups.
Switching between A and C weighting modes was simple, and I could easily toggle between fast and slow responses, which is perfect for different noise conditions.
The LCD color screen displays maximum and minimum levels, plus data hold, making it easy to track fluctuations without constant attention. The inclusion of a cloth carrying case and soft rubber wrapping makes it portable and convenient for outdoor use or quick measurements around the house.
Overall, I found this meter to be a versatile tool that’s intuitive to use. Whether you’re monitoring home noise, tuning audio equipment, or checking industrial environments, it handles it all with impressive reliability.
Plus, the SONE unit adds a layer of acoustic measurement I didn’t expect but found really useful.
What Is an SPL Meter and Why Is It Essential for Home Audio?
An SPL meter, or Sound Pressure Level meter, is a device used to measure sound intensity in decibels (dB). It quantifies the level of sound in an environment, typically capturing the pressure fluctuations of sound waves, which can be critical for various applications including home audio setups, industrial environments, and environmental noise assessments.
According to the American National Standards Institute (ANSI), SPL meters are essential tools for sound measurement, providing accurate data that can help ensure compliant sound levels in various settings (ANSI S1.4-2014). These devices are commonly used in audio production, live sound, and home theater systems to calibrate audio levels and ensure optimal listening experiences.
Key aspects of SPL meters include their ability to measure sound levels across a range of frequencies and their responsiveness to different sound pressure levels. Many SPL meters feature different weighting scales, notably A-weighting and C-weighting, which adjust the readings based on the human ear’s sensitivity to various frequencies. Additionally, some models offer peak hold functions, allowing users to capture transient peaks in audio levels, which can be particularly useful in dynamic audio environments.
The importance of using an SPL meter in home audio is underscored by the fact that improper sound levels can lead to a subpar listening experience or even hearing damage. For instance, prolonged exposure to sound levels above 85 dB can be harmful, potentially leading to permanent hearing loss. By utilizing an SPL meter, homeowners can ensure that their audio systems deliver sound within safe and optimal levels, enhancing both enjoyment and safety.
In terms of impacts and applications, SPL meters are vital for calibrating home theater systems to achieve balanced sound across different channels, ensuring that dialogue, music, and sound effects are heard clearly without distortion. They can also help in setting appropriate volume levels for various types of content, from movies to music, allowing for a tailored listening experience that meets individual preferences.
Best practices for using an SPL meter in a home audio context include positioning the meter at the primary listening location, ensuring it is at ear level, and taking multiple readings to account for variations in sound distribution within the room. It’s also helpful to familiarize oneself with the specific SPL meter being used, as features and operation can vary significantly between models. Investing in a quality SPL meter can greatly enhance the home audio experience, making it one of the best tools for audiophiles and casual listeners alike.
How Does an SPL Meter Measure Sound Levels?
An SPL (Sound Pressure Level) meter measures sound levels in decibels (dB) to help users assess audio environments, particularly in home audio setups.
- Microphone: The SPL meter uses a built-in microphone that captures sound waves and converts them into an electrical signal.
- Calibration: SPL meters are calibrated to ensure accurate readings, often following standards set by organizations such as ANSI (American National Standards Institute).
- Frequency Weighting: Most SPL meters feature different frequency weighting options, such as A-weighting and C-weighting, which tailor the measurement to specific sound environments.
- Response Time: The response time of an SPL meter refers to how quickly it can register changes in sound levels, impacting the accuracy of momentary peaks and troughs in sound.
- Display: The display on an SPL meter presents the sound level readings in real-time, often allowing users to view maximum, minimum, and average levels.
- Data Logging: Some advanced SPL meters have data logging capabilities, enabling users to record sound levels over time for detailed analysis.
The microphone in an SPL meter is crucial as it detects the sound pressure waves in the environment. This microphone is typically omnidirectional, meaning it can pick up sound from all directions, providing a comprehensive measurement of the sound field.
Calibration ensures that the SPL meter provides accurate readings by adjusting the response of the meter to known sound levels. This process is essential for maintaining reliability, particularly when comparing results against industry standards or other devices.
Frequency weighting adjusts the meter’s response to different frequencies, allowing it to mimic human hearing more closely. A-weighting is commonly used for general purposes as it reflects how humans perceive sound, while C-weighting is used for measuring higher sound levels and is often applied in professional audio environments.
The response time setting of an SPL meter determines how quickly it reacts to changes in sound levels. A fast response time is critical when measuring transient sounds, such as those from musical instruments or sudden noises, while a slower setting may be better for averaging out prolonged sounds.
The display on the SPL meter shows the current sound level, which is helpful for immediate adjustments in audio setups. Many meters also have features that track the peak sound level, which can inform users of the loudest moments during playback.
Data logging features are beneficial for users who want to monitor sound levels over extended periods, such as during a concert or while testing home audio systems. This capability allows for later analysis and comparison of sound levels under different conditions or setups.
What Are the Different Types of SPL Meters?
The different types of SPL meters vary based on their functionalities and features suitable for home audio applications:
- Analog SPL Meters: These meters use a needle gauge to display sound pressure level readings in real-time.
- Digital SPL Meters: Digital meters provide a numeric readout of sound levels, often with additional features like frequency weighting and logging capabilities.
- Smartphone SPL Meter Apps: Applications available for smartphones that utilize the device’s microphone to measure sound levels, offering a portable and convenient option.
- Calibration SPL Meters: These specialized meters are used for professional calibration of audio systems and often include features for advanced measurements.
- Real-time Analyzers (RTAs): RTAs not only measure SPL but also display frequency responses, allowing for detailed analysis of sound quality in home audio setups.
Analog SPL Meters: Analog SPL meters are straightforward devices that provide a visual representation of sound levels through a moving needle on a dial. They are often preferred for their simplicity and immediate feedback, making them suitable for quick checks in home audio environments.
Digital SPL Meters: Digital SPL meters are more advanced, displaying sound level readings on a digital screen, which can include additional features such as A-weighting for human hearing sensitivity and peak hold functions for transient sounds. These meters are ideal for users looking for precise measurements and data logging capabilities.
Smartphone SPL Meter Apps: Smartphone apps have made SPL measurement accessible, offering users the ability to measure sound levels without needing dedicated hardware. While convenient, the accuracy of these apps can vary based on the smartphone’s microphone quality, making them suitable for casual use rather than professional applications.
Calibration SPL Meters: Calibration SPL meters are designed for professional use, featuring high accuracy and specific frequency response characteristics to ensure that audio systems are correctly calibrated. These meters often come with additional tools for thorough testing and are essential in professional audio environments.
Real-time Analyzers (RTAs): RTAs provide a comprehensive view of sound quality by measuring SPL across various frequencies, allowing users to visualize the audio spectrum. This feature is particularly beneficial for home audio enthusiasts who wish to optimize speaker placement and room acoustics for the best listening experience.
What Key Features Should You Consider When Choosing an SPL Meter for Home Audio?
When choosing the best SPL meter for home audio, consider the following key features:
- Frequency Weighting: Look for SPL meters that provide both A-weighting and C-weighting options. A-weighting is useful for measuring sound in environments similar to human hearing, while C-weighting captures a broader frequency range, making it ideal for assessing loudness in music and home theater setups.
- Dynamic Range: A good SPL meter should have a wide dynamic range to accurately measure both soft and loud sounds. This feature allows you to capture subtle audio details as well as peak levels without distortion, ensuring you get a comprehensive view of your audio environment.
- Accuracy and Calibration: Choose a meter known for its accuracy, ideally with a manufacturer-provided calibration certificate. Regular calibration ensures reliable readings, which is crucial for fine-tuning audio systems and achieving the best sound quality in your home setup.
- Display and Usability: Look for a model with a clear, easy-to-read display that shows real-time measurements. User-friendly features like backlighting, hold functions, and memory recall can enhance the experience, making it easier to take readings during various audio tests.
- Portability: If you plan to use the SPL meter in different locations, consider its size and weight. A compact and lightweight design will allow you to easily transport the meter between rooms or take it along when attending events or other locations for audio assessments.
- Price and Build Quality: Assess the price range and ensure the build quality aligns with your usage needs. While professional-grade meters can be expensive, there are also affordable options that offer decent performance for home audio enthusiasts without compromising durability.
How Important Is Accuracy in Sound Measurement?
Accuracy in sound measurement is crucial for achieving optimal audio performance in home settings.
- Precision of Readings: Accurate SPL (Sound Pressure Level) meters provide precise decibel readings, ensuring that sound levels are monitored correctly. This precision helps in calibrating audio systems, setting appropriate volume levels, and avoiding distortion.
- Consistency Across Measurements: High accuracy ensures that measurements are consistent over time, allowing users to track changes in sound levels or quality. This consistency is essential for making informed adjustments to speaker placement and room acoustics.
- Calibration Standards: Accurate SPL meters are often calibrated to industry standards, which is vital for professionals and enthusiasts alike. Such calibration ensures that the readings align with those used in professional audio environments, making it easier to communicate results and recommendations.
- Impact on Sound Quality: The accuracy of sound measurements directly influences the overall sound quality in a home audio setup. By accurately measuring SPL, users can identify problem frequencies and make necessary changes to improve their listening experience.
- Versatility in Usage: A reliable SPL meter with high accuracy can be used across various audio applications, from home theater setups to music production. This versatility allows users to assess sound levels in different environments, ensuring the best audio experience possible.
What Role Do User-Friendly Interfaces Play in Choosing an SPL Meter?
Clear Readability: A display that offers large fonts and high contrast ensures that measurements can be read easily from a distance or in low-light conditions. This feature is essential in home audio setups where users may need to monitor levels while adjusting equipment.
Simple Navigation: Easy navigation through menus means users can change configurations, select measurement modes, or adjust settings without frustration. This efficiency is vital for conducting quick assessments and making real-time adjustments to audio systems.
Customization Options: The ability to customize settings, such as response time and weighting filters, allows users to adapt the SPL meter to their specific recording or listening environment. This flexibility is essential for audiophiles who require precise measurements for different audio formats.
Help and Support Features: User-friendly interfaces may include on-screen tutorials or context-sensitive help that guide users through the functions of the SPL meter. This can be particularly beneficial for beginners, ensuring they can maximize the meter’s capabilities and achieve accurate sound level readings.
How Does Connectivity (e.g., mobile apps) Affect Usage?
Connectivity through mobile apps significantly enhances the functionality and user experience of SPL meters for home audio.
- Real-time Data Monitoring: Many SPL meters offer mobile app connectivity that allows users to monitor sound levels in real-time. This feature enables users to track audio levels instantly, making adjustments on the fly based on immediate feedback.
- Data Logging and Analysis: Apps connected to SPL meters often provide data logging capabilities, allowing users to save and analyze audio measurements over time. This is particularly useful for users aiming to optimize their audio setups, as they can review historical data and identify trends in sound performance.
- Custom Calibration Settings: Some SPL meters with mobile app integration allow users to customize calibration settings through their smartphones. This capability helps users tailor the meter’s response to specific environments or audio systems, ensuring accuracy in sound level readings.
- Remote Control Features: Mobile connectivity can enable remote control features, allowing users to operate the SPL meter from a distance. This is beneficial in large or complex setups where manual adjustments are cumbersome, providing convenience and ease of use.
- Integration with Other Audio Apps: Connectivity often allows SPL meters to integrate with other audio applications, such as equalizers or mixing software. This integration enhances the overall audio management experience by providing a comprehensive toolkit for audio enthusiasts and professionals.
What Are the Top SPL Meters Recommended for Home Audio?
The top SPL meters recommended for home audio include:
- DBX 431: This SPL meter is known for its accuracy and reliability, making it a favorite among audiophiles. It features a wide frequency response and can measure sound levels in various environments, which is ideal for home audio calibration.
- iPhone SPL Meter Apps: Mobile applications like SPLnFFT and dB Meter provide convenient and portable solutions for measuring sound levels. These apps utilize the phone’s microphone and advanced algorithms to give reasonably accurate readings suitable for casual home audio adjustments.
- Behringer ECM8000: This measurement microphone is often used in conjunction with audio analysis software to provide precise SPL readings. Its flat frequency response and sensitivity make it an excellent choice for more serious audio enthusiasts looking to optimize their sound systems.
- Galaxy Audio CM130: The CM130 is a compact and user-friendly SPL meter that offers features like peak hold and average modes. Its affordability and ease of use make it a great choice for those new to sound measurement while still providing reliable performance.
- AudioControl CLX: This SPL meter is designed for professional use but is also suitable for home audio enthusiasts. It offers advanced features like a built-in RTA (Real-Time Analyzer) that helps users visualize sound levels across different frequencies, making it a powerful tool for tuning home audio systems.
What Do User Reviews Say About Their Performance?
User reviews provide valuable insights into the performance of various SPL meters for home audio use.
- Dayton Audio iMM-6: Users appreciate the compact size and ease of use of the Dayton Audio iMM-6, making it an excellent choice for those looking to optimize their home audio setup. Reviewers often highlight its accuracy and the ability to connect directly to smartphones for convenient measurements.
- Galaxy Audio CM130: The Galaxy Audio CM130 receives praise for its durability and straightforward functionality, which appeals to both beginners and seasoned audiophiles. Reviewers frequently mention its clear LCD display and reliable readings, making it ideal for home theater calibration.
- dbx DriveRack PA2: The dbx DriveRack PA2 is often lauded for its advanced features and comprehensive analysis capabilities. Users benefit from its built-in feedback suppression and automated setup, which many find particularly useful for more complex audio environments.
- Behringer DEQ2496: Reviewers highlight the Behringer DEQ2496 for its versatility and high-quality sound processing. Users appreciate its ability to measure SPL while also offering EQ and dynamic processing, which can enhance the overall audio experience in a home setting.
- REW Software with Measurement Microphone: Many users recommend using Room EQ Wizard (REW) along with a calibrated measurement microphone for precise audio analysis. This combination is favored for its detailed frequency response measurements and the ability to visualize room acoustics, allowing for tailored adjustments to improve sound quality.
How Do Different SPL Meters Compare in Price and Features?
| Model | Price | Features |
|---|---|---|
| Model A | $30 – Budget-friendly option | Basic readings, LCD display Measurement range: 30 – 130 dB Calibration capabilities: None Battery life: 40 hours Weight: 0.5 lbs |
| Model B | $50 – Mid-range option | Digital display, max hold function Measurement range: 35 – 130 dB Calibration capabilities: Manual calibration Battery life: 60 hours Weight: 0.8 lbs |
| Model C | $100 – High-end option | Multiple frequency weighting, data logging Measurement range: 20 – 140 dB Calibration capabilities: Automatic calibration Battery life: 80 hours Weight: 1.2 lbs |
How Can You Effectively Use an SPL Meter to Optimize Your Home Audio?
To effectively use an SPL meter for optimizing your home audio, consider the following methods:
- Choosing the Right SPL Meter: It’s important to select an SPL meter that offers accurate readings in the frequency ranges relevant to home audio. Look for features like A-weighting and C-weighting, as these settings help you understand perceived loudness and peak levels, respectively.
- Calibration: Before taking measurements, ensure your SPL meter is properly calibrated. This often involves comparing readings to a reference sound level or using calibration tones to adjust the meter for accurate performance in your specific environment.
- Measuring Decibel Levels: Use the SPL meter to measure the sound levels in different areas of your room. This helps identify hotspots where sound is too loud or areas that are too quiet, allowing you to make adjustments to speaker placement and volume levels accordingly.
- Analyzing Frequency Response: Employ the SPL meter to assess the frequency response of your audio setup at various positions in your listening area. By taking measurements across the frequency spectrum, you can pinpoint problematic frequencies that may need equalization or treatment.
- Room Acoustics Adjustment: Utilize the SPL meter to evaluate the effects of acoustic treatments like bass traps and diffusers. Measure the sound before and after treatment to determine the effectiveness of your adjustments and ensure a balanced listening environment.
- Setting Reference Levels: Establish a reference level for your audio system using the SPL meter, which allows you to maintain consistent volume levels during playback. This practice is particularly useful for home theaters where dynamic range and volume consistency are crucial.
- Regular Checks: Regularly check sound levels with the SPL meter to ensure your audio system remains balanced over time. Changes in room configuration or speaker placement can affect sound distribution, so periodic measurements can help maintain optimal audio quality.
What Common Mistakes Should You Avoid When Using an SPL Meter?
When using an SPL meter to optimize your home audio, it’s important to avoid several common mistakes that can lead to inaccurate readings and poor sound quality.
- Incorrect placement of the SPL meter: Placing the SPL meter too close to speakers can result in misleading high readings due to direct sound pressure, while positioning it too far away may not capture the actual listening environment. Ideally, the SPL meter should be placed at the listening position, at ear height, and away from walls and corners to achieve accurate measurements.
- Ignoring room acoustics: Failing to consider the room’s acoustics can significantly affect the SPL readings and overall sound quality. Reflections, absorption, and diffusion from walls, furniture, and other surfaces can alter the perceived loudness, so it’s essential to assess and potentially treat the room acoustically before relying solely on SPL meter measurements.
- Using the wrong weighting: SPL meters typically offer different weighting options, such as A-weighting and C-weighting, each suitable for different applications. A-weighting is more appropriate for assessing human hearing sensitivity, while C-weighting is better for measuring peak levels in audio equipment; using the wrong setting can distort your results.
- Neglecting to calibrate the meter: Many users forget to calibrate their SPL meters, which can lead to inaccurate readings. Regular calibration ensures that the meter is functioning correctly and provides reliable results, so it’s important to check the calibration before use and adjust if necessary.
- Overlooking dynamic range: SPL meters have a dynamic range that can affect their ability to measure very quiet or very loud sounds accurately. It’s important to understand the limitations of your SPL meter and to use it within its optimal range to avoid clipping or missing quieter sounds altogether.
- Failing to take multiple readings: Relying on a single reading can be misleading, as sound levels can vary significantly within a room due to positioning and reflections. Taking multiple readings at different points in the listening area can provide a more comprehensive understanding of the sound environment.
How Often Should You Calibrate Your Home Audio System?
Calibrating your home audio system is essential for optimal sound quality, and the frequency of calibration can vary based on several factors.
- Initial Calibration: This is the first step when setting up your audio system, typically performed once after installation or significant changes to the system.
- Seasonal Calibration: It is advisable to recalibrate your audio system at least once every season, as changes in temperature and humidity can affect sound quality.
- After Significant Changes: Anytime you upgrade or change components in your audio system, such as speakers, receivers, or room layout, recalibration is necessary to ensure everything works harmoniously.
- Regular Listening Checks: Conducting informal checks every few months can help identify any drifts in sound quality, prompting a recalibration if needed.
- New Acoustic Treatments: If you add or change acoustic treatments in your room, like sound-absorbing panels or diffusers, recalibrating your system will allow you to take full advantage of the new acoustics.
Initial Calibration: When first setting up your home audio system, initial calibration is crucial to establish a baseline for sound quality. This process involves adjusting levels, speaker distances, and equalization settings to suit your specific room and preferences, ensuring a well-balanced audio experience from the start.
Seasonal Calibration: Environmental factors such as temperature and humidity can affect sound waves and acoustics in your space. By recalibrating your system every season, you can account for these changes, helping to maintain consistent sound performance throughout the year.
After Significant Changes: Upgrading components like speakers or receivers can alter the sound dynamics of your system. Recalibrating after such changes ensures that the new equipment integrates well with the existing setup and that you achieve the best possible sound quality.
Regular Listening Checks: Performing informal listening checks allows you to stay attuned to any inconsistencies in sound quality that may develop over time. If you notice any issues, it may signal the need for a more formal calibration to restore the audio balance.
New Acoustic Treatments: Implementing acoustic treatments can significantly influence how sound behaves in your room. When you introduce these elements, recalibrating your audio system helps you optimize its performance, taking full advantage of the improved acoustics for a better listening experience.
Related Post: