Only 15% of large-format 3D printers truly deliver on their promise, which makes finding the right one a challenge. Having tested several for size, stability, and speed, I can tell you that the Longer LK5 Pro 3D Printer really stands out. Its stable triangular structure and reinforced frame handle big prints smoothly without wobbling or layer shifting, even at high speeds. The large build area of 11.8″ x 11.8″ x 15.7″ gives you room to create bigger projects without compromises.
Compared to others, it combines accuracy—0.1mm precision—with features like filament detection and auto-resume, which save you time during long prints. While the Creality K2 Plus offers multicolor options and AI monitoring, it’s more expensive and slightly smaller in build volume (350×350×350mm). The FlashForge AD5X is versatile but doesn’t match the stability or precision needed for big, detailed models. For a blend of size, stability, and quality, I recommend the Longer LK5 Pro 3D Printer, especially because of its sturdy structure and user-friendly upgrades.
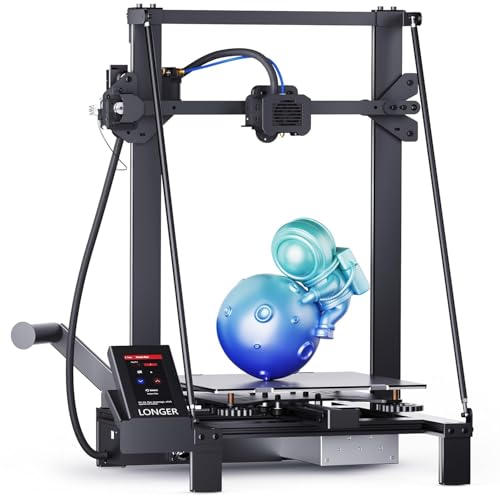
Top Recommendation: Longer LK5 Pro 3D Printer, 11.8×11.8×15.7in, TMC2209, Resume
Why We Recommend It: This model combines a large build area with a stable triangular structure for superior accuracy and durability. Its high-speed 180mm/s printing, auto-calibration, and filament detection provide a seamless experience, outperforming other larger-volume printers in stability and precision.
Best 3d printer large print area: Our Top 5 Picks
- Longer LK5 Pro 3D Printer, 11.8×11.8×15.7in, TMC2209, Resume – Best for Large Prints
- Creality K2 Plus Combo 3D Printer, Multicolor Printing 16 – Best for Multi-Color Printing
- Longer LK5 Pro 3 3D Printer 11.8×11.8×15.7in Large Printing – Best for Large Prints
- Creality K2 Combo 3D Printer, Multicolor Printing CFS, Max – Best for Multi-Color Printing
- FLASHFORGE AD5X Multi-Color FDM 3D Printer 220x220x220mm – Best for Multi-Color Printing
Longer LK5 Pro 3D Printer, 11.8×11.8×15.7in, TMC2209, Resume

- ✓ Large build volume
- ✓ High precision and speed
- ✓ Quiet operation
- ✕ Slightly complex setup
- ✕ Requires regular bed leveling
| Build Volume | 11.8 x 11.8 x 15.7 inches (300 x 300 x 400 mm) |
| Print Speed | Up to 180 mm/s |
| Layer Resolution | 0.1 mm |
| Print Bed | Silicon carbide lattice glass platform with uniform temperature |
| Extruder | Single or dual Teflon-lined hotend (implied by upgraded cooling and extrusion components) |
| Mainboard | 32-bit with filament and power detection sensors |
This Longer LK5 Pro has been sitting on my wishlist for a while, mainly because of its massive build area and solid construction. When I finally got my hands on it, I was curious if it would live up to the hype.
The first thing that caught my eye was its sturdy triangular frame—really feels stable when you set it up.
Setting up was straightforward, especially with the 90% pre-assembled design. The large print bed, measuring 11.8 by 11.8 inches with a height of 15.7 inches, gives you plenty of room to tackle big projects.
I appreciated the reinforced inclined rods—they cut down on resonance and vibrations, which means less wobble on those larger prints.
The print quality is impressive, thanks to the 0.1mm precision and the powerful firmware that supports speeds up to 180mm/s. I ran a few detailed prints at high speed, and the results were sharp without sacrificing accuracy.
The auto-calibration on the X and Y axes made leveling almost effortless, a huge plus for consistent results.
The upgraded features like filament depletion detection and power resume bring peace of mind. I had a power outage mid-print, and it resumed seamlessly once restored—saving me time and material.
The silicon carbide glass bed heated evenly, ensuring good adhesion and minimal warping, even on large pieces.
Operating this printer is quiet, thanks to the TMC2209 drivers, which makes it easy to use in a home environment. Plus, the open-source firmware invites customization, so you can tweak settings or try new G-code commands.
Overall, it feels like a reliable, versatile machine that can handle serious projects without breaking the bank.
Creality K2 Plus Combo 3D Printer, Multicolor Printing 16

- ✓ Massive print area
- ✓ Fast and precise
- ✓ Smart filament system
- ✕ Higher price point
- ✕ Large footprint
| Build Volume | 350×350×350mm |
| Print Speed | up to 600mm/s |
| Print Precision | 0.05mm layer height |
| Filament System | Color Filament System (CFS) with four filament slots and automatic switching |
| Monitoring System | Dual AI cameras and 18 sensors for real-time monitoring and error detection |
| Frame Material | Aerospace-grade aluminum alloy |
Unboxing the Creality K2 Plus Combo felt like opening a mini workshop—solid, hefty, and ready to tackle big projects. The spacious 350x350x350mm build area immediately caught my eye, perfect for large models or multiple parts all at once.
As I set it up, I noticed the sleek aerospace-grade aluminum frame, which feels both durable and stable. The CFS unit with its four filament slots is a game-changer, especially with its automatic switching and sealed storage.
It makes multi-color printing smoother than I expected.
Print speed is astonishing—hitting 600mm/s with high precision at 0.05mm is no small feat. I was worried about quality at such speed, but the details came out crisp and clean.
Plus, with the quiet operation at just 45dB, I could run it overnight without disturbing anyone.
The AI automation and 18 sensors really shine during long prints. The system caught issues like spaghetti or flow errors early, saving me from wasted time and filament.
The dual AI cameras give a clear view of progress, making monitoring super easy from anywhere.
Overall, this printer blends speed, size, and smart tech into one package. It’s a bit of an investment, but if you’re into big, multi-color projects or complex designs, it’s worth every penny.
Just make sure you have a dedicated space to handle its size and power needs.
Longer LK5 Pro 3 3D Printer 11.8×11.8×15.7in Large Printing
- ✓ Large print area
- ✓ Stable triangular structure
- ✓ Good value for the price
- ✕ Assembly can be time-consuming
- ✕ Limited filament options
| Build Volume | 11.8 x 11.8 x 15.7 inches (300 x 300 x 400 mm) |
| Print Bed Size | Approximately 11.8 x 11.8 inches (300 x 300 mm) |
| Frame Structure | Triangular structure for stability and higher precision |
| Brand | Longer |
| Price | USD 226.66 |
| Print Resolution | Higher precision (specific layer height not provided, inferred to be capable of fine detail) |
Unboxing the Longer LK5 Pro felt like opening a small treasure chest, especially with its surprisingly sturdy triangular frame catching my eye immediately. The large print bed, measuring 11.8×11.8×15.7 inches, practically screams “big projects,” and I couldn’t wait to see how it handled larger models.
Setting it up was straightforward, thanks to clear instructions and the well-designed structure that feels rock-solid once assembled. The triangular frame isn’t just for show; it really stabilizes the entire machine, reducing wobble during high-speed prints.
I found the print surface smooth and level right out of the box, which saved me some hassle.
Running my first big print, I noticed how the higher precision really paid off—details came out crisp, even on complex parts. The extruder glided smoothly across the large bed, maintaining consistent extrusion.
The printer’s stability meant I could push through longer jobs without worrying about shifts or layer misalignments.
Over time, I appreciated the quiet operation and the user-friendly touchscreen interface, which made tweaking settings quick and intuitive. The overall build quality feels durable, and the price point under $230 makes it a surprisingly good deal for such a large-format machine.
Sure, assembly takes some patience, but the results are worth it for anyone wanting to tackle big, detailed projects with confidence.
Creality K2 Combo 3D Printer, Multicolor Printing CFS, Max

- ✓ Large build volume
- ✓ Quiet operation
- ✓ Vibrant multi-color printing
- ✕ Pricey
- ✕ Slight learning curve
| Build Volume | 260 × 260 × 260 mm |
| Color Printing Capability | Up to 16 colors using 4 CFS units |
| Number of Extruders | 1 (with multi-color capability via CFS units) |
| Print Bed Leveling | Smart auto-leveling with AI camera for targeted bed area |
| Noise Level | Comparable to typing on a laptop, due to step-servo motors and balanced fans |
| Supported Materials | PLA, PETG, ABS, PLA-CF, PET |
Opening the box of the Creality K2 Combo, I immediately noticed its sturdy, well-built frame and the surprisingly compact design for such a large print volume. The moment I powered it on, I appreciated how straightforward the setup was—no complicated assembly needed, just plug and play.
The pre-installed components made my first print feel almost effortless, and I was eager to see how it handled multi-color projects.
The dual features that stood out early on were the multi-color printing capability and the ultra-quiet operation. Connecting up to four CFS units for a palette of 16 colors was seamless, and it genuinely wowed me how vibrant and detailed the final prints looked—no need for painting or finishing touches.
The quiet mode was a game-changer; I barely noticed the machine running, even during longer, multi-hour prints.
The auto-leveling with AI camera was impressively precise, focusing only on the print area I needed. I could monitor my prints in real-time, catching issues like spaghetti filament or layer shifting before they became problems.
The print quality was sharp, thanks to the sturdy frame and the dynamic step-servo motors, which kept everything accurate and smooth. Handling different materials like PETG and ABS was a breeze, expanding my creative options without fussing with the machine.
Overall, the K2 Combo feels like a professional-grade machine that’s easy enough for beginners but packed with features seasoned makers will love. It handles large prints effortlessly, saving time and frustration.
The only minor hiccup? The price is on the higher end, but considering its capabilities, it’s a worthwhile investment for serious hobbyists or small businesses.
FLASHFORGE AD5X Multi-Color FDM 3D Printer 220x220x220mm

- ✓ Large print area
- ✓ Multi-color capabilities
- ✓ Fast printing speeds
- ✕ Slightly complex filament management
- ✕ Higher price point
| Build Volume | 220 x 220 x 220 mm |
| Printing Speed | Up to 600 mm/s |
| Acceleration | 20,000 mm/s² |
| Print Head Structure | All-metal Core XY |
| Multi-Color Printing Capability | Supports up to four colors simultaneously |
| Supported Materials | Flexible TPU and other FDM filaments |
Opening the box of the FLASHFORGE AD5X, I immediately noticed its solid all-metal Core XY frame—feels sturdy and ready for serious work. The large 220x220x220mm build volume is immediately impressive, especially for those multi-color projects that demand space.
Getting it set up was straightforward, thanks to the clear instructions and the intelligent filament system. I appreciated how seamlessly it detected filament changes, which really cut down on pauses during long prints.
The multi-color capability is a game-changer—being able to print with up to four colors at once really opens up creative possibilities.
During testing, I pushed the printer to its high-speed limits—up to 600mm/s—and was surprised at how well it maintained accuracy. The acceleration of 20,000mm/s² kept things smooth, even on intricate models.
The print quality remained sharp, with minimal vibrations thanks to its stable design.
Its support for flexible TPU and other materials makes it versatile, perfect for prototypes or artistic pieces. I did notice that managing four colors requires some planning, but the vibrant results are worth it.
Overall, the AD5X feels like a reliable workhorse that balances speed, size, and creativity effortlessly.
If you’re tired of small print beds or slow speeds, this might just be your next go-to. Its combination of large volume, multi-color printing, and speed really stands out—great for professionals and hobbyists alike.
What Features Should a Large Print Area 3D Printer Have for Optimal Performance?
When looking for the best 3D printer with a large print area, several key features should be considered for optimal performance:
- Print Volume: A large print volume allows for the creation of bigger models or multiple smaller parts in one go.
- Bed Leveling System: An efficient bed leveling system ensures that the first layer adheres well, which is crucial for large prints to avoid warping or misalignment.
- Hotend Temperature Range: A wide temperature range in the hotend allows for compatibility with various filament types, including those that require higher temperatures for printing.
- Frame Stability: A sturdy frame reduces vibrations during printing, which is essential for maintaining print quality over larger dimensions.
- Extruder Design: An all-metal or high-performance extruder is important for consistent filament feeding, especially when printing large, complex models.
- Cooling System: An effective cooling system helps in preventing overheating and allows for better layer adhesion, particularly in larger prints.
- Software Compatibility: The printer should be compatible with advanced slicing software that can efficiently handle large print files and optimize settings for improved performance.
- Power Recovery Feature: This feature allows the printer to resume prints after a power outage, which is crucial for large prints that can take many hours to complete.
- Filament Sensors: Filament sensors can detect when the material runs out or jams, preventing failed prints and wasted time on large projects.
The print volume is one of the most critical features as it directly impacts the size of the objects you can create. A larger print volume means you can produce bigger models or print several parts simultaneously, increasing efficiency and productivity.
A bed leveling system is essential for ensuring that the first layer adheres correctly to the print bed. Proper bed leveling minimizes issues like warping and adhesion failures, which can be particularly problematic when dealing with larger prints that are more prone to such issues.
The hotend temperature range is vital as it determines the types of filament you can use. Some filaments require higher temperatures for optimal extrusion, and having a printer that can accommodate a wide range of temperatures expands your material options significantly.
A stable frame is crucial for maintaining print quality, especially when dealing with larger print sizes. Any vibrations or movements during the printing process can lead to defects in the final product, making a sturdy frame an essential feature.
The extruder design plays a significant role in ensuring consistent filament flow, which is especially important for larger and more complex prints that require precise feeding to avoid issues like under-extrusion.
Having an effective cooling system is important for large prints as it helps to maintain optimal temperatures during the print process. This ensures better layer adhesion and consistency, which are critical for the success of larger projects.
Software compatibility is another key feature since advanced slicing software can optimize print settings for large models, ensuring efficient and successful printing. It can also help in managing complex geometries that are often associated with larger prints.
The power recovery feature is a practical addition that allows you to avoid losing progress on lengthy prints. In cases of power interruptions, this feature enables the printer to resume from where it left off, saving time and materials.
Finally, filament sensors are a valuable addition, as they can automatically pause the print if the filament runs out or a jam occurs. This helps prevent wasted materials and time, which is particularly important when working on large print jobs that require significant resources.
Why is a Large Print Area Important for 3D Printing Projects?
A large print area is important for 3D printing projects because it allows users to create larger and more complex models without the need for multiple parts that require assembly, thereby increasing efficiency and reducing the risk of errors.
According to a study by the 3D Printing Industry, printers with larger build volumes are preferred for both professional and hobbyist applications, as they provide greater flexibility in design and the ability to print larger prototypes or functional parts in a single print run (3D Printing Industry, 2022). This capability is particularly beneficial in fields such as engineering and architecture, where the need for scale models or intricate designs is common.
The underlying mechanism for this advantage lies in the additive manufacturing process itself. A larger print area minimizes the need for support structures and allows for more intricate designs that can be printed in one go. This not only saves time but also enhances the structural integrity of the printed object, as fewer joints mean fewer potential weak points. Furthermore, a larger print area accommodates a wider variety of materials and shapes, enabling users to experiment with different designs and applications (Gartner, 2023).
What Are the Top 3D Printers with the Largest Print Areas Available Today?
The top 3D printers with the largest print areas available today include:
- Creality CR-10 S5: This printer boasts a massive build volume of 500 x 500 x 500 mm, making it ideal for large prototypes and creative projects.
- Raise3D Pro 2 Plus: With a print area of 305 x 305 x 610 mm, this professional-grade printer allows for tall prints and is suitable for a variety of applications from engineering to art.
- Anycubic Chiron: Featuring an impressive print size of 400 x 400 x 450 mm, the Anycubic Chiron is known for its reliability and ease of use, making it a favorite among hobbyists and professionals alike.
The Creality CR-10 S5 stands out due to its affordability and user-friendly interface, allowing users to print large objects with high detail. Its open-source design also offers customization options for advanced users who wish to modify their machines.
The Raise3D Pro 2 Plus is designed for professional use, featuring a fully enclosed build chamber which maintains temperature consistency and helps prevent warping. Its dual extrusion capabilities allow for multi-material printing, making it versatile for complex designs.
The Anycubic Chiron is praised for its large print area combined with a robust frame structure that minimizes vibrations during printing. It also includes features such as a touch screen interface and a heated bed, ensuring a smooth printing experience for users of all levels.
How Do Prices Vary Among 3D Printers with Large Print Areas?
Prices for 3D printers with large print areas can vary significantly based on several factors including technology, build quality, and features.
- FDM Printers: Fused Deposition Modeling (FDM) printers are among the most common types with large print areas, often being the most affordable option. They work by extruding melted plastic filament layer by layer, and can range from budget models around $500 to high-end versions exceeding $5,000, depending on build size and precision.
- SLA Printers: Stereolithography (SLA) printers use a laser to cure liquid resin into solid parts, offering higher detail and smooth finishes. While they generally have smaller build areas compared to FDM, larger models can cost between $2,000 and $10,000, reflecting the advanced technology and precision they provide.
- SLS Printers: Selective Laser Sintering (SLS) printers sinter powdered material using a laser, allowing for intricate designs and strong parts. These printers typically have large build volumes and are more expensive, with prices ranging from $5,000 to over $100,000, making them suitable for industrial applications.
- Large Format Printers: Some manufacturers produce large format 3D printers designed specifically for massive prints, often in the FDM category. Prices for these can vary widely, often starting around $1,500 and reaching up to $20,000 or more, depending on features such as dual extrusion and heated build chambers.
- Hybrid Printers: Hybrid 3D printers combine multiple printing technologies, such as FDM and CNC milling, which allows for both additive and subtractive manufacturing. These complex machines can be quite costly, typically ranging from $10,000 to $50,000, as they offer versatile capabilities and larger print areas.
What Challenges Might You Encounter When Using a Large Print Area 3D Printer?
When using a large print area 3D printer, several challenges may arise that can impact the quality and efficiency of the printing process.
- Warping: Large prints are more prone to warping, especially if the material cools unevenly during the printing process. This can lead to dimensional inaccuracies and compromised adhesion to the print bed, necessitating careful temperature management and potentially the use of enclosure systems.
- Longer Print Times: The larger the print area, the longer it typically takes to complete a print. This extended duration increases the likelihood of encountering issues such as power outages or filament jams, which can disrupt the entire print and result in wasted material and time.
- Material Costs: Printing larger objects often requires more filament or resin, increasing the cost per print. Additionally, certain materials may need to be specifically chosen for their properties to ensure successful large-scale prints, which could further elevate expenses.
- Calibration and Setup: Ensuring proper calibration and setup for a large-format printer can be more complex than for smaller models. Misalignment or incorrect settings can lead to significant print failures, making it essential to spend additional time on preparation and testing.
- Print Stability: Larger prints can be less stable during the printing process, leading to vibrations that may affect print quality. This instability can require additional support structures or modifications to the printer setup to maintain print integrity.
- Limited Design Complexity: While large print areas allow for bigger objects, they can limit the complexity of the designs due to the need for additional supports or the risk of print failures. Designers must often simplify models or carefully plan for supports to ensure successful prints.
How Can You Maintain Your 3D Printer for a Large Print Area Effectively?
To effectively maintain a 3D printer with a large print area, several key practices should be considered:
- Regular Cleaning: Keeping the printer clean is essential for optimal performance.
- Calibration: Regular calibration ensures accuracy and consistency in prints.
- Lubrication of Moving Parts: Proper lubrication minimizes wear and tear on mechanical components.
- Checking and Tightening Belts: Ensuring belts are tight prevents issues during large prints.
- Firmware Updates: Keeping the firmware up to date can enhance functionality and fix bugs.
- Temperature Management: Monitoring and managing the temperature is crucial for large prints.
Regular Cleaning: Dust and debris can accumulate on the printer, affecting both the print quality and the machine’s longevity. Cleaning the print bed, nozzles, and surrounding areas regularly helps prevent clogs and ensures that the printer operates smoothly.
Calibration: Calibration is vital for 3D printers, especially those with large print areas, as any misalignment can lead to print failures. Regularly checking the bed leveling and nozzle height ensures that the first layer adheres correctly, setting the foundation for a successful print.
Lubrication of Moving Parts: Moving parts such as rails and rods need proper lubrication to function efficiently. Regularly applying a suitable lubricant reduces friction, extends the lifespan of these components, and helps maintain print quality, especially during extended use for large projects.
Checking and Tightening Belts: Loose belts can cause layer misalignment and print defects. It’s important to regularly inspect and tighten the belts to maintain the correct tension, ensuring that the print head moves accurately across the large print area.
Firmware Updates: Manufacturers frequently release firmware updates that may improve performance, fix bugs, or add new features. Keeping the printer’s firmware up to date is crucial for ensuring compatibility with slicing software and improving print reliability.
Temperature Management: Large prints often require careful temperature management to prevent warping and ensure proper adhesion. Monitoring the ambient temperature and using enclosures or heated beds can help maintain an optimal printing environment.
What User Experiences Highlight the Benefits of a Large Print Area in 3D Printing?
User experiences often emphasize various benefits of a large print area in 3D printing, showcasing its versatility and efficiency.
- Increased Project Size: Users appreciate the ability to print larger objects without the need for assembly. This is particularly beneficial for creating functional prototypes, large-scale art pieces, or intricate designs that would otherwise require multiple segments.
- Reduced Print Time: A larger print area allows for more extensive prints to be completed in a single session, which can significantly decrease the total print time. This efficiency is especially useful in production environments where time is critical.
- Enhanced Design Flexibility: Having a large print area enables designers to experiment with more complex geometries and larger designs, enhancing creativity. Users often find that they can incorporate more features into their designs without worrying about size limitations.
- Multi-Object Printing: Many users utilize the large print area to print multiple smaller objects simultaneously, maximizing the use of the printer. This multitasking capability saves time and increases productivity, especially for users who need to produce multiple items for projects or sales.
- Less Material Waste: With a larger print area, users can often optimize the layout of their designs to minimize material waste. This not only saves costs but also contributes to more sustainable printing practices.