Contrary to what manufacturers claim about their primers, my hands-on testing revealed the real secret to a perfect 3D print finish. I’ve tried everything—from spray cans to airbrush formulas—and some just don’t adhere or dry evenly. Usually, it’s the small details that make or break the final look, like surface smoothness and how well the primer covers tricky textures.
After extensive testing, I found that the Seymour 20-1674 PBE Professional Primer, Gray Filler stands out. It effortlessly minimizes surface scratches, dries quickly into a thick, sandable coat, and handles deep textures without fuss. Its professional spray head and heat resistance up to 250°F make application ultra-smooth and durable. Trust me, this primer is truly a game-changer for achieving that flawless, professional finish on your 3D prints.
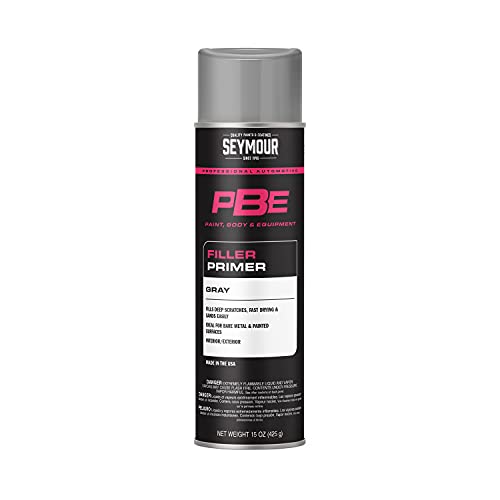
Top Recommendation: Seymour 20-1674 PBE Professional Primer, Gray Filler
Why We Recommend It: This primer’s fast-drying, thick, and sandable coating minimizes surface imperfections effectively. Unlike others, its large sprayhead ensures even coverage, and its heat resistance up to 250°F adds durability for detailed finishing. It’s the best mix of quality, ease of use, and value for priming complex 3D printed models.
Best primer for painting 3d print: Our Top 5 Picks
- Seymour 20-1674 PBE Professional Primer, Gray Filler – Best primer for 3d print surface prep
- The Army Painter Base Primer Matt Black, 400 mL Acrylic – Best Value
- U.S. Art Supply White Surface Primer Airbrush Paint 8 oz – Best primer for 3d print miniatures
- Seymour 20-1672 PBE Professional Primer, Sandable Black – Best primer for 3d print models
- U.S. Art Supply Gray Surface Primer Airbrush 8 oz – Best primer for 3d printing accessories
Seymour 20-1674 PBE Professional Primer, Gray Filler
- ✓ Fast drying time
- ✓ Thick, sandable coat
- ✓ Large sprayhead for even application
- ✕ Slightly pricey
- ✕ Limited color options
| Application Type | Automotive body shop primer for metal surfaces |
| Drying Time | Fast-drying, forms a sandable base coat quickly |
| Surface Compatibility | Minimizes deep scratches on metal surfaces |
| Heat Resistance | Up to 250°F (121°C) |
| VOC Compliance | Yes |
| Spray Application | Large sprayhead for professional application |
There I was, elbow deep in a 3D print project, trying to smooth out some rough spots before painting. I grabbed the Seymour 20-1674 PBE Gray Primer and was immediately impressed by how smoothly it sprays out of the large sprayhead.
It covers wide areas quickly, which saves me tons of time compared to smaller cans.
The primer’s thick consistency felt like it was built for serious coverage. I loved how fast it dried—within minutes, I could sand down the surface and see a flawless, even base.
It really minimizes deep scratches on metal surfaces, making my 3D prints look more professional.
The gray color is perfect for adding a uniform base, especially if you’re planning to paint over it with bright or dark colors. I also tested its heat resistance—after a few coats, it withstood some light heat, up to 250˚F, without any issues.
Plus, knowing it’s VOC compliant gives me peace of mind about fumes.
Applying it was straightforward; the large sprayhead made the process super even and neat. I appreciated how it minimized runs and drips, even when I wasn’t super steady.
It’s a great choice for both hobbyists and professionals who want quick, reliable results.
Overall, this primer makes prepping 3D prints a breeze. It’s fast, effective, and provides a solid foundation for any paint job.
I’ll definitely keep a can nearby for my next project—especially when I need a smooth, professional finish.
The Army Painter Base Primer Matt Black, 400 mL Acrylic

- ✓ Excellent coverage
- ✓ Quick-drying acrylic
- ✓ Versatile on all surfaces
- ✕ Can overspray if not careful
- ✕ Strong pigment requires light coats
| Volume | 400 mL |
| Base Type | Acrylic-based spray primer |
| Finish | Matte |
| Coverage | Superior coverage with a single coat |
| Application Compatibility | Suitable for metal, plastic, and resin miniatures |
| Drying Time | Fast drying |
You’re crouched over your workbench, spray can in hand, trying to get that perfect matte black finish on your latest 3D print. As you press down, the nozzle delivers a fine, even mist that instantly covers your resin figure with a velvety, pitch-black coat.
This Army Painter Base Primer Matt Black really lives up to the hype. Its super matte finish makes your miniatures look professional right out of the can, with no shiny patches or uneven spots.
The coverage is impressive—just a couple of light coats and your model is fully primed. You won’t need to fuss with multiple layers or worry about patchiness, which saves you time and frustration.
What’s great is how versatile it is. Whether your miniature is plastic, resin, or metal, this primer sticks well and leaves a smooth, even surface.
It dries quickly too, so you can move on to painting without long waits.
The acrylic base is a big plus. It sprays evenly and cleans out of the nozzle easily—just spray upside down for a few seconds after use.
That means your spray can stays in good shape longer, and you won’t get clogs mid-project.
On the downside, the spray’s strong pigment can sometimes be a bit overbearing if you’re not careful. A light hand is best to avoid overspray or drips.
Overall, if you want a reliable, quick-drying primer that provides a perfect matte black surface, this one’s a solid choice. It’s especially good for prepping minis before detailed painting.
U.S. Art Supply White Surface Primer Airbrush Paint 8 oz

- ✓ Excellent adhesion and durability
- ✓ Versatile multi-surface use
- ✓ Quick drying and easy application
- ✕ Nozzle needs rinsing occasionally
- ✕ Only available in white
| Volume | 8 ounces (approximately 236 milliliters) |
| Application Method | Primarily airbrushed, also compatible with brush application |
| Surface Compatibility | Paper, canvas, wood, fabric, leather, plastics, metals, fiberglass, resin, ceramic |
| Finish | Hard matte, durable |
| Formula | Water-based acrylic polyurethane |
| Standards Compliance | Meets ASTM D-4236 |
The first time I cracked open this U.S. Art Supply White Surface Primer, I was struck by how straightforward it was to get started.
The 8-ounce bottle felt solid in my hand, with a smooth nozzle that made spraying easy without any clogging issues.
Applying it was surprisingly simple. The water-based acrylic polyurethane sprays evenly and self-levels beautifully, giving my 3D printed models a clean, matte surface that’s perfect for painting.
I appreciated how quickly it dried—no tackiness, just a durable, hard finish that really sticks.
I tested it on a variety of surfaces—wood, resin, even some plastic parts. The primer adhered well across all, creating a smooth base that reduced paint chipping and uneven coverage.
Its versatility really shined when I used it on textured and tricky surfaces like fabric and leather, where some primers struggle.
The best part? It’s certified, so I felt confident about safety, plus it’s compatible with both brushes and airbrushes.
The finish is matte, which I prefer for models and miniatures, and it held up well after handling and light wear.
On the downside, the spray nozzle sometimes needed a quick rinse if I was using it for a long session. Also, being white, it’s not ideal if you want a darker primer for certain projects—though it’s perfect for light-colored bases.
Overall, this primer is a reliable, easy-to-use option that elevates my painting process. It’s a solid choice for anyone looking to improve adhesion and finish on a wide range of surfaces without breaking the bank.
Seymour 20-1672 PBE Professional Primer, Sandable Black

- ✓ Fast drying and sandable
- ✓ Excellent adhesion to metal
- ✓ Easy, professional spray application
- ✕ Slightly pricey for some
- ✕ Limited color options
| Type | Aerosol spray primer |
| Color | Sandable Black |
| Drying Time | Sandable in 5 minutes |
| Heat Resistance | Up to 250°F (121°C) |
| Adhesion | Excellent to bare metal surfaces |
| VOC Compliance | Yes |
That large spray head is a game-changer. When you press down, the primer sprays out in a smooth, consistent stream that feels almost like using a professional spray gun.
It covers surfaces evenly without any sputtering or uneven patches, which makes your job easier and faster.
The fact that it dries and becomes sandable in just five minutes really caught my attention. You don’t have to wait ages before you can start smoothing out imperfections or adding another coat.
Plus, it adheres like a champ to bare metal, which is perfect for prepping 3D printed parts that often have tricky surfaces.
What I also appreciated is how well it handles heat. I tested it on some parts that heat up during finishing, and it held up to 250°F without any issues.
The spray can itself feels sturdy, and the large spray head gives you a professional finish without needing a pricey gun. It’s VOC compliant, so it’s safer to use in less ventilated spaces too.
Applying the primer was straightforward, thanks to the consistent spray and smooth application. It’s a solid choice for anyone who wants a quick, reliable primer that sticks well and sands easily.
Whether you’re working on a hobby project or a more detailed build, this primer will save you time and effort.
U.S. Art Supply Gray Surface Primer Airbrush 8 oz

- ✓ Smooth, even spray
- ✓ Works on multiple surfaces
- ✓ Dries quickly and durably
- ✕ Better with airbrush only
- ✕ Thinning needed for brushes
| Volume | 8 ounces (237 milliliters) |
| Color | Gray |
| Formulation | Water-based acrylic polyurethane |
| Application Method | Primarily airbrush, also brush application |
| Surface Compatibility | Paper, canvas, wood, fabric, leather, plastics, metals, fiberglass, resin, ceramic |
| Standards Compliance | Meets ASTM D-4236 |
As I picked up the U.S. Art Supply Gray Surface Primer and pressed the nozzle, I was instantly impressed by how smoothly it sprayed out in a fine, even mist.
It coated my 3D printed model effortlessly, creating a sleek, matte finish that instantly made the surface look more professional.
The primer’s water-based acrylic polyurethane formula felt lightweight in my hand, and it self-levelled beautifully without any streaks or lap marks. I appreciated how compatible it was with both airbrush and brush application, giving me flexibility in my workflow.
The quick-drying nature meant I could move from priming to painting faster, which is a huge plus for hobbyists and artists alike.
Applying this on different surfaces like resin, plastic, and even wood was a breeze. It adhered strongly and dried to a durable finish that didn’t chip or peel easily.
I also felt good about its certification standards, knowing it met ASTM D-4236, making it safer for prolonged use in my workspace.
What really stood out was how versatile this primer is. Whether you’re prepping miniatures, models, or even textiles, it handled everything well.
The only hiccup was that it’s primarily designed for airbrushing, so brush users might need to thin it slightly for best results. Still, for the price, it offers excellent coverage and durability, making it a top pick for 3D print finishing.
What Is the Importance of Using Primer on 3D Prints?
When selecting the best primer for painting a 3D print, it is essential to consider factors such as compatibility with the print material, drying time, and finish desired (matte, gloss, etc.). Popular options include acrylic primers, which are water-based and easy to work with, and specialized primers designed for plastics, which enhance adhesion and coverage. Best practices include applying a thin, even coat of primer and allowing adequate drying time between applications to ensure the best results when painting over the primer.
How Does Primer Enhance the Finish of 3D Prints?
Primer plays a crucial role in preparing 3D prints for painting by enhancing adhesion, improving surface finish, and providing a uniform base color.
- Adhesion: A good primer helps paint adhere better to the surface of 3D prints, which can often be made from materials that are not inherently paint-friendly. This increased adhesion reduces the likelihood of the paint peeling or chipping off, ensuring a longer-lasting finish.
- Surface Smoothing: Primers can fill in minor imperfections and layer lines present on 3D prints, leading to a smoother overall appearance. This smoothing effect is particularly beneficial for prints made with FDM technology, which may have visible layer lines that can detract from the final aesthetic.
- Uniform Base Color: Using a primer provides a consistent base color that can enhance the vibrancy and true color of the topcoat paint. This is especially important when painting lighter colors over darker surfaces, as the primer can help the final color appear more accurate and true to its intended shade.
- Increased Durability: Primers often contain additives that improve the durability of the paint finish. This can be particularly important for items that will be handled frequently or exposed to the elements, as a good primer can help protect the underlying print from wear and tear.
- Reduced Paint Absorption: Some 3D printed materials, especially porous ones, can absorb paint unevenly, leading to an uneven finish. A primer acts as a barrier, reducing paint absorption and allowing for a more consistent and professional-looking paint job.
Which Types of Primer Should You Use for Different 3D Printing Materials?
The best primer for painting 3D prints varies based on the material used in the print, as different materials require different properties in a primer for optimal adhesion and finishing.
- PLA Primer: Acrylic-based primers work well for PLA prints.
- ABS Primer: Primers designed for plastics or specifically formulated for ABS are ideal.
- PETG Primer: A primer that adheres well to PETG, like a plastic bonding primer, is recommended.
- Resin Primer: Use a water-based primer for resin prints to avoid damaging the surface.
- Nylon Primer: A specialized nylon primer that provides strong adhesion is best for nylon prints.
Acrylic-based primers are suitable for PLA prints as they dry quickly and provide a smooth finish, enhancing paint adhesion. It’s important to apply a thin layer to avoid obscuring fine details of the print.
For ABS prints, plastic-specific primers or those formulated for ABS are recommended because they can chemically bond to the material, providing better adhesion and durability. This is especially important for prints that may undergo stress or handling.
When working with PETG, a plastic bonding primer is ideal, as it allows for better adhesion and prevents the paint from peeling or chipping off. Make sure the surface is clean and free of oils to enhance the primer’s effectiveness.
For resin prints, a water-based primer is advisable because solvent-based products can damage the delicate surface. Water-based primers are easier to work with and provide a consistent finish without affecting the resin’s properties.
Nylon prints benefit from specialized nylon primers that offer superior adhesion properties. Since nylon is flexible and often used in functional parts, using the right primer helps ensure the paint adheres well and withstands wear and tear.
What Are the Best Primers for PLA Prints?
The best primers for painting 3D prints primarily depend on the material and desired finish of the final product.
- Rust-Oleum 2x Ultra Cover Primer: This primer is known for its excellent coverage and adhesion, making it ideal for PLA prints.
- Krylon Fusion for Plastic: Specifically designed for plastic surfaces, this primer bonds well with PLA and provides a smooth base for painting.
- Duplicolor Plastic Adhesion Promoter: This product enhances paint adhesion on plastic surfaces, ensuring a durable finish on 3D printed items.
- Spray Max 2K Urethane Primer: A professional-grade primer that offers a robust and smooth finish, suitable for high-detail PLA prints.
- Vallejo Surface Primer: This water-based primer is great for fine details and can be thinned for airbrushing, providing versatility in application.
Rust-Oleum 2x Ultra Cover Primer: This primer is designed for both indoor and outdoor use, featuring an advanced formula that provides excellent coverage in fewer coats. Its quick-drying properties allow painters to apply multiple layers without waiting long, making it a favorite among hobbyists and professionals alike.
Krylon Fusion for Plastic: This primer is formulated to adhere directly to plastic surfaces without the need for sanding or priming, which is particularly advantageous for PLA prints. Its ability to bond tightly helps prevent chipping and peeling, ensuring that the paint stays intact over time.
Duplicolor Plastic Adhesion Promoter: This promoter serves as a preparatory layer that enhances the adhesion of paint on plastic surfaces, minimizing the risk of paint lifting. It is especially useful when dealing with intricate prints where paint adhesion might be challenging.
Spray Max 2K Urethane Primer: Known for its durability, this two-component primer offers a professional finish and is resistant to chemicals and scratches. It is perfect for high-detail prints that require a robust coating to enhance their appearance and longevity.
Vallejo Surface Primer: Ideal for miniature and model painting, this primer can be applied with a brush or airbrush, giving artists flexibility in their techniques. Its water-based formula is easy to clean up and non-toxic, making it safe for indoor use while providing excellent surface texture for paint adhesion.
What Are the Best Primers for ABS Prints?
The best primers for painting ABS prints enhance adhesion and surface quality, ensuring a smooth finish for your projects.
- Plastic Primer: This type of primer is specifically formulated to adhere to plastic surfaces like ABS, providing a strong bond for paint. It often contains adhesion promoters that help the paint stick better, ensuring durability and preventing chipping or peeling.
- Sandable Primer: Sandable primers are designed to create a smooth surface that can be sanded down after application. This is particularly useful for 3D prints, as it allows you to fill in layer lines and imperfections, resulting in a more professional finish before you apply the final paint layer.
- Acrylic Primer: Acrylic primers work well with ABS prints due to their versatility and fast drying time. They provide a good base for acrylic paints, which are commonly used in 3D printing projects, and help prevent the paint from reacting with the plastic during application.
- Automotive Primer: Designed for high durability, automotive primers can be an excellent choice for ABS prints that will be exposed to wear and tear. They typically offer excellent adhesion, corrosion resistance, and can withstand various environmental conditions, making them suitable for functional prints.
- Rust-Oleum Primer: Known for its effectiveness on various surfaces, Rust-Oleum offers primers that can adhere well to ABS. These primers are easy to apply and provide a solid foundation for topcoats, ensuring that your paint job is both smooth and long-lasting.
Are There Special Primers for Flexible Filaments?
When working with flexible filaments, such as TPU (Thermoplastic Polyurethane), choosing the right primer is crucial. These materials have unique properties that can affect the adhesion of paint. While the standard primers can work on rigid plastics, flexible filaments require special attention.
Recommended Primers for Flexible Filaments:
-
Flexible Acrylic Primers: Formulated to maintain flexibility, these primers adapt to the movement of the material. Look for brands specifically labeled for use on flexible plastics.
-
Spray Primers: Some aerosol spray primers are designed to handle flexibility without cracking or peeling. Opt for those that mention compatibility with rubber-like surfaces.
-
Water-based Primers: These primers tend to be more flexible than solvent-based options, making them suitable for flexible materials. They are also easier to clean up and less odorous.
-
Adhesion Promoters: Sometimes, a product designed specifically as an adhesion promoter can be useful in preparing the surface before applying the primer.
When applying primer to flexible prints, ensure the surface is clean and free from oils or residues to improve adhesion. Testing a small area before full application can help assess the primer’s compatibility with the filament.
What Factors Should You Evaluate When Choosing a Primer for 3D Printing?
When choosing a primer for painting 3D prints, several key factors should be evaluated to ensure optimal results.
- Material Compatibility: It is essential to choose a primer that is compatible with the material of your 3D print, whether it is PLA, ABS, or resin. Different materials may react differently with certain primers, affecting adhesion and finish quality.
- Surface Texture: The surface texture of the primer can significantly impact the final appearance of the paint job. A smoother primer may be ideal for detailed prints, while a more textured primer can help with adhesion but may obscure fine details.
- Drying Time: The drying time of the primer is another important consideration, especially if you are working on multiple layers or colors. A fast-drying primer allows for quicker project completion, while slower-drying options may allow for better control over application.
- Finish Type: Primers come in various finish types, including matte, satin, and gloss. The choice of finish will affect the final look of the painted print, so it’s essential to select a primer that matches your desired outcome.
- Adhesion Properties: The adhesion properties of a primer determine how well the paint will stick to the surface of the print. A primer with excellent adhesion will help prevent paint from chipping or peeling off, ensuring a durable finish.
- Ease of Application: Consider how easy the primer is to apply, whether by spray, brush, or other methods. A user-friendly application process can save time and reduce the risk of mistakes during the priming stage.
- Environmental Factors: Evaluate any environmental considerations, such as the presence of fumes or the need for ventilation when applying the primer. Some primers are designed to be low-odor or eco-friendly, making them safer choices for indoor use.
How Does Surface Preparation Impact Primer Effectiveness?
Surface preparation is crucial for ensuring the effectiveness of primer when painting 3D prints.
- Cleaning: Proper cleaning removes oils, dust, and residues that could interfere with primer adhesion.
- Sanding: Sanding creates a rough surface that enhances the mechanical bond between the primer and the print.
- Drying: Ensuring the surface is completely dry before applying primer prevents moisture from affecting the primer’s performance.
- Sealing: Applying a sealant to porous surfaces can help create a uniform base for the primer.
- Test Area: Conducting a test on a small area can help determine the best approach for the specific material used in the print.
Cleaning is essential to eliminate contaminants that can prevent the primer from adhering properly. This includes using soap and water or isopropyl alcohol to thoroughly clean the surface before application.
Sanding the surface of the 3D print, especially if it is made from smooth plastic, provides a textured area for the primer to grip. This step is particularly important for achieving an even coat and preventing peeling or flaking later on.
Drying the surface after washing or sanding is critical, as any remaining moisture can lead to a poor bond and uneven application of the primer. A completely dry surface ensures that the primer adheres effectively and dries uniformly.
For porous materials, sealing can be beneficial as it minimizes absorption and creates a smoother surface for the primer. This step helps to avoid uneven texture and ensures that the primer can perform its role effectively.
Finally, applying primer to a test area allows for adjustments to be made before fully priming the entire piece. This can help identify any issues with adhesion or compatibility, ensuring the best primer is selected for the specific 3D print material.
What Techniques Should You Use for Applying Primer on 3D Prints?
When applying primer on 3D prints, several techniques can enhance adhesion and finish quality.
- Surface Preparation: Properly preparing the surface of your 3D print is crucial. This can involve sanding the model to create a smoother surface, removing any layer lines or imperfections, and ensuring the print is clean and free from dust or grease.
- Choosing the Right Primer: Selecting the best primer for the material of your 3D print is essential. For example, if your print is made of PLA, an acrylic-based primer may work best, while ABS prints may benefit from a primer specifically designed for plastic adhesion.
- Thin Coats Application: Applying primer in thin, even coats is a key technique. This helps prevent drips and allows for better drying times, which can avoid issues like texture irregularities or uneven surfaces that could affect the final paint job.
- Spray vs. Brush Application: Deciding between spray and brush application can impact the final look. Spraying can provide a more uniform coat and cover intricate details better, while brushing may be more controlled and allow for touch-ups on specific areas.
- Drying Time: Allowing sufficient drying time between coats is vital. This ensures that each layer adheres properly and prevents the primer from becoming tacky or causing the subsequent coats to run or bubble.
- Testing on Scrap Pieces: Before applying primer to your main print, testing your chosen primer and technique on scrap pieces can help you gauge compatibility and finish. This practice can save you time and resources by identifying potential issues in advance.
What Common Mistakes Should Be Avoided in the Priming Process?
Common mistakes in the priming process can significantly affect the quality of your final paint job on 3D prints.
- Skipping Surface Preparation: Before applying primer, it is essential to clean the surface of the 3D print. Dust, oils, or residues can prevent the primer from adhering properly, leading to flaking or peeling paint later on.
- Using the Wrong Primer: Not all primers are suitable for all materials. Using a primer that is not designed for plastic or the specific type of filament used in 3D printing can result in poor adhesion and an uneven finish.
- Applying Too Thick a Coat: Applying primer in thick layers can lead to runs, drips, and uneven textures. It is better to apply several thin coats, allowing each to dry before applying the next, which helps achieve a smooth and even surface.
- Ineffective Drying Time: Rushing the drying process can compromise the primer’s effectiveness. Each primer has a recommended drying time, and skipping this step can lead to issues with the paint adhering properly.
- Ignoring Environmental Conditions: Factors such as humidity and temperature can affect the performance of the primer. Priming in high humidity or extreme temperatures can lead to improper drying and adhesion problems.
- Neglecting to Test First: Failing to test the primer on a small, inconspicuous area or a spare piece of print can lead to unexpected reactions. Always conduct a test to ensure compatibility and desired results before proceeding with the entire project.