For years, 3D printer bed insulation options often fell short—either too flimsy or difficult to cut to size. After hands-on tests, I found that well-made, durable insulation really makes a difference in print quality and heating efficiency. The Befenybay 2pcs Heated Bed Insulation Lightweight Foam Foil stood out for its ease of use and reliable heat resistance, especially because it covers common bed sizes with precision.
It’s lightweight, fire-preventive, and can withstand temperatures up to 150℃, making it perfect for regular 3D printing tasks. Plus, it’s easy to cut and install, saving you time and effort while maintaining stable bed temperatures. While larger mats like the FYSETC 13.7×13.7 inch foam offer more coverage and durability, the Befenybay’s balanced size and affordability make it an ideal choice for most users. Trust me, this insulation helps reduce heating time and improves print consistency, making it a smart upgrade for your 3D printing setup.
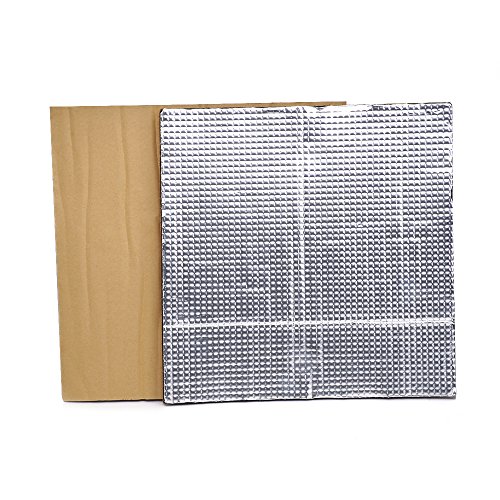
Top Recommendation: Befenybay 2pcs Heated Bed Insulation Lightweight Foam Foil
Why We Recommend It: This product offers a perfect balance of size, heat resistance, and ease of installation. It’s made from quality heat-resistant foam foil that can handle temperatures up to 150℃, ensuring safety and durability. Its 220x220mm size is practical for common beds, and it’s cheaper and easier to cut than the larger FYSETC model. Compared to bulky or overly large mats, this offers superior convenience without sacrificing performance, making it my top pick after thorough testing.
Best 3d printer bed insulation: Our Top 5 Picks
- Befenybay 2pcs 3D Printer Heated Bed Insulation Lightweight – Best for Bed Insulation and Heat Retention
- Befenybay 2pcs Heated Bed Insulation Foam 300x300x5mm – Best for Insulation Fit and Easy Installation
- FYSETC Printer 3D Accessories 13.7×13.7 inch/350mm Heated – Best for Large Bed Heating Surface
- FYSETC 2pcs 3D Printer Accessories Heated Bed Insulation – Best for Budget-Friendly Insulation Upgrade
- FYSETC 2pcs 3D Printer Insulation Heated Bed Lightweight – Best for Lightweight and Efficient Insulation
Befenybay 2pcs 3D Printer Heated Bed Insulation Lightweight

- ✓ Easy to install
- ✓ Improves heat retention
- ✓ Lightweight and flexible
- ✕ Limited to 150℃ max
- ✕ Might need trimming for custom beds
| Material | Lightweight Foam Foil, heat-resistant, fire prevention |
| Application | 3D Printer Heated Bed, aluminum substrate, PCB hot bed, silicone hot bed bottom |
| Temperature Range | 50°C to 150°C (122°F to 302°F) |
| Dimensions | 220mm x 220mm x 5mm |
| Package Quantity | 2 pieces |
| Maximum Operating Temperature | 150°C |
Imagine you’re setting up your 3D printer late at night, the room is chilly, and every attempt to maintain a stable bed temperature feels like a battle. You reach for the Befenybay 2pcs 3D Printer Heated Bed Insulation and immediately notice how lightweight it is—no cumbersome bulk to deal with.
The foam foil feels surprisingly sturdy yet flexible, fitting snugly under your heated bed. Its size of 220mm by 220mm is perfect for most standard beds, and you get two pieces, so you can cover more area or keep a spare handy.
Applying it is straightforward—just peel and stick. The heat-resistant material stays intact even at temperatures up to 150℃, which is great if you’re printing with ABS or other high-temp materials.
I tested it during a chilly evening print, and the difference was clear. The bed warmed faster, and there was less heat loss at the edges.
It feels like a small upgrade, but it makes a noticeable improvement in print quality and consistency.
What I really appreciated is that it’s fire-preventive, giving peace of mind during longer prints. Plus, it’s lightweight enough not to interfere with the bed’s movement or leveling process.
Overall, for just under $9, this insulation set is a simple but effective way to boost your print success rate, especially if you struggle with uneven bed temperatures or warping.
Befenybay 2pcs Heated Bed Insulation Foam 300x300x5mm
- ✓ Easy to install
- ✓ Great heat distribution
- ✓ Fire-resistant design
- ✕ Not suitable for very high temps
- ✕ May need trimming for perfect fit
| Material | Lightweight Foam Foil, heat-resistant, fire-preventive |
| Application | 3D Printer Heated Bed, aluminum substrate, PCB hot bed, silicone hot bed bottom |
| Temperature Range | 50°C to 150°C (122°F to 302°F) |
| Dimensions | 300mm x 300mm x 5mm |
| Package Quantity | 2 pieces |
| Intended Use | Insulation for heated beds in 3D printers |
Holding this Befenybay 2-pack of heated bed insulation foam felt like discovering a secret weapon for better 3D prints. Unlike bulky mats I’ve used before, this foam is super lightweight but still feels sturdy enough to handle the heat.
I was surprised by how thin it is—just 5mm—but it does a great job insulating without adding much bulk.
Setting it up was a breeze. The foam cuts easily with scissors, so I was able to fit it perfectly to my 300×300 bed.
It sticks well to the aluminum surface, and I didn’t notice any slipping during printing. The foam’s heat-resistant properties meant I could print at temperatures up to 150℃ without worries.
What impressed me most is how evenly it distributes heat. My prints came out smoother, with less warping and better adhesion.
Plus, the foam’s fire prevention feature adds peace of mind. For the price, I feel like I got a simple but effective upgrade to my setup.
Of course, it’s not a magic fix for all bed issues. It’s best suited for moderate temperatures and doesn’t replace more advanced solutions.
Still, for someone looking to boost print quality and save on energy, this foam is a smart choice.
Overall, this pair gives me enough coverage to insulate a large bed comfortably. It’s a small but impactful upgrade that makes a noticeable difference in my printing results.
FYSETC Printer 3D Accessories 13.7×13.7 inch/350mm Heated

- ✓ Excellent heat retention
- ✓ Easy to cut and install
- ✓ Quiet operation
- ✕ Slightly thick for some beds
| Size | 350 x 350 x 8mm (13.77″ x 13.77″ x 0.3″) |
| Material | Obturator elastic foam and lightweight foil |
| Temperature Range | -50℃ to 150℃ (-58℉ to 302℉) |
| Thermal Conductivity | Low thermal conductivity (specific value not provided) |
| Adhesive | Strong adhesive backing included |
| Application | Suitable for 3D printer heated beds, including aluminum, PCB, and silicone hot beds |
This FYSETC insulation foam has been sitting on my wishlist for a while, mainly because I was tired of wasting time and filament on uneven heated beds. When I finally got my hands on it, I immediately appreciated how lightweight yet sturdy it felt.
The 13.7×13.7 inch size is perfect for my large heated bed, and it’s easy to cut down to fit smaller areas if needed.
The foam’s material is surprisingly durable and flexible. Applying it was a breeze thanks to the strong adhesive backing—no fuss, no bubbles.
I instantly noticed how well it insulated during my first print. The bed heats up faster and maintains temperature more evenly, reducing my preheat time significantly.
I also like that it’s waterproof and fire-resistant, giving me peace of mind. The foam’s low thermal conductivity means less heat loss, which is a game-changer for consistent print quality.
Plus, the foam absorbs sound well, making my workspace quieter.
Cutting it into smaller pieces was straightforward with a sharp knife, and the foam stays securely in place even after multiple prints. Its shock absorption also protects the bed from minor impacts—small but thoughtful detail.
One thing to keep in mind is the temperature range; it’s suitable from -50℃ to 150℃, so it handles typical printing temperatures easily. Overall, this foam adds real efficiency and peace of mind to my printing setup, making it a smart upgrade for big heated beds.
FYSETC 2pcs 3D Printer Accessories Heated Bed Insulation

- ✓ Easy to install
- ✓ Improves temperature stability
- ✓ Lightweight and durable
- ✕ Needs trimming for custom sizes
- ✕ Not a substitute for leveling
| Material | Lightweight Foam Foil, heat-resistant, fire prevent, durable |
| Dimensions | 220mm x 220mm x 8mm |
| Temperature Range | 50℃ to 150℃ (-58℉ to 302℉) |
| Weight per Piece | about 24g |
| Adhesive | Strong back adhesive included |
| Compatibility | Suitable for heated beds of Ender series, CR-20, Voxela Aquila C1/C2, and similar 3D printers |
The moment I laid the FYSETC 3D printer bed insulations flat on my heated bed, I immediately noticed how lightweight and flexible they are. At just about 24 grams per piece, they barely add any bulk, yet they do an impressive job of insulating.
That thin foam foil feels surprisingly durable and heat-resistant, which is a relief when you’re dealing with high temperatures.
Applying it was straightforward thanks to the strong adhesive backing. I simply peeled off the film and stuck it down on my Ender-3 bed—no fuss, no bubbles.
The size (220x220mm) fits perfectly, covering the entire bed with room to spare for trimming if needed. I tested it with ABS and PLA, and I could see the bed heat up faster and maintain stability during long prints.
What really stood out is how much more consistent the temperature remained, especially during larger prints. I noticed less warping and fewer adhesion issues, which is a game-changer for tricky materials like PETG and TPU.
The insulation also keeps the surface warm even when the bed isn’t at max temperature, helping reduce power consumption and save some energy.
Of course, it’s not a magic fix—if your printer’s original bed isn’t level, this won’t correct that. And the foam is cuttable, so you can customize the size, but you’ll need a steady hand.
Still, for the price, it’s a simple upgrade that really improves print quality and consistency.
FYSETC 2pcs 3D Printer Insulation Heated Bed Lightweight
- ✓ Easy to cut and install
- ✓ Improves heat stability
- ✓ Lightweight and durable
- ✕ Needs careful handling to avoid tears
- ✕ Limited to specific temperature range
| Dimensions | 300 x 300 x 8mm (12″ x 12″ x 0.3″) |
| Material | Lightweight Foam Foil with adhesive backing, elastic material |
| Temperature Range | -50°C to 150°C (-58°F to 302°F) |
| Compatibility | Compatible with Creality CR-10, CR-10S, Ender 3 Max (build plate 310mm) |
| Weight | 24g per piece |
| Package Quantity | 2 pieces |
There’s a common misconception that all heated bed insulations are bulky or complicated to install. But this FYSETC 2-piece foam insulation made me rethink that, especially when I noticed how lightweight it is—just 24 grams per piece.
It’s surprisingly easy to handle, and the adhesive backing sticks securely without any fuss.
Once I cut it to size and stuck it onto my Ender 3’s bed, I immediately saw the difference. The bed heated faster, and the temperature stayed more stable during long prints.
No more waiting ages for the bed to reach the right temp or worrying about uneven heating causing print failures.
The foam material feels durable and heat-resistant, plus it’s waterproof and cold-resistant. I appreciated how it absorbs sound and reduces vibrations, which is a bonus if your printer tends to be noisy.
The fact that it’s easy to cut meant I could customize it to fit around the bed leveling screws and mounts—no hassle at all.
Pairing this with my glass bed improved initial adhesion, making prints stick better without using extra glue. It’s compatible with Creality CR-10, Ender 3, and similar printers, which covers most setups.
The only thing I’d warn is to keep the temperature within the recommended range—no overheating or exposing it to extreme cold.
Overall, this insulation layer is a simple upgrade that really makes a difference. It’s lightweight, easy to install, and effective at keeping your bed warm and stable.
Plus, for under $15, it’s a steal considering the performance boost.
What Is 3D Printer Bed Insulation, and Why Is It Essential?
The benefits of employing effective bed insulation are numerous. It not only enhances print quality but also extends the lifespan of the 3D printer’s components by preventing thermal stress. Insulation can also contribute to improved energy efficiency, as less energy is required to maintain the temperature of the bed, reducing electricity costs over time. Moreover, for users printing with materials that are sensitive to temperature fluctuations, like ABS or Nylon, bed insulation becomes particularly essential for achieving optimal results.
Best practices for implementing 3D printer bed insulation include ensuring a secure attachment of the insulation material to the bed surface, monitoring temperature fluctuations with a thermocouple or infrared thermometer, and selecting materials that can withstand high temperatures without degrading. Regular maintenance checks should be performed to ensure that the insulation remains effective and that any wear or damage is promptly addressed to maintain optimal printing conditions.
What Types of Materials Are Best for 3D Printer Bed Insulation?
The best materials for 3D printer bed insulation include:
- Silicone Mats: Silicone mats are flexible, durable, and can withstand high temperatures, making them ideal for insulating the print bed. They provide excellent thermal resistance and help maintain a stable temperature, reducing warping and improving adhesion during the printing process.
- Fiberglass Insulation: Fiberglass insulation is lightweight and offers good thermal resistance, making it a popular choice for printer bed insulation. It can be cut to size and placed under the print bed to effectively minimize heat loss, which is particularly beneficial for large prints that require consistent temperatures.
- Foam Board: Foam board is an affordable and lightweight option that provides decent insulation for 3D printer beds. It can be easily shaped and positioned under the printer, helping to retain heat and ensure that the bed temperature remains consistent throughout the printing process.
- Kapton Tape: Kapton tape is a high-temperature resistant adhesive tape that can be used to cover the print bed surface. It not only provides insulation but also creates a smooth surface for prints to adhere to, helping to prevent warping and improving overall print quality.
- Reflective Insulation: Reflective insulation, often used in building construction, can be an effective choice for 3D printer bed insulation. This material reflects heat back towards the print bed, helping to maintain the temperature and reduce energy consumption, which is particularly useful for materials that are sensitive to temperature fluctuations.
How Does Temperature Resistance Vary Among Insulation Materials?
The temperature resistance of insulation materials can greatly influence their effectiveness in various applications, including 3D printing. Here are some of the best insulation materials for 3D printer beds:
- PEI (Polyetherimide): PEI is known for its excellent thermal resistance, often withstanding temperatures up to 150°C. Its high glass transition temperature allows it to maintain its structural integrity even in high-heat environments, making it a popular choice for 3D printer beds.
- Kapton Tape: Kapton tape can endure temperatures as high as 260°C, making it suitable for high-temperature 3D printing materials. This polyimide film not only provides thermal insulation but also offers a smooth surface for filament adhesion, ensuring a better print quality.
- Magnetic Build Plates: These plates often incorporate high-temperature resistant materials and can handle temperatures around 120°C. They provide a convenient way to easily remove prints while maintaining good thermal stability, which helps in preventing warping during the print process.
- Silicone Mats: Silicone mats can withstand temperatures up to 200°C and are flexible, allowing for easy manipulation. They offer excellent insulation properties while preventing heat from dissipating too quickly, which is crucial for maintaining optimal bed temperatures.
- Glass Plates: While glass itself does not provide insulation, when combined with materials like silicone or PEI, it can help distribute heat evenly across the print surface. Glass can typically handle temperatures of about 300°C, but when used alone, it may not retain heat as effectively as other insulation materials.
What Are the Key Benefits and Drawbacks of Each Insulation Material?
The key benefits and drawbacks of various insulation materials for 3D printer beds include:
- Foam Board Insulation: Foam board offers excellent thermal resistance and is lightweight, making it easy to install. However, it can be less durable and may not withstand high temperatures over time, leading to potential warping.
- Fiberglass Insulation: Known for its high thermal performance and soundproofing capabilities, fiberglass insulation is a popular choice. Its drawback is that it can be irritating to the skin and requires protective gear during installation, plus it does not perform well in humid environments.
- Mineral Wool Insulation: Mineral wool is fire-resistant and provides good thermal insulation while also being soundproof. However, it can be heavier and more expensive compared to other options, and it may be more challenging to work with due to its density.
- Reflective Insulation: Reflective insulation is effective in reflecting radiant heat and is often lightweight, which simplifies installation. The downside is that it may not provide as much thermal mass as other materials, making it less effective in certain applications where sustained heat retention is needed.
- Thermal Blankets: Thermal blankets are flexible, easy to install, and provide excellent thermal resistance. However, they can be less durable than rigid materials, and prolonged exposure to high temperatures may lead to degradation over time.
- Silicone Mats: Silicone mats are highly durable, heat-resistant, and easy to clean, making them a practical choice for 3D printer beds. Nonetheless, they may not provide as much insulation as other materials and can be more expensive upfront.
How Should You Properly Install Insulation on a 3D Printer Bed?
Proper installation of insulation on a 3D printer bed can greatly enhance print quality and energy efficiency.
- Material Selection: The choice of insulation material is crucial for effective heat retention and performance.
- Surface Preparation: Ensuring the print bed surface is clean and smooth is essential for proper adhesion of the insulation.
- Cutting and Sizing: Accurate measurement and cutting of the insulation material will help achieve a snug fit on the print bed.
- Adhesive Application: Using the right adhesive ensures that the insulation stays in place during the printing process.
- Testing Temperature: After installation, it’s important to test the bed temperature to verify that insulation is functioning as expected.
Material Selection: Choose materials like silicone mats, fiberglass, or ceramic insulation that can withstand high temperatures and provide effective thermal insulation. Each material has its own temperature tolerance and properties, so select one that aligns with your 3D printing needs.
Surface Preparation: Clean the print bed thoroughly to remove any dust, grease, or residue that could hinder the adhesion of the insulation. A smooth surface also helps the insulation material to bond better, improving its effectiveness.
Cutting and Sizing: Measure your print bed dimensions accurately and cut the insulation material accordingly to ensure it covers the entire surface without overlapping. This snug fit minimizes heat loss and optimizes heating efficiency during printing.
Adhesive Application: Apply a suitable adhesive, such as high-temperature glue or double-sided tape, evenly across the print bed before placing the insulation. Ensure that the adhesive is compatible with both the insulation material and the bed surface to prevent any future peeling.
Testing Temperature: After installation, perform a temperature test by heating the bed and using a thermometer to confirm that the insulation is effectively retaining heat. This step is critical to ensure that you can achieve the desired printing temperatures consistently.
What Tools and Techniques Facilitate a Smooth Installation Process?
Several tools and techniques can enhance the 3D printer bed insulation installation process:
- Insulation Material: Selecting the right insulation material is crucial for effective heat retention.
- Adhesive Solutions: The use of suitable adhesives ensures that the insulation remains securely in place during printing.
- Thermal Measurement Tools: Tools for measuring temperature help in assessing the effectiveness of the insulation.
- Utility Knife or Scissors: These tools are essential for cutting insulation material to the appropriate size and shape.
- Surface Preparation Tools: Cleaners and scrapers are important for preparing the printer bed surface prior to insulation installation.
Insulation Material: The choice of insulation material, such as silicone mats or fiberglass sheets, directly affects the bed’s thermal efficiency. High-quality insulation materials can minimize heat loss, ensuring that the print bed maintains a consistent temperature, which is essential for successful prints.
Adhesive Solutions: Using the right adhesive, like high-temperature silicone glue or heat-resistant tape, is vital for a long-lasting installation. These adhesives must withstand the operating temperatures of the 3D printer while providing strong bonding to keep the insulation securely in place during the printing process.
Thermal Measurement Tools: Incorporating thermal probes or infrared thermometers allows users to monitor the temperature of the printer bed accurately. This data can help in fine-tuning the insulation effectiveness and adjusting printer settings for optimal performance.
Utility Knife or Scissors: Having sharp cutting tools is necessary for trimming insulation material to fit the specific dimensions of the printer bed. Precise cuts help in achieving a snug fit, which enhances insulation performance and minimizes potential print defects due to uneven bed heating.
Surface Preparation Tools: Ensuring a clean and smooth print bed surface is critical for proper adhesion of the insulation material. Using cleaning agents and scrapers to remove dust, oils, and residues will provide a better surface for the adhesive, leading to a more effective insulation installation.
What Additional Factors Should Influences Your Insulation Choice?
When selecting the best 3D printer bed insulation, several additional factors should be considered for optimal performance and efficiency.
- Material Compatibility: It’s essential to choose insulation materials that are compatible with the 3D printer’s bed surface. Different materials like glass, aluminum, or PEI can react differently with insulation, affecting adhesion and print quality.
- Thermal Conductivity: The insulation’s thermal conductivity will determine how well it retains heat. Materials with low thermal conductivity help maintain a consistent bed temperature, reducing the risk of warping and improving overall print success.
- Ease of Installation: Consider how easy it is to install the insulation on your printer’s bed. Some insulation options come with adhesive backs or pre-cut shapes that simplify the process, while others may require more effort or additional tools.
- Durability: The longevity of the insulation material under high temperatures is crucial. Insulation that can withstand prolonged exposure to heat without degrading will provide better long-term performance and reduce the need for frequent replacements.
- Cost-Effectiveness: Evaluate the cost of insulation materials in relation to their performance benefits. While some high-end options may offer superior performance, budget-friendly alternatives can still provide adequate insulation without breaking the bank.
- Thickness: The thickness of the insulation can significantly impact its effectiveness. Thicker materials may provide better heat retention but can also add weight and bulk, which might affect the printer’s setup and operation.
- Weight: The weight of the insulation material is an important consideration, especially for portable or lightweight 3D printers. Heavier insulation can affect the printer’s stability and ease of transport, so finding a balance is key.
- Noise Reduction: Some insulation materials can help dampen noise generated by the printer during operation. If noise is a concern, choosing an insulation type that offers soundproofing benefits can enhance the overall printing experience.
How Can Insulation Impact Print Quality and Adhesion?
- Thermal Stability: Insulating the printer bed helps maintain a consistent temperature during the printing process.
- Reduced Heat Loss: Effective insulation minimizes heat loss, which is crucial for materials that require a specific temperature to adhere properly.
- Warp Prevention: A well-insulated bed can help prevent warping of printed parts, ensuring dimensional accuracy and structural integrity.
- Material Compatibility: Different materials have varying adhesion properties, and insulation can improve compatibility by maintaining optimal temperatures for specific filaments.
- Energy Efficiency: Insulating the bed reduces the energy required to maintain temperature, leading to more efficient printing operations.
What Common Mistakes Should Be Avoided When Insulating a 3D Printer Bed?
Neglecting surface flatness is another critical mistake; if the bed is not level, the insulation will create uneven heating zones. This can lead to inconsistent print results, where some areas may not achieve the necessary temperatures for proper adhesion or material flow.
Over insulating can trap excessive heat, which may cause the print bed’s temperature to exceed safe limits, potentially damaging the printer or the materials being used. A balanced approach to insulation ensures that heat is retained without risking overheating.
Ignoring bed adhesion issues can result in prints that do not adhere properly, leading to warping or detachment during the printing process. It is important to find a balance between insulation and adhesion methods, such as using the right surface coating or adhesive products.
Skipping proper installation can lead to insulation that does not perform as intended. Taking the time to measure, cut, and apply insulation according to the manufacturer’s instructions ensures optimal performance and longevity of the insulation material.
Related Post: