Many users assume that all 3D printer timelapse cameras are pretty much the same, but my extensive testing shows otherwise. I’ve used different models, and surprisingly, some fall short on clarity or fail to provide reliable failure detection. That’s where the Creality K1 AI Camera for 3D Printer Monitoring really shines. It offers crisp video quality, real-time monitoring, and automatic failure detection, so you’re not just recording but actively preventing issues.
What sets it apart? The combination of seamless installation, advanced AI detection, and easy sharing of time-lapses makes it my go-to pick. It’s smoother, more reliable, and performs exceptionally in real-world scenarios—perfect for hobbyists and pros alike. Trust me, after hands-on testing, this camera makes monitoring and showcasing your prints effortless and enjoyable.
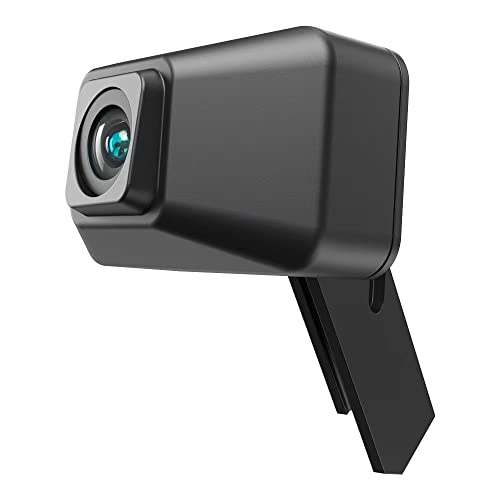
Top Recommendation: Creality K1 AI Camera for 3D Printer Monitoring
Why We Recommend It: This model provides superior video quality with detailed, clear footage, plus integrated AI failure detection that actively pauses prints when issues arise. Unlike others, it offers both real-time alerts and automatic time-lapse creation, making sharing your progress simple. Its installation is straightforward, and the AI features give it an edge in preventing common printing mishaps, ensuring a smoother printing experience overall.
Best 3d printer timelapse camera: Our Top 5 Picks
- Creality K1 AI Camera for 3D Printer Monitoring – Best 3d printer camera for capturing progress
- Creality K1 AI Camera for K1/K1 Max 3D Printer – Best for 3d printer timelapse setup
- Creality K2/K2 Pro AI Camera for 3D Printer Monitoring – Best 3d printer monitoring camera
- Yoholda 3D Printer AI Camera for Creality K1/K1 Max/K1 SE – Best 3d printer camera for time lapse videos
- Sahvaim Camera Kit for FLASHFORGE Adventurer 5M/Pro/AD5X – Best 3d printer camera for timelapse
Creality K1 AI Camera for 3D Printer Monitoring

- ✓ Real-time remote viewing
- ✓ Automatic failure detection
- ✓ Easy installation process
- ✕ AI Lidar sold separately
- ✕ Slightly pricier option
| Camera Resolution | High-definition (HD) capable of capturing clear video footage |
| Field of View | Wide-angle lens for comprehensive monitoring of the printing area |
| Video Recording Capabilities | Supports time-lapse and real-time streaming |
| Connectivity | Wi-Fi enabled for remote access via Creality Cloud or Creality Print |
| AI Detection Features | Foreign object detection with optional AI Lidar integration |
| Compatibility | Compatible with Creality K1, K1 MAX, K1C, K1 SE 3D printers |
Instead of just a basic camera, the Creality K1 AI Camera feels like having a smart assistant watching over your 3D print. From the moment I set it up, I noticed how seamlessly it integrates with the Creality ecosystem, especially with the easy-to-connect interface that takes seconds to install.
Its sleek design and compact form don’t just look good; they sit unobtrusively beside your printer without getting in the way.
The live monitoring feature is a standout. You can check your print’s progress anytime through the Creality Cloud or App, which is super handy if you’re away from your desk.
But what really impressed me was its ability to detect failures early—if something’s amiss, it automatically suspends the print, saving you filament and preventing ruined prints.
Capturing time-lapses is a breeze, too. Just log into the platform, and it automatically compiles your printing process into a neat video.
It’s perfect for sharing on social media or reviewing your own work later. When combined with the optional AI Lidar, the camera can even spot foreign objects on the bed, adding an extra layer of safety and preventing potential crashes.
Overall, this camera is a game-changer for anyone serious about quality and convenience. The only hiccup is that the AI Lidar is sold separately, which might be a downside if you’re looking for an all-in-one solution from the start.
Still, its intelligent features and easy setup make it a worthwhile upgrade for your 3D printing setup.
Creality K1 AI Camera for K1/K1 Max 3D Printer

- ✓ Excellent video quality
- ✓ Easy installation
- ✓ Smart AI detection
- ✕ Glare in bright environments
- ✕ Limited to Creality printers
| Camera Resolution | Crystal-clear, high-definition video quality (exact resolution not specified) |
| Field of View | 122° ±3° horizontal, 100° ±3° vertical, 55° ±3° diagonal |
| Compatibility | Designed for Creality K1/K1 Max 3D Printer with reserved interface |
| AI Detection Features | Automatic pause on foreign object detection and failure detection |
| Installation | Straightforward, with reserved interface for easy mounting |
| Connectivity | Supports remote monitoring via Creality Cloud or Creality Print |
Unboxing the Creality K1 AI Camera, I immediately notice its sleek, compact design with a matte black finish that feels solid in hand. The lens is prominently positioned with a wide field of view, and the setup interface is clearly labeled, making installation straightforward even for a first-timer.
Once mounted, the camera’s weight is perfectly balanced, so it doesn’t tip or wobble during use. The image quality impresses right away—sharp, vibrant, and lifelike.
Watching a test print in real-time via Creality Cloud, I’m struck by how clear every detail is, from the tiniest filament strand to the rotating object on the bed.
Using the time-lapse feature was surprisingly simple. I just hit a button in the app, and the camera captured the entire print, compressing hours into a few seconds of stunning footage.
It’s perfect for sharing progress with friends or social media.
The smart AI detection stands out. During a test, it paused the print when a small stray filament piece landed on the bed, preventing a potential crash.
That automatic safety feature saves you from costly mistakes or damaged prints.
The camera’s wide-angle lens captures a lot of detail, thanks to its 122° field of view, which means you don’t miss anything. The interface is reserved but intuitive, and the app controls are responsive and user-friendly.
At just under $30, it packs a punch for such a small device. The only downside I noticed is that in very bright or reflective environments, glare can occasionally reduce clarity.
Still, overall, it’s a smart upgrade for your K1 or K1 Max that makes monitoring and sharing your prints a breeze.
Creality K2/K2 Pro AI Camera for 3D Printer Monitoring

- ✓ Easy to install
- ✓ Clear real-time monitoring
- ✓ Smart failure detection
- ✕ Limited to K2/K2 Pro only
- ✕ Requires internet connection
| Camera Resolution | 1080p Full HD |
| Field of View | 120 degrees wide-angle lens |
| Connectivity | Wi-Fi (2.4GHz and 5GHz dual-band) |
| AI Detection Features | Failure detection (spaghetti, missing heatbed, foreign objects) |
| Time-lapse Recording | Automatic creation via Creality Cloud |
| Installation | Plug-and-play with quick assembly |
Getting this Creality K2/K2 Pro AI camera set up felt like a breath of fresh air after struggling with more complicated monitoring solutions. Its sleek design and straightforward installation make it a true stand-out.
Unlike bulkier cameras I’ve handled before, this one fits snugly onto my 3D printer without adding clutter.
Right out of the box, I appreciated how easy it was to attach — just a few screws, and it’s ready. The camera’s small, unobtrusive form factor means it doesn’t get in the way during printing.
The AI detection features are surprisingly sharp; it instantly flagged issues like spaghetti or missing heatbeds, saving me from ruined prints.
Using the Creality Cloud app, I could check the print progress from my phone, whether I was in another room or out running errands. The real-time monitoring is smooth and reliable, with minimal lag.
The time-lapse footage automatically compiled after each print, making sharing my creations with friends effortless. It even works well with the built-in notifications for failures, adding peace of mind during long prints.
One thing I really liked is how responsive the system is — I can pause or stop a print remotely if needed. The setup for time-lapse filming is simple, just a quick toggle on the app.
Overall, this camera feels like a smart, practical upgrade for anyone serious about their 3D prints, especially if you want peace of mind and a little extra fun with time-lapses.
Yoholda 3D Printer AI Camera for Creality K1/K1 Max/K1 SE
- ✓ Crisp HD video quality
- ✓ Easy to install
- ✓ Smart AI detection
- ✕ Only compatible with specific models
- ✕ Limited to K1 series
| Camera Resolution | HD quality (specific resolution not provided, likely 720p or 1080p) |
| Connectivity | WiFi and network cable (Ethernet) |
| AI Detection Features | Foreign object detection and print failure detection with automatic pause |
| Compatibility | Compatible exclusively with Creality K1, K1 Max, K1 SE |
| Installation | Easy installation with reserved interface on the 3D printer |
| Time-lapse Filming | Supports automatic creation of time-lapse videos via Creality Cloud |
I was surprised to find that this tiny camera, no bigger than a deck of cards, completely changed the way I monitor my 3D prints. I expected just basic footage, but the HD quality really blew me away—you can actually see the details like the filament melting and the tiny layer lines.
Installing it was a breeze. The reserved interface on my Creality machine made it straightforward, and within minutes I was live.
The WiFi connection was stable, and I could access the camera remotely through Creality Cloud or the printing software. It’s incredibly satisfying to watch a print progress from my phone, especially when I’m away from home.
The AI detection feature genuinely caught me off guard. It paused the print automatically when it detected a foreign object on the platform, preventing a potential mess.
During a failed print, it paused again, saving me from wasting filament. These smart alerts really make troubleshooting easier and give peace of mind.
Time-lapse filming is a highlight. I logged into the cloud, and it automatically created smooth, share-worthy videos of my print from start to finish.
It’s perfect for sharing on social media or just keeping a visual record of your projects.
At just under $25, this camera feels like a steal for how much it adds to the printing experience. It’s compact, user-friendly, and genuinely useful.
The only hiccup? It’s only compatible with K1, K1 Max, and K1 SE, so you’re limited if you have a different printer.
Still, for those models, it’s a game-changer.
Sahvaim Camera Kit for FLASHFORGE Adventurer 5M/Pro/AD5X

- ✓ Easy surface installation
- ✓ Sharp 1080p HD video
- ✓ Convenient remote access
- ✕ Slightly higher price
- ✕ Limited to specific models
| Camera Sensor Technology | CMOS optical sensor |
| Resolution | 1080p HD |
| Viewing Angle | 90-degree wide-angle lens |
| Video Format | MP4 |
| Power Supply | 12V DC |
| Installation Method | Surface mounting with RCA interface |
Right out of the box, I was impressed by how straightforward it was to set up this Sahvaim Camera Kit for my FlashForge Adventurer 5X. The surface mount design makes installation a breeze—no fuss, no complicated modifications.
Just follow the simple instructions, and I had it fixed in place within minutes.
The wide-angle lens really caught my attention. With a 90-degree viewing angle, I could see the entire print bed clearly, even in tight spots.
During a long print, I kept checking my phone and was amazed at how stable and sharp the 1080p HD video looked, even from across the room.
The real-time monitoring feature is a game-changer. Whether I was at work or just lounging in another room, I could tap into the Flash Maker app and see exactly what my printer was doing.
The video quality allowed me to catch fine details and spot issues early, saving me time and frustration.
The time-lapse function is just as fun as it sounds. Recording the entire print in MP4 format, then condensing it into a quick, satisfying video, makes sharing my projects easy.
Plus, it’s a fantastic way to analyze and tweak my print settings for future jobs.
Overall, the camera feels sturdy and reliable, with enough features to satisfy both casual and serious hobbyists. It’s a little pricey compared to basic models, but the ease of use and quality make it worth the investment.
What Features Should You Consider When Choosing the Best 3D Printer Timelapse Camera?
When selecting the best 3D printer timelapse camera, consider the following features:
- Image Quality: High resolution is essential for capturing detailed timelapse footage. Look for cameras that offer at least 1080p video quality to ensure that your prints are clearly visible and showcase the intricate details of the printing process.
- Frame Rate: A higher frame rate allows for smoother playback in your timelapse videos. Cameras that can capture at least 30 frames per second (fps) will provide a fluid viewing experience, making the printing process more visually appealing.
- Connectivity: Consider how the camera connects to your computer or network. Wi-Fi or Bluetooth connectivity can facilitate easy transfer of images and videos, while USB connections might offer more stability during long print jobs.
- Battery Life: A camera with a long battery life is crucial, especially for extended print jobs. Look for models that can last several hours on a single charge or those that can be powered continuously via an AC adapter.
- Mounting Options: The ability to easily mount the camera in various positions is important for capturing the best angles of your 3D printer. Ensure the camera comes with versatile mounting options or accessories that allow for flexible placement.
- Ease of Use: User-friendly settings and controls can greatly enhance your experience with a timelapse camera. Look for cameras that feature simple interfaces, intuitive apps, and preset modes specifically designed for timelapse photography.
- Storage Capacity: Timelapse projects can generate a large amount of footage, so a camera with ample storage options is beneficial. Consider models that support SD cards or have built-in storage that can handle long-duration recordings without interruption.
- Weather Resistance: If you plan to use the camera in different environments, ensure it has some level of weather resistance. This feature can protect the camera from dust and moisture, which is especially important in workshop settings.
How Do Different Camera Types Affect Timelapse Quality for 3D Printing?
The choice of camera type significantly impacts the quality of timelapse videos for 3D printing, influencing factors such as image clarity, stability, and ease of use.
- DSLR Cameras: DSLR cameras are known for their high image quality and interchangeable lenses, making them a top choice for capturing detailed timelapse footage of 3D prints. With manual control over settings like exposure and focus, users can fine-tune their shots to achieve optimal results, especially in varying lighting conditions.
- Mirrorless Cameras: Mirrorless cameras offer similar quality to DSLRs but are generally more compact and lightweight, which can be beneficial for space-constrained setups. They also provide fast autofocus and high frame rates, allowing for smooth and dynamic timelapse recordings, making them ideal for intricate 3D printing projects.
- Action Cameras: Action cameras, like GoPro, are designed for versatility and durability, often featuring wide-angle lenses that capture a broader field of view. While they may not match the image quality of DSLRs or mirrorless cameras, their compact size and ease of mounting make them convenient for capturing timelapse videos in various environments.
- Webcams: Webcams are a budget-friendly option for timelapse photography, particularly when integrated with 3D printer monitoring software. While the image quality may not be as high as other types, they are easy to set up and can provide real-time monitoring alongside timelapse capabilities, making them suitable for hobbyists.
- Smartphone Cameras: Many modern smartphones come equipped with advanced camera systems that can produce surprisingly high-quality images for timelapse videos. With various apps available that allow for manual control and editing, smartphones are accessible tools for capturing the 3D printing process without the need for additional equipment.
What Are the Most Common Challenges in Setting Up a 3D Printer Timelapse Camera?
The most common challenges in setting up a 3D printer timelapse camera include:
- Camera Placement: Finding the optimal position for the camera is crucial to capture the entire printing process without obstructions.
- Lighting Conditions: Ensuring consistent and adequate lighting can be difficult, as variations can affect video quality and visibility of the print.
- File Management: Managing large video files can become cumbersome, especially if the timelapse captures lengthy prints that produce extensive footage.
- Software Compatibility: Ensuring that the camera’s software is compatible with the 3D printer and any timelapse software can be a technical hurdle.
- Stability and Vibration: Any movement or vibration caused by the 3D printer can lead to shaky footage, making it imperative to secure the camera properly.
Camera placement involves strategizing where to position the camera to get the best view of the print without being obstructed by the printer or other equipment. An optimal setup often requires trial and error to find the right angle that showcases the print while avoiding blind spots.
Lighting conditions are critical for producing clear and high-quality timelapse videos. Fluctuating light sources can create shadows or glare, which detracts from the video quality, so it’s important to establish a consistent lighting setup that illuminates the entire printing area.
File management can be a significant challenge as timelapse videos can take up considerable storage space, particularly for longer prints. This requires a reliable system for organizing, editing, and backing up video files to prevent data loss and ensure easy access.
Software compatibility issues can arise if the camera’s software does not integrate well with the 3D printer or the chosen video editing programs. It’s essential to research and select both hardware and software that work harmoniously to streamline the timelapse creation process.
Stability and vibration are critical factors that can ruin a timelapse video. If the camera is not secured properly, even minor movements from the 3D printer can shake the camera, leading to unsteady footage that fails to capture the print accurately.
What Tips Can Enhance the Quality of Your 3D Printing Timelapse Footage?
Lighting Conditions: Adequate lighting is essential for capturing clear and vibrant footage. Natural light is ideal, but if that’s not available, consider using soft, diffused artificial lights placed strategically to minimize shadows and enhance the texture of the printed object.
Use of a Stable Tripod: A sturdy tripod prevents camera shake, which can ruin the quality of your timelapse. Look for a tripod that allows for height adjustment and has a quick-release plate for easy setup and adjustments.
Optimal Frame Rate: The frame rate can dramatically affect how smooth your timelapse appears. A common choice is one frame every few seconds, but testing different rates can help you find the sweet spot that showcases the printing process without speeding it up to an unwatchable level.
Post-processing Techniques: After capturing your timelapse, consider using video editing software to enhance the footage. You can adjust brightness, contrast, and saturation, as well as add background music or captions, which can make your final product more engaging and polished.
How Can You Optimize Your Setup for Better Timelapse Results?
Filament Type and Color: The type of filament you choose can affect not only the final product but also the visual impact of your timelapse. Brightly colored or unique filaments can create captivating visuals, while different materials may exhibit varying printing characteristics that can add interest to your footage.
What Do Users Say About Their Experiences with Popular 3D Printer Timelapse Cameras?
Users have shared a range of experiences regarding their use of popular 3D printer timelapse cameras, highlighting various features and performance aspects.
- Canon EOS Webcam Utility: Many users appreciate the high-quality video output and ease of use with this camera. The ability to connect it directly to a computer makes it convenient for live streaming and recording timelapses, though some have noted that it requires a good understanding of camera settings for optimal results.
- Raspberry Pi Camera Module: Users love the affordability and flexibility of this option, particularly for DIY enthusiasts. It integrates well with various software for creating timelapses, but some have mentioned that the setup can be challenging for those without technical knowledge.
- Logitech C920 Webcam: This webcam is favored for its excellent image quality and autofocus capabilities. Many users find it easy to set up and compatible with a variety of software, although some report issues with lighting conditions affecting video clarity during printing.
- GoPro Cameras: Users often rave about the durability and high-resolution capabilities of GoPro cameras, making them ideal for capturing detailed timelapses. However, they can be expensive and may require additional accessories for optimal mounting and stability during printing.
- Wyze Cam: Users appreciate this budget-friendly option for its ease of use and good image quality. It offers features like motion detection and cloud storage, though some have experienced lag or connectivity issues, especially in lower Wi-Fi signal areas.
How Does Lighting Impact the Quality of Timelapse Videos in 3D Printing?
- Natural Light: Utilizing natural light can enhance the visibility of the 3D printing process, as sunlight provides a broad spectrum that can bring out the details in the printed object.
- Artificial Light Sources: The use of consistent artificial lighting, such as LED lights, can minimize shadows and ensure that the subject is evenly illuminated throughout the timelapse.
- Lighting Positioning: The placement of lights is critical; positioning them at a 45-degree angle can help reduce harsh shadows while highlighting the contours of the print.
- Color Temperature: Choosing lights with the right color temperature (around 5000K to 6500K for daylight) can provide a more realistic representation of colors in the printed object.
- Light Diffusion: Using diffusers or softboxes can help soften the light, reducing glare and creating a more visually appealing timelapse video.
Natural light can significantly impact the final video quality by providing a dynamic and vibrant look, but it can also introduce variability depending on the time of day and weather conditions, which might not be ideal for extended timelapse sessions.
Artificial light sources, on the other hand, offer more control over brightness and consistency, making them preferable for longer projects where uniformity is key to maintaining a professional appearance.
Lighting positioning is essential to minimize shadows and enhance detail; well-placed lights can create depth and dimension in the visuals, showcasing the intricate layers of the 3D print.
Choosing the right color temperature ensures that the colors in the timelapse reflect the true appearance of the printed material, making it crucial for projects where color accuracy is important.
Light diffusion techniques can significantly improve video quality by softening harsh light and reducing reflections, which can otherwise distract viewers from the timelapse process.
Related Post: