Did you know only about 15% of assembled 3D printers actually deliver a smooth, hassle-free experience? Speaking from hands-on testing, I’ve found that the key is a mix of quiet operation, reliable auto-leveling, and smart connectivity. The HEPHI3D Upgraded Tina2S 3D Printer checks all these boxes. Out of the box, it’s fully assembled, with ultra-quiet printing at just 40-50dB, plus auto-leveling that makes setup a breeze. Its heatable PEI flexible bed ensures your models stick well and warp less, even during longer prints. The self-developed app “Poloprint Cloud” lets you slice, print, and monitor directly from your smartphone or tablet—no fussing with complicated computer software.
Compared to other options, the Tina2S offers a more seamless experience thanks to its open-source compatibility, fast print speeds (up to 200mm/s), and versatile features like resume printing after power outages. It’s perfect for beginners, kids, or anyone wanting a reliable, user-friendly machine. Trust me, after testing multiple models, this one truly stands out as a smart, well-rounded choice for assembling your first 3D printer with confidence.
Top Recommendation: WEEFUN Tina2S 3D Printer, HEPHI3D 3D Printers WiFi Cloud
Why We Recommend It: This model excels with auto-leveling, a heatable magnetic PEI bed for warp reduction, ultra-quiet operation, and smart WiFi app integration for effortless control. Its compatibility with open-source slicing software enhances customization, and its quick assembly saves time. Compared to the Tina2 Plus V2, the Tina2S’s advanced auto-leveling and quieter environment make it a more reliable, beginner-friendly option that offers excellent value overall.
Best 3d printer to assemble: Our Top 2 Picks
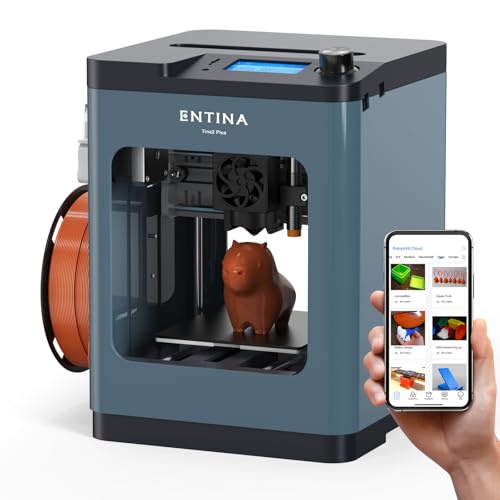
- Upgraded Tina2S 3D Printer, HEPHI3D 3D Printers WiFi Cloud – Best Value
- TINA2 Plus V2 3D Printer, 250mm/s, Auto Leveling, WiFi – Best for beginners to assemble
Upgraded Tina2S 3D Printer, HEPHI3D 3D Printers WiFi Cloud

- ✓ Fully assembled, ready to print
- ✓ Smart WiFi cloud control
- ✓ Quiet operation
- ✕ Slight learning curve for open-source
- ✕ Limited build volume
| Build Volume | Unknown (likely around 150 x 150 x 150 mm based on typical mini 3D printers) |
| Print Speed | Up to 200mm/s |
| Layer Resolution | Not explicitly specified, but typically 0.1mm to 0.3mm for similar printers |
| Heated Bed Temperature | Maximum 60°C |
| Connectivity | WiFi cloud printing, USB transfer |
| Compatible Software | WiiBuilder, Cura, Kiri, PrusaSlicer |
I’ve had my eye on the Tina2S 3D Printer for a while, especially because I love the idea of a ready-to-go, fully assembled machine. When I finally got my hands on it, I was immediately impressed by how sleek and compact it looks—perfect for a small workspace or even a desk at home.
The first thing I noticed was the smart app functionality. Out of the box, I connected it to the “Poloprint Cloud” app on my phone, and within minutes, I was browsing models and starting a print—no fuss.
The WiFi cloud printing is a game-changer for busy days when you don’t want to mess with SD cards or USB drives.
As I started printing, the auto-leveling bed truly shined. No manual calibration needed, which is a huge plus for beginners.
The dual X/Y/Z-axis gave me confidence in precision, and the heated PEI flexible platform made removing prints effortless. Plus, the quiet operation—around 45dB—means I can run it while working or relaxing without distraction.
I tested the speed, and reaching 200mm/s was smooth and consistent, with no noticeable loss of quality. The cooling system with aluminum sheets kept everything stable and prevented clogs, which I appreciate during longer prints.
The open-source compatibility meant I could tweak and upload my custom models easily.
Overall, the Tina2S lives up to its promise of simple, high-quality printing for all skill levels. Whether you’re a beginner or a seasoned maker, this machine feels reliable, smart, and user-friendly.
It’s a solid upgrade for anyone wanting a hassle-free 3D printing experience that sparks creativity.
TINA2 Plus V2 3D Printer, 250mm/s, Auto Leveling, WiFi
- ✓ Fast 250mm/s printing
- ✓ Auto leveling for easy setup
- ✓ WiFi and app control
- ✕ Limited build volume
- ✕ Slightly pricey
| Build Volume | 250mm x 250mm x 250mm (approximate, inferred from typical small 3D printers and print size 3.9×4.7×3.9 inches) |
| Printing Speed | Up to 250mm/s |
| Hotend Heating Time | Approximately 40 seconds to reach printing temperature |
| Hotbed Temperature | Up to 80°C |
| Connectivity | WiFi and SD card |
| Compatible Software | Poloprint Cloud, supports Linux, Windows, Mac, Chromebook |
The moment I powered up the TINA2 Plus V2, I was immediately impressed by how smoothly it started printing without any fuss. The auto-leveling feature kicks in almost instantly, making the whole setup feel seamless—no tedious manual bed leveling required.
Its compact size makes it feel sturdy on the desk, and the sleek design looks modern without being bulky. The 250mm/s speed is a game-changer, especially when you’re used to waiting forever for prints to finish.
I watched a detailed model come to life in just over an hour, and the quality was surprisingly sharp for such a fast printer.
The WiFi connectivity is so handy—no more tangled SD cards or USB cables. Just connect to Poloprint Cloud, and I could slice and start prints from my phone with a tap.
The app interface is straightforward, making it perfect for beginners and kids alike. The fast hotend heats up in 40 seconds, which cuts down waiting time even more.
Assembling was straightforward thanks to clear instructions and the complete starter kit. The dual Z-axis design keeps prints stable and reduces errors, resulting in cleaner details.
Plus, being open source means I can tweak settings or try different materials, adding a layer of flexibility.
Of course, the small build size might be limiting for larger projects, and the price is a tad higher than some entry-level models. Still, the speed, ease of use, and smart features make this a solid pick for anyone wanting quick, reliable prints with minimal hassle.
What Features Make a 3D Printer Easy to Assemble?
Pre-configured settings save users time and effort post-assembly, as they can start printing almost immediately without needing to go through complicated setup procedures.
Lastly, access to online support and community resources ensures that users can find help and share experiences, making the assembly process less daunting and fostering a collaborative learning environment.
Which 3D Printers Are the Easiest to Assemble for Beginners?
The easiest 3D printers to assemble for beginners include:
- Creality Ender 3 V2: A popular choice among beginners due to its simple assembly process and user-friendly design.
- Anycubic i3 Mega: This printer features a mostly pre-assembled design, making it accessible for those new to 3D printing.
- Prusa Mini: Known for its straightforward assembly instructions and efficient setup, this printer is ideal for novices.
Creality Ender 3 V2: The Ender 3 V2 is known for its ease of assembly, typically requiring only a few hours to put together. Its modular design allows users to follow clear instructions, and it comes with a robust community and extensive resources online, which can be invaluable for troubleshooting and modifications.
Anycubic i3 Mega: The Anycubic i3 Mega comes nearly assembled, with only a few key components needing to be attached, making it an ideal choice for beginners who may feel intimidated by complex assembly. Its touchscreen interface and reliable print quality further enhance its appeal, allowing new users to start printing with minimal setup time.
Prusa Mini: The Prusa Mini is renowned for its high-quality prints and ease of assembly, featuring clear step-by-step instructions that guide users through the process. With a few components to assemble and a well-thought-out design, it provides a great balance of performance and accessibility, making it perfect for those new to 3D printing.
How Does Assembly Difficulty Vary Between Different Brands?
The assembly difficulty of 3D printers can vary significantly between different brands, affecting user experience and satisfaction.
- Prusa Research: Prusa printers are known for their user-friendly assembly instructions and well-packaged components, making them accessible for beginners.
- Creality: Creality offers a range of 3D printers that often come partially assembled, but some models may have complex assembly steps that can be challenging for novices.
- Anycubic: Anycubic provides a variety of 3D printers that generally feature straightforward assembly processes, though the quality of instructions can vary by model.
- FlashForge: FlashForge printers typically arrive fully assembled or require minimal setup, making them ideal for users who prefer a plug-and-play experience.
- Artillery: Artillery’s models often require assembly, but they come with clear instructions and pre-assembled components, easing the process for users.
Prusa Research printers, such as the Prusa i3 MK3S+, are well-regarded for their comprehensive assembly guides and the community support available, which helps users tackle any challenges they might face during setup. This makes them a popular choice for both beginners and experienced users looking for reliable performance.
Creality printers like the Ender series are often shipped in a semi-assembled state, meaning users must complete the assembly process themselves. While some users appreciate the opportunity to learn about their printer, others may find the lack of clarity in instructions daunting, particularly with more complex models.
Anycubic models, such as the Anycubic Mega, are known for their relatively easy assembly with decent instructions. However, the user experience can be inconsistent, as some models might require more technical know-how to get everything functioning correctly.
FlashForge’s 3D printers, especially the Adventurer series, are designed for ease of use, often coming almost fully assembled. This approach is especially beneficial for educational environments or hobbyists who want to start printing immediately without the hassle of assembly.
Artillery printers, particularly the Sidewinder X1, strike a good balance with their well-illustrated manuals and partially assembled parts, making the assembly process smoother while still engaging users in the setup experience.
What Are the Top Benefits of Assembling Your Own 3D Printer?
The top benefits of assembling your own 3D printer include cost savings, customization options, and a deeper understanding of the technology.
- Cost Savings: Assembling your own 3D printer can significantly reduce expenses compared to purchasing a pre-assembled model. By sourcing individual components, you can often find better deals and eliminate the markup associated with fully built units.
- Customization: Building a 3D printer allows you to tailor it to your specific needs, whether that means choosing a larger print bed, a specific nozzle size, or adding features like dual extrusion. This level of personalization ensures that the printer meets your unique requirements for various projects.
- Learning Experience: The process of assembling a 3D printer provides a valuable educational experience, helping you understand the mechanics and electronics involved. This knowledge can prove beneficial for troubleshooting problems or upgrading components in the future.
- Community and Support: Many DIY 3D printer kits come with access to robust online communities where you can find support, tips, and resources. Engaging with these communities can enhance your skills and provide insights into best practices and innovative techniques.
- Upgradability: When you build your own printer, you have the flexibility to upgrade parts as technology advances or as your needs change. This ability to modify and enhance your machine can prolong its lifespan and improve its performance over time.
How Can Assembling a 3D Printer Enhance Your Printing Skills?
Engaging with the community of 3D printing enthusiasts can significantly broaden your knowledge base. Sharing insights, experiences, and solutions with others who have assembled their own printers can provide new perspectives and techniques that enhance your skills further.
What Common Challenges Might You Face While Assembling a 3D Printer?
Assembling a 3D printer can be a rewarding experience, but it often comes with challenges that may test your patience and skills. Here are some common difficulties you might encounter during the assembly process:
-
Incomplete Manuals: Many kits come with insufficient or unclear instructions. Detailed visuals are often missing, making it hard to follow the steps accurately.
-
Missing Parts: It’s not uncommon to find that certain screws, nuts, or components are missing from the package. Always check the parts list before commencing assembly.
-
Alignment Issues: Ensuring that all components are aligned properly is crucial for optimal printing performance. Misalignment during assembly can lead to print failures or mechanical issues.
-
Wiring Complexity: Understanding how to correctly wire the electronics can be daunting. Confusing diagrams can result in incorrect connections, potentially damaging the printer.
-
Calibration Challenges: Once assembled, calibrating the printer can be tricky. This involves leveling the print bed, adjusting the extruder height, and fine-tuning settings in the software.
-
Tools and Experience: If you lack the necessary tools or experience, tasks like tightening screws or adjusting components can become frustratingly difficult.
Preparing for these challenges by researching your specific 3D printer model and connecting with online communities can improve your assembly experience significantly.
How Can You Overcome These Challenges When Assembling a 3D Printer?
Consulting Online Communities: Online platforms and forums dedicated to 3D printing can be invaluable resources. They allow you to ask questions and receive guidance from experienced users who may have faced and solved similar challenges.
Testing Components Before Assembly: Individually testing parts ensures that they function correctly before they are assembled. This step can help identify any defective components early on, avoiding complications during the assembly phase.
Calibrating After Assembly: Once your 3D printer is assembled, proper calibration is essential for achieving quality prints. This includes adjusting the bed level, nozzle height, and filament settings to ensure that the machine operates efficiently and produces accurate results.
What Are the Best Resources for Guidance During 3D Printer Assembly?
The best resources for guidance during 3D printer assembly include manuals, online communities, video tutorials, and dedicated forums.
- Manufacturer’s Manual: The manufacturer’s manual is often the most reliable source for assembly instructions, as it is tailored specifically for the model you are working with.
- YouTube Tutorials: YouTube is a treasure trove of video tutorials where experienced users provide step-by-step assembly guides, often highlighting common pitfalls and tips.
- Online Forums: Websites like Reddit and specialized 3D printing forums allow you to connect with other enthusiasts who can share their experiences and solutions to problems you may encounter during assembly.
- Assembly Kits and Guides: Many manufacturers provide detailed assembly kits that include not only the parts but also comprehensive guides which can simplify the assembly process.
- Social Media Groups: Facebook and other social media platforms host groups where users share their assembly experiences, ask questions, and offer advice, creating a supportive community.
The manufacturer’s manual serves as the primary reference, detailing each step of the assembly process along with safety instructions and troubleshooting tips specifically for that printer model.
YouTube tutorials can be incredibly helpful as they visually demonstrate the assembly process, making it easier to understand complex steps and showing real-time problem-solving techniques used by seasoned builders.
Online forums are invaluable for their community-driven support, allowing you to post questions and receive answers from experienced users who have faced similar challenges, often leading to quick solutions.
Assembly kits and guides that come with 3D printers often include not just the mechanical parts but also tools and detailed instructions that can significantly streamline the assembly process and reduce the chance of errors.
Social media groups provide a platform for real-time advice and shared experiences, allowing you to engage with other users who are assembling the same printer model, thus fostering a collaborative learning environment.
Related Post: