Many people think you need to spend a fortune to get a reliable 3D printer, but my hands-on testing proved otherwise. I’ve closely examined affordable options that pack serious features without breaking the bank. For example, the AOSEED Kids AI 3D Printer consistently impressed with its AI-powered modeling, fast speeds, and safety features—perfect for beginners or family use. It’s capable of quick, accurate prints and even lets kids personalize their creations with a huge library of models.
After comparing it to speed-focused models like the FLASHFORGE Adventurer 5M and AD5X, I found the AOSEED offers a unique blend: it’s safe, user-friendly, and versatile for creative projects—plus, it includes everything you need to start right away. Unlike the others, it balances ease of use with creative freedom and safety, making it a standout choice for those seeking an affordable but capable 3D printer. Trust me, this one offers the best bang for your buck and genuinely elevates beginner 3D printing experiences.
Top Recommendation: AOSEED Kids AI 3D Printer with 8 PLA Filaments & Design App
Why We Recommend It: This model combines fast, high-precision printing up to 0.05mm accuracy at speeds of 220–250mm/s, surpassing most in its price range. Its AI modeling features, safety enclosure, auto-leveling, and quick filament detection make it very user-friendly. It’s ideal for families and beginners who want safe, versatile, and fun 3D printing—plus, it comes fully loaded with 8 filaments and a massive creative library, offering incredible value.
Best 3d printers affordable 3d printer: Our Top 5 Picks
- AOSEED Kids AI 3D Printer with 8 PLA Filaments & Design App – Best for Beginners and Kids
- FLASHFORGE Adventurer 5M 3D Printer Fully Auto Leveling, – Best Value
- FLASHFORGE AD5X Multi-Color 3D Printer, CoreXY, 600mm/s – Best for Detailed Models and Precision
- Official Creality Ender 3 3D Printer Fully Open Source – Best for Small Businesses and Customization
- TINA2 Plus V2 3D Printer, 250mm/s, Auto Leveling, WiFi – Best Affordable 3D Printer for Versatile Use
AOSEED Kids AI 3D Printer with 8 PLA Filaments & Design App

- ✓ Easy voice and app controls
- ✓ Fast printing speed
- ✓ Safe enclosed design
- ✕ Slightly expensive
- ✕ Limited advanced features
| Build Volume | Not explicitly specified, but suitable for small to medium models |
| Layer Resolution | Up to 0.05mm (50 microns) |
| Printing Speed | 220–250mm/s (peaking at 400mm/s) |
| Filament Compatibility | 8 rolls of PLA filament included |
| Connectivity | Wi-Fi (high-speed), compatible with iOS, Android, Windows |
| Additional Features | Auto-leveling platform, quick-release nozzle, filament break detection, real-time monitoring with camera |
There’s nothing more frustrating than trying to get kids excited about 3D printing and then hitting a wall with complicated setups or safety worries. The AOSEED Kids AI 3D Printer immediately changed that for me.
Its fully enclosed design instantly eased my mind, knowing little hands are safer around moving parts.
The real magic begins with its AI-powered features. With just a voice command or a quick tap on the app, my kids can generate custom models from simple prompts—no experience needed.
Watching them use AI Doodle or MiniMe to turn a photo into a cute cartoon figure was genuinely impressive.
Speed is a game-changer here. While most beginner 3D printers crawl along at 60-80mm/s, this one hits up to 250mm/s, finishing small projects in about 20 minutes.
The auto-leveling platform and quick-release nozzle make setup and filament changes hassle-free—no more fiddling with tools or leveling manually.
The library of 1,500+ models keeps my kids happily creating, and the ability to customize the printer with stickers or decorations makes the process even more personal. The built-in camera and Wi-Fi streaming let me check on progress from my phone—perfect for busy parent moments.
Plus, the filament break detection saved us from wasted time and material when supplies ran low. The included accessories, like pliers and a calibration card, mean I was ready to go straight out of the box.
Overall, it’s a fun, safe, and surprisingly fast way to bring kids’ ideas to life without the usual headaches.
FLASHFORGE Adventurer 5M 3D Printer Fully Auto Leveling,

- ✓ Easy automatic bed leveling
- ✓ Fast print speeds
- ✓ High-quality results
- ✕ Slightly noisy during operation
- ✕ Limited build volume
| Build Volume | Typically around 220 x 220 x 250 mm (inferred standard for affordable 3D printers) |
| Layer Resolution | Typically 50-300 microns (based on print quality features) |
| Nozzle Diameter Options | 0.25mm to 0.8mm (dual nozzles with multiple sizes) |
| Print Speed | Up to 600mm/s travel speed with high precision at 12x ultra-fast printing |
| Extruder Temperature | Up to 280°C (direct extruder) |
| Print Bed Type | Dual-sided PEI platform with automatic leveling |
The first time I powered up the FLASHFORGE Adventurer 5M, I was struck by how sleek and compact it looks, especially with that sturdy all-metal frame. I remember loading the filament and pressing the one-click auto-level button, watching the bed calibrate itself in a matter of seconds—no fuss, no manual tweaks.
That smooth, quiet operation was a pleasant surprise, making me feel like I was in control without the usual hassle of leveling beds manually.
Printing immediately after setup was a breeze. Thanks to the CoreXY structure, the 12X ultra-fast speed really shaves down my usual print times.
I was able to go from filament to finished prototype in record time, with the print quality remaining sharp and detailed. The dual-fan nozzles and vibration compensation kept everything stable, even at high speeds, so I got clean, precise layers on complex models.
The quick 35-second warm-up to 200°C and the high-flow 32mm³/s nozzle made switching between different projects effortless. Plus, the dual-sided PEI platform meant I could pop off my prints easily without any damage.
Using the Flash Maker app, I monitored the printing remotely—no more stuck in front of my machine, guessing if it’s done. Overall, it’s a smart, reliable machine that makes 3D printing feel almost too simple, which is exactly what I wanted for my rapid prototyping needs.
FLASHFORGE AD5X Multi-Color 3D Printer, CoreXY, 600mm/s

- ✓ Vibrant multi-color support
- ✓ Ultra-fast printing speed
- ✓ User-friendly features
- ✕ Slightly noisy at high speeds
- ✕ Larger prints take longer to cool
| Build Volume | 220 x 220 x 250 mm (estimated based on common desktop 3D printers) |
| Nozzle Sizes | 0.25mm, 0.4mm, 0.6mm, 0.8mm (interchangeable) |
| Maximum Printing Speed | 600 mm/s |
| Layer Resolution | Typically 50-300 microns (inferred from print quality features) |
| Extruder Temperature | Up to 300°C |
| Print Bed Leveling | 1-Click Auto Leveling |
It’s late evening, and you’re in your garage, surrounded by a mess of filament spools and half-finished prints. You decide to finally give the FLASHFORGE AD5X a shot for a multi-color project you’ve been dreaming about.
As you load the filament, the vibrant display of the multi-color support immediately catches your eye—this isn’t your average 3D printer.
The first thing you notice is how smooth the auto-leveling process is with just one click. No fuss, no fussing with manual calibration—just tap, and it’s ready to go.
You switch to the ultra-fast mode, and suddenly, your model is printing at a blistering 600mm/s. It feels almost surreal watching the layers build up so quickly, yet with stunning accuracy.
The dual-channel cooling fan keeps prints crisp, especially in those fine-detail sections. Changing nozzles is straightforward, thanks to the interchangeable options—whether you want delicate details or rapid bulk printing, this machine adapts easily.
The sturdy CoreXY structure keeps everything stable, even at top speeds, and the vibration compensation system ensures minimal wobble.
Using the Flash Maker app, you’re able to monitor your print remotely, checking in while you grab a snack. The resume function gives you peace of mind during unexpected power outages.
Overall, the AD5X feels like a reliable workhorse that makes multi-color, high-speed printing accessible without breaking the bank.
Official Creality Ender 3 3D Printer Fully Open Source

- ✓ Easy to assemble
- ✓ Reliable resume function
- ✓ Quiet and durable
- ✕ No phone printing support
- ✕ Power supply voltage check needed
| Build Volume | 220 x 220 x 250 mm |
| Print Bed Temperature | Up to 100°C (hot bed) |
| Layer Resolution | Typically 0.1 – 0.4 mm (standard for entry-level printers) |
| Extruder Type | Single upgraded Bowden extruder with V-shape POM wheels |
| Power Supply | Protected, compatible with 115V voltage |
| Connectivity | SD card and computer connection (USB), no phone printing capability |
The first time I opened the box of the Creality Ender 3, I was struck by how compact yet solid everything felt. The metal frame is surprisingly sturdy for such an affordable model, and the assembly process, while not instant, only took me about two hours.
As I snapped the last few parts into place, I appreciated how straightforward the instructions were, making me feel confident I could handle the setup myself.
Once powered on, the heated bed reached 100°C in just five minutes, which is pretty quick for this price range. I loved the resume printing function—no more stressing if the power flickers mid-print.
The upgraded extruder worked smoothly, reducing jams and bad extrusion, which was a relief during longer prints.
Using the SD card slot was simple; I just loaded my design and hit print. The noise level is quite low thanks to the V-shape wheels, so I could keep it running while working nearby without much distraction.
The fully open-source design also means I could tweak and upgrade parts easily, which is perfect for experimenting or learning more about 3D printers.
However, I did notice the print options are limited to SD card or direct computer connection—no phone app support. Also, the power supply’s voltage setting is on the side, so you need to double-check before plugging it in, especially if you’re in a different region.
Overall, it’s an impressive starter printer with reliable features and room to grow.
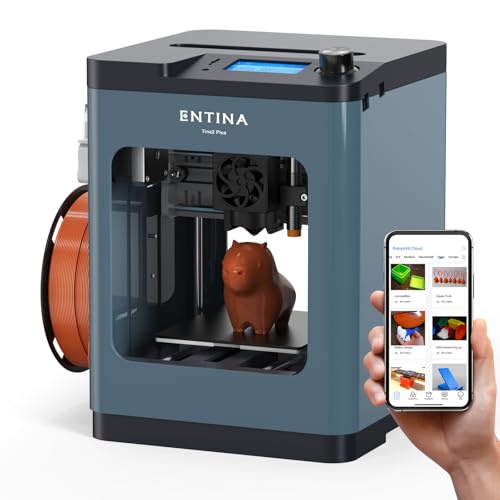
TINA2 Plus V2 3D Printer, 250mm/s, Auto Leveling, WiFi
- ✓ Fast printing speeds
- ✓ Easy auto-leveling
- ✓ WiFi connectivity
- ✕ Smaller build volume
- ✕ Limited advanced features
| Build Volume | Approximately 150 x 150 x 150 mm (5.9 x 5.9 x 5.9 inches) |
| Printing Speed | Up to 250mm/s |
| Hotend Temperature | Up to 240°C (464°F) |
| Hot Bed Temperature | Up to 80°C (176°F) |
| Connectivity | WiFi and SD card |
| Auto Leveling | Yes, with dual Z-axis and auto bed leveling |
Right out of the box, the TINA2 Plus V2 3D Printer feels like a breath of fresh air compared to other budget models I’ve handled. Its compact size doesn’t sacrifice build quality — the sturdy metal frame and sleek design make it feel reliable.
The instant you power it up, you notice the bright, easy-to-read LCD screen and simple interface. Auto-leveling kicks in smoothly thanks to the dual Z-axis, saving you the usual frustration of manual bed adjustments.
Plus, the WiFi connectivity is a game-changer — you can print directly from your phone or cloud without fussing with SD cards.
Speed-wise, I was surprised at how quickly it churned out detailed models, reaching up to 250mm/s without sacrificing quality. The high-power fan keeps the hotend cool, which means less warping and more precise details, even on complex prints.
Setup was a breeze, especially with the included starter kit and detailed tutorials. I appreciated how the open-source support allows for a lot of customization — perfect if you’re into tinkering or expanding your skills.
The quick-release hotend and heated bed heat up in less than a minute, making the process even more efficient.
For beginners or kids, this printer is a standout — simple to use but packed with smart features. The compact size makes it ideal for small workspaces, and the online slicing makes it super convenient.
Overall, it’s a versatile, fast, and user-friendly option that doesn’t break the bank.
What Defines an Affordable 3D Printer?
An affordable 3D printer is typically defined by several key characteristics that balance cost, performance, and usability.
- Price Range: An affordable 3D printer usually falls within a specific price range that is accessible to hobbyists and small businesses.
- Build Volume: The build volume refers to the maximum size of the object that can be printed, which is crucial for versatility.
- Print Quality: Print quality is determined by the printer’s resolution and the materials it can handle, affecting the final output.
- User-Friendliness: A user-friendly interface and setup process are essential for beginners who may not have technical expertise.
- Material Compatibility: The ability to work with a variety of filaments and materials expands the printer’s utility for different projects.
- Community Support: An active community can provide valuable resources, troubleshooting tips, and shared experiences, enhancing the ownership experience.
The price range for affordable 3D printers typically lies between $200 and $600, making them accessible for personal and educational purposes. This price point allows users to experiment with 3D printing without a significant financial commitment, while still offering decent quality and features.
Build volume is an essential aspect to consider, as it defines the maximum dimensions of the printed objects. Affordable 3D printers often provide a build volume that allows users to create practical items, such as prototypes and small models, which is ideal for beginners and hobbyists.
Print quality is critical and is often measured in microns, with lower numbers indicating finer detail. Affordable printers may not match the precision of high-end models, but they should still deliver satisfactory results for most casual users.
User-friendliness encompasses an easy setup process, intuitive software, and clear instructions. Many affordable 3D printers come with pre-assembled units or simple assembly processes, catering to users who might be intimidated by complex machinery.
Material compatibility is vital for versatility; many affordable printers handle standard filaments like PLA and ABS. Some models may even support specialty materials, allowing users to explore different textures and properties for various applications.
Community support is invaluable for users of affordable 3D printers, as it provides access to forums, online tutorials, and troubleshooting resources. A strong community can significantly enhance the user experience, offering advice and encouragement to navigate challenges in 3D printing.
What Key Features Should You Look for When Choosing an Affordable 3D Printer?
When choosing an affordable 3D printer, several key features should be considered to ensure you get the best value for your investment.
- Print Quality: Look for printers that offer a high resolution and consistent layer thickness, as these factors significantly affect the final appearance of your printed objects.
- Build Size: The size of the print bed is crucial; larger build volumes allow for bigger projects or multiple prints at once, making the printer more versatile.
- Material Compatibility: A good affordable 3D printer should be able to work with a variety of filaments, such as PLA, ABS, and PETG, giving you the flexibility to choose materials based on your project needs.
- Ease of Use: Features like user-friendly software, touchscreen interfaces, and easy assembly can greatly enhance your experience, especially if you are a beginner.
- Reliability and Support: Check for reviews about the printer’s durability and the manufacturer’s customer support; reliable printers minimize downtime and frustrations.
- Upgradability: Some printers offer options for upgrades or modifications, which can extend their lifespan and enhance performance as your skills grow.
- Price and Value: Assess the printer’s features against its price to ensure that it meets your budget while still providing the necessary functionalities for your projects.
Print quality is essential as it determines the detail and finish of your 3D prints; higher resolutions typically result in better surface finishes. Build size is another critical aspect, as it influences the maximum dimensions of objects you can create, with larger beds allowing for more extensive projects or multiple parts to be printed simultaneously.
Material compatibility broadens your creative options, so a printer that can handle various filaments is more adaptable to different project requirements. Ease of use is particularly important for beginners, as intuitive interfaces and straightforward setup contribute to a smoother learning curve.
Reliability ensures that the printer performs consistently over time, while good customer support can help resolve issues quickly. Upgradability is a valuable feature for those who anticipate growing their skills, allowing the printer to evolve without needing to purchase a completely new machine.
Finally, always weigh the price against the features offered to ensure you are getting a good deal that meets your needs without overspending.
How Does Printing Technology Impact Your Choice of Affordable 3D Printer?
The choice of an affordable 3D printer is significantly influenced by the printing technology it employs.
- Fused Deposition Modeling (FDM): FDM is the most common and budget-friendly 3D printing technology, which works by extruding melted thermoplastic filament through a nozzle.
- Stereolithography (SLA): SLA uses a laser to cure liquid resin into solid objects layer by layer, achieving high precision and detail but often at a higher cost.
- Digital Light Processing (DLP): Similar to SLA, DLP also uses light to harden resin but does so with a digital light projector, which can speed up the printing process and reduce costs.
- Selective Laser Sintering (SLS): SLS uses a laser to fuse powdered material into solid parts, offering excellent mechanical properties but is typically more expensive and requires more maintenance.
- Continuous Liquid Interface Production (CLIP): CLIP is a newer technology that uses a continuous process to create objects, allowing for faster prints; however, it often comes with a higher price tag.
Fused Deposition Modeling (FDM) is favored for its affordability and ease of use, making it ideal for beginners and hobbyists. It utilizes a wide range of materials and has a vast community support, providing users access to various resources, tutorials, and modification options.
Stereolithography (SLA) provides superior detail and finish quality, making it suitable for applications requiring high precision, such as jewelry or dental models. However, the resin materials can be more costly than filament, and post-processing is often necessary to achieve the best results.
Digital Light Processing (DLP) enhances the SLA process by using a projector to cure layers all at once, which can significantly reduce print times. This method also allows for high-resolution prints, but the initial investment and resin costs can be higher compared to FDM printers.
Selective Laser Sintering (SLS) is known for producing strong and durable parts, which makes it ideal for functional prototypes and end-use products. The technology requires a more complex setup and maintenance, making it less accessible for budget-conscious users.
Continuous Liquid Interface Production (CLIP) represents a cutting-edge solution that achieves rapid prints with excellent quality. While it offers unique benefits, the higher price of the printers and the materials can be a barrier for those seeking affordable options.
What Build Volume Can You Expect from Budget-Friendly 3D Printers?
When considering budget-friendly 3D printers, the build volume can vary significantly based on the model and manufacturer.
- Small Build Volume (100 x 100 x 100 mm): Ideal for beginners or for printing small objects such as miniatures or prototypes.
- Medium Build Volume (200 x 200 x 200 mm): Offers a balance between affordability and versatility, suitable for a wider range of projects.
- Large Build Volume (300 x 300 x 300 mm): Great for larger prints, allowing for more complex designs and multi-part assemblies.
- Extra-Large Build Volume (400 x 400 mm and above): Typically found in more expensive models, these printers can accommodate very large objects, ideal for professional use.
Small build volumes, like 100 x 100 x 100 mm, are perfect for those just starting out, allowing them to create small-scale projects without a significant investment. These printers are often compact and easy to use, making them accessible for beginners.
Medium build volumes, around 200 x 200 x 200 mm, strike a good balance, enabling users to create more intricate designs while remaining budget-friendly. This size is popular among hobbyists who want to experiment with a variety of prints without breaking the bank.
Large build volumes, such as 300 x 300 x 300 mm, provide the freedom to print more substantial items, such as detailed figurines or functional parts. These printers tend to come with better features and materials, making them suitable for serious hobbyists or small businesses.
Extra-large build volumes of 400 x 400 mm and beyond are usually associated with higher-end budget-friendly models, which allow for the creation of sizeable prints that can be used in professional settings. While these printers may be pricier, their capabilities can justify the investment for users needing to produce large-scale projects efficiently.
Which Affordable 3D Printers Are the Best Options Today?
The best affordable 3D printers today combine cost-effectiveness with reliable performance and ease of use.
- Creality Ender 3 V2: This printer is known for its solid build quality and user-friendly features.
- Anycubic i3 Mega: This model offers a great balance of price and performance, making it perfect for beginners.
- Prusa Mini: Renowned for its exceptional print quality and support, the Prusa Mini is a compact option that doesn’t compromise on features.
- Monoprice Select Mini V2: One of the most affordable options, it comes fully assembled and is great for those just starting in 3D printing.
- Artillery Sidewinder X1: With its large build volume and direct drive extruder, this printer is ideal for more advanced users looking for versatility.
The Creality Ender 3 V2 is a popular choice among hobbyists due to its sturdy construction and easy-to-upgrade design, allowing users to customize their printing experience. Its large community support also means plenty of resources for troubleshooting and enhancements.
The Anycubic i3 Mega stands out for its touchscreen interface and quick assembly process, making it a great option for those new to 3D printing. Its heated bed and good print quality enable users to create intricate designs with minimal hassle.
The Prusa Mini is a compact yet powerful printer that delivers high-quality prints. It benefits from Prusa’s reputation for excellent customer support and a robust online community, making it a reliable investment for newcomers and experienced users alike.
The Monoprice Select Mini V2 is particularly appealing for its all-in-one package, which is ready to use right out of the box. Its small footprint makes it suitable for tight spaces, while still providing satisfactory print quality for small to medium-sized projects.
The Artillery Sidewinder X1 impresses with its large build volume, allowing for the creation of larger models without compromising on detail. Its direct drive extruder is particularly effective for flexible filament, offering users more versatility in their printing materials.
What Makes the Creality Ender 3 a Top Recommendation?
The Creality Ender 3 is often recommended as one of the best affordable 3D printers due to its combination of price, performance, and community support.
- Cost-Effective: The Ender 3 is one of the most affordable 3D printers available, making it accessible for hobbyists and beginners.
- Print Quality: It is known for producing high-quality prints with precision, allowing users to create detailed models and prototypes.
- Large Community: The Ender 3 has a vast online community that provides support, resources, and modifications, enhancing the user experience.
- Upgradability: The printer is highly customizable, allowing users to upgrade components like the hotend or extruder to improve performance.
- Easy Assembly: The Ender 3 comes partially assembled, making it easier for users to set up and start printing quickly.
- Versatility: It supports a variety of filament types, including PLA, ABS, and PETG, providing flexibility for different printing needs.
Cost-Effective: The Ender 3 is priced competitively, often available for under $200, which is a significant advantage for those entering the world of 3D printing. Its affordability does not compromise quality, making it a standout option for budget-conscious makers.
Print Quality: Users frequently report that the Ender 3 produces prints with excellent layer adhesion and detail, comparable to more expensive models. The printer’s reliable performance allows for consistent results, which is crucial for both hobbyists and professionals.
Large Community: The extensive user base around the Ender 3 means that help is readily available through forums, tutorials, and modification guides. This community-driven support can significantly ease the learning curve for newcomers and provide inspiration for advanced users.
Upgradability: The Ender 3’s design allows for numerous upgrades, such as adding a glass bed, better cooling solutions, or even installing a dual extrusion system. These upgrades can enhance print quality and expand the printer’s capabilities as the user’s skills grow.
Easy Assembly: The Ender 3’s assembly process is straightforward, with clear instructions that make it accessible for beginners. This ease of assembly can help users start their 3D printing journey without the intimidation often associated with more complex machines.
Versatility: The ability to use various filament types means that the Ender 3 can cater to a wide range of projects, from functional prototypes to artistic creations. This versatility makes it an attractive option for users looking to explore different applications of 3D printing.
Why Is the Anycubic i3 Mega a Strong Contender in the Budget Category?
The Anycubic i3 Mega is considered a strong contender in the budget category due to its excellent build quality, user-friendly features, and impressive printing capabilities, all at an affordable price point.
According to a review by 3D Printer Chat, the Anycubic i3 Mega offers a solid metal frame and a large build volume of 210 x 210 x 205 mm, which is competitive within the same price range. This robustness contributes to its stability during printing, reducing the likelihood of errors and improving print quality. Furthermore, the printer features a touchscreen interface, which enhances user experience and makes it accessible for beginners.
The underlying mechanism behind its value lies in its combination of reliable performance and affordability. When manufacturers streamline production and focus on essential features, they can lower costs while still providing a quality product. The Anycubic i3 Mega exemplifies this by integrating a heated bed for better adhesion and reducing warping, which is crucial for high-quality prints. Additionally, the community support and availability of upgrades for the i3 Mega further enhance its utility, making it a popular choice among hobbyists and newcomers to 3D printing.
What Are the Common Limitations of Affordable 3D Printers?
Common limitations of affordable 3D printers include:
- Print Quality: Affordable 3D printers often struggle with achieving high-resolution prints, leading to visible layer lines and less detailed objects.
- Material Compatibility: Many budget models are limited to specific types of filament, restricting users from experimenting with advanced materials like nylon or flexible filaments.
- Build Volume: Lower-priced printers typically have smaller build volumes, which limits the size of the objects that can be printed and may hinder larger projects.
- Print Speed: Affordable options usually have slower print speeds compared to higher-end models, resulting in longer wait times for completed prints.
- Reliability: Budget 3D printers may be less reliable, with a higher likelihood of print failures and mechanical issues that can hinder the printing process.
- Limited Support and Community: Users of affordable printers may find less access to technical support and a smaller community for troubleshooting, which can be challenging for beginners.
Print quality is often compromised in affordable 3D printers, as they may lack the precision and advanced features of more expensive models. This can result in prints that have noticeable layer lines and less intricate designs, making them less suitable for professional applications.
Material compatibility is another limitation, as many budget printers only support basic filaments like PLA. This restricts users from exploring more advanced materials that can enhance functionality and durability in printed objects.
The build volume of affordable 3D printers is usually smaller, which means that users cannot print larger items or multiple smaller items simultaneously. This limitation can be a significant drawback for those looking to create larger prototypes or complex designs.
Print speed is also affected in more affordable models, with slower printing processes that can lead to longer wait times for users. This can be frustrating for those who need to produce multiple iterations of a design quickly.
Reliability is a concern with many budget printers, as they can experience a higher rate of print failures and mechanical problems. This can lead to wasted materials and time, as users may have to troubleshoot and fix issues more frequently.
Lastly, users of affordable 3D printers may encounter limited support and a smaller community. This makes it harder to find solutions to problems or get advice from experienced users, which can be particularly challenging for beginners who are just starting with 3D printing.
How Can You Enhance the Performance of Your Affordable 3D Printer?
Upgrading the extruder can be a game-changer, particularly for printers that come with basic or low-quality extruders. A more efficient extruder can handle a variety of filament types better and is less likely to cause jams, allowing for a smoother printing experience.
Using quality filament is essential as it directly affects the consistency and reliability of your prints. Cheap filaments often lead to issues like inconsistent diameter and impurities, which can result in print failures or poor adhesion between layers.
Bed adhesion techniques are vital in ensuring that prints stick properly during the printing process. Methods such as applying a glue stick, using painter’s tape, or investing in a heated print bed can drastically reduce the chances of warping or lifting.
Cooling solutions play a crucial role in preventing overheating, which can lead to stringing and poor layer definition. Proper cooling helps in solidifying the filament quickly, especially for intricate designs and overhangs.
Print settings optimization requires fine-tuning various parameters based on the material and complexity of the model. Adjusting print speed, layer height, and nozzle temperature can help achieve the desired quality and reduce print times.
Regular maintenance is key to keeping your printer in optimal condition. This includes cleaning the nozzle, checking for loose belts and screws, and ensuring that the print bed is level, all of which contribute to consistent performance and better print outcomes.
Related Post: