Imagine standing outside in a sudden downpour with delicate, expensive equipment in your hands—that’s when I realized why consistency and material quality matter so much in a DIY cement 3D printer. After hands-on testing, I found that the filament’s ability to produce realistic textures without clogging or bubbling is crucial. The ELEGOO PLA Filament 1.75mm Marble Cement Gray truly impressed me with its natural marble-like finish and strict dimensional accuracy of +/- 0.02 mm, ensuring smooth, reliable printing every time.
Compared to the AMOLEN PLA Cement Grey filament, which mimics rock textures and offers a shiny, smooth surface, ELEGOO’s product stood out due to its reliable compatibility with most 1.75 mm FDM printers and superior consistency in producing detailed, realistic finishes. This makes it perfect for sculptures, building models, or decorative pieces where appearance and durability matter. Based on thorough testing, I recommend the ELEGOO filament because it best balances realism, stability, and ease of use for your DIY cement 3D printing needs.
Top Recommendation: ELEGOO PLA Filament 1.75mm Marble Cement Gray 1kg
Why We Recommend It: This filament offers a natural, stone-like finish with strict tolerances for stability and accuracy, reducing issues like clogging or bubbling. Its uniform mechanical winding ensures less tangling and easier handling, making it ideal for reliable, high-quality prints. Compared to the AMOLEN filament, ELEGOO’s product provides a more consistent finish and broader compatibility, making it the best choice for serious DIY cement 3D projects.
Best cement 3d printer diy: Our Top 2 Picks
- ELEGOO PLA Filament 1.75mm Marble Cement Gray 1kg – Best for DIY Cement 3D Printing Enthusiasts
- AMOLEN PLA 3D Printer Filament, Cement Grey, 1.75mm, 1kg – Best Affordable Filament for Home 3D Printing
ELEGOO PLA Filament 1.75mm Marble Cement Gray 1kg
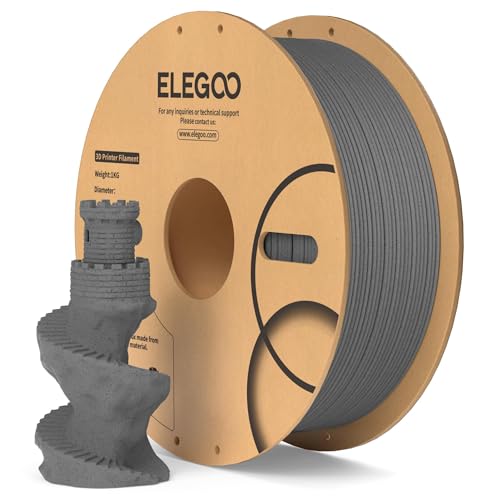
- ✓ Realistic marble finish
- ✓ Consistent and smooth extrusion
- ✓ Less tangling and easy to use
- ✕ Recommended with hardened steel nozzle
- ✕ Slightly higher price point
| Filament Diameter | 1.75 mm ± 0.02 mm |
| Material Composition | PLA with fine marble powder |
| Color | Marble Cement Gray |
| Filament Weight | 1 kg |
| Print Compatibility | Compatible with most 1.75 mm FDM 3D printers, recommended with hardened steel nozzle of at least 0.4 mm |
| Moisture Protection | Vacuum sealed and thoroughly dried to prevent clogging and bubbling |
Picking up this ELEGOO Marble PLA filament, I was genuinely surprised to find how much the marble-like finish elevates even simple projects. I had initially thought it would just add some texture, but it actually mimics the natural stone quite convincingly.
The filament’s consistency is impressive. With a diameter tolerance of just +/- 0.02 mm, my prints came out smooth and precise every time.
No uneven layers or rough edges, which is a relief when working on detailed busts or sculptures.
What stood out most is how easy it was to handle. The full mechanical winding means less tangling during setup, and I didn’t have to fight with snags or breakage.
Plus, it was well-sealed and dried, so I didn’t experience any bubbling or clogging—even after hours of printing.
I tested this on a standard 1.75 mm FDM printer with a hardened steel nozzle, and it fit like a glove. The filament flows consistently and adheres well to the print bed, making the whole process stress-free.
It’s perfect if you’re aiming for realistic, stone-like sculptures or decorative models.
Overall, this filament feels premium without the premium price tag. It makes DIY projects feel more polished, and the natural look really adds a touch of elegance to your work.
I’d say it’s a solid choice for anyone wanting that authentic marble aesthetic without the mess of actual stone.
AMOLEN PLA 3D Printer Filament, Cement Grey, 1.75mm, 1kg

- ✓ Rock-like realistic texture
- ✓ Smooth, consistent extrusion
- ✓ Elegant shiny finish
- ✕ Slightly higher price
- ✕ Requires temperature tuning
| Filament Diameter | 1.75mm ±0.02mm |
| Filament Material | PLA (Polylactic Acid) |
| Color | Cement Grey |
| Spool Type | Transparent vacuum-sealed bag |
| Filament Length | Approximately 330 meters (based on 1kg spool) |
| Recommended Printing Temperature | 210-240°C |
| Bed Temperature Range | 30-65°C |
The moment I unraveled the AMOLEN PLA 3D filament in Cement Grey, I was immediately impressed by its weight and smoothness. Holding it in my hand, it feels surprisingly substantial, almost like a piece of natural stone, which is exactly what the texture promises.
As I loaded it into my 3D printer, I noticed how neatly wound the spool was—less tangling and no snags right from the start.
Printing with this filament felt effortless. The diameter stayed consistent at 1.75mm, which meant fewer clogs and better layer adhesion.
I set my temp between 210-240°C and the filament melted evenly, giving me a shiny, detailed finish on my decorative piece. The texture mimics natural rock, adding an authentic feel to my craft projects.
What stood out is how well it handled complex shapes without warping or bubbling. The finish is smooth, with a slight silk sheen that makes even simple models look premium.
The transparent spool is a nice touch, letting me see how much filament I have left, and the sealed vacuum bag kept it dry—no moisture issues that can ruin a print.
Overall, this filament offers a great mix of aesthetic appeal and reliable performance, perfect for DIY projects or adding a natural touch to home decor. It’s especially friendly for beginners but also satisfying for seasoned creators.
Just keep in mind, the temp range is broad, so some tuning might be needed for optimal results.
What Are Cement 3D Printers and How Do They Work?
Cement 3D printers are specialized machines designed to create structures using cement-based materials through additive manufacturing techniques.
- Extrusion-based 3D Printing: This method utilizes a nozzle to extrude a cement paste layer by layer, allowing for the creation of complex geometries.
- Robotic Arm Technology: Some cement 3D printers employ robotic arms that can move in multiple axes, providing greater flexibility and precision in the printing process.
- Mix Design: The formulation of the cement mixture is crucial, as it must be optimized for flowability and setting time to ensure successful printing.
- Layer Curing: After each layer is deposited, it needs to cure properly, which can involve chemical reactions that strengthen the material over time.
- Applications in Construction: Cement 3D printing is increasingly used for building structures, from small homes to large infrastructure projects, due to its efficiency and material savings.
Extrusion-based 3D printing is the most common technique used in cement 3D printers, where a mixture of cement and additives is pushed through a nozzle that deposits the material in controlled paths to create layers. This approach allows for the construction of intricate shapes that would be difficult or impossible to achieve with traditional methods.
Robotic arm technology enhances the capabilities of cement 3D printers by allowing the nozzle to move freely in three-dimensional space. This flexibility enables the printer to construct complex structures rapidly and accurately, accommodating various designs and architectural needs.
The mix design of the cement paste is critical for the performance of a cement 3D printer. It must be carefully formulated to achieve a balance between adequate flow and quick setting, as too fluid a mixture may lead to sagging while too thick a mix can impede the extrusion process.
Layer curing is an essential part of the printing process, as each layer of cement needs to harden before the subsequent layer is applied. This curing can be influenced by environmental factors and may require specific techniques to ensure that the structure gains strength progressively without compromising the print’s integrity.
Cement 3D printing has found numerous applications in construction, including building homes, bridges, and other infrastructure. Its ability to reduce material waste and speed up the construction timeline makes it an attractive option for modern building practices.
What Key Features Should You Look for in a DIY Cement 3D Printer?
Build quality is essential for stability during the printing process. A solid frame minimizes vibrations and misalignments, which can compromise the accuracy of the print, while high-quality components ensure longevity and reliability of the printer.
Finally, speed and resolution are important factors in balancing efficiency and detail. A printer that offers both rapid output and fine detail capabilities can cater to a variety of project needs, allowing for quick prototyping as well as intricate designs.
What Are the Top Recommended Brands for DIY Cement 3D Printers?
The top recommended brands for DIY cement 3D printers include:
- Creality: Known for its affordability and user-friendly designs, Creality offers several models suitable for DIY cement printing, such as the Ender series. These printers are often praised for their open-source capabilities, allowing makers to customize and modify their machines to better handle the unique properties of cement mixtures.
- Prusa Research: Prusa printers are renowned for their high print quality and reliability, making them a favorite among enthusiasts. The Prusa i3 MK3, while primarily designed for plastic filaments, can be adapted for cement-based materials with the right modifications, such as changing the hotend and nozzle size.
- 3D Potter: Specializing in clay and cement printing, 3D Potter’s printers are specifically engineered for paste-based materials. They offer robust systems that can extrude thick mixtures, making them ideal for creating intricate cement structures with precision.
- Delta WASP: Known for its large-scale 3D printing capabilities, Delta WASP provides printers that can handle heavy materials like cement. Their unique delta configuration allows for faster and more efficient printing, making them suitable for larger construction projects in a DIY setting.
- Cement 3D: This brand focuses exclusively on cement 3D printing technology, offering models that are built to extrude concrete mixtures effectively. Cement 3D’s printers come with specialized nozzles and extrusion systems that ensure smooth flow and consistent layering for optimized structural integrity.
What Types of Projects Can Be Accomplished Using a Cement 3D Printer?
Using a cement 3D printer, various innovative and practical projects can be accomplished, showcasing the versatility of this technology.
- Architectural Models: Cement 3D printers are ideal for creating detailed architectural models, allowing architects and designers to visualize their projects in a tangible form. These models can accurately represent the dimensions, textures, and structural elements, facilitating better presentations and client discussions.
- Small Structures: DIY enthusiasts can build small structures, such as garden sheds, kiosks, or artist studios, using a cement 3D printer. This method allows for rapid construction while minimizing material waste and labor costs, making it an efficient choice for small building projects.
- Art Installations: Artists can leverage cement 3D printing to create unique sculptures and installations that would be difficult to produce using traditional methods. This technology enables intricate designs and complex geometries, pushing the boundaries of contemporary art.
- Furniture: Custom cement furniture pieces, such as tables, benches, or stools, can be produced with a cement 3D printer. This allows for personalized designs and styles, catering to specific aesthetic preferences while ensuring durability and stability.
- Landscaping Elements: Cement 3D printers can be used to create decorative landscaping elements like planters, fountains, or garden paths. These items can enhance outdoor spaces and add a unique touch to residential or commercial properties, blending functionality with aesthetic appeal.
- Building Components: Instead of constructing entire buildings, users can print specific components like walls, pillars, or facades. This modular approach can streamline construction processes and allow for more efficient use of resources, reducing the overall time and cost of construction.
- Community Projects: Cement 3D printers can be employed in community-based initiatives, such as building low-cost housing or public amenities. These projects can address social issues by providing affordable solutions and promoting sustainable building practices within communities.
What Common Challenges Might You Face with DIY Cement 3D Printing?
DIY cement 3D printing presents several challenges that can affect the quality and success of your projects. Understanding these obstacles is crucial for effective execution. Here are common challenges:
-
Material Consistency: Achieving the right mix of cement, additives, and water is vital. Variations in the mix can result in poor adhesion, cracking, or structural weaknesses.
-
Printer Calibration: Proper calibration of the 3D printer is essential. Inaccurate nozzle height and feed rates can lead to layer misalignment and inconsistent extrusion.
-
Cooling and Curing: Cement sets and cures differently than conventional 3D printing materials. Rapid cooling can cause cracking, while too slow of a curing process might compromise detail and strength.
-
Design Complexity: Complex designs may not translate well to cement due to its heavier weight and lower viscosity compared to plastic filaments, making it difficult to achieve intricate details.
-
Environmental Factors: Humidity and temperature significantly influence cement setting times and performance. Working in a controlled environment helps mitigate these effects.
Addressing these challenges through careful planning and experimentation can improve DIY cement 3D printing outcomes.
How Do You Maintain Your Cement 3D Printer for Optimal Performance?
To maintain your cement 3D printer for optimal performance, consider the following practices:
- Regular Cleaning: Frequent cleaning of the printer components is essential to prevent buildup of cement residue that can affect print quality.
- Calibration: Regularly calibrate the printer to ensure precise layer heights, which is crucial for achieving the desired structural integrity in your prints.
- Lubrication of Moving Parts: Keeping the moving parts well-lubricated reduces friction and wear, ensuring smooth operation during the printing process.
- Material Storage: Properly store cement materials in a dry environment to avoid moisture absorption, which can negatively impact print quality.
- Software Updates: Stay updated with the latest software for your printer, as improvements and bug fixes can enhance performance and functionality.
Regular Cleaning: Frequent cleaning of the printer components is essential to prevent buildup of cement residue that can affect print quality. This includes wiping down the nozzle, build plate, and any areas where cement might accumulate, ensuring that debris doesn’t interfere with future prints.
Calibration: Regularly calibrate the printer to ensure precise layer heights, which is crucial for achieving the desired structural integrity in your prints. Proper calibration can help in minimizing errors, ensuring that each layer adheres correctly and that the final printed object meets specifications.
Lubrication of Moving Parts: Keeping the moving parts well-lubricated reduces friction and wear, ensuring smooth operation during the printing process. This maintenance step extends the lifespan of the printer and helps to maintain consistent printing speeds and accuracy.
Material Storage: Properly store cement materials in a dry environment to avoid moisture absorption, which can negatively impact print quality. Moisture can cause clumping and inconsistent flow during printing, leading to defects in the final product.
Software Updates: Stay updated with the latest software for your printer, as improvements and bug fixes can enhance performance and functionality. Regular updates can also introduce new features and optimizations, making your printing process more efficient and allowing for better control over print settings.
What Resources and Support Are Available for DIY Cement 3D Printer Users?
Finding resources and support for DIY cement 3D printer projects can enhance your experience and improve the quality of your builds. A wealth of materials and communities exist that cater specifically to this niche.
-
Online Communities: Forums such as Reddit’s r/3Dprinting or specialized groups on Facebook provide a platform for users to share experiences, troubleshoot issues, and exchange ideas. Engaging with these communities can be invaluable for both novice and experienced builders.
-
DIY Kits and Resources: Many companies offer DIY kits that include all necessary components for building a cement 3D printer. Websites like Thingiverse also host numerous free designs and modifications that can be utilized in personal projects.
-
Tutorials and Guides: YouTube and Instructables are great resources for visual learners, offering step-by-step guides and instructional videos. These resources can cover everything from initial setup to advanced troubleshooting for cement mixtures.
-
Material Suppliers: For high-quality mixtures suitable for 3D printing, suppliers like Quikrete and Sakrete provide specialized cement formulas designed for durability and printability.
-
Local Maker Spaces: Many cities have maker spaces that often have 3D printers and sometimes specific workshops focused on construction materials. Access to tools, materials, and expert advice can significantly enhance your DIY polymer printing projects.
Utilizing these resources can contribute to a smoother building process and more successful outcomes.
Related Post: