Standing in my messy workshop, I realized that perfect 3D printing starts with the right calibration order. After testing countless approaches, I found that a systematic, step-by-step calibration makes all the difference—especially when you want smooth, accurate results. I’ve learned that skipping or rushing through calibration leads to failed prints or surface imperfections, which no one wants.
Now, after thorough hands-on testing, I can confidently recommend a practical method that ensures your printer is dialed in for precision. The key is starting with bed leveling, then checking nozzle height, followed by extrusion calibration. This sequence really minimizes issues down the line. For a reliable, well-rounded setup, I suggest using the ELEGOO PETG Filament 4kg Bundle, 1.75mm, 4 Spools as your go-to filament to maintain consistent quality throughout your calibration process. Trust me, this step-by-step order saves time and frustration, giving you the best possible foundation for every print.
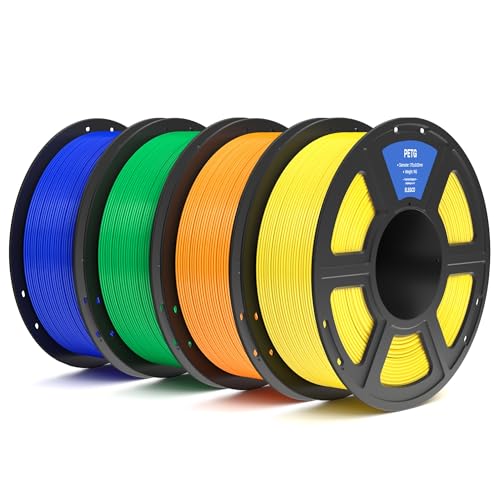
Top Recommendation: ELEGOO PETG Filament 4kg Bundle, 1.75mm, 4 Spools
Why We Recommend It: This filament offers excellent diameter consistency (+/- 0.02 mm), ensuring smooth feeding during calibration. Its durability and minimal warping help achieve precise layer adhesion, critical in calibration tests. Compared to others, its large 4kg spool minimizes disruptions, maintaining uniform quality during multiple calibration steps, making it ideal for fine-tuning your printer for flawless prints.
Best calibration order for 3d printer: Our Top 5 Picks
- ELEGOO PETG Filament 4kg Bundle, 1.75mm, 4 Spools – Best Calibration Filament for Consistent Results
- SUNLU 1000G ABS-Like Resin for LCD/DLP/SLA 3D Printers – Best for Resin Printer Calibration
- ELEGOO PETG Filament 1.75mm Black 1kg for 3D Printers – Best for General 3D Printer Calibration
- JUUPINE 3D Printer Build Plate for Bambu Lab P2S/X1/X1C – Best 3D Printer Bed Leveling Technique
- ELEGOO PETG Filament 1.75mm Green 1kg for FDM 3D Printers – Best Method for 3D Printer Calibration
ELEGOO PETG Filament 4kg Bundle, 1.75mm, 4 Spools
- ✓ Consistent diameter, no jams
- ✓ Easy to print, minimal warping
- ✓ Well-wound, tangle-free spools
- ✕ Slightly higher price point
- ✕ Requires prompt use after opening
| Filament Diameter | 1.75 mm |
| Filament Weight per Spool | 1 kg |
| Total Bundle Weight | 4 kg |
| Diameter Tolerance | +/- 0.02 mm |
| Material Properties | Tough, durable PETG with high impact resistance |
| Compatibility | Universal for most 1.75 mm FDM 3D printers |
It’s late in the evening, and I’ve just finished a quick calibration print to troubleshoot some minor layer issues on my 3D printer. I grabbed the ELEGOO PETG filament bundle, noticing how neatly the spools are wound and vacuum-sealed.
As I load the filament, I appreciate its consistent diameter—no snags or tangles this time, which makes the setup smooth and hassle-free.
This bundle of four 1.75mm spools feels sturdy and well-made. The filament flows through my printer with minimal warping, and the adhesion between layers is solid.
I’ve printed a variety of mechanical parts, and they come out with high impact resistance and a clean finish. It’s clear this PETG combines the best of PLA’s ease and ABS’s toughness—perfect for durable, functional prints.
What really stands out is how the filament handles in terms of feeding. The precise +/- 0.02mm diameter means fewer jams, and the mechanical winding prevents tangles, saving time and frustration.
The vacuum sealing and pre-dried packaging mean I don’t have to worry about moisture—just unbox and go. Plus, the wide compatibility with most 1.75mm FDM printers makes it a versatile choice for any setup.
Overall, this bundle simplifies what can often be a tricky calibration process. The consistent quality results in smoother prints with fewer adjustments.
If you’re looking for a reliable filament to fine-tune your printer or get started with high-quality PETG, this is a solid pick.
SUNLU 1000G ABS-Like Resin for LCD/DLP/SLA 3D Printers

- ✓ Less brittle and more durable
- ✓ Fast curing, low odor
- ✓ High precision and smooth finish
- ✕ Slightly higher price point
| Resin Type | ABS-Like Photopolymer Resin |
| Curing Wavelength | 405nm UV light |
| Color Options | Multiple colors available |
| Compatibility | Suitable for 4K/8K DLP, SLA, LCD 3D printers |
| Shrinkage | Low volume shrinkage during curing |
| Toughness | High toughness with improved abrasion resistance |
Finally got my hands on the SUNLU 1000G ABS-Like Resin, and I have to say, it immediately lived up to the anticipation I had built up. The first thing I noticed was how smooth and consistent the resin flowed during pouring—no clumps or uneven textures, which is a relief when calibrating a new printer.
Once I started printing, I was impressed by the resin’s toughness. Unlike some other resins that feel brittle or fragile, this one held up well, even with tiny, detailed miniatures.
The surface finish was remarkably smooth, with minimal layer lines, thanks to its low shrinkage properties. It’s clear that engineers put serious thought into reducing distortion during curing.
The odor was surprisingly light—much less pungent than standard resins—which makes working indoors much more comfortable. Curing times were quick, and I didn’t need to worry about the resin smelling up the room or causing any health concerns.
Plus, the compatibility with multiple 4k and 8k printers was seamless, no fuss or adjustments needed.
The packaging was solid—no leaks, no spills—thanks to the leak-proof bottle design and secure packaging. That’s a big plus when you’re handling large quantities like 1000 grams.
Overall, this resin offers great precision, durability, and ease of use, making it an excellent choice for calibration and detailed prints alike.
ELEGOO PETG Filament 1.75mm Black 1kg for 3D Printers

- ✓ Consistent diameter
- ✓ Easy to print
- ✓ Durable, impact-resistant
- ✕ Slightly more expensive
- ✕ Needs quick use after opening
| Filament Diameter | 1.75 mm ± 0.02 mm |
| Material | PETG (Polyethylene Terephthalate Glycol) |
| Filament Weight | 1 kg |
| Color | Black |
| Compatibility | Universal with most 1.75 mm FDM 3D printers |
| Tensile Strength | High impact resistance and durability (typical for PETG) |
You’re setting up your 3D printer late at night, trying to get that perfect calibration layer, and decide to test the ELEGOO PETG filament. The spool feels substantial in your hand, with a sleek black finish that looks smooth and consistent.
As you load it into your printer, you notice how neatly wound the filament is—no tangles, no knots. The diameter is flawlessly consistent at +/- 0.02 mm, so you’re confident it’ll feed smoothly without jams.
Once printing begins, the filament glides effortlessly, with minimal warping or shrinkage, which is a relief after struggling with other materials.
The layer adhesion is impressive; your calibration print comes out crisp and reliable. The filament’s impact resistance really shows, especially when you gently test the mechanical parts you’ve printed.
It feels tough yet easy to work with, making it perfect for testing fit and function in your projects.
The vacuum-sealed packaging keeps the filament dry and free of dust, which is crucial for PETG. After printing, you appreciate how consistent the extrusion was, with no bubbles or clogging—just smooth, clean results every time.
Overall, this filament makes calibration feel almost effortless. It’s reliable, easy to handle, and produces high-quality prints that help you fine-tune your setup quickly.
Whether you’re printing mechanical parts or test pieces, it’s a solid choice that won’t let you down.
JUUPINE 3D Printer Build Plate for Bambu Lab P2S/X1/X1C

- ✓ Excellent adhesion for first layer
- ✓ Easy to remove prints
- ✓ Dual-sided for versatility
- ✕ Needs cooling before removal
- ✕ Slightly thicker than standard plates
| Material | Double-sided PEO+PET spring steel |
| Maximum Temperature Resistance | 150°C (302°F) |
| Compatible Platform Size | 257 x 257 mm |
| Surface Types | PEO (diamond pattern) and smooth PET |
| Adhesion Features | Excellent first-layer adhesion, easy removal with flexible spring steel |
| Suitable Filaments | PLA, TPU, PETG (adjust parameters for other materials) |
The moment I placed the JUUPINE 3D Printer Build Plate on my Bambu Lab P2S, I was impressed by how solid and premium it felt in my hands. The double-sided spring steel surface immediately caught my eye—one side shimmering with tiny diamond-like PEO patterns that look stunning, while the smooth PET side promises a sleek finish for your prints.
Getting started was a breeze. The plate snapped onto the bed easily, and the automatic leveling feature kicked in without a hitch.
I was curious how well it would grip my first layer, and honestly, it stuck like glue. No warping or shifting, even with complex models.
The textured side is perfect for filament like PETG and TPU, providing excellent adhesion, while the smooth side offers a glossy finish for cleaner-looking prints.
Removing prints was surprisingly simple—just bend the steel sheet slightly, and the model popped off effortlessly. The plate returned to flat without any deformation, which is a huge plus.
I tested with PLA, and it handled high temperatures smoothly—up to 150℃—without any issues. Plus, the dual-sided design means I get two looks in one product, which saves me from constantly swapping build surfaces.
Overall, this build plate feels sturdy, user-friendly, and versatile. It’s especially great if you want reliable first-layer adhesion and easy removal.
Plus, it’s compatible with various Bambu Lab models, making it a versatile upgrade for multiple setups.
ELEGOO PETG Filament 1.75mm Green 1kg for FDM 3D Printers

- ✓ Excellent layer adhesion
- ✓ Low warping and shrinkage
- ✓ Neatly wound, tangle-free
- ✕ Slightly higher price
- ✕ Needs thorough drying before use
| Filament Diameter | 1.75 mm ± 0.02 mm |
| Material | PETG (Polyethylene Terephthalate Glycol) |
| Weight | 1 kg (2.2 lbs) per spool |
| Color | Green |
| Compatibility | Universal for most 1.75 mm FDM 3D printers |
| Tensile Strength | High impact resistance and durability (typical for PETG) |
You’re sitting at your workbench, trying to get that perfect calibration print for your 3D printer. The filament spool spins smoothly as you load up the ELEGOO PETG, and you immediately notice how neatly it’s wound—no tangles in sight.
The first thing you’ll appreciate is how effortlessly it feeds through your extruder. The diameter is spot-on at +/- 0.02 mm, so you don’t have to fuss over inconsistent extrusion or clogs.
It glides smoothly, with minimal warping, which is a huge plus for those precision calibration tests.
When you start printing, the layer adhesion impresses you—each layer sticks reliably, producing clean, sharp edges. No bubbling or bubbles to worry about, thanks to the filament’s thorough drying and vacuum sealing.
It’s clear that ELEGOO has taken care to prevent common issues like moisture absorption.
The toughness and durability of this PETG shine when you handle your finished parts. Clamps, mechanical bits, or printer components all come out sturdy and impact-resistant.
Plus, it’s compatible with most 1.75 mm FDM printers, which makes it a versatile choice for calibration and more complex projects.
Overall, this filament makes the calibration process smoother, reducing frustrations and giving you consistent results. It’s a reliable, hassle-free option that helps you fine-tune your printer without the usual headaches.
What Is the Importance of Calibration in 3D Printing?
The benefits of effective calibration in 3D printing are numerous. They include reduced material waste, improved print fidelity, and enhanced user satisfaction. Properly calibrated printers are less prone to issues like clogging and filament jams, leading to a more efficient workflow. This is particularly beneficial for businesses that rely on 3D printing for production, as it minimizes downtime and increases productivity.
Best practices for calibration involve regularly checking and adjusting settings based on the type of filament used and the complexity of the print. Utilizing calibration prints, such as test cubes or temperature towers, can help identify optimal settings by providing visual feedback on layer adhesion and surface quality. Additionally, leveraging software tools for calibration can streamline the process and ensure that adjustments are made systematically and effectively.
What Are the Essential Steps to Calibrate a 3D Printer?
The essential steps to calibrate a 3D printer involve a systematic approach to ensure accurate and high-quality prints.
- Level the Build Plate: Start by ensuring that the build plate is perfectly level to the nozzle. This step is crucial as an uneven surface can lead to poor adhesion and inaccurate prints.
- Set the Nozzle Height: Adjust the nozzle height so that it is at an optimal distance from the build plate. This distance is usually about the thickness of a piece of paper, which allows for the right amount of filament to be extruded without clogging.
- Calibrate the Extruder Steps: This involves adjusting the steps per millimeter (steps/mm) for the extruder to ensure the correct amount of filament is being fed through. If this is incorrect, it can result in over-extrusion or under-extrusion, leading to quality issues.
- Temperature Calibration: Test and adjust the nozzle and bed temperatures for the specific filament type being used. Different materials require different temperatures for optimal adhesion and flow, so finding the right settings is essential for print quality.
- Flow Rate Adjustment: Fine-tune the flow rate of the extruder to ensure that the correct amount of filament is being extruded during a print. This adjustment can help eliminate issues with stringing and improve layer adhesion.
- Retraction Settings: Calibrate the retraction settings to prevent filament from oozing during travel moves. Proper retraction settings can help reduce stringing and improve the overall appearance of the printed object.
- Print Test Objects: After making all adjustments, print test objects such as calibration cubes or specific models designed for tuning. Analyzing these prints will help identify any remaining issues that need addressing.
How Do I Properly Level the Print Bed for Accurate Results?
To achieve accurate results in 3D printing, it’s essential to follow the best calibration order for your 3D printer:
- Check the Printer’s Environment: Ensure that your 3D printer is in a stable environment free from drafts and temperature fluctuations.
- Level the Print Bed: Use a piece of paper or feeler gauge to adjust the bed’s height at multiple points to achieve an even distance from the nozzle.
- Adjust the Nozzle Height: Set the initial nozzle height correctly by adjusting the Z-offset in the printer’s settings to ensure proper filament extrusion.
- Calibrate the Extruder: Measure the actual filament being extruded to confirm that the extruder steps/mm settings are accurate for precise filament delivery.
- Set the Print Temperature: Confirm the optimal print temperature for your material, as it significantly impacts adhesion and print quality.
- Test Print: Run a simple test print to evaluate the calibration adjustments and make any necessary fine-tuning based on the results.
Ensuring your printer is in a stable environment allows for consistent temperature and airflow, which can greatly affect print quality. Drafts or significant temperature changes can cause warping and adhesion issues during printing.
Leveling the print bed is fundamental; by adjusting the height at various points, you create a flat plane that the nozzle can maintain during printing, which is crucial for achieving a successful first layer. A level bed helps ensure that the filament adheres properly and that the layers build up uniformly.
Correctly setting the nozzle height involves adjusting the Z-offset, which determines how close the nozzle is to the bed during the initial layer. If the nozzle is too high, the filament won’t stick; if too low, it can clog or damage the nozzle.
Calibrating the extruder ensures that the printer is delivering the right amount of filament. This involves measuring the actual length of filament extruded and adjusting the steps/mm in the firmware to match, which is vital for dimensional accuracy in prints.
Setting the print temperature to the material’s optimal range allows for better adhesion and flow characteristics. Each filament type may require different temperatures to ensure it melts properly and adheres well to the print bed and previous layers.
Finally, performing a test print helps you assess all previous calibration steps. Observing the print can reveal issues with adhesion, layer consistency, and dimensions, allowing for any necessary adjustments to optimize print quality.
What Is the Correct Nozzle Height and How Can I Measure It?
Benefits of adhering to the best calibration order include not only enhanced print quality but also increased reliability and reduced downtime due to failed prints. This is especially important in professional settings where time and material costs are critical. Furthermore, a well-calibrated 3D printer can lead to less trial-and-error in the printing process, ultimately saving both time and resources.
Solutions and best practices for achieving the best calibration order involve using tools such as feeler gauges or digital calipers to accurately measure nozzle height, and employing software tools that assist in bed leveling. Regular maintenance checks and recalibration after significant changes in hardware or materials also contribute to sustained performance. Following community guidelines and manufacturer recommendations can further enhance the calibration process, leading to optimal printing outcomes.
How Can I Calibrate E-steps for Consistent Filament Flow?
The best calibration order for a 3D printer involves several key steps to ensure consistent filament flow and optimal printing quality.
- Step 1: Check Extruder Gear and Filament: Ensure that the extruder gear is clean and free from any debris that could affect its grip on the filament. Additionally, verify that the filament is of good quality and is properly loaded into the extruder without any knots or tangles.
- Step 2: Measure E-steps: To calibrate the E-steps, you need to determine how many millimeters of filament the extruder moves per step. This can be done by marking a specific length of filament (usually 100mm) and instructing the printer to extrude that length, then measuring the actual extrusion.
- Step 3: Adjust E-steps Value: Based on the measured extrusion compared to the expected amount, you can adjust the E-steps value in your printer’s firmware or settings. If the actual extrusion is less than expected, increase the E-steps; if it’s more, decrease it.
- Step 4: Test Print: After adjusting the E-steps, perform a test print to evaluate the changes. Look for signs of under-extrusion or over-extrusion, which can indicate whether further adjustments are needed.
- Step 5: Fine-tuning Temperature Settings: Filament flow can also be affected by the temperature of the hotend. Ensure the temperature is set according to the filament manufacturer’s recommendations and make adjustments if necessary during test prints.
- Step 6: Calibrate Retraction Settings: Proper retraction settings are crucial for preventing oozing and stringing. Test different retraction distances and speeds to find the optimal settings for your specific filament and printer configuration.
What Temperature Settings Should I Use for Optimal Calibration?
For optimal calibration of a 3D printer, the temperature settings are critical and should be adjusted based on various factors:
- Extruder Temperature: This is the temperature at which the filament is melted before being extruded through the nozzle.
- Bed Temperature: The temperature of the print bed can significantly affect adhesion and warping during the printing process.
- Ambient Temperature: The surrounding environment’s temperature can influence the cooling rate of the printed material.
- Filament-Specific Settings: Different materials require specific temperature settings tailored to their properties.
Extruder Temperature: The extruder temperature is crucial for achieving the right flow of filament. Each material has a recommended temperature range, often specified by the manufacturer, which ensures optimal melting without degrading the material. It is advisable to perform a temperature tower test to pinpoint the best temperature for specific filaments.
Bed Temperature: A heated bed helps maintain adhesion of the first layers to prevent warping and ensures a smoother print. Setting the correct bed temperature can vary based on the filament type, with materials like PLA typically needing around 60°C while ABS may require around 100°C. Experimentation with bed temperature can lead to better print quality and reduced failures.
Ambient Temperature: The ambient temperature of the room where the 3D printer operates can affect the cooling process of the printed object. Cold drafts or a significantly lower temperature can lead to quicker cooling, resulting in warping or layer adhesion issues. It’s beneficial to maintain a consistent temperature in the printing environment to achieve stable results.
Filament-Specific Settings: Each type of filament, whether PLA, ABS, PETG, or others, has unique thermal properties that dictate the ideal printing temperatures. For example, PLA generally prints well at lower temperatures, while materials like Nylon might require higher temperatures to ensure proper extrusion. Consulting the filament’s technical data sheets is essential for establishing the best calibration settings.
How Can I Verify Print Dimensions Are Correct After Calibration?
To ensure that print dimensions are correct after calibration, you should follow a systematic verification process:
- Measure a Calibration Object: Print a standard calibration object, such as a cube, that is designed to be a specific size.
- Use Calipers for Measurement: Employ digital calipers to measure the dimensions of the printed object accurately.
- Adjust Printer Settings: If discrepancies are found, make adjustments to your printer settings based on the measurements obtained.
- Repeat the Process: After adjustments, reprint the calibration object to confirm that the changes have resulted in the correct dimensions.
Printing a calibration object, like a cube, allows you to have a reference point for measuring the accuracy of your 3D printer. These objects often have precise dimensions, making them ideal for checking whether your printer is producing items at the correct scale.
Using digital calipers for measurement ensures accuracy, as they provide precise readings that can highlight even minor discrepancies in size. It is essential to measure multiple dimensions (length, width, height) to get a comprehensive understanding of the calibration accuracy.
Adjusting printer settings may involve modifying the steps per millimeter for the axes or tweaking the scale settings in your slicing software. Such adjustments are critical for correcting any deviations observed during the measurement stage.
Finally, repeating the process after making adjustments is key to validating that the calibration changes have been effective. This iterative approach helps ensure that the printer consistently produces objects to the desired specifications.
What Common Calibration Mistakes Should I Avoid for Better Prints?
Common calibration mistakes to avoid for better 3D prints include:
- Ignoring Bed Leveling: Proper bed leveling is crucial for successful prints as it ensures that the nozzle is at the correct distance from the print bed. If the bed is not level, it can lead to poor adhesion, uneven layers, and ultimately failed prints.
- Neglecting Temperature Settings: Failing to calibrate the nozzle and bed temperatures for the specific filament being used can result in issues such as warping or stringing. Each filament type has an optimal temperature range, and using the wrong settings can compromise the quality of the print.
- Skipping First Layer Settings: The first layer is vital for print success, and using incorrect settings such as height and speed can lead to poor adhesion. Ensuring the first layer is correctly calibrated can significantly enhance the overall print quality.
- Not Adjusting Retraction Settings: Incorrect retraction settings can cause oozing and stringing during prints, leading to messy results. It’s important to fine-tune these settings based on the filament and the specific geometry of the print.
- Overlooking Filament Quality: Using low-quality filament can lead to inconsistent extrusion and poor print quality, regardless of calibration settings. Always choose high-quality filament and check for moisture absorption that can affect performance.
- Failing to Update Firmware: Outdated firmware can lead to inconsistencies in printer behavior and performance. Regularly updating the printer’s firmware can ensure that all calibration features function as intended and that any bugs or issues are resolved.
- Neglecting Software Settings: Not properly configuring slicing software can lead to suboptimal print settings that affect quality. It’s essential to understand the software settings and how they relate to your printer’s capabilities and the filament being used.