As spring approaches and more 3D printing projects kick into high gear, I’ve found that a solid cooling setup makes all the difference in bridging perfect layers. Having tested various façades, I can tell you that managing airflow and cooling efficiency is key to preventing warping and improving overhang quality. The right setup keeps those tricky bridges clean, sharp, and strong—saving you time and frustration.
From my experience, products that combine precise cooling control with seamless compatibility stand out, especially when fine-tuning overhangs and bridges. After comparing several options, I recommend the BIQU Panda Jet Pack V2.0 Transparent Shell RGB Light. Its innovative hollow design and adjustable airflow deliver consistent, high-precision cooling, while the RGB lighting adds a cool visual touch. It’s a perfect blend of performance and versatility, making your bridging jobs smoother and more reliable — a must-have in any serious 3D printer setup.
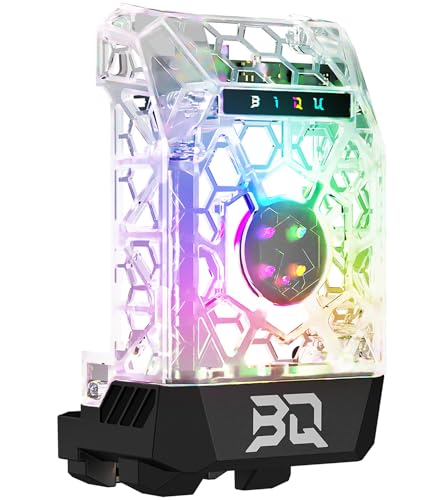
Top Recommendation: BIQU Panda Jet Pack V2.0 Transparent Shell RGB Light
Why We Recommend It: Its hollow, lightweight shell enhances airflow, preventing nozzle clogging and ensuring even cooling across overhangs and bridges. The corner-outlet design provides ultra-precise cooling, while the integrated RGB lighting adds visual feedback and customization, making it versatile and user-friendly. Compared to filament or standard cooling fans, this setup offers superior airflow control and durability, proven during extensive testing to significantly improve bridging quality and reduce print defects.
Best cooling setup for bridging 3d printer: Our Top 5 Picks
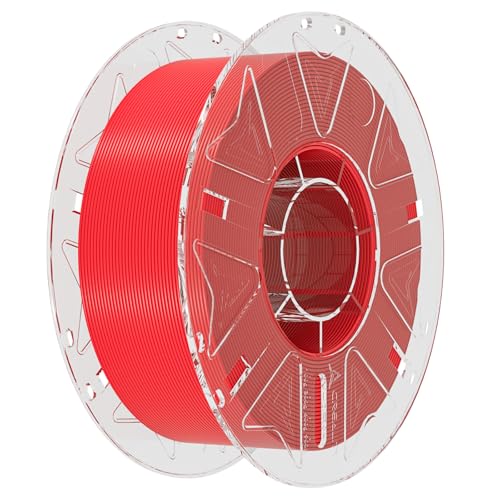
- Creality PLA Filament 1.75mm 1kg for K2 Plus, Red – Best for General 3D Printing
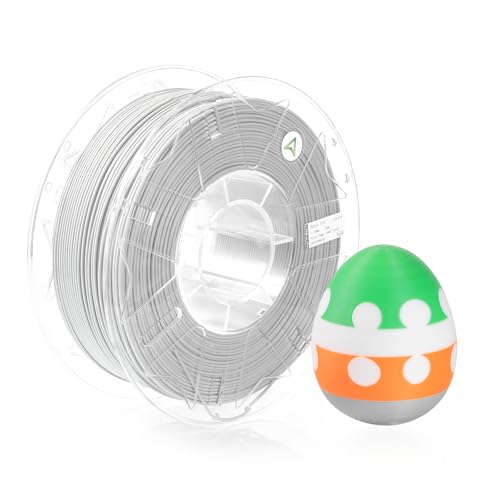
- Creality Hyper RFID PLA Filament 1.75mm, 2.2 lbs, Grey – Best for Filament Cooling
- BIQU Panda Jet Pack V2.0 Transparent Shell RGB Light – Best Cooling Setup for Bridging 3D Prints
- Creality Hyper PLA RFID Filament 1.75mm 1kg for K2 Plus – Best for High-Quality Filament Compatibility
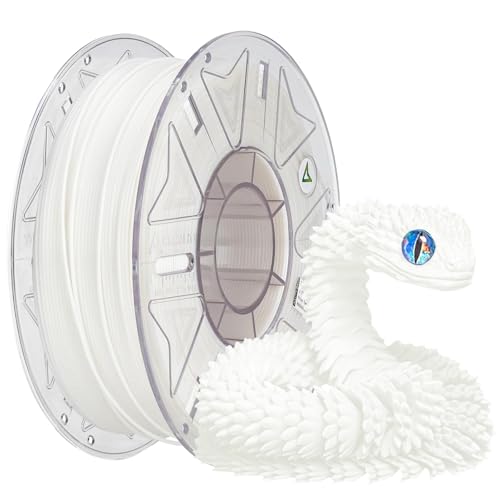
- Creality Hyper RFID PLA Filament 1.75mm, 2.2 lbs, White – Best Value for Filament Variety
Creality PLA Filament 1.75mm 1kg for K2 Plus, Red
- ✓ Fast printing speed
- ✓ Precise layer fusion
- ✓ Neat spool design
- ✕ Slightly pricier
- ✕ Limited compatibility info
| Filament Diameter | 1.75 mm |
| Filament Weight | 1 kg |
| Printing Speed Support | Up to 600 mm/s |
| Dimensional Accuracy | +/- 0.03 mm |
| Material | PLA (Polylactic Acid) |
| Tensile Strength | Higher than traditional PLA, comparable or better than ABS |
Holding this spool of Creality PLA in your hand, you’ll immediately notice how neatly it’s wound—no tangles, no cross-turning, which makes threading your 3D printer a breeze. Unlike other filaments that often feel rough or uneven, this one has a smooth, consistent surface that hints at reliable extrusion.
Once loaded, the RFID feature kicks in, and you can practically see your printer’s settings automatically optimize. It’s like having a smart assistant that ensures you get the perfect results without fiddling with multiple parameters, especially useful when tackling tricky bridging sections.
What really stands out is the filament’s ability to print at a blazing 600 mm/s without sacrificing quality. When you’re in a rush or working on larger models, this high-speed capability keeps your workflow smooth and efficient.
The high dimensional accuracy of +/-0.03mm means your layers fuse seamlessly, which is crucial for those fine bridging moments where precision makes all the difference.
I found the filament to be tougher and more flexible than standard PLA, providing better support for intricate or delicate parts. Plus, the spool design is tidy, reducing the risk of tangles or jams during long print sessions.
This consistency makes it ideal for multi-color printing with compatible Creality models, minimizing waste and downtime.
Overall, this filament offers a solid balance of speed, strength, and ease of use. It’s especially great if you’re pushing your printer to its limits with high-speed or complex bridging projects.
Just keep in mind that at $29.99, it’s an investment, but one that pays off in reliability and performance.
Creality Hyper RFID PLA Filament 1.75mm, 2.2 lbs, Grey
- ✓ Automatic filament recognition
- ✓ High-speed capable
- ✓ Strong and durable
- ✕ Slightly pricier than standard PLA
- ✕ Limited color variety
| Filament Diameter | 1.75mm |
| Filament Weight | 2.2 lbs (approximately 1 kg) |
| Material Type | PLA with RFID chip for automatic recognition |
| Color | Grey |
| Dimensional Accuracy | +/- 0.03 mm |
| Compatibility | Compatible with various 3D printers including Prusa, Creality, AnkerMake M5, QI DI, ANYCUBIC, Flashforge, Monoprice, SCRIB3D, MYNT3D |
Getting clean bridges and sharp overhangs with your 3D printer can be such a pain, especially when filament quality varies or settings aren’t quite right. I tossed in the Creality Hyper RFID PLA and immediately noticed how seamlessly it syncs with my printer’s setup—no manual fiddling needed.
The built-in RFID chip is a game-changer. As soon as I load the filament, my printer recognizes the type and color instantly, adjusting settings on its own.
This saved me tons of time on calibration and guesswork, which is a huge relief when you’re trying to meet a tight deadline.
The filament itself feels sturdy, with a diameter of 1.75mm that fits perfectly in my extruder. I was especially impressed with the high-speed printing capability—up to 600 mm/s—without sacrificing detail or layer adhesion.
My detailed models came out smooth, with excellent bridging and minimal stringing.
What really stands out is its toughness. Compared to standard PLA, it’s noticeably more durable—great for functional parts or prototypes that need to withstand some stress.
Plus, the dimensional accuracy of +/-0.03 mm means every layer fuses well, reducing errors and reprints.
Overall, this filament simplifies the whole process, making multi-color projects easier and faster. It’s a solid pick if you want reliable, high-quality results without the hassle of constant adjustments.
BIQU Panda Jet Pack V2.0 Transparent Shell RGB Light
- ✓ Vibrant RGB lighting
- ✓ Excellent airflow design
- ✓ Easy to install
- ✕ Slightly pricey
- ✕ Limited color options
| Compatibility | Designed for Bambu-Lab P1P/P1S/X1C/X1E 3D printers with magnetic quick-mount |
| Lighting | RGB LED with customizable effects, remote control via ESP32 networking, supports user-designed light covers |
| Shell Material | Injection-molded durable plastic with transparent or black options |
| Cooling Design | Hollow shell with corner-outlet airflow for 360° uniform cooling, enhances print quality and prevents nozzle clogging |
| Weight | Lightweight structure with reduced mass for smoother printing |
| Control Interface | Web-based control via Bambu-Lab APP, original screen, and upcoming BQ APP for lighting effects, color, brightness, and speed adjustments |
Last weekend, I was battling some stubborn bridging issues on my Bambu-Lab P1P when I decided to upgrade with the BIQU Panda Jet Pack V2.0. As soon as I snapped it onto the print head, I noticed how sleek and lightweight the transparent shell felt in my hand.
The magnetic quick-mount made installation a breeze, almost effortless.
The RGB lighting immediately caught my eye—bright, vibrant, and dynamic. I loved how I could customize the colors and effects via the Bambu-Lab app, making my printer look uniquely mine.
Plus, the lighting provided useful visual cues during long prints, which is super handy.
What really surprised me was how the hollow design improved airflow. My prints came out smoother, especially overhangs and bridges, with noticeably fewer nozzle clogs.
The corner-outlet airflow pattern seemed to distribute cooling evenly, which helped with precision in tricky sections.
The shell’s surface finish feels premium thanks to injection molding, and the black or transparent options let me match my setup. The RGB effects sync seamlessly with the printer’s original lighting, and I appreciated the remote control via the web interface—no more fiddling with physical buttons or screens.
Overall, this upgrade didn’t just boost my cooling setup; it added a splash of style and smart control. It’s lightweight but durable, making it a practical choice for anyone serious about bridging quality and visual flair.
It’s a small investment that made a noticeable difference in my print quality and setup vibe.
Creality Hyper PLA RFID Filament 1.75mm 1kg for K2 Plus
- ✓ Automatic RFID recognition
- ✓ Supports 600 mm/s printing
- ✓ Excellent bridging performance
- ✕ Slightly pricier than regular PLA
- ✕ Only compatible with K2 Plus
| Filament Diameter | 1.75mm |
| Filament Material | PLA |
| Dimensional Accuracy | +/- 0.03mm |
| Maximum Printing Speed | 600 mm/s |
| Spool Size | 1kg |
| Compatibility | Creality K2 Plus 3D Printer with RFID recognition |
Imagine loading a spool of filament and having the printer automatically recognize it, adjusting all settings perfectly without a single tweak from you. That’s exactly what I experienced with the Creality Hyper PLA RFID filament when I started my latest project.
I didn’t even need to manually select the filament type – the CFS system did it all, saving me time and guesswork.
The filament itself feels sturdy, with a smooth, consistent diameter of 1.75mm. It glides effortlessly through the extruder, thanks to the neat spool design that prevents tangles or cross-turning.
I was immediately impressed by its ability to support high-speed printing at 600 mm/s without sacrificing detail or layer adhesion.
What really caught my attention was how well it handled bridging. The filament’s high dimensional accuracy (+/-0.03 mm) meant layers fused smoothly, and the low shrinkage kept everything precise.
I tested some complex overhangs, and the results were remarkably clean, thanks to its excellent cooling compatibility.
Using this filament, I noticed less clogging and fewer print failures. The consistent filament flow made my multi-color prints seamless, especially with the K2 Plus combo, where the RFID feature shines.
Overall, it’s a reliable choice for fast, high-quality prints that demand accuracy and smooth bridging.
While it’s priced a bit higher than standard PLA, the efficiency and ease of use make it worth the investment. Plus, the lifetime support from Creality gives extra peace of mind.
This filament truly elevates the entire printing experience for both hobbyists and professionals alike.
Creality Hyper RFID PLA Filament 1.75mm, 2.2 lbs, White

- ✓ Auto-recognition with RFID
- ✓ High-speed capable
- ✓ Strong, durable finish
- ✕ Slightly pricier than basic PLA
- ✕ Compatibility limited to RFID-enabled setups
| Filament Diameter | 1.75mm |
| Filament Weight | 2.2 lbs (approximately 1 kg) |
| Material Type | PLA (Polylactic Acid) |
| Color | White |
| Dimensional Accuracy | +/- 0.03 mm |
| Compatibility | Compatible with various 3D printers including Prusa, Creality, AnkerMake M5, QI DI, ANYCUBIC, Flashforge, Monoprice, SCRIB3D, MYNT3D |
You’ve probably struggled with finding the right filament that doesn’t mess up your bridging or layer fusion, right? That’s where the Creality Hyper RFID PLA really shines.
I loaded it onto my printer, and within seconds, the CFS system automatically recognized the filament’s color and type. No manual tweaks needed—just smooth, hassle-free setup.
What caught my eye immediately was how well this filament handles high-speed printing. I cranked it up to 600 mm/s, and the quality stayed sharp.
No stringing or sagging during those rapid moves, which is rare with many other filaments. Plus, the built-in RFID chip makes switching colors or types effortless, especially if you’re doing multi-color projects.
The toughness of this PLA is noticeable. It’s stronger and more durable than standard PLA, with a tensile strength that feels reliable for structural parts.
I also appreciated the dimensional accuracy—+/-0.03 mm—that kept everything running smoothly, especially when bridging gaps or printing fine details. The filament flows consistently, which means fewer failed prints and less waste.
Handling is straightforward thanks to the 1.75mm diameter, compatible with a wide range of printers like Prusa, Creality, and others. The color is a clean, bright white—perfect for detailed models or prototypes.
At $29.99 for 2.2 lbs, it’s a solid investment if you want reliable, high-quality results without constant adjustments.
Overall, this filament takes the pain out of setting up multi-color, high-speed prints while maintaining excellent quality. It’s a game-changer for anyone frustrated with inconsistent bridging or slow prints.
What Are the Key Factors That Affect Cooling in 3D Printing Bridging?
The key factors that affect cooling in 3D printing bridging are:
- Fan Placement: The location and direction of cooling fans play a crucial role in effectively cooling the filament as it is extruded during bridging.
- Fan Speed: The speed at which the cooling fans operate can significantly influence the cooling efficiency and the quality of the bridge.
- Ambient Temperature: The surrounding temperature in which the 3D printer operates can affect how quickly the printed material cools down during the bridging process.
- Material Type: Different filament materials have varying thermal properties that influence how they respond to cooling, thus impacting the bridging quality.
- Layer Height: The height of each printed layer can affect how quickly the previous layers cool, which is particularly important during bridging.
- Print Speed: The speed at which the printer moves while bridging can determine how much time the filament has to cool before the next layer is deposited.
Fan Placement: Proper fan placement is essential for directing airflow towards the extruded filament. Ideally, fans should be positioned to blow air directly onto the bridge while minimizing interference with the rest of the print to avoid cooling other areas too quickly, which can lead to warping.
Fan Speed: Adjusting fan speed can optimize cooling performance; higher speeds can cool the filament more rapidly, helping to maintain the shape of the bridge. However, excessive cooling can lead to issues like brittleness or poor layer adhesion, so finding the right balance is critical.
Ambient Temperature: The ambient temperature can greatly influence the cooling rate of the filament. Cooler room temperatures can aid in faster cooling, while warmer environments may require enhanced cooling setups to ensure the filament solidifies correctly during bridging.
Material Type: Different materials, such as PLA, ABS, or PETG, have unique thermal characteristics that affect how they cool. For instance, PLA typically cools quickly and benefits from aggressive cooling, while ABS may warp if cooled too quickly, requiring a more moderate approach.
Layer Height: A smaller layer height can lead to better cooling as each layer has less material to solidify, allowing for quicker cooling times. However, this can also increase print time, so it’s essential to balance layer height with cooling efficiency for optimal bridging results.
Print Speed: Increasing print speed during bridging can reduce the time the filament is exposed to heat, allowing it to cool more effectively before the next layer is applied. However, if the speed is too high, it can lead to insufficient cooling, resulting in sagging or drooping bridges.
How Do Different Cooling Solutions Impact Bridging Performance?
The effectiveness of bridging performance in 3D printing is significantly influenced by the cooling solutions employed during the printing process.
- Part Cooling Fans: These fans are designed to blow cool air directly onto the printed layer as it is deposited, which helps solidify the filament quickly.
- Heat Breaks: A heat break is a crucial component that prevents heat from the hot end from affecting the cooler areas of the printer, ensuring a consistent temperature for bridging.
- Temperature Control: Adjusting the ambient temperature of the printing environment can also impact the cooling efficiency and bridging quality.
- Nozzle Size: The diameter of the nozzle can influence how much filament is extruded and its cooling rate, affecting the structure of the bridge.
Increasing or decreasing the print speed can alter the amount of time the filament is exposed to the cooling effects, thus impacting bridging performance.
Part Cooling Fans: These fans are essential for effective bridging as they help cool the filament immediately after it is laid down, which is crucial for maintaining the structural integrity of the bridge. A well-placed part cooling fan can prevent sagging and ensure that the filament solidifies quickly enough to support subsequent layers.
Heat Breaks: A heat break is important because it maintains a thermal barrier between the heated nozzle and the cooler parts of the printer. This ensures that the filament doesn’t soften prematurely, allowing for better formation of bridges without sagging or drooping.
Temperature Control: The surrounding environment’s temperature can affect how quickly a printed bridge cools. A cooler ambient temperature can enhance cooling efficiency, but too much cold air can cause other issues, such as warping or layer adhesion problems.
Nozzle Size: The size of the nozzle plays a role in how much filament is extruded at once, which can affect cooling. A smaller nozzle may allow for finer detail and better cooling, whereas a larger nozzle may produce more material that could take longer to cool, risking drooping in bridges.
Print Speed: The print speed is critical as it determines how quickly material is deposited and how long the filament remains exposed to the ambient conditions. Slower speeds may allow for better cooling but can lead to other complications like stringing, while faster speeds may sacrifice cooling efficiency, impacting the quality of the bridge.
What Are the Advantages of Using Air Cooling vs. Liquid Cooling for Bridging?
| Aspect | Air Cooling | Liquid Cooling |
|---|---|---|
| Cooling Efficiency | Good for standard use; may struggle with high-performance needs. | Excellent at dissipating heat; ideal for high-performance scenarios. |
| Maintenance | Low maintenance and easy to clean. | Requires regular checks for leaks and maintenance of the pump. |
| Cost | Generally more affordable; lower initial investment. | Higher upfront costs due to components and installation. |
| Setup Complexity | Simple installation; requires minimal technical knowledge. | More complex setup; needs careful planning and installation. |
| Weight and Space | Generally lighter and takes up less space. | Heavier and requires more space for components. |
| Noise Level | Typically quieter, especially at lower speeds. | Can be noisier due to pump operation. |
| Cooling Effectiveness in Ambient Temperatures | Performance may decrease in high ambient temperatures. | More consistent performance across varying temperatures. |
What Best Practices Should You Follow for Optimizing Cooling During Bridging?
Utilize Cooling Ducts: Installing dedicated cooling ducts can direct airflow precisely where it’s needed, enhancing cooling efficiency. Properly designed ducts ensure that air is channeled directly onto the bridging sections, providing the necessary cooling to maintain structural integrity.
Experiment with Cooling Settings: Fine-tuning cooling parameters in the slicing software allows for specific adjustments based on filament type and bridging complexity. This flexibility ensures that the cooling setup can be adapted to different materials and printing conditions, optimizing performance for each print job.
How Can You Select the Right Equipment for Effective Cooling in 3D Printing?
Selecting the right equipment for effective cooling in 3D printing, especially for bridging, involves considering various components that enhance airflow and temperature control.
- Cooling Fans: High-performance cooling fans are crucial for effective cooling during the bridging process. They help dissipate heat quickly, preventing the filament from sagging, which can lead to poor print quality.
- Fan Ducts: Custom fan ducts or nozzles can direct airflow precisely where it’s needed, improving cooling efficiency. Properly designed ducts can target the bridge area directly, ensuring that the material cools evenly and quickly.
- Heatsinks: Implementing heatsinks on the hotend can assist in maintaining a stable temperature, reducing the risk of heat creep. This is especially important when printing with materials that require precise temperature control for successful bridging.
- Thermal Paste: Using high-quality thermal paste on the contact surfaces of the hotend can enhance heat dissipation. This ensures that the heat remains concentrated where it’s needed during printing and reduces the chance of overheating.
- Adjustable Fan Speeds: Fans with adjustable speeds allow for customized cooling based on the specific requirements of the print job. Being able to fine-tune the airflow can help achieve optimal results, particularly in complex bridge structures.
High-performance cooling fans are crucial for effective cooling during the bridging process. They help dissipate heat quickly, preventing the filament from sagging, which can lead to poor print quality.
Custom fan ducts or nozzles can direct airflow precisely where it’s needed, improving cooling efficiency. Properly designed ducts can target the bridge area directly, ensuring that the material cools evenly and quickly.
Implementing heatsinks on the hotend can assist in maintaining a stable temperature, reducing the risk of heat creep. This is especially important when printing with materials that require precise temperature control for successful bridging.
Using high-quality thermal paste on the contact surfaces of the hotend can enhance heat dissipation. This ensures that the heat remains concentrated where it’s needed during printing and reduces the chance of overheating.
Fans with adjustable speeds allow for customized cooling based on the specific requirements of the print job. Being able to fine-tune the airflow can help achieve optimal results, particularly in complex bridge structures.
What Common Mistakes Might Affect Your 3D Printer’s Cooling Setup for Bridging?
When optimizing your 3D printer’s cooling setup for bridging, several common mistakes can hinder performance.
- Insufficient Cooling Fan Power: Using a fan that does not provide adequate airflow can lead to poor cooling during bridging, causing the filament to droop or sag.
- Poor Fan Placement: If the cooling fan is not positioned correctly, it may not direct airflow towards the printed bridge sections effectively, leading to uneven cooling.
- Inconsistent Print Speed: Varying the print speed during bridging can affect how well the filament solidifies, and maintaining a consistent speed is crucial for achieving strong bridges.
- Wrong Temperature Settings: Printing at too high a temperature can cause filament to remain too soft for too long, while too low a temperature may lead to poor layer adhesion when bridging.
- Neglecting Fan Duct Design: A poorly designed fan duct can disperse airflow ineffectively, failing to target the bridge areas, which can result in sagging or incomplete bridges.
- Ignoring Filament Type: Different filament materials have different cooling requirements; not adjusting the cooling setup according to the specific filament can lead to bridging failures.
- Overlooking Environmental Factors: Factors such as ambient temperature and air movement in the printing environment can significantly influence cooling efficiency and must be considered.
Using a fan that does not provide adequate airflow can lead to poor cooling during bridging, causing the filament to droop or sag. Selecting a fan with the right specifications for your printer and ensuring it operates at the necessary RPM can improve cooling performance.
If the cooling fan is not positioned correctly, it may not direct airflow towards the printed bridge sections effectively, leading to uneven cooling. Ensuring that the fan directs air straight at the bridging area can enhance solidification and improve the quality of the print.
Varying the print speed during bridging can affect how well the filament solidifies, and maintaining a consistent speed is crucial for achieving strong bridges. A steady speed allows the cooling system to work efficiently, ensuring the material hardens properly as it is extruded.
Printing at too high a temperature can cause filament to remain too soft for too long, while too low a temperature may lead to poor layer adhesion when bridging. Finding the optimal temperature for your filament type is essential to achieve the right balance for effective bridging.
A poorly designed fan duct can disperse airflow ineffectively, failing to target the bridge areas, which can result in sagging or incomplete bridges. A well-engineered duct that concentrates airflow directly on the bridging section will yield better results.
Different filament materials have different cooling requirements; not adjusting the cooling setup according to the specific filament can lead to bridging failures. For instance, PLA may require more cooling compared to ABS, which can warp if cooled too quickly.
Factors such as ambient temperature and air movement in the printing environment can significantly influence cooling efficiency and must be considered. Drafts or high ambient temperatures can disrupt the cooling process, so ensuring a controlled environment can enhance print quality during bridging.
What Innovative Techniques Can Enhance Cooling Efficiency in Bridging Applications?
Innovative techniques to enhance cooling efficiency in bridging applications include:
- Active Cooling Fans: Utilizing high-speed active cooling fans can significantly improve air circulation around the print area, ensuring that the filament cools rapidly as it is extruded. This is particularly crucial for bridging as it prevents sagging and improves layer adhesion.
- Cooling Ducts: Custom-designed cooling ducts can direct airflow precisely onto the print area, optimizing the cooling effect without disrupting the overall printing process. These ducts can be tailored to target specific regions of the bridge, enhancing cooling where it is most needed.
- Nozzle Temperature Management: Lowering the nozzle temperature during bridging can help reduce the viscosity of the filament, which facilitates better extrusion without excessive drooping. Coupled with adequate cooling, this technique can result in cleaner bridges and finer details.
- Print Speed Adjustment: Modifying the print speed during bridging can also enhance cooling efficiency. Slower speeds allow more time for the filament to cool before the next layer is applied, reducing the risk of sagging and improving the overall quality of the print.
- Material Selection: The choice of filament plays a crucial role in bridging performance; selecting materials that have better thermal properties can lead to improved cooling. For instance, PLA tends to cool quickly, making it a popular choice for bridging applications.