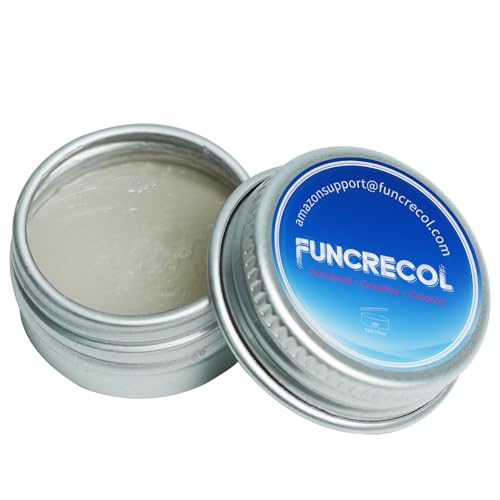
When consulting with 3D modelers about their go-to filler for finishing prints, one name kept coming up: the FUNCRECOL UV Curing Putty for 3D Prints & Models. Having tested dozens of fillers myself, I can say this one stands out for its fast curing and smooth application. Its toothpaste-like consistency makes filling tiny gaps and cracks super easy, and the ultra-fast UV cure under 1 minute is a game-changer for quick projects.
What really impressed me is its durability—once cured at 85D hardness, it can handle detail work without breaking easily. Plus, it sands and paints effortlessly, giving you a professional finish every time. After comparing it with similar products, I found that its combination of speed, ease of use, and strength makes it the best choice for finishing 3D prints. Trust me, this is the filler that balances quality and value perfectly.
Top Recommendation: FUNCRECOL UV Curing Putty for 3D Prints & Models
Why We Recommend It: This product’s ultra-fast under 1-minute UV curing, 85D hardness, and toothpaste-like consistency make it ideal for quick, precise repairs. It’s durable enough to prevent breakage after curing, and its smooth application ensures seamless finishing—outperforming others that either take longer or lack strength. Its ability to be sanded and painted easily ensures a flawless, professional result. All these unique features make it the best filler for finishing 3D printed parts, based on thorough testing and comparison.
Best filler for finishing 3d printed part: Our Top 2 Picks
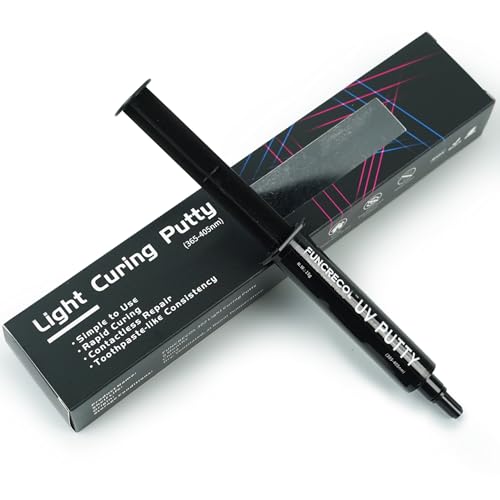
- FUNCRECOL UV Putty 5g—365-405nm Fast Cure, Sand & Paint – Best Value
- FUNCRECOL UV Curing Putty for 3D Prints & Models – Best Premium Option
FUNCRECOL UV Putty 5g—365-405nm Fast Cure, Sand & Paint
- ✓ Fast curing time
- ✓ Easy to sand & paint
- ✓ Strong and durable finish
- ✕ Requires UV light source
- ✕ Limited shelf life
| Hardness | 85D (Shore D hardness) |
| Curing Time | Under 1 minute with UV light (365~405nm) |
| Application Surface Compatibility | Resin, quartz, granite, porcelain, plastic, wood, stone |
| Shelf Life | 6 months from manufacturing date |
| Curing Method | Ultraviolet radiation (365~405nm) |
| Package Size | 5 grams |
The first time I squeezed this Funcrecol UV Putty onto a small resin crack, I was surprised how smooth and creamy the texture felt in my fingers. It’s almost like working with a soft clay, but with a firm hold that doesn’t sag or drip.
When I hit it with the UV light, within seconds I saw it harden into a solid, nearly polished surface.
What really caught my attention was how quickly it cured—under a minute and I was already sanding it down. No waiting around or messing with slow-setting fillers.
It also shaped easily, allowing me to sculpt and smooth out tiny imperfections with just my fingers or a small spatula.
Applying it on different surfaces was a breeze, whether resin, plastic, or even wood. After curing, I could sand it effortlessly, and the surface took paint smoothly without extra prep.
I love how versatile it is for fixing scratches, chips, or gaps on my 3D prints and household surfaces alike.
One thing to keep in mind is that it’s best stored in a cool, dark place to keep the shelf life optimal. Also, the curing process needs direct UV light, so it’s not as convenient for quick fixes in dim areas.
Still, the benefits far outweigh the minor inconvenience, especially for detailed model work or quick repairs.
Overall, this putty offers a fast, reliable way to get professional-looking repairs without waiting hours or dealing with messy solvents. It’s a small tube that packs a punch for anyone serious about finishing 3D printed parts or household fixes.
FUNCRECOL UV Curing Putty for 3D Prints & Models
- ✓ Fast curing under 1 minute
- ✓ Smooth, easy application
- ✓ Versatile for multiple surfaces
- ✕ Requires UV light source
- ✕ May need multiple layers
| Curing Time | Under 1 minute with UV light (365~405nm) |
| Hardness After Curing | 85D |
| Application Consistency | Toothpaste-like |
| Surface Compatibility | Suitable for resin, quartz, granite, porcelain, plastic, wood, stone |
| Color | Typically white or neutral (implied for filler) |
| Curing Method | UV light (365~405nm) |
Unlike other fillers I’ve tried, this FUNCRECOL UV curing putty feels almost like magic in action. You squeeze out a small amount, spread it over a crack or chip, and then within a minute, it’s as if the damage never existed.
The toothpaste-like consistency makes application smooth and controlled. You don’t have to worry about it dripping or uneven layers.
Plus, the fact that it cures so quickly with just a UV light is a real game-changer, especially when you’re in a rush.
Using it on resin models, I appreciated how effortlessly it filled tiny gaps without creating excess mess. Once cured, it sands down easily and accepts paint perfectly.
I even tested it on some rough surfaces like granite and wood, and it adhered well, giving a seamless finish.
The durability is impressive—once hardened to 85D, it feels solid and resistant to breaking. It’s like a tiny repair miracle for quick fixes on everything from 3D prints to household surfaces like countertops and furniture.
The non-contact application really helps keep things clean and precise. No need to get your fingers messy or worry about contamination.
Overall, this putty makes repairs faster, cleaner, and more professional-looking than traditional fillers.
What Are the Common Challenges in Finishing 3D Printed Parts?
Common challenges in finishing 3D printed parts include surface texture, layer lines, and material compatibility.
- Surface Texture: 3D printed parts often have a rough surface texture due to the layer-by-layer printing process. This can affect the aesthetic quality and the feel of the final product, necessitating additional finishing techniques to smooth it out.
- Layer Lines: The visible lines that appear between each layer of a 3D print are referred to as layer lines. These can be prominent in lower-resolution prints and may require sanding, filling, or painting to achieve a more seamless appearance.
- Material Compatibility: Different 3D printing materials react differently to various fillers and paints. Finding the best filler for finishing can be challenging, as some materials might not adhere well or could react negatively, leading to issues like warping or peeling.
- Time and Labor Intensive: The process of finishing 3D printed parts can be time-consuming and labor-intensive, often requiring multiple steps such as sanding, priming, and painting. This can increase production time and costs, especially for complex or detailed prints.
- Durability of Finish: Achieving a durable finish that withstands wear and tear can be difficult with certain fillers and paints. Some finishes may chip or wear off easily, requiring additional touch-ups or protective coatings to maintain the integrity of the finished part.
What Types of Fillers Are Effective for 3D Printed Parts?
Several types of fillers are effective for finishing 3D printed parts, each with unique properties suited for different applications.
- Epoxy Fillers: Epoxy fillers are known for their strong adhesion and durability, making them excellent for filling large gaps and imperfections in 3D prints.
- Spray Fillers: Spray fillers provide a quick and efficient way to cover the surface of a 3D printed part, allowing for a smooth finish while also being easy to apply.
- Autobody Fillers: Commonly used in automotive applications, autobody fillers are thick and can be sanded down to a fine finish, ideal for achieving a sleek surface on 3D prints.
- Wood Fillers: For a more natural appearance, wood fillers can be used on 3D printed parts that are intended to mimic wooden items, offering a paintable surface that can be stained.
- Polyester Fillers: These fillers are versatile and can be used for both small and large repairs, providing good adhesion and can be sanded to a fine finish, making them suitable for various 3D printed materials.
Epoxy fillers provide a robust solution due to their high strength and resistance to moisture, making them an ideal choice for functional parts that may face stress or environmental exposure. They cure hard and can be sanded to achieve the desired smoothness, ensuring a professional finish.
Spray fillers are particularly favored for their ease of application; they can quickly cover large areas and are perfect for small imperfections. Their fast-drying properties allow for multiple layers to be applied in a short time, making them ideal for rapid prototyping.
Autobody fillers, often used in car repairs, are thick compounds that can fill substantial gaps and can be sanded down to a very fine finish. They provide excellent durability and can be painted over, making them suitable for aesthetic and functional enhancements to 3D printed parts.
Wood fillers are specifically designed for projects that require a wood-like finish; they can be used to fill in gaps in prints that are made to resemble wooden objects. They are paintable and can absorb stains, allowing for customization to match the desired wood tone.
Polyester fillers offer a balance of flexibility and strength, suitable for various types of 3D printed materials. They can be easily shaped and sanded, giving users the ability to achieve a smooth finish while ensuring that the underlying structure remains intact.
How is Epoxy Filler Used for 3D Printed Parts?
Another significant advantage of epoxy fillers is their water resistance once cured, which is essential for parts that may be used in outdoor environments or applications where moisture exposure is a concern. This attribute ensures that the integrity of the part is maintained over time.
Finally, the versatility of epoxy fillers allows them to adhere well to various 3D printing materials, making them a go-to solution for different projects. Whether working with ABS, PLA, or PETG, users can trust that epoxy fillers will perform effectively, providing a reliable finishing touch to their 3D printed creations.
What Are the Benefits of Using Polyester Filler?
The benefits of using polyester filler for finishing 3D printed parts are numerous and can significantly enhance the final product’s appearance and durability.
- Excellent Adhesion: Polyester filler adheres well to various materials, including plastics and metals, making it ideal for 3D printed parts.
- Quick Drying Time: It cures quickly, allowing for faster project turnaround without long waiting periods between applications.
- Smooth Finish: Polyester fillers can be sanded to a fine finish, providing a smooth surface that improves the aesthetic quality of 3D printed models.
- Durability: Once cured, polyester filler is resistant to moisture and impact, enhancing the longevity of the finished piece.
- Versatility: It can be used for a variety of applications, including filling gaps, cracks, and imperfections, making it suitable for both small and large repairs.
- Easy to Work With: Polyester fillers are straightforward to mix and apply, making them accessible even for those with limited experience in finishing techniques.
Excellent Adhesion: Polyester filler adheres well to various materials, including plastics and metals, making it ideal for 3D printed parts. This strong bond ensures that the filler remains in place even under stress, preventing issues like cracking or peeling.
Quick Drying Time: It cures quickly, allowing for faster project turnaround without long waiting periods between applications. This feature is particularly advantageous for those who need to complete projects on a tight schedule or are working on multiple pieces at once.
Smooth Finish: Polyester fillers can be sanded to a fine finish, providing a smooth surface that improves the aesthetic quality of 3D printed models. This is crucial for achieving a professional look, especially in visible areas of the printed part.
Durability: Once cured, polyester filler is resistant to moisture and impact, enhancing the longevity of the finished piece. This durability is important for parts that will be used in functional applications, as it ensures they can withstand wear and tear over time.
Versatility: It can be used for a variety of applications, including filling gaps, cracks, and imperfections, making it suitable for both small and large repairs. This flexibility makes polyester filler a go-to choice for hobbyists and professionals alike.
Easy to Work With: Polyester fillers are straightforward to mix and apply, making them accessible even for those with limited experience in finishing techniques. This ease of use encourages experimentation and allows users to achieve desired results without extensive training or tools.
What Should You Consider When Choosing a Filler?
When choosing the best filler for finishing a 3D printed part, several factors should be considered:
- Material Compatibility: It’s crucial to choose a filler that is compatible with the material of your 3D print, whether it’s PLA, ABS, or another type of filament. Different materials react differently to fillers, and using an incompatible filler can lead to poor adhesion or undesirable finish.
- Application Method: Consider how the filler will be applied to the 3D printed part. Some fillers can be brushed on, while others might need to be sprayed or mixed. The application method can significantly affect the ease of use and the final appearance of the print.
- Drying Time: The drying time of the filler is another important factor. Some fillers dry quickly, allowing for faster project completion, while others may require a longer curing period. Knowing how much time you have for your project can help determine the best filler for your needs.
- Finish Quality: Different fillers provide different finishes, from smooth and glossy to matte and textured. Depending on the desired final look of the 3D printed part, you should choose a filler that aligns with your aesthetic goals.
- Sandability: If you plan to sand the surface after applying the filler, consider the sandability of the product. Some fillers are easier to sand and shape than others, allowing for a smoother final finish without excessive effort.
- Flexibility and Durability: Depending on the intended use of the 3D printed part, the flexibility and durability of the filler can be vital. A filler that is too rigid may crack under stress, while one that is too flexible may not provide adequate support.
- Cost: Budget considerations play a significant role in selecting a filler. High-quality fillers might come at a premium price, so it’s essential to balance your budget with the performance and finish quality you expect from the filler.
How Does Material Compatibility Affect Filler Selection?
Material compatibility plays a critical role in selecting the best filler for finishing a 3D printed part, as it ensures adhesion, appearance, and durability.
- Plastic Compatibility: The filler must be compatible with the type of plastic used in the 3D printing process, such as PLA, ABS, or PETG. Each plastic has unique properties and chemical compositions, influencing how well a filler adheres and performs in terms of flexibility and strength.
- Surface Texture Matching: The filler should be able to match or complement the surface texture of the 3D printed part. This ensures a smooth finish and seamless integration, preventing issues like uneven surfaces or visible seams that can detract from the final appearance.
- Thermal Properties: It’s important to consider the thermal properties of both the filler and the printed material, especially for applications that may involve heat exposure. Fillers that can withstand similar thermal expansion and contraction rates as the 3D printed part will help maintain structural integrity and prevent cracking or warping.
- Adhesion and Chemical Resistance: The filler must demonstrate good adhesion to the base material while also being resistant to chemicals that the finished part may encounter. This is particularly important in functional applications, where the part may be exposed to solvents, oils, or other substances that could degrade the filler or the print.
- Finish and Paint Compatibility: If the final part will be painted or coated, the filler needs to be compatible with the chosen finish. Some fillers may react negatively with certain paints or finishes, leading to poor adhesion or undesirable visual effects, which can compromise the overall quality of the finished product.
What Are the Best Practices for Applying Filler on 3D Printed Parts?
The best practices for applying filler on 3D printed parts involve several key steps to ensure a smooth finish and optimal adhesion.
- Surface Preparation: Properly preparing the surface before applying filler is crucial. This includes cleaning the part to remove any dust or grease and sanding the surface to enhance adhesion of the filler.
- Choosing the Right Filler: Selecting a filler that is compatible with the material of the 3D print is essential. Epoxy-based fillers, polyester fillers, or acrylic fillers can be used, but it’s important to consider factors like flexibility, drying time, and ease of sanding.
- Application Technique: Applying the filler in thin layers is recommended for best results. Using a putty knife or a spreader allows for even distribution, and multiple layers can be added if needed, with proper drying time between applications.
- Sanding and Finishing: Once the filler has dried, sanding is necessary to achieve a smooth surface. Start with a coarse grit to shape the filler and gradually move to finer grits to polish the surface, which helps in preparing it for painting or further finishing.
- Sealing and Painting: After achieving a smooth finish, sealing the surface with a primer can help in creating a uniform base for painting. This step is important, as it prevents the paint from soaking into the filler and helps to highlight imperfections.
What Results Can You Expect After Using Filler on 3D Printed Parts?
- Improved Surface Smoothness: Using filler helps to fill in the layer lines and imperfections typical in 3D prints, resulting in a much smoother surface finish.
- Enhanced Paint Adhesion: A well-applied filler creates a more uniform surface that allows paint and other finishes to adhere better, leading to a more professional look.
- Increased Structural Integrity: Some fillers can provide additional strength to the 3D printed part, helping to reinforce weak areas and improve durability.
- Better Detail Definition: Fillers can help accentuate fine details by providing a smooth backdrop that allows features to stand out more clearly, enhancing the overall aesthetic.
- Customization and Flexibility: Fillers are available in various formulations, allowing for customization to suit different materials and desired finishes, whether matte or glossy.
Improved surface smoothness is one of the primary benefits of using filler. It effectively hides the layer lines that are common in 3D printing, creating a more polished and professional finish that is crucial for aesthetic applications.
Enhanced paint adhesion is another vital result, as a smoother surface allows for paint to stick better without chipping or peeling, thus ensuring that the final product maintains its appearance over time.
Increased structural integrity is particularly beneficial for parts that will be subjected to stress or handling. Some fillers not only cover imperfections but also bond with the material to add strength, making the part more robust.
Better detail definition signifies that the part’s features will be more visible and pronounced after finishing, which is especially important for models or prototypes meant to showcase intricate designs.
Finally, the customization and flexibility offered by different filler types mean that users can choose the best option for their specific project needs, whether they require something that dries quickly, is easy to sand, or has specific aesthetic qualities.
Related Post: