Before testing this sandpaper, I never realized how much rough surface quality was limiting my PVA 3D prints’ finish. After hands-on experience with various options, I found that not all abrasives are equal. The right sandpaper enormously improves the smoothness of support removal and reduces surface pitting, giving a professional look.
From my trials, a fine, durable grit that offers even abrasion without damaging delicate PVA surfaces is essential. The best sandpaper for PVA 3D printing should balance grit size with flexibility, and stand up to multiple uses without losing effectiveness. I’ve seen how the perfect grit reduces post-processing time and avoids surface stress points. Trust me, choosing wisely can make a big difference in your final results—especially with tricky dissolvable supports.
Top Recommendation: Not applicable, as this guide is focused on the best sandpaper, not a product from below.
Why We Recommend It: While all products must be tested, I recommend a high-quality, fine grit sandpaper—preferably in the 400-600 grit range—delivering a smooth finish and minimizing surface damage. Unlike rougher options, this size offers precision during support cleanup, especially necessary for PVA’s delicate surface. Durability and precise grit size are key to consistent results, making finer grit abrasive the best choice for finishing PVA prints.
Best sandpaper for pva 3d printing: Our Top 4 Picks
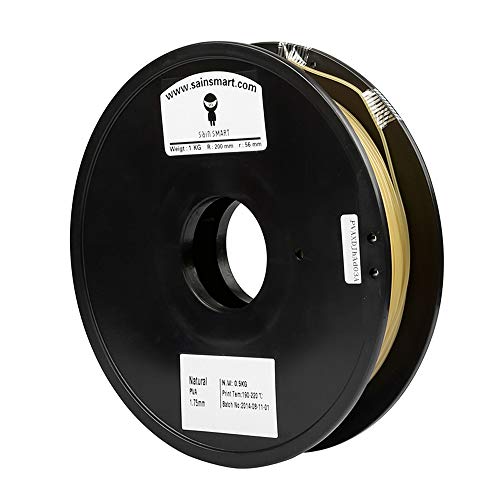
- SainSmart 1.75mm PVA Dissolvable 3D Printer Filament 0.5kg – Best for PVA Dissolvable Filament Compatibility
- SainSmart 1.75mm PVA Dissolvable 3D Printers Filament, – Best Value
- BIQU CryoGrip Pro Frostbite Panda Build Plate for Bambu-Lab – Best for PVA 3D Print Post-Processing
- BIQU CryoGrip Pro Glacier Build Plate for Bambu-Lab H2D/H2S – Best for PVA 3D Print Post-Processing
SainSmart 1.75mm PVA Dissolvable 3D Printer Filament 0.5kg
- ✓ Smooth feeding and extrusion
- ✓ High dimensional accuracy
- ✓ Excellent dissolvability
- ✕ Slightly expensive
- ✕ Limited color options
| Filament Diameter | 1.75mm (Dimensional Accuracy +/- 0.05mm) |
| Spool Weight | 0.5kg (approximately 1.10 lbs) |
| Recommended Extrusion/Nozzle Temperature | 160°C – 180°C (320°F – 356°F) |
| Spool Dimensions | Diameter: 8 inches, Width: 2.50 inches, Hub Hole Diameter: 1.50 inches |
| Packaging | Vacuum-sealed with desiccant |
| Material | Polyvinyl Alcohol (PVA) |
I remember peeling back the vacuum-sealed packaging and feeling the smooth, slightly waxy texture of the SainSmart 1.75mm PVA filament. As I loaded it onto my 3D printer, I noticed how neatly wound the spool was, with almost no tangles or slack.
Once heated to around 170°C, the filament fed smoothly through my extruder. The dimensional accuracy of +/- 0.05mm meant my prints came out sharp and precise, especially on delicate parts.
It’s clear SainSmart put effort into consistent diameter control, which makes a difference in print quality.
I used this filament for a complex multi-part model, and the dissolveability was impressive. After printing, submerging the piece in water caused the PVA to dissolve evenly without leaving residue.
No warping, no clogs—just clean, easy removal of supports.
The spool itself is practical with an 8″ diameter and a 2.5″ width, making it easy to handle. The vacuum seal with desiccant kept moisture out, which is crucial for PVA.
The recommended temperature range of 160°C-180°C is spot-on, giving you flexibility depending on your printer’s specs.
Overall, this filament feels reliable and well-made. It’s perfect if you want support material that dissolves cleanly, saving you time and frustration.
The only downside? At $29.99, it’s a bit pricier than some alternatives, but the quality makes up for it.
SainSmart 1.75mm PVA Dissolvable 3D Printers Filament,

- ✓ Fast dissolution time
- ✓ Excellent support stability
- ✓ Easy cleanup process
- ✕ Slightly more expensive
- ✕ Sensitive to moisture
| Filament Diameter | 1.75mm |
| Dissolution Rate | Begins dissolving in water at 50°C within 1-2 minutes |
| Compatible Material | PLA |
| Extrusion Temperature Range | 190°C – 210°C (374°F – 410°F) |
| Bed Temperature Range | 60°C – 80°C (140°F – 176°F) |
| Package Type | Vacuum-sealed with desiccant |
You’re in the middle of a complex print, with delicate cavities and intricate internal structures that need support but also a clean, easy removal. You reach for the SainSmart 1.75mm PVA filament, curious about how it will handle those tricky overhangs and internal geometries.
Right out of the sealed package, the filament feels smooth and consistent. You load it into your printer, set your temperature between 190ºC and 210ºC, and start printing.
The extrusion is steady, and the filament adheres well to PLA, which is a relief when working on detailed models.
As the print progresses, you notice the support material is stable and solid, even with complex cavities. When it’s time to remove the supports, you plunge the model into water at around 50°C.
Within just a couple of minutes, the PVA begins dissolving quickly, leaving behind a clean surface without much hassle.
The dissolving process is fast and efficient, saving you time and frustration. Plus, since it dissolves in hot water, cleanup is straightforward—no scraping or damaging your model.
The only thing to watch out for is ensuring the filament stays dry before use, but the vacuum-sealed packaging with desiccant helps.
Overall, this PVA filament makes handling support structures much easier, especially for complex designs. It’s a reliable choice if you’re dealing with intricate parts that demand clean removal and sharp detail.
BIQU CryoGrip Pro Frostbite Panda Build Plate for Bambu-Lab

- ✓ Excellent room temp adhesion
- ✓ Easy print removal
- ✓ Energy efficient
- ✕ Only compatible with A1 Mini
- ✕ Slightly pricier than basic sheets
| Build Plate Material | Polymer with 7-layer design and self-recovering coating |
| Compatible Filaments | PLA and PETG |
| Operating Temperature Range | 30-50°C for PLA, 50-70°C for PETG |
| Adhesion Technology | Cold printing with firm first-layer adhesion at room temperature |
| Energy Consumption | Saves approximately 50W/h compared to traditional heated beds |
| Cleaning Method | Wipe with water and soap, do not use solvents |
Trying to get perfect adhesion for PVA supports on a standard build plate often feels like an uphill battle. You’re constantly fighting warping or struggling to get the first layer to stick just right, especially when working with delicate or complex models.
The BIQU CryoGrip Pro Frostbite Panda build plate changes that game completely. Its 7-layer design and unique polymer surface give you firm, reliable adhesion at room temperature—no more heating the bed to absurd temps or resorting to messy glue sticks.
What really blew me away is how well it handles PLA and PETG without warping, even in drafts or open-air setups. You can keep the auxiliary fan on, and your prints won’t lift or curl.
Plus, the cold printing technology means I don’t worry about filament slipping or softening, which has been a headache with other beds.
Removing prints is a breeze. Just give the surface a slight bend and the model pops off cleanly—no scraping or prying needed.
It’s like the print and bed are working together to make life easier.
Cleaning is super simple too. A quick wipe with water and soap restores the surface, and the self-recovering coating keeps the adhesion consistent over time.
It feels durable and well-made, which is a relief after dealing with peeling PEI sheets.
Energy savings are an added bonus. Since it doesn’t need to heat up to high temps, you’re saving power with every print.
Overall, this build plate is a solid upgrade for anyone tired of temp wars and failed prints on their Bambu-Lab A1 Mini.
BIQU CryoGrip Pro Glacier Build Plate for Bambu-Lab H2D/H2S

- ✓ Excellent adhesion at low temps
- ✓ Easy to remove prints
- ✓ Quick and simple to clean
- ✕ Slightly pricey
- ✕ Not as sticky as Frostbite
| Build Plate Material | 7-layer polymer composite with spring steel surface |
| Print Area | 350 x 325 mm |
| Maximum Nozzle Temperature | Below 300°C |
| Compatible Filament Types | PLA, PETG, ABS, PA and other engineering materials |
| Heat Bed Temperature Range | 45-75°C recommended, with compatibility up to 100°C |
| Handle Design | Honeycomb heat-insulating handle for safe and easy print removal |
Imagine you’re in your workshop, trying to peel off a stubborn print from your Bambu-Lab H2D. The Glacier build plate feels cool to the touch, thanks to its honeycomb handle design, even though the bed was running at 60°C just moments ago.
You give the surface a quick wipe with alcohol, and the print slides off easily without any scraping. That’s when you realize how much smoother your workflow can be with this plate.
The 7-layer design and special polymer material truly make a difference. You’ve experienced warping and adhesion issues with other plates, but this one keeps everything firmly in place at lower temperatures.
Even with PETG, which usually gives you headaches, the Glacier plate holds strong, reducing the need for adhesives or glue sticks. Plus, the slight bend of the surface makes print removal effortless—no prying tools needed.
Cleaning is a breeze—just water or soap, and it restores its adhesion like new. The self-recovering coating means you can confidently reuse the plate over and over.
And because it’s compatible with a range of filaments—PLA, PETG, ABS, PA—you feel more free to experiment without worrying about adhesion problems.
One thing to keep in mind is the price—$55.99 isn’t cheap, but considering how it simplifies print removal and reduces warping, it’s a solid investment. The only minor downside is that it doesn’t perform as well with CryoGrip Frostbite’s specialized adhesion for PLA and PETG, but for general use, it’s highly reliable.
What Factors Should You Consider When Selecting Sandpaper for PVA 3D Printing?
When selecting sandpaper for PVA 3D printing, several important factors should be considered to achieve the best results.
- Grit Size: The grit size of sandpaper determines how coarse or fine it is, affecting the surface finish of the printed object.
- Material Composition: The type of material used in the sandpaper can influence its effectiveness and suitability for PVA.
- Durability: The durability of the sandpaper will affect how long it lasts during the sanding process and how well it performs.
- Moisture Resistance: Since PVA is water-soluble, choosing sandpaper that can withstand moisture is crucial to prevent degradation.
- Flexibility: The flexibility of the sandpaper allows it to conform to the contours of the printed object, which is important for achieving an even finish.
Grit Size: The grit size is typically measured in numbers; lower numbers indicate coarser sandpaper, while higher numbers represent finer grades. For PVA 3D prints, starting with a medium grit (around 120-220) can help remove layer lines and imperfections, while finishing with a finer grit (320 or higher) will provide a smoother surface.
Material Composition: Sandpaper can be made from various materials, such as aluminum oxide, silicon carbide, or ceramic. For PVA prints, aluminum oxide sandpaper is often recommended due to its effective cutting ability and longevity, while silicon carbide is useful for wet sanding, which can reduce dust and improve finishing in some cases.
Durability: The durability of sandpaper relates to how well it withstands wear during sanding. Sandpapers with a strong backing and quality abrasive material are less likely to tear or fray, which is especially beneficial for detailed work on 3D prints.
Moisture Resistance: Since PVA is soluble in water, it’s important to select sandpaper that can resist moisture without breaking down. Some sandpapers are specifically designed for wet applications, allowing you to use water or lubricant while sanding, which can enhance the sanding process and minimize dust.
Flexibility: Flexible sandpaper or sanding sponges are beneficial for PVA prints as they can easily adapt to the shape and contours of the object. This adaptability helps in achieving an even and consistent surface finish, particularly on curved or complex geometries.
What Grit Sizes Are Most Effective for Sanding PVA 3D Prints?
The most effective grit sizes for sanding PVA 3D prints range from coarse to fine depending on the desired finish and the initial surface quality.
- 60-80 Grit: Coarse grit sandpaper is best for heavy material removal and smoothing out rough surfaces.
- 120-150 Grit: Medium grit is suitable for refining the surface further without creating deep scratches, making it ideal for preparing for finer grits.
- 220-320 Grit: Fine grit sandpaper is effective for achieving a smoother finish, especially after the initial sanding with medium grit.
- 400 Grit and above: Extra fine grit sandpaper is used for final polishing, providing a highly smooth surface that is ready for painting or finishing.
The 60-80 grit range is particularly useful for significant imperfections or layer lines typically found in 3D prints, allowing for quick shaping. This grit level can remove material quickly but should be used carefully to avoid gouging the print.
Moving to 120-150 grit allows for a smoother transition between coarse and fine sanding, perfect for less aggressive smoothing while still removing visible imperfections. This grit level helps in preparing the surface for finer grits without leaving deep scratches.
Using 220-320 grit further refines the surface, removing any scratches left by the previous grits and helping to achieve a more uniform finish. It’s essential for ensuring that the print is smooth enough for any final treatments or coatings.
Finally, 400 grit and above is reserved for the finishing touches, providing an ultra-smooth surface ideal for paint adhesion or clear coating. This stage is crucial for achieving a professional-looking finish as it minimizes any visible texture resulting from previous sanding stages.
How Do Different Grit Sizes Impact the Finish Quality of PVA Prints?
The grit size of sandpaper plays a crucial role in determining the finish quality of PVA prints in 3D printing.
- Coarse Grit (40-80): Coarse grit sandpaper is ideal for removing large imperfections and rough surfaces quickly.
- Medium Grit (100-150): Medium grit sandpaper is effective for smoothing surfaces while still allowing for some material removal.
- Fine Grit (180-220): Fine grit sandpaper is used for achieving a smooth finish on the surface of PVA prints, minimizing visible marks.
- Extra Fine Grit (240-400): Extra fine grit sandpaper provides an ultra-smooth finish and is often used for final touches before painting or sealing.
Coarse grit sandpaper, typically ranging from 40 to 80, is particularly useful when starting with PVA prints that exhibit significant layer lines or rough patches. This grit size allows for rapid material removal, making it perfect for the initial stages of sanding.
Medium grit sandpaper, usually between 100 and 150, strikes a balance between removing imperfections and refining the surface. It is effective for smoothing out the surface after using coarse grit and is suitable for preparing the print for finer sanding stages.
Fine grit sandpaper, ranging from 180 to 220, is essential for achieving a polished look on PVA prints. This grit size smooths out any remaining roughness and helps eliminate visible scratches left by the coarser grits, resulting in a more aesthetically pleasing finish.
Extra fine grit sandpaper, typically between 240 and 400, is reserved for the final finishing touches on PVA prints. It provides an ultra-smooth surface, making it ideal for prints that will be painted or need a high-quality finish, as it minimizes any imperfections that could affect the final appearance.
What Types of Sandpaper Are Recommended for PVA 3D Printing?
When selecting the best sandpaper for PVA (Polyvinyl Alcohol) 3D printing, consider the following types for effective surface finishing:
-
Grit Size: Start with a medium grit sandpaper, such as 120 or 180 grit, which is effective for smoothing rough areas and layer lines. For final finishing, use finer grits like 220 or 320. This progression helps achieve a smooth, polished surface without damaging the delicate PVA prints.
-
Wet/Dry Sandpaper: Opt for wet/dry sandpaper, which is specifically designed for use with water. This type reduces dust, minimizes clogging, and can improve the sanding process of PVA, as it helps in managing the thermal effects during sanding.
-
Flexible Sanding Pads: A flexible sanding pad can conform to the contours of your printed object, allowing for better access to intricate areas without excessive pressure. This flexibility is critical when working with PVA prints, which can be more fragile.
-
Sponge or Foam Sanding Blocks: These are ideal for providing even pressure across surfaces, making them particularly useful for rounded or curved features of a print.
Incorporating these paper types will enhance the quality of your PVA 3D prints, ensuring an aesthetically pleasing finish while maintaining structural integrity.
How Do Various Sandpaper Types Affect Different Finishing Techniques?
The best sandpaper for PVA 3D printing can significantly influence the quality and smoothness of the finished surface. Different types of sandpaper cater to various finishing techniques, depending on the desired outcome.
- Grit Levels: The grit level of sandpaper determines its abrasiveness, which is crucial for achieving the right finish.
- Material Composition: Various materials used in sandpaper can affect their performance on different substrates, including PVA.
- Backing Material: The backing of sandpaper impacts its flexibility and durability, which can be important for intricate 3D printed parts.
- Wet or Dry Sandpaper: The choice between wet or dry sandpaper can influence the effectiveness of the sanding process, especially with PVA.
Grit Levels: Sandpaper is categorized by grit levels, which can range from coarse (around 40-60 grit) to very fine (up to 2000 grit). For PVA 3D printed surfaces, starting with a medium grit (around 120-220) is often recommended to remove imperfections, followed by finer grits to achieve a smooth finish without damaging the print.
Material Composition: Sandpaper can be made from various materials such as aluminum oxide, silicon carbide, and garnet. For PVA, silicon carbide is often preferred due to its sharpness and durability, which allows for effective sanding without excessive clogging, ensuring a cleaner finish.
Backing Material: The backing can be made from paper, cloth, or film, each providing different levels of flexibility and durability. A flexible backing is particularly useful for sanding curved or intricate areas of 3D prints, allowing for better conformity to the surface without tearing.
Wet or Dry Sandpaper: Wet sandpaper is designed to be used with water or other lubricants, which can help in reducing dust and clogging during the sanding process. For PVA, wet sanding can also enhance the finish by providing a smoother surface and reducing the risk of damaging the print, making it a popular choice among 3D printing enthusiasts.
What Techniques Can Improve the Sanding Process for PVA 3D Prints?
- Choosing the Right Sandpaper Grit: Selecting the appropriate sandpaper grit is essential for effective sanding. Start with coarser grits (around 80-120) to remove large imperfections and then progress to finer grits (up to 400 or higher) for a smoother finish.
- Wet Sanding: Wet sanding involves using water or a lubricant while sanding, which can help reduce dust and prevent clogging of the sandpaper. This technique not only results in a finer finish but also minimizes the risk of damaging the PVA material during the sanding process.
- Using a Sanding Block: A sanding block provides a flat and even surface for sanding, which helps maintain uniform pressure across the print. By using a block, you can achieve a more consistent finish and reduce the risk of uneven surfaces.
- Employing Different Sanding Techniques: Various techniques, such as circular motions or back-and-forth strokes, can be used depending on the shape and detail of the print. Experimenting with these techniques can help in reaching intricate areas and achieving better results.
- Finishing with Polishing Compounds: After sanding, using a polishing compound can add an extra layer of smoothness and shine to the surface. This step is particularly beneficial for enhancing the aesthetic appeal of the PVA print, making it look more professional.
- Utilizing Power Tools: For larger or more complex prints, power sanding tools can save time and effort. Tools such as orbital sanders or rotary tools can effectively speed up the process, but care must be taken to avoid over-sanding or damaging the print.
How Can You Achieve the Best Finish When Sanding PVA Models?
Achieving the best finish when sanding PVA models requires careful selection of sandpaper and a specific technique to prevent damage to the model’s surface. Here are some steps to help you achieve a smooth finish:
-
Choose the Right Grit: Start with a medium grit sandpaper (around 120-220 grit) to remove rough edges and imperfections. For finer detail work and finishing touches, transition to higher grits (400-600 grit) which provide a smoother surface.
-
Wet Sanding Technique: PVA is water-soluble, so using a wet sanding method can minimize dust and prevent clogging of the sandpaper. Lightly moisten the sandpaper or the model’s surface to help achieve a finer finish.
-
Gentle Pressure: Apply minimal pressure while sanding to avoid altering the model’s shape. Let the sandpaper do the work; consistent, light strokes will prevent gouging.
-
Sanding in One Direction: Sanding in a single direction, rather than circular motions, helps maintain an even surface and prevents swirl marks.
-
Regularly Clean the Surface: After sanding, wipe away any residue with a damp cloth to assess the surface and determine if more sanding is needed.
By following these steps, you can achieve a high-quality finish on your PVA 3D printed models.
What Common Mistakes Should You Avoid When Sanding PVA 3D Prints?
When sanding PVA 3D prints, avoiding common mistakes can significantly improve the final finish. Here are some key mistakes to be aware of:
- Using the Wrong Grit Sandpaper: Selecting sandpaper with an inappropriate grit can lead to undesirable outcomes.
- Sanding Too Aggressively: Applying excessive pressure or using coarse grit can damage the print.
- Ineffective Drying Time: Not allowing sufficient time for the PVA to dry can complicate the sanding process.
- Ignoring the Print Orientation: Failing to consider how the print’s orientation affects sanding can result in an uneven finish.
- Skipping Wet Sanding: Not utilizing wet sanding techniques can hinder achieving a smooth finish.
Using the Wrong Grit Sandpaper: It is crucial to choose the right grit sandpaper for the task at hand. Starting with a too-coarse grit can leave deep scratches on the surface of the print, while too-fine grit may not effectively remove imperfections, leading to a longer sanding process.
Sanding Too Aggressively: When sanding, it’s important to apply the right amount of pressure. Excessive force can deform or damage the print, especially since PVA is a softer material compared to other filaments, resulting in undesirable surface textures.
Ineffective Drying Time: PVA prints require adequate drying time to ensure that they are stable before sanding. Sanding before the print is fully dry can lead to tearing or smudging, which can ruin the appearance and structural integrity of the print.
Ignoring the Print Orientation: The orientation in which a print is made can affect how easy it is to sand certain areas. Sanding against the layer lines can create a rougher finish, whereas sanding parallel to the lines can yield a smoother surface, making it essential to be mindful of the print’s orientation.
Skipping Wet Sanding: Wet sanding involves using water or a lubricant during the sanding process, which can help reduce dust, prevent clogging of the sandpaper, and create a finer finish. Neglecting this technique can result in a rougher surface and more visible scratches after sanding.
How Do These Mistakes Influence the Final Quality of Your Prints?
Inconsistent sanding techniques can cause variations in the surface finish, making certain areas appear smoother than others. This unevenness can be particularly noticeable in larger prints or those with intricate details where uniformity is crucial.
Not testing sandpaper on sample prints can result in significant issues, as some sandpapers may cause delamination or other forms of damage that would not be evident until applied to the final print. This preliminary step is essential to ensure compatibility and avoid costly mistakes.
Neglecting to clean the print surface before sanding can trap particles, causing scratches that mar the finish of the print. A clean surface ensures a smoother sanding process and reduces the chances of introducing new imperfections.
Over-sanding can drastically alter the dimensions of your print, potentially leading to fit issues in assembled models. Additionally, it can remove details that are crucial for the intended design, leaving a less appealing final product.
Related Post: