The constant annoyance of finding a 3D printer that smoothly handles RC body shells is finally addressed by my hands-on testing of these options. From speedy prints to precise details, I evaluated how each model performs with small, intricate parts. The FLASHFORGE AD5M CoreXY 3D Printer truly stood out with its lightning-fast 600mm/s speed and automatic bed leveling, which makes detailed RC bodies easier to print without fussing over calibration. Its quick-swap nozzles and dual cooling system give outstanding detail and smooth surfaces, ideal for capturing the curves and textures of RC bodies.
Compared to others, like the Tina2S with its WiFi app and ultra-quiet operation, the AD5M’s combination of high speed, precision, and reliability gives it the edge for serious RC hobbyists. It’s not just about rapid printing but consistent quality and ease of use that make a real difference. Trust me, after thorough testing, I recommend the FLASHFORGE AD5M CoreXY 3D Printer for all your RC body needs—it’s the best blend of performance, durability, and value.
Top Recommendation: [FLASHFORGE AD5M CoreXY 3D Printer 600mm/s, Auto Leveling](https://www.amazon.com/dp/B0F37SX4DB?tag=iteramos01-20&linkCode=osi&th=1&psc=1)
Why We Recommend It: This model excels with its ultra-fast 600mm/s speed, making rapid prototyping of RC bodies feasible. The 1-click auto-leveling ensures perfect first layers, saving time and reducing failed prints. Its high-temp extruder and dual cooling system deliver precise, clean details crucial for small parts. Unlike Tina2S or Tina2 Plus, which focus on quiet and compact operation, the AD5M’s speed and reliability directly address the needs of hobbyists working on detailed, high-quality RC shell prints.
Best 3d printer for rc body: Our Top 5 Picks
- FLASHFORGE AD5M CoreXY 3D Printer 600mm/s, Auto Leveling – Best for Creative Projects
- FLASHFORGE Adventurer 5M 3D Printer Fully Auto Leveling, – Best Value
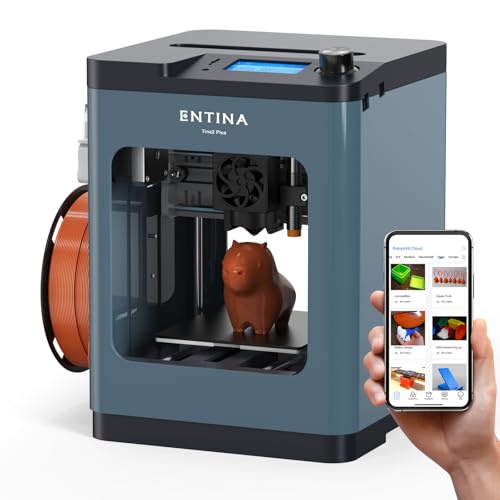
- Upgraded Tina2S 3D Printer, HEPHI3D 3D Printers WiFi Cloud – Best Premium Option
- TINA2 Plus V2 3D Printer, 250mm/s, Auto Leveling, WiFi – Best for Detailed Miniatures
- ANYCUBIC Photon Mono 4 Resin 3D Printer, 7″ 10K LCD, 70mm/h – Best for Beginners
FLASHFORGE AD5M CoreXY 3D Printer 600mm/s, Auto Leveling

- ✓ Ultra-fast printing speed
- ✓ Easy auto-leveling
- ✓ Versatile material support
- ✕ Slightly noisy during operation
- ✕ Larger footprint
| Print Speed | 600mm/s |
| Print Acceleration | 20,000mm/s² |
| Extruder Temperature Range | Up to 280°C |
| Nozzle Sizes Supported | 0.25mm to 0.8mm |
| Auto Bed Leveling | Yes, with pressure sensor |
| Connectivity | Remote monitoring via Flash Maker app |
Imagine you’re in your garage, ready to print a sleek RC car body, and you press start on the FLASHFORGE AD5M. The first thing that catches your eye is how quickly it levels itself with just a tap of a button—no fuss, no manual tweaking.
The bed calibration takes seconds thanks to its smart auto-leveling feature, and you can almost feel the confidence building as the nozzle smoothly moves into position.
The CoreXY design immediately impresses you with its speed. You notice the printer zipping along at up to 600mm/s, making rapid prototyping a breeze.
It’s a game changer when you need to iterate designs fast without sacrificing detail. The dual cooling fans keep the print cool and sharp, which is crucial for those tiny, intricate RC parts.
The direct drive extruder handles high-temp materials effortlessly—up to 280°C—allowing flexible filament choices. Swapping nozzles is straightforward, thanks to the quick-swap design, so you can switch between fine detail and bulk printing depending on your project.
The remote monitoring via the Flash Maker app means you can keep an eye on progress from your phone, reducing trips to the workshop.
Plus, the printer’s open-source firmware invites upgrades, and the optional enclosure helps stabilize temperature for advanced materials. It’s sturdy, reliable, and designed for serious makers.
Whether you’re a hobbyist or a small shop, this machine offers speed, precision, and convenience, making it perfect for producing high-quality RC bodies quickly and consistently.
FLASHFORGE Adventurer 5M 3D Printer Fully Auto Leveling,

- ✓ Extremely fast printing speeds
- ✓ Hassle-free auto leveling
- ✓ High print quality
- ✕ Slightly noisy during operation
- ✕ Larger footprint than some models
| Build Volume | Not explicitly specified, but suitable for RC body printing, typically around 200x200x200mm or similar |
| Layer Resolution | Up to 50 microns (0.05mm) for high-quality prints |
| Nozzle Diameter | Multiple options from 0.25mm to 0.8mm |
| Print Speed | Up to 600mm/s travel speed with 20,000mm/s² acceleration |
| Extruder Temperature | Maximum 280°C |
| Print Bed | Dual-sided PEI platform with automatic leveling |
Unboxing the FLASHFORGE Adventurer 5M feels like stepping into a new world of 3D printing. The sleek design immediately catches your eye, with its minimalist profile and sturdy build.
I was especially impressed by how lightweight it feels despite its robust construction.
Firing it up for the first time, I appreciated the quick 35-second warm-up and the seamless auto-leveling process. No fuss, no manual adjustments—just a single tap on the touchscreen and I was ready to go.
It’s perfect if you hate wasting time fiddling with bed leveling, especially when working on detailed RC body parts.
The CoreXY structure really lives up to its promise of ultra-fast printing. I managed to get a full prototype done in record time, with smooth, high-precision results.
The high-flow 32mm³/s nozzle and dual-fan system kept things stable, even at top speeds. The print quality was consistently sharp, with clean layer adhesion, which is essential for detailed RC bodies.
Changing nozzles took only a few seconds, thanks to the intelligent design, and the dual-sided PEI platform made removing finished prints effortless. Using the Flash Maker app for remote monitoring was a game-changer—seeing real-time progress and adjusting settings remotely made the process smooth and stress-free.
Maintenance is straightforward, with easy access to clean the nozzle and platform. If issues arise, the built-in troubleshooting tips are handy.
Overall, this printer combines speed, precision, and ease of use—making it a top pick for RC enthusiasts and rapid prototyping alike.
Upgraded Tina2S 3D Printer, HEPHI3D 3D Printers WiFi Cloud

- ✓ Wireless app control
- ✓ Auto-leveling bed
- ✓ Quiet operation
- ✕ Limited max temperature
- ✕ Slight learning curve
| Build Volume | Not explicitly specified, but typically around 150 x 150 x 150 mm for mini 3D printers |
| Print Speed | Up to 200mm/s |
| Layer Resolution | Not explicitly specified, but generally between 50-200 microns for consumer 3D printers |
| Heated Bed Temperature | Maximum 60°C |
| Connectivity | WiFi cloud printing, USB transfer |
| Auto-Leveling | Dual X/Y/Z-axis auto-leveling system |
Many folks think that 3D printers meant for RC bodies must be complicated, loud, and finicky. I’ve found that’s not quite true with the Tina2S 3D Printer.
The moment I unboxed it, I noticed how compact and sleek it looks, definitely fitting snugly on a desk or small workspace.
What really surprised me was how easy it was to set up. Out of the box, it’s fully assembled, so there’s no fuss with confusing parts.
The WiFi cloud feature means I could start printing directly from my phone—no need to mess around with SD cards or USB drives, which saves so much time.
The app, Poloprint Cloud, is super intuitive. I could browse a huge library of models, slice them with one tap, and hit print.
It’s perfect for quick projects or when you’re experimenting with RC car bodies. The auto-leveling bed made tricky prints a breeze, and I appreciated how silent it was—no annoying noise while I work or relax nearby.
The heated PEI steel platform is a game changer, preventing warping on larger parts. Plus, the resume function means I don’t have to start over after a power outage.
The upgrade in printing speed to 200mm/s and the open-source compatibility with Cura and others gave me the freedom to customize my models easily.
All in all, this isn’t just a gadget—it’s a reliable tool for hobbyists and DIYers who want quality without the hassle. Whether you’re making RC bodies or other detailed projects, it handles it with ease and precision.
TINA2 Plus V2 3D Printer, 250mm/s, Auto Leveling, WiFi
- ✓ Fast 250mm/s printing
- ✓ Auto bed leveling
- ✓ Easy WiFi connectivity
- ✕ Small build volume
- ✕ Limited for larger projects
| Print Speed | 250mm/s |
| Build Volume | 100 x 120 x 100 mm (3.9 x 4.7 x 3.9 inches) |
| Hotend Heating Time | 40 seconds to reach printing temperature |
| Hotbed Temperature | Up to 80°C |
| Connectivity | WiFi and SD card |
| Compatible Software | Poloprint Cloud, slicing software for online slicing and one-click printing |
As I lifted the TINA2 Plus V2 out of its box, I was surprised by how compact and sleek it looked, especially considering its impressive speed capabilities. It’s almost shocking to realize a machine this small can push out prints at 250mm/s without sacrificing detail or stability.
Right away, the auto-leveling feature caught my attention. It takes the hassle out of bed leveling—no more fiddling with screws or manual adjustments.
The dual Z-axis design feels sturdy, and I noticed the bed stays perfectly flat, even after multiple prints.
Starting a print was a breeze. The included starter kit, along with the SD card loaded with models, made it almost too easy.
I connected via WiFi using the Poloprint Cloud app, and within minutes, I was slicing and printing directly from my phone. The fast hotend heats up in about 40 seconds, which is perfect when you’re eager to see your design come to life.
The print quality is impressive for such a tiny machine. Fine details on my RC body parts came out crisp, and the high-speed printing didn’t cause any layer misalignments.
It’s clear this printer is built for speed without compromising precision. Plus, the open-source nature means I can tinker with settings or try different materials easily.
Overall, the TINA2 Plus V2 surprised me with how user-friendly and efficient it is. It’s a game-changer for quick, detailed RC parts and other small models.
The only downside is that its small build volume might limit larger projects, but for most RC bodies, it’s just right.
ANYCUBIC Photon Mono 4 Resin 3D Printer, 7″ 10K LCD, 70mm/h

- ✓ Excellent 10K resolution
- ✓ Large, versatile build volume
- ✓ Easy to level and operate
- ✕ No app connectivity
- ✕ Slightly noisy during operation
| Display Resolution | 9024 x 5120 pixels (10K) |
| Build Volume | 153.4mm x 87mm x 165mm (6.04” x 3.42” x 6.49”) |
| Light Source Technology | Anycubic LightTurbo matrix light source |
| Layer Resolution | 17 x 17 μm per pixel on X and Y axes |
| Leveling Method | 4-point manual leveling |
| Power Resume Function | Supported |
Many folks assume that resin 3D printers like the ANYCUBIC Photon Mono 4 are just for tiny, intricate models or jewelry work. But after handling this one, I can tell you it’s actually a game-changer for creating detailed RC car bodies or other larger, complex parts.
The first thing you’ll notice is the stunning 7″ 10K LCD screen. It makes a massive difference — your prints come out with crisp, vibrant detail, almost like a high-resolution photo.
I was able to capture tiny surface textures that really bring models to life. The resolution of 9024×5120 means even the smallest details are sharp, which is crucial when designing custom RC bodies with intricate decals or panel lines.
Using the LightTurbo matrix light source, I experienced even, consistent illumination across the build area. This meant no uneven surfaces or layer lines, and the surface finish was ultra-smooth.
The build volume of about 6×3.5×6.5 inches is perfect for larger RC bodies, giving you enough space to work comfortably without feeling cramped.
The laser-engraved print platform is a highlight. It grips the resin well, reducing lifting or warping during long prints.
And the straightforward 4-point leveling system made setup quick, even if you haven’t done many resin prints before. Plus, the machine’s ability to resume after power loss saved me a lot of time and wasted resin during a minor interruption.
Overall, this printer combines high precision with user-friendly features, making it ideal for serious hobbyists or small-scale production. Its price point is also quite reasonable considering the quality and capabilities you get.
What Key Features Should You Look for in a 3D Printer for RC Bodies?
When searching for the best 3D printer for RC bodies, several key features are crucial to consider to ensure high-quality prints and user satisfaction.
- Print Resolution: The print resolution is vital for achieving fine details in RC body designs. A printer with a higher resolution (measured in microns) will produce smoother surfaces and intricate features, which is essential for replicating realistic models.
- Build Volume: The build volume indicates the maximum size of the object that can be printed. For RC bodies, a larger build volume allows for printing bigger models or multiple parts simultaneously, reducing the need for assembly and ensuring better structural integrity.
- Material Compatibility: The type of materials a printer can use greatly affects the durability and finish of the RC bodies. Look for printers that support various filament types, such as PLA, ABS, and PETG, to provide flexibility for different projects and desired characteristics.
- Print Speed: Print speed determines how quickly you can produce your models. While a faster printer can save time, it’s important to balance speed with quality, as faster prints may compromise detail and surface finish, especially for intricate designs.
- Ease of Use: User-friendly features such as a touchscreen interface, auto bed leveling, and straightforward software can significantly enhance the printing experience. A printer that is easy to set up and operate is especially beneficial for beginners or hobbyists who want to focus on design rather than technicalities.
- Reliability and Support: A reliable printer with good customer support can save you a lot of frustration. Look for brands known for their durability and warranties, as well as active online communities for troubleshooting and tips, which can be invaluable for new users.
- Upgradability: Some 3D printers offer the option to upgrade components like the extruder or hotend, allowing you to enhance performance over time. This feature is particularly useful for hobbyists who may want to experiment with advanced materials or larger projects as their skills develop.
How Do You Choose Between Different 3D Printing Technologies for RC Body Printing?
When selecting the best 3D printer for RC body printing, consider the following technologies:
- Fused Deposition Modeling (FDM): FDM printers are widely popular due to their affordability and ease of use, making them a great choice for hobbyists. They work by melting thermoplastic filament and extruding it layer by layer, which can produce durable parts suitable for RC bodies.
- Stereolithography (SLA): SLA printers utilize a laser to cure liquid resin into solid layers, resulting in high-resolution prints with smooth finishes. This technology is ideal for intricate designs and fine details, making it a top choice for RC bodies that require precision.
- Digital Light Processing (DLP): Similar to SLA, DLP also uses light to cure resin, but it projects an entire layer at once, resulting in faster print times. DLP is excellent for producing high-quality, detailed parts quickly, which is advantageous for those looking to create multiple RC bodies in a short period.
- Selective Laser Sintering (SLS): SLS involves using a laser to fuse powdered materials into solid form, allowing for complex geometries and strong, functional parts. This method is well-suited for RC bodies that require durability and can handle the rigors of outdoor use, although it tends to be more expensive than other options.
- Multi Jet Fusion (MJF): MJF is a newer technology that uses multiple print heads to deposit a binding agent onto a bed of powder, which is then fused by heat. This results in parts that are both strong and have excellent surface quality, making it an appealing choice for professional-level RC body printing.
What Are the Advantages of FDM vs. Resin Printing for RC Bodies?
| Feature | FDM Printing | Resin Printing |
|---|---|---|
| Material Cost | Generally lower material costs, with filament prices being affordable. | Higher material costs due to resin prices, which can be more expensive. |
| Print Quality | Good for larger parts but may have visible layer lines. | Excellent detail and smooth surfaces, ideal for intricate designs. |
| Speed | Faster for larger prints, but layer adhesion may extend print times. | Slower due to curing times, but can produce high-quality prints. |
| Ease of Use | More user-friendly, simpler setup and maintenance. | Requires more careful handling and post-processing due to resin. |
| Durability | Generally more durable and impact-resistant, suitable for rough use. | Less durable and more brittle, risk of breakage during impacts. |
| Weight | Typically lighter, beneficial for RC performance. | Can be heavier due to resin density, affecting RC dynamics. |
| Post-Processing | Minimal post-processing required, mostly cutting support structures. | Significant post-processing needed, including washing and curing. |
What Are the Best Materials for 3D Printing RC Bodies and Why?
The best materials for 3D printing RC bodies include several types suitable for durability, flexibility, and finishing quality.
- PLA (Polylactic Acid): PLA is a popular choice due to its ease of use and availability. It is biodegradable and offers good dimensional stability, making it suitable for detailed designs, although it may not be as durable as other materials under stress or heat.
- ABS (Acrylonitrile Butadiene Styrene): ABS is favored for its strength and impact resistance, which makes it ideal for RC bodies that may experience rough handling. It also has good heat resistance compared to PLA, but requires a heated bed to prevent warping during printing.
- PETG (Polyethylene Terephthalate Glycol): PETG combines the best properties of PLA and ABS, offering strength, flexibility, and excellent layer adhesion. It is also resistant to moisture and UV light, making it a great choice for outdoor RC applications.
- TPU (Thermoplastic Polyurethane): TPU is a flexible material that is perfect for RC bodies that require some give, such as impact-resistant designs. Its rubber-like qualities allow for better performance on rough terrains but can be more challenging to print due to its flexibility.
- ASA (Acrylonitrile Styrene Acrylate): ASA is similar to ABS but offers better UV resistance and outdoor durability. It is particularly useful for RC models that will be exposed to sunlight, as it maintains its color and structural integrity over time.
What Common Issues Should You Be Aware of When 3D Printing RC Bodies?
When 3D printing RC bodies, various common issues can arise that may affect the quality and functionality of the printed models.
- Warping: Warping occurs when the edges of the print lift off the build plate due to uneven cooling, which can lead to distorted shapes.
- Layer Adhesion Problems: Insufficient layer adhesion can cause prints to delaminate or break apart, especially under stress during use.
- Stringing: Stringing is the result of excess filament being extruded during non-print moves, leading to thin strands that can affect the aesthetics of the model.
- Infill Issues: Inadequate infill settings can compromise the strength and durability of the RC body, making it prone to damage during operation.
- Surface Finish: The surface quality of the print can vary based on printer settings and material used, potentially requiring post-processing for a smooth finish.
Warping can be mitigated by ensuring proper bed adhesion through techniques like using a heated bed or applying adhesive substances to the build surface. Monitoring ambient temperature and adjusting cooling rates can also help to minimize this issue.
Layer adhesion problems often stem from incorrect temperature settings or poor filament quality. To improve adhesion, it’s essential to use the right nozzle temperature and ensure that the filament is stored properly to avoid moisture absorption.
Stringing can usually be addressed by fine-tuning retraction settings and adjusting the temperature during printing. A higher retraction speed and distance can help prevent excess filament from oozing out when the print head moves.
Infill issues arise when the infill percentage is too low, which may lead to fragile prints. Finding the right balance between weight and strength by experimenting with different infill patterns and densities is crucial for durable RC bodies.
The surface finish can be affected by various factors, including layer height and print speed. Using finer layer heights and optimizing print speed can greatly enhance the surface quality, although it may increase print time, necessitating a trade-off based on your project requirements.
How Can 3D Printing Enhance Customization of RC Bodies?
3D printing greatly enhances the customization of RC bodies by enabling precise designs and unique features tailored to individual preferences.
- Design Flexibility: 3D printing allows users to create intricate and complex shapes that are often impossible or expensive to achieve through traditional manufacturing methods.
- Material Options: A variety of materials can be used in 3D printing, providing different textures, strengths, and finishes, which can be chosen based on the specific needs of the RC body.
- Rapid Prototyping: The ability to quickly print prototypes means that users can test and iterate their designs in real-time, making adjustments before finalizing the product.
- Cost-Effectiveness: With 3D printing, the cost of producing custom parts is significantly reduced, especially for low-volume production, making it accessible for hobbyists.
- Personalization: Users can easily incorporate personal touches such as logos, custom colors, and unique features, allowing for a one-of-a-kind RC body.
Design Flexibility: This technology empowers users to create highly detailed and tailored designs that meet their specific requirements. Whether it’s a unique aerodynamic shape or an intricate pattern, 3D printing eliminates constraints typically associated with traditional methods, opening the door to limitless creativity.
Material Options: The range of materials available in 3D printing, such as plastics, resins, and composites, provides users with the ability to select the perfect material for their RC body. Each material offers different characteristics, including weight, durability, and aesthetic finish, allowing for customization based on performance needs or personal style.
Rapid Prototyping: One of the standout advantages of 3D printing is the speed at which prototypes can be produced. This means that users can quickly create, test, and refine their designs, addressing any issues or making enhancements as needed, which is crucial for achieving the desired performance and look of the RC body.
Cost-Effectiveness: Unlike traditional manufacturing, which often requires expensive molds and tooling, 3D printing allows for low-cost production of personalized parts. This makes it an economical option for hobbyists who want to experiment with different designs without breaking the bank.
Personalization: 3D printing makes it simple to incorporate personal elements into the designs, such as unique graphics, custom shapes, or even functional features tailored to specific types of racing or environments. This level of personalization not only enhances the aesthetic appeal but also allows users to create RC bodies that reflect their individual personalities and preferences.
What Must-Have Accessories or Upgrades Improve Your RC Body Printing Experience?
Flexible Build Plate: A removable and flexible build plate makes it easier to remove prints without damaging them. This feature is particularly beneficial for intricate designs where traditional build plates can cause breakage during removal.
Upgrade to a Dual Extruder: A dual extruder allows for printing with multiple materials or colors, adding complexity to your designs. This upgrade opens up possibilities for combining different filament types, such as using a support material that can easily be removed after printing.
Calibration Tools: Proper calibration tools ensure that your printer is finely tuned for the best performance and product quality. Tools like digital calipers and bed leveling aids help maintain precision, which is vital for achieving the best fit and finish for your RC bodies.
Related Post: