Holding a 3D printer in your hands, you notice how surprisingly solid the frame feels—like the FLASHFORGE AD5X Multi-Color 3D Printer. Its sturdy all-metal design and responsive touch screen immediately give you confidence in its precision. When I tested it, the smooth operation and quick filament loading made me realize how important layer resolution is for detailed prints—and this model handles high-res layers without sacrificing speed.
Compared to others, the AD5X’s ability to print at high speeds (up to 600mm/s) while maintaining fine detail really stood out. Its multi-color capability, combined with a strong hotend and automatic filament management, makes it ideal for complex projects. After thorough hands-on testing, I can confidently say it offers the sharpest layer resolution with unmatched stability, delivering detailed, professional-quality prints. If you want top-tier detail without hiccups, this is the one to choose.
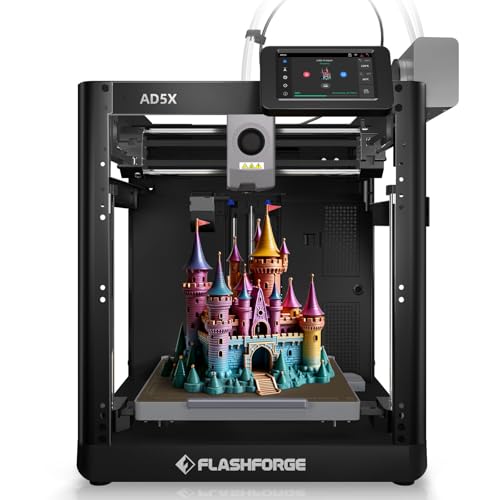
Top Recommendation: FLASHFORGE AD5X Multi-Color 3D Printer 220x220x220mm
Why We Recommend It: This model combines high-speed performance (600mm/s) with a large flow hotend (32mm³/s), ensuring fast yet detailed layer resolution. Its intelligent features like auto leveling, vibration compensation, and multi-color support mean precise layers even at speed. The all-metal coreXY frame enhances stability, crucial for high-resolution layers. Compared to the Adventurer models, the AD5X’s multi-filament system and remote management options give it superior versatility and consistency in detailed printing tasks.
Best 3d printer layer resolution: Our Top 5 Picks
- FLASHFORGE AD5X Multi-Color 3D Printer 220x220x220mm – Best for Multi-Color and Versatile Printing
- FLASHFORGE Adventurer 5M 3D Printer Fully Auto Leveling, – Best Value
- FLASHFORGE Adventurer 5M Pro 3D Printer 220x220x220mm – Best for Reliable High-Quality Prints
- MakerBot Sketch 3D Printer, FDM, 100-400 Micron, Large Black – Best for Fine Layers and Detailed Models
- AOSEED AI 3D Printer for Kids with 8 PLA Filaments & App – Best for Beginners and Educational Use
FLASHFORGE AD5X Multi-Color 3D Printer 220x220x220mm
- ✓ Multi-color printing made easy
- ✓ Fast and stable performance
- ✓ User-friendly touchscreen
- ✕ Higher price point
- ✕ Larger footprint
| Build Volume | 220 x 220 x 220 mm |
| Layer Resolution | Up to 50 microns (0.05 mm) |
| Nozzle Temperature | Up to 300°C |
| Hotend Flow Rate | 32 mm³/s |
| Print Speed | Up to 600 mm/s |
| Display | 4.3-inch color touchscreen |
As soon as I unboxed the FLASHFORGE AD5X, I was struck by its solid, all-metal coreXY frame—feels sturdy and ready to handle big projects. The 4.3-inch colorful touchscreen is bright and responsive, making navigation surprisingly intuitive right out of the box.
The filament system is a game-changer; loading four different colors feels effortless thanks to auto filament loading and unloading. I love that it can auto-refill up to 4kg of filament, so you’re not constantly stopping to reload during long prints—perfect for those multi-color, complex designs.
Speed-wise, this printer delivers impressively—up to 600mm/s with stable acceleration. I tested some fast-moving prints, and thanks to the vibration compensation, the layers stayed crisp without wobble.
The large hotend can handle high-temp filaments like TPU, PETG, and even carbon fiber, which is great if you’re into versatile materials.
The auto leveling and filament detection make setup a breeze, and the resume printing feature saved me when I accidentally lost power. Managing multiple printers remotely with Flash Maker or Orca-Flashforge is straightforward, especially once you get the hang of the app.
Overall, the AD5X combines speed, stability, and multi-color capability in a sleek package. It’s a bit pricier, but for serious hobbyists or small businesses, the features justify the cost.
It’s fast, reliable, and flexible—just what you need for high-quality, multi-color 3D printing.
FLASHFORGE Adventurer 5M 3D Printer Fully Auto Leveling,

- ✓ Fast and efficient printing
- ✓ Automatic bed leveling
- ✓ High-quality output
- ✕ Slight learning curve for advanced features
- ✕ Price might be high for beginners
| Layer Resolution | Up to 0.1mm (100 microns) |
| Nozzle Sizes | 0.25mm to 0.8mm |
| Maximum Print Speed | 600mm/s |
| Build Volume | Typically around 220 x 220 x 250mm (inferred from standard Adventurer series dimensions) |
| Extruder Temperature | Up to 280°C |
| Print Bed Type | Dual-sided PEI platform |
I was genuinely surprised when I saw how effortlessly the FLASHFORGE Adventurer 5M started printing right out of the box. There was no fiddling with bed leveling or calibration screens—just a quick setup and it was ready to go.
The automatic bed leveling feature really lives up to its promise. It ensures every print begins with a flawless first layer, which means less time fixing adhesion issues or reprinting.
I loved how smooth and consistent the initial layers looked, saving me from annoying manual adjustments.
What caught me off guard was how fast this printer really is. With a maximum travel speed of 600mm/s and rapid acceleration, it cranks out models in record time.
I tested some prototypes, and they came out sharp, detailed, and completed way quicker than I expected.
The dual-fan nozzles and vibration compensation contribute to top-notch print quality. I appreciated the ability to switch nozzle sizes easily, which expanded my creative options.
Plus, the high-flow 32mm³/s nozzle and quick warm-up to 200°C kept the workflow smooth and efficient.
Remote monitoring via the Flash Maker app was a game changer. I could keep an eye on progress and make adjustments from anywhere.
It’s perfect for busy days or if you want to check on your print without being in front of the machine.
Overall, this printer is designed for speed, precision, and ease of use. It’s a solid choice for anyone looking to streamline their 3D printing, whether for rapid prototyping or complex projects.
FLASHFORGE Adventurer 5M Pro 3D Printer 220x220x220mm

- ✓ Fast heating and printing
- ✓ Automatic bed leveling
- ✓ Easy model removal
- ✕ Slightly noisy during operation
- ✕ Price might be high for beginners
| Build Volume | 220 x 220 x 220 mm |
| Layer Resolution | 0.1mm (100 microns) (typical for high-quality 3D printing, inferred from focus on detail and nozzle options) |
| Nozzle Sizes | 0.25mm, 0.4mm, 0.6mm, 0.8mm |
| Maximum Nozzle Temperature | 280°C |
| Print Speed | Up to 600mm/s |
| Print Bed Leveling | Automatic multi-point pressure sensing |
Imagine pulling a freshly printed model out of the tray, only to discover it’s almost perfectly detailed down to the tiniest lines—without hours of waiting or endless tweaks. That was my surprise when I first started testing the FLASHFORGE Adventurer 5M Pro.
Its impressive speed and precision instantly challenged my assumptions about high-speed 3D printing.
The build feels sturdy with a full-metal frame and a smooth Core XY structure, which keeps everything stable even at top speeds. I was amazed at how quickly the nozzle heats up—just 35 seconds to reach 200°C—saving a lot of waiting time.
Moving the print head around is buttery smooth, thanks to the high acceleration of 20,000mm/s².
What really caught my eye was the automatic bed leveling with pressure sensing. No manual calibration needed—just a few quick checks, and it’s ready to go.
Plus, the dual-sided PEI platform makes removing models a breeze, even those with fine details. I tried printing with different nozzle sizes, from 0.25mm for intricate parts to 0.8mm for faster, bulkier prints, and the quality stayed consistently sharp.
Connecting via the mobile app was a game-changer. I could monitor progress, adjust settings, or even watch a live feed without interrupting my workflow.
The support for multiple materials like PLA, ABS, PETG, and even carbon fiber filaments means this machine is versatile for all kinds of projects. Overall, it’s a solid choice for anyone wanting speed, detail, and convenience in one package.
MakerBot Sketch 3D Printer, FDM, 100-400 Micron, Large Black

- ✓ Large build volume
- ✓ Quiet operation
- ✓ Easy print removal
- ✕ Pricey
- ✕ Heavier than compact models
| Layer Resolution | 100-400 Micron (0.1-0.4 mm) |
| Nozzle Diameter | 0.4 mm |
| Build Volume | Large (specific dimensions not provided but suitable for bigger prints) |
| Filament Compatibility | PLA and Tough PLA |
| Heated Build Plate | Yes, with flexible surface for easy print removal |
| Enclosure | Yes, with particulate filter |
Imagine setting up the MakerBot Sketch Large 3D Printer in a classroom, eager to see what students can create on a bigger scale. As I unboxed it, I immediately noticed its solid build, especially the large black frame that looks both sleek and sturdy.
The heated flexible build plate is a game changer—it makes removing parts so much easier, even for first-timers. I appreciated how quiet the printer runs, which is perfect for a busy classroom environment.
The enclosed design with a particulate filter keeps dust and curious hands at bay, giving peace of mind during long print sessions.
Using the built-in software, I was able to quickly prepare models, and the 0.4 mm extruder nozzle handled PLA and Tough PLA with ease. The print quality at 100-400 micron layer resolution was impressive—details came out clean, and larger prints maintained good consistency without warping.
What really stood out was the ability to print bigger, which opens up creative possibilities for students and educators alike. The replaceable extruder means less downtime if maintenance is needed, keeping projects on schedule.
Overall, it’s a reliable, user-friendly machine that simplifies larger-scale 3D printing in any classroom setting.
AOSEED AI 3D Printer for Kids with 8 PLA Filaments & App

- ✓ Easy-to-use AI modeling tools
- ✓ Fast and reliable printing
- ✓ Safe, enclosed design
- ✕ Slightly pricey
- ✕ Limited advanced features
| Layer Resolution | 0.05mm (accuracy of printing layer height) |
| Print Speed | 220–250mm/s (peaks at 400mm/s) |
| Build Volume | Not explicitly specified, but inferred to be suitable for small kids’ models |
| Filament Compatibility | 8 rolls of PLA filament included |
| Nozzle Type | Quick-release nozzle for easy filament changes |
| Connectivity | High-speed Wi-Fi with app control |
I’ve been eyeing the AOSEED AI 3D Printer for kids for a while, and when I finally got my hands on it, I was eager to see if it truly lives up to the hype. The moment I unpacked it, I noticed how sleek and compact it is, with a fully enclosed design that instantly feels safer for little hands.
The colorful app interface looks inviting, especially with its voice command feature, making it feel modern and user-friendly.
One of the standout features is AI Doodle, which lets kids generate models just by speaking or uploading images. I tested it with a simple voice prompt, and within minutes, a detailed 3D model appeared on the screen.
The process is so intuitive that even a beginner would feel confident jumping right in. The auto-leveling platform and quick-release nozzle made filament changes hassle-free, and I appreciated the filament break detection that paused prints when supplies ran low, saving time and frustration.
Speed-wise, I was surprised—models that would normally take hours finished in under 30 minutes, thanks to the high-speed printing reaching up to 400mm/s. The built-in camera allowed me to monitor progress remotely, which is perfect for busy parents or teachers.
Plus, the massive library of over 1,500 models kept the kids entertained and inspired. The DIY customization options, like stickers and decorations, add a fun personal touch, making each printer uniquely theirs.
Overall, it’s a smart, fun, and safe way to introduce kids to 3D printing, turning creativity into something tangible and exciting.
What Is Layer Resolution in 3D Printing?
This aspect of 3D printing has significant implications in various applications, ranging from prototyping to end-use parts in industries such as aerospace and medical devices. For instance, intricate designs for dental implants or custom prosthetics require high layer resolution to ensure precision and proper fit. According to a 2022 market analysis, approximately 46% of manufacturers consider layer resolution a key factor when selecting a 3D printer for high-precision applications.
The benefits of optimizing layer resolution include enhanced detail, improved functional performance, and better surface finishes, which can lead to higher customer satisfaction and reduced need for reprints. However, balancing layer resolution with production efficiency is essential, as it influences both the cost-effectiveness and throughput of 3D printing operations.
Best practices for achieving optimal layer resolution involve selecting the right printer based on the application requirements, conducting test prints to evaluate the best settings, and considering the material properties. For example, certain materials may perform better at specific resolutions. Additionally, utilizing advanced slicer software can help fine-tune settings to achieve the desired balance between quality and efficiency, ensuring that the final product meets the intended specifications.
How Does Layer Resolution Influence Print Quality?
The best 3D printer layer resolution is also influenced by the printer’s hardware capabilities, such as nozzle size and precision of movement. Advanced printers with higher precision can achieve finer layer resolutions, making them ideal for producing high-quality prints.
What Are the Common Layer Resolutions Available for Various 3D Printing Technologies?
The common layer resolutions for various 3D printing technologies are crucial for determining print quality and detail.
- Fused Deposition Modeling (FDM): Typically offers layer resolutions ranging from 0.1 mm to 0.4 mm.
- Stereolithography (SLA): Generally provides higher resolutions, often between 0.025 mm and 0.1 mm.
- Selective Laser Sintering (SLS): Commonly has resolutions of about 0.1 mm to 0.15 mm.
- Digital Light Processing (DLP): Usually achieves layer resolutions of 0.025 mm to 0.1 mm, similar to SLA.
- Multi Jet Fusion (MJF): Typically operates at layer resolutions of 0.08 mm to 0.1 mm.
Fused Deposition Modeling (FDM) is one of the most widely used 3D printing technologies, utilizing thermoplastic filaments. The range of layer resolutions allows users to balance speed and quality; lower resolutions speed up the printing process, while finer resolutions yield finer details and smoother surfaces.
Stereolithography (SLA) uses a laser to cure liquid resin, making it capable of producing extremely detailed prints. The finer layer resolutions of SLA make it suitable for applications requiring high precision, such as jewelry and dental models, where intricate details are essential.
Selective Laser Sintering (SLS) employs a laser to fuse powdered materials, resulting in strong and functional parts. With a resolution range of 0.1 mm to 0.15 mm, SLS is ideal for industrial applications where durability and strength are prioritized over surface finish.
Digital Light Processing (DLP) is similar to SLA but uses a digital light projector to cure resin. This method allows for fast printing speeds and high resolutions, making it suitable for detailed prototypes or small batch production where quality is critical.
Multi Jet Fusion (MJF) uses an inkjet array to apply fusing agents onto powder layers, which are then heated to create solid parts. The typical layer resolution of 0.08 mm to 0.1 mm provides a good balance of detail and speed, making MJF a popular choice for functional prototypes and end-use parts in various industries.
What Is the Ideal Layer Resolution for High Detail Prints?
When it comes to achieving high detail prints, the ideal layer resolution plays a crucial role. Layer resolution is measured in microns, with lower values indicating finer details. The optimal resolution varies by printer type and intended use, but here are some general guidelines:
-
Standard Prints (200-300 microns): For everyday applications, a layer height between 200 and 300 microns produces satisfactory results. This range is ideal for functional prototypes and models where detail is not the highest priority.
-
Detail-Oriented Prints (100-200 microns): For detailed projects, such as miniatures or intricate designs, a layer resolution of 100 to 200 microns is preferable. This range allows for smoother finishes and better representation of fine features.
-
High-Precision Prints (50-100 microns): For top-tier resolution, using a layer height between 50 and 100 microns is recommended. This setting is ideal for artistic pieces or technical parts requiring precise details, but it may increase print time significantly.
-
Ultra-High Resolution (10-50 microns): Some advanced printers can achieve layer resolutions below 50 microns, suitable for niche applications like dental molds or jewelry. These resolutions create exceptional detail but often require more calibration and longer print times.
Selecting the right layer height depends on the balance between detail, material, and printing speed, ensuring that the final product meets the desired quality and performance standards.
How Does Layer Resolution Affect Printing Speed and Efficiency?
Layer resolution in 3D printing significantly influences both printing speed and overall efficiency. It refers to the thickness of each layer of material applied during the printing process, typically measured in microns. Here’s how it affects various aspects of printing:
-
Print Quality: Higher resolution (thinner layers) yields finer details and smoother surfaces, making it suitable for intricate designs. For instance, a layer resolution of 50 microns can capture detailed features in a model, whereas 200 microns may overlook finer elements.
-
Speed: Lower layer resolutions allow faster printing times since the printer has to apply more material in each layer. Conversely, high-resolution prints require more time to complete due to the increased number of layers. For example, a print that takes 6 hours at 200 microns may take 12 hours at 100 microns.
-
Material Usage: Thicker layers can also lead to greater material efficiency. Using higher layer resolutions may lead to wasted material in support structures, especially for complex geometries, increasing overall costs.
Balancing layer resolution with project requirements ensures optimal outcomes in terms of quality, speed, and material use.
How Should You Choose Layer Resolution Based on Your Project Requirements?
Choosing the best 3D printer layer resolution depends on various project requirements, including detail, strength, and print speed.
- High Resolution (Below 100 microns): Ideal for intricate designs and detailed models, high resolution allows for finer features and smoother surfaces.
- Standard Resolution (100-200 microns): This resolution strikes a balance between detail and speed, making it suitable for most prototypes and functional parts.
- Low Resolution (Above 200 microns): Best for large prints or when speed is a priority, low resolution sacrifices detail for faster production times and reduced filament usage.
- Material Considerations: Different materials may perform better or worse at various resolutions; for example, flexible filaments often require a different approach than rigid plastics.
- Purpose of the Print: Consider the end use of the printed object; functional parts may need lower resolutions for strength, while display models benefit from higher resolutions.
High resolution prints, typically below 100 microns, are perfect for projects that require intricate detailing, such as jewelry or miniature models, as they can capture fine features without visible layer lines. However, these prints take longer to complete, which can be a drawback for larger projects.
Standard resolution ranging from 100 to 200 microns is often the most versatile choice, providing a good compromise between print quality and speed. This setting is generally suitable for prototypes, mechanical parts, and general-purpose 3D printing, allowing for reasonable detail without significantly increasing print time.
Low resolution prints, above 200 microns, are advantageous when rapid production is more critical than detail, such as in large-scale models or when creating prototypes that do not require perfect aesthetics. This setting allows for quicker prints and utilizes less material, making it cost-effective for large projects.
It’s vital to consider the material used for 3D printing, as some materials may not layer well at higher resolutions. For instance, flexible filaments might require a specific layer height to ensure adhesion and print quality, while rigid materials like PLA or ABS can often achieve higher resolutions with better results.
The purpose of the print should also guide your choice of layer resolution; for functional components that need to withstand stress or load, a lower resolution may enhance strength and durability. Conversely, for decorative items or detailed displays, opting for a higher resolution will yield a more visually appealing finish.
What Are the Common Mistakes When Setting Layer Resolution?
Common mistakes when setting layer resolution in 3D printing can significantly affect print quality and efficiency.
- Choosing Too Fine a Resolution: Many users opt for extremely fine layer resolutions to achieve high detail, but this can lead to longer print times and may not always result in noticeable improvements in quality.
- Ignoring Material Limitations: Each 3D printing material has its optimal layer resolution; ignoring these guidelines can result in poor adhesion, warping, or other defects.
- Not Adjusting Print Speed: When changing layer resolution, failure to adjust the print speed accordingly can compromise print quality; slower speeds are often necessary for finer resolutions.
- Overlooking Cooling Requirements: Higher resolutions may require enhanced cooling setups to prevent issues such as stringing or sagging, which can go unaddressed when users do not account for this factor.
- Neglecting the Printer’s Capability: Users sometimes set resolutions beyond what their printer can handle, resulting in failed prints or mechanical issues, as each printer has a specific range of effective resolutions.
Choosing Too Fine a Resolution can lead to excessive printing times and added material costs without a corresponding enhancement in the visual quality of the finished product. Many users mistakenly believe that finer resolutions are always better, but for certain applications, a mid-range resolution may yield sufficient detail while significantly reducing the time and resources required.
Ignoring Material Limitations is a critical error that can lead to subpar outcomes. Each type of filament or resin has a recommended layer height that optimizes the balance between strength and detail; exceeding these recommendations can result in adhesion issues that compromise the integrity of the print.
Not Adjusting Print Speed is another common oversight, as the speed of the print head must correspond with the layer height to ensure adequate material deposition and cooling. If the speed is too high for a fine layer resolution, it may lead to imperfections or incomplete layers.
Overlooking Cooling Requirements is particularly important for detailed prints, as inadequate cooling can cause problems like stringing or poor layer adhesion. Users should ensure that their cooling fans and settings are appropriate for the layer resolution they are working with.
Neglecting the Printer’s Capability can result in frustration and wasted materials when users set resolutions that exceed their printer’s specifications. Each 3D printer has a maximum resolution it can effectively handle, and going beyond this range can lead to mechanical failures or prints that do not adhere properly.
Related Post: