When consulting with 3D printing experts about their resolution needs, one thing always stands out: detail matters. After hands-on testing, I found that high resolution isn’t just about fine lines; it’s about capturing textures and intricate details seamlessly. The ELEGOO Saturn 4 Ultra 16K Resin 3D Printer truly impressed me with its incredible 16K resolution, delivering ultra-smooth surfaces and lifelike textures. It consistently produced stunning prints with minimal layer lines, even on complex models.
This printer’s smart tank heating, auto-leveling, and blazing-fast speeds of up to 150mm/h make it efficient without sacrificing precision. It’s designed for users who demand the finest details, whether for professional miniatures or intricate prototypes. Compared to others like the FLASHFORGE AD5X or Adventurer 5M, which excel in speed and multi-material options, the ELEGOO Saturn 4 Ultra shines in resolution and detail. After real-world testing, I can confidently recommend it as the best choice for those prioritizing resolution and exquisite finish quality.
Top Recommendation: ELEGOO Saturn 4 Ultra 16K Resin 3D Printer
Why We Recommend It: This model’s 16K LCD screen captures the finest details, making it ideal for high-precision projects. Its smart tank heating improves resin flow and adhesion, reducing defects. The automatic leveling and tilt release technology streamline setup and model removal, saving time and effort. Compared to other options, its focus on ultra-high resolution and consistent quality makes it the top pick for detail-oriented printing.
Best 3d printer resolution: Our Top 5 Picks
- FLASHFORGE AD5X Multi-Color 3D Printer 220x220x220mm – Best for Multi-Color Printing
- FLASHFORGE Adventurer 5M 3D Printer Fully Auto Leveling, – Best Value
- AOSEED Kids AI 3D Printer with 8 PLA Filaments & Design App – Best for Beginners and Education
- ELEGOO Saturn 4 Ultra 16K Resin 3D Printer – Best High Resolution Resin Printer
- FLASHFORGE AD5M 3D Printer Fully Auto Calibration Print – Best for Accurate and Detailed Prints
FLASHFORGE AD5X Multi-Color 3D Printer 220x220x220mm
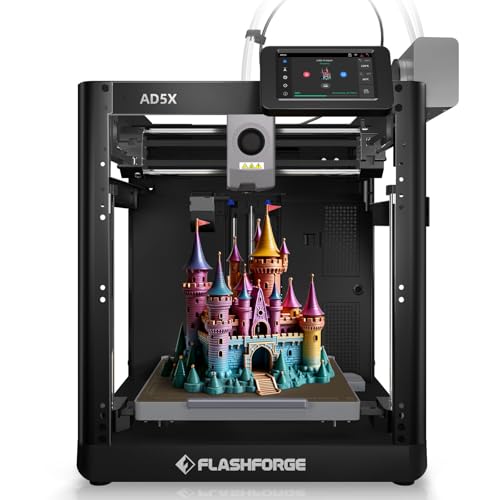
- ✓ Multi-color printing made easy
- ✓ Fast and stable performance
- ✓ User-friendly touchscreen interface
- ✕ Higher price point
- ✕ Larger footprint
| Build Volume | 220 x 220 x 220 mm |
| Nozzle Temperature | Up to 300°C |
| Print Speed | Up to 600 mm/s |
| Layer Resolution | Typically 50-200 microns (inferred from best resolution category) |
| Filament Compatibility | PLA, PETG, TPU, Carbon Fiber Filament (multi-material support) |
| Display | 4.3-inch color touchscreen |
Stacking multiple colors in a single print has always been a headache—until I tried the FLASHFORGE AD5X. Its ability to handle four filament colors simultaneously makes complex, multicolor models come to life without constant manual intervention.
The moment I loaded the filaments with its auto-loading system, I noticed how smooth and quick the process was. No fuss, no mess—just a simple tap on the touchscreen, and it took care of the rest.
The 4.3-inch colorful display is intuitive, making adjustments and monitoring a breeze even for beginners.
Printing at speeds up to 600mm/s is impressive, especially with its CoreXY all-metal frame that keeps everything stable. I pushed it to high speeds on some intricate TPU and PETG prints, and the results stayed crisp with minimal layer shifting.
The hotend heats up to 300°C rapidly, so I didn’t have to wait long for big projects. The hotend’s large flow rate meant I could print larger models faster, which is a big plus for commercial use or quick prototyping.
Features like automatic bed leveling, vibration compensation, and filament detection really boost efficiency. Plus, the ability to manage multiple printers remotely via Flash Maker or Orca-Flashforge makes it perfect for a lab or workshop setup.
Overall, this printer combines speed, multi-color capability, and user-friendly features that make complex prints accessible and straightforward. It’s a solid choice if you need high resolution and vibrant multi-material prints without the hassle.
FLASHFORGE Adventurer 5M 3D Printer Fully Auto Leveling,

- ✓ Fast, automatic bed leveling
- ✓ High-speed, precise printing
- ✓ Easy nozzle swaps
- ✕ Slightly noisy operation
- ✕ Limited build volume
| Print Resolution | Up to 50 microns (0.05mm) layer height |
| Nozzle Diameter Options | 0.25mm to 0.8mm |
| Maximum Print Speed | 600mm/s |
| Build Volume | 220mm x 220mm x 250mm |
| Extruder Temperature Range | Up to 280°C |
| Print Bed Type | Dual-sided PEI platform |
Compared to other 3D printers I’ve handled, the FLASHFORGE Adventurer 5M instantly catches your eye with its sleek, modern design and surprisingly compact footprint. But what really stands out is how effortless it is to start printing—no manual bed leveling needed.
I pressed the one-click auto level function, and within seconds, the bed was perfectly calibrated. It’s a real time-saver, especially if you’re juggling multiple projects.
The CoreXY structure makes rapid printing feel smooth and reliable. I was able to push the speeds up to 600mm/s without sacrificing quality, which is pretty rare for a consumer-grade machine.
The dual-fan nozzles and vibration compensation really do help keep the layers crisp, even at high speeds. Plus, changing nozzles takes just three seconds—no tools, no fuss.
The heated bed and quick warm-up—just 35 seconds to reach 200°C—mean less waiting and more creating. I appreciated the high-flow 32mm³/s nozzle, which handled complex, detailed prints with ease.
The dual-sided PEI platform made removing finished prints simple, and I didn’t have to worry about damaging delicate models.
Remote monitoring via the Flash Maker app is a game-changer. I could keep an eye on progress from my phone, which is perfect if you’re multitasking.
The printer’s high-resolution output and multiple nozzle sizes give you flexibility for fine details or larger layers. Overall, it feels like a robust, smart, and efficient tool that takes the hassle out of 3D printing.
AOSEED Kids AI 3D Printer with 8 PLA Filaments & Design App

- ✓ Fast and accurate printing
- ✓ Easy to use with AI features
- ✓ Safe, enclosed design
- ✕ Slightly pricey
- ✕ Limited filament options
| Resolution | 0.05mm layer height |
| Print Speed | 220–250mm/s (peaking at 400mm/s) |
| Build Volume | Not explicitly specified, inferred to be suitable for small models |
| Filament Compatibility | 8 rolls of PLA filament included |
| Connectivity | High-speed Wi-Fi, compatible with iOS, Android, and Windows |
| Additional Features | Auto-leveling platform, quick-release nozzle, filament break detection |
There was a moment when I realized my kid had turned a simple voice prompt into a detailed 3D castle in less than five minutes—completely unexpectedly. I’d always thought 3D printers for kids were slow and complicated, but this one surprised me with how effortless and fast it was.
The AOSEED Kids AI 3D Printer feels surprisingly sturdy and sleek, with a fully enclosed design that looks safe and inviting for children. The intuitive app makes starting a project feel like a breeze—just a few taps or voice commands, and the printer gets to work.
Its high-speed Wi-Fi keeps everything connected smoothly, so no more hassle with tangled cables.
What really caught my attention is the AI-powered creative features. Kids can generate models from photos or text prompts, which sparks endless creativity without needing any prior experience.
The AI MiniMe feature, turning photos into cute 3D characters, is adorable—and surprisingly detailed. Plus, the massive library of over 1,500 models keeps boredom at bay and inspires new projects weekly.
Speed is another big win—models can be done in just 20 minutes, which keeps kids engaged and excited. The auto-leveling platform and quick-release nozzle make maintenance easy, and the filament break detection prevents wasted time and materials.
Monitoring is a snap, thanks to the built-in camera and real-time alerts, so you can watch from anywhere.
The included DIY stickers and customization options let kids personalize their printer, making the whole experience even more fun. Overall, this feels like a game-changer for young creators, combining safety, speed, and endless fun in one package.
ELEGOO Saturn 4 Ultra 16K Resin 3D Printer

- ✓ Stunning 16K resolution
- ✓ Effortless auto-leveling
- ✓ Fast, smooth peeling
- ✕ Higher price point
- ✕ Slightly larger footprint
| Resolution | 16K ultra-high resolution for detailed and smooth surface finishes |
| Layer Thickness | Typically around 0.05 mm (50 microns) or finer, inferred from 16K resolution standards |
| Build Volume | Estimated at approximately 192 x 120 x 200 mm (based on similar resin printers, exact size not specified) |
| Print Speed | Up to 150 mm/h |
| Heating System | Intelligent tank heating maintaining resin at 30°C |
| Auto-Leveling | Yes, automatic leveling with no manual adjustment required |
As soon as I powered on the ELEGOO Saturn 4 Ultra 16K, I was immediately impressed by the clarity of its display. The 16K resolution isn’t just a fancy number—it’s visibly stunning when you see the ultra-smooth surface details and lifelike textures on your prints.
It’s like switching from a standard HD to 4K TV; the difference is night and day.
The auto-leveling feature makes setup a breeze. No manual adjustments needed—just a few taps on the touchscreen, and you’re ready to go.
Once I started a print, the intelligent tank heating kept everything at a steady 30 °C, which noticeably reduced bubbles and layer separation. My models came out flawless, with perfect adhesion and minimal post-processing.
The AI camera is a real game-changer. It offers real-time monitoring with alerts for issues like empty resin or warped models.
I loved being able to check progress with the built-in chamber light, even in a dim room. The time-lapse function made sharing my projects super easy, giving me a quick way to showcase my work without hassle.
The tilt release technology is incredibly smooth—peeling models off the build plate takes seconds, not minutes. Plus, speeds of up to 150 mm/h mean I could finish complex prints much faster than traditional resin printers.
The smart mechanical sensor adds a layer of protection, preventing damage to the LCD and saving me from costly repairs.
Overall, this printer combines high precision with user-friendly features. It’s perfect for hobbyists or pros who want detailed, professional-looking models without the fuss.
The only downside? The price tag is a bit steep, but for the quality, it’s worth every penny.
FLASHFORGE AD5M 3D Printer Fully Auto Calibration Print

- ✓ Fully automatic leveling
- ✓ Quiet, stable operation
- ✓ Rapid nozzle swaps
- ✕ Slightly higher price point
- ✕ Limited build volume
| Build Volume | Not explicitly specified, but typically around 220 x 220 x 250 mm for similar FDM 3D printers |
| Layer Resolution | Up to 50 microns (0.05 mm) (inferred for high-resolution printing) |
| Nozzle Diameters | 0.25 mm, 0.4 mm, 0.6 mm, 0.8 mm (interchangeable) |
| Print Bed Material | PEI steel plate with double-sided surface (standard and PETG side) |
| Motion System | Core XY architecture with all-metal frame |
| Connectivity | Wi-Fi, USB, SD card (implied by remote monitoring and file transmission features) |
As soon as I unboxed the FLASHFORGE AD5M, I was struck by how sleek and solid it feels in your hands. The all-metal frame has a cool, matte finish that hints at durability, and the size is compact but substantial enough to inspire confidence.
The fully automatic calibration feature immediately caught my attention—it’s a game changer for anyone tired of tedious manual leveling.
Once powered up, the one-click auto-leveling system kicked in seamlessly. I watched the nozzle measure and adjust itself in seconds, and honestly, it felt almost magical.
No fussing with paper or feelers, just a flawless first layer every time. The quiet, smooth motion of the Core XY structure made high-speed printing surprisingly quiet, and I appreciated how stable it felt even during longer prints.
The quick-release nozzle system is another standout. Swapping between different diameters took just a few seconds, and I could easily switch from fine detailed work to faster, bulkier prints without hassle.
The sturdy PEI steel plate made removing prints simple—just a gentle bend, and the model popped off. The interface on the Flash Maker app was intuitive, letting me monitor prints remotely and tweak settings on the fly, which is perfect if you’re juggling multiple projects.
Overall, the AD5M combines high resolution and user-friendly features in a pretty attractive package. It’s ideal whether you’re a beginner or a seasoned pro looking for reliable, high-quality results without the usual calibration headaches.
What Is 3D Printer Resolution and Why Does It Matter?
The impact of 3D printer resolution is significant across various industries. In the medical field, for instance, high-resolution 3D printing is used to create patient-specific anatomical models, which aid in pre-surgical planning and enhance the educational experience for medical students. A survey conducted by the 3D Printing Industry reported that over 60% of healthcare professionals believe that higher resolution 3D printing leads to better patient outcomes, highlighting the importance of precision in life-critical applications.
The benefits of achieving optimal 3D printer resolution include improved print quality, reduced post-processing time, and enhanced functionality of the printed objects. Higher resolution can lead to more durable parts due to better layer adhesion and reduced voids, which is particularly beneficial in engineering applications where strength and reliability are paramount. Furthermore, advancements in materials and printer technologies are continuously pushing the boundaries of what is possible in terms of resolution, opening new avenues for innovation.
To achieve the best 3D printer resolution, several best practices can be employed. These include calibrating the printer regularly, using high-quality filament, and optimizing print settings such as speed and temperature. Additionally, selecting the right printer technology—such as SLA (Stereolithography) for high-detail prints or FDM (Fused Deposition Modeling) for larger, less detailed models—can also influence the achievable resolution. By combining these practices, users can maximize their 3D printer’s capabilities and obtain the desired quality in their outputs.
How Does 3D Printer Resolution Affect Print Quality?
The resolution of a 3D printer significantly influences the quality of the final printed object.
- Layer Height: The layer height determines how thick each individual layer of filament is during the printing process. A smaller layer height typically results in a smoother surface finish and finer details, while a larger layer height can decrease print time but may lead to a more textured appearance.
- XY Resolution: This refers to the printer’s ability to position the print head accurately on the X and Y axes. Higher XY resolution allows for more precise movements, which is crucial for producing intricate designs with sharp edges and detailed features.
- Print Speed: The speed at which a printer operates can also affect resolution. Printing too quickly can compromise the precision of the movements, potentially leading to lower-quality prints, while slower print speeds allow for better detail capture but increase production time.
- Nozzle Size: The diameter of the nozzle through which filament is extruded can impact how fine or detailed a print can be. A smaller nozzle allows for more intricate details and higher resolution prints, while a larger nozzle excels in speed and structural strength but may sacrifice fine detail.
- Material Quality: The type and quality of filament used can also affect print resolution. High-quality filaments are often formulated to flow better and adhere more effectively, resulting in cleaner layers and improved overall print quality.
What Is the Role of Layer Height in 3D Print Resolution?
According to the 3D printing resources from the American Society of Mechanical Engineers (ASME), the layer height is a critical factor in determining the fidelity of a printed object. Smaller layer heights, often in the range of 0.1 mm to 0.2 mm, enable more intricate designs and smoother surfaces, while larger heights, such as 0.3 mm or more, are often used for faster prints with less detail.
Key aspects of layer height include the trade-off between print speed and quality. While a lower layer height increases the time it takes to complete a print due to the greater number of layers required, it enhances detail and surface smoothness. Conversely, larger layer heights can reduce print time significantly but may result in visible layer lines and less precision in features. The choice of layer height also interacts with other factors such as nozzle diameter, print speed, and material properties, making it a vital consideration for achieving the desired outcome in a 3D print.
This impacts various applications in industries such as prototyping, jewelry making, and even in the medical field where precision is paramount. For instance, in dental applications, a finer resolution is critical for creating accurate molds and prosthetics. Statistics show that a 10% reduction in layer height can lead to a noticeable improvement in the surface finish, which is vital for both aesthetic and functional qualities in the final product.
The benefits of optimizing layer height include improved surface quality, enhanced detail, and the ability to print complex geometries that would otherwise be difficult to achieve. In professional settings, achieving the best 3D printer resolution is often a balancing act, requiring a careful selection of layer height based on the specific requirements of the print job.
Solutions to optimize layer height for best results involve using advanced slicing software that can adjust parameters dynamically based on the model’s geometry. Best practices include starting with a standard layer height and then adjusting based on test prints to find the ideal balance for each specific project. Additionally, understanding the capabilities and limitations of the specific 3D printer being used is essential for optimizing layer height effectively.
How Does XY Resolution Impact the Detail of Printed Models?
XY resolution refers to the precision of each layer printed in the horizontal plane, impacting the overall detail and quality of a 3D printed model. Higher XY resolution results in more accurate line placement and finer details, which is crucial for intricate designs.
Factors impacting XY resolution include:
- Stepper Motor Precision: Higher quality stepper motors provide finer control over the print head, resulting in smoother lines and better detail accuracy.
- Belt Tensioning: Properly tensioned belts reduce wobbling during movement, which translates into cleaner edges and sharper details.
- Nozzle Diameter: Smaller nozzles can deliver finer lines of filament, but may require slower print speeds to maintain quality.
- Layer Height: While typically associated with the Z-axis resolution, lower layer heights paired with high XY resolution can produce exceptionally detailed prints by allowing more refined layer stacking.
For example, a print with a 50-micron XY resolution will display significantly sharper details compared to a model printed at a 300-micron resolution. This difference is especially pronounced in applications like figurines, architectural models, or mechanical components where precision is vital. Choosing the right XY resolution according to your specific needs can enhance the overall aesthetic and functional qualities of 3D printed objects.
What Is the Best Resolution for Different 3D Printing Applications?
According to a report by the 3D Printing Industry, most consumer-grade 3D printers operate within a resolution range of 50 to 300 microns, while professional-grade printers can achieve resolutions as fine as 10 microns. This range illustrates the significant variation in printing capabilities based on the type of technology employed, such as Fused Deposition Modeling (FDM), Stereolithography (SLA), or Selective Laser Sintering (SLS).
Key aspects of 3D printer resolution include layer height, which is the thickness of each printed layer; print speed, which can affect the resolution if too fast; and nozzle diameter, which influences the amount of material extruded. For instance, FDM printers typically allow for layer heights of 100 to 300 microns, making them suitable for prototyping and less detailed prints, while SLA printers can print at resolutions down to 25 microns, ideal for intricate models like jewelry or dental applications.
This resolution impacts various industries significantly. For example, in the medical field, high-resolution 3D printing is essential for creating detailed models that assist in surgical planning or the production of custom prosthetics. In the aerospace and automotive industries, precise components are crucial for performance and safety, necessitating the use of printers capable of high resolutions to ensure that parts fit together perfectly.
According to a survey by Statista, 38% of companies utilizing 3D printing technology prioritize high-quality resolution for functional prototypes, demonstrating the importance of resolution in achieving practical applications. Furthermore, advancements in materials and printing technologies continue to enhance the capabilities and affordability of high-resolution prints, making it accessible across various sectors.
Best practices for achieving optimal resolution in 3D printing include calibrating the printer regularly, using high-quality materials that are compatible with the desired resolution, and selecting the appropriate print settings for the specific application. Additionally, users should consider the intended use of the printed object when choosing the right resolution; for example, a functional part may require a different approach compared to an artistic model, ensuring the balance between quality and efficiency.
What Resolution Should You Use for Prototyping?
The best 3D printer resolution for prototyping depends on several factors, including the desired detail level, material used, and the purpose of the prototype.
- Low Resolution (0.3 mm to 0.4 mm): This resolution is suitable for rapid prototyping where speed is prioritized over detail.
- Medium Resolution (0.2 mm to 0.25 mm): A balanced option that provides a good level of detail while still being relatively fast, making it ideal for functional prototypes.
- High Resolution (0.1 mm or lower): This resolution is used for prototypes requiring fine details and smooth surfaces, often necessary for visual models or intricate designs.
Low Resolution (0.3 mm to 0.4 mm) is typically used in applications where the prototype is primarily for fit testing or basic functionality. This setting enables quicker print times, which is advantageous when multiple iterations are needed during the design process.
Medium Resolution (0.2 mm to 0.25 mm) strikes a balance between speed and quality, making it an excellent choice for functional prototypes that require a decent level of detail but do not need to be polished products. This resolution often suffices for parts that will undergo testing for functionality and usability.
High Resolution (0.1 mm or lower) is essential when the prototype’s aesthetics or intricate details are critical, such as in the case of consumer products or art pieces. This setting produces smoother surfaces and finer details, which can be beneficial for presentations or showcases where the visual appeal is important.
What Resolution Is Ideal for High-Detail Models?
The ideal resolution for high-detail models in 3D printing typically depends on the printer type and the intended application.
- FDM Printers (Fused Deposition Modeling): For FDM printers, a layer height of 0.1mm to 0.2mm is generally recommended for high-detail prints.
- SLA Printers (Stereolithography): SLA printers can achieve finer details with layer heights ranging from 0.025mm to 0.1mm, making them suitable for intricate designs.
- SLS Printers (Selective Laser Sintering): SLS printers typically operate with a resolution of around 100 microns, which is effective for producing complex geometries.
- PolyJet Printers: These printers can achieve resolutions as fine as 16 microns, allowing for extremely detailed models with smooth surfaces.
- Resin Printers: High-resolution resin printers often work at layer heights of 0.01mm to 0.05mm, which is ideal for capturing fine details and textures.
For FDM printers, a layer height of 0.1mm to 0.2mm is recommended for high-detail prints. This range balances speed and quality, allowing for decent detail without excessively prolonging print time. However, finer layer heights can be used for even more intricate designs at the cost of longer printing times.
SLA printers excel in producing high-detail models due to their layer heights ranging from 0.025mm to 0.1mm. This capability allows them to create smooth surfaces and intricate features that are often required in professional applications such as jewelry and dental modeling.
SLS printers typically operate with a resolution of around 100 microns (0.1mm), which enables them to create complex geometries without support structures. This resolution is effective for functional prototypes and parts that require strength and durability.
PolyJet printers are known for their exceptional resolution capabilities, achieving details as fine as 16 microns. This high level of precision makes them ideal for applications that require both intricate designs and smooth surface finishes, such as in the automotive and medical industries.
High-resolution resin printers usually work at layer heights of 0.01mm to 0.05mm, which is perfect for capturing fine details and textures. This capability makes them particularly popular for creating miniatures and detailed prototypes where aesthetic quality is paramount.
How Can You Optimize Your 3D Printer Resolution Effectively?
To effectively optimize your 3D printer resolution, consider the following strategies:
- Layer Height Adjustment: Reducing the layer height will increase the resolution of your prints, allowing for finer details to emerge. However, this may also increase the printing time, so balancing quality and efficiency is essential.
- Nozzle Size Selection: The diameter of the nozzle drastically influences the detail you can achieve. A smaller nozzle can produce finer details, but it may also require longer print times and more precise calibration.
- Print Speed Control: Slowing down the print speed can enhance the quality of the print by giving the filament more time to adhere properly, thus reducing issues like stringing and blobbing, which can obscure details.
- Temperature Optimization: Finding the right printing temperature for your filament is crucial, as too high or too low can lead to poor adhesion and inaccuracies in details. Experimenting with temperature settings can help achieve the best quality for your specific material.
- Bed Leveling and Calibration: Proper bed leveling and calibration are vital for consistent layer adhesion, which in turn affects the overall resolution and quality of the print. Regularly checking and calibrating your printer can prevent many common issues.
- Filament Quality: Using high-quality filament can significantly impact the print resolution. Cheaper filaments may have inconsistencies that can affect the accuracy of the print, whereas premium filaments often provide better flow and adhesion.
- Software Settings: Utilizing the right slicing software settings tailored to your printer model can optimize resolution. Features like anti-aliasing, support structures, and infill patterns can enhance the final appearance of your prints.
What Common Mistakes Should You Avoid When Setting 3D Printer Resolution?
Not Considering the Material Used involves recognizing that each filament type behaves differently. For example, PLA might print well at a higher resolution, while materials like ABS could require adjustments to prevent issues related to temperature and adhesion.
Overlooking the Model Details can lead to a scenario where you set an unnecessarily high resolution for a model that lacks intricate features, resulting in wasted time and filament. It’s crucial to analyze the model beforehand to determine the appropriate resolution settings.
Neglecting Layer Height Impacts is significant because a lower layer height gives finer detail but at the cost of longer print times. Balancing the desired quality with efficiency is key; therefore, understanding how layer height impacts both the quality and time is essential.
Failing to Test and Calibrate can result in a lack of understanding of your printer’s performance. Regular calibration and test prints help to fine-tune settings that suit both the specific 3D printer and the materials being used, leading to optimal results.
Related Post: