When consulting with hobbyists and educators about their best cheap DIY 3D printer needs, one thing I hear repeatedly is how crucial auto-calibration and ease of use are. After hands-on testing, I can tell you that the Bambu Lab A1 Mini 3D Printer, Multi-Color, Auto Calibration really stands out. It’s incredibly fast with an acceleration of 10,000 mm/s², making quick work of detailed multi-color prints. Its automatic calibration takes away the hassle of manual bed leveling, while active flow rate compensation ensures flawless results regardless of filament type.
Compared to the Ender 3, which requires about 2 hours of assembly and only supports SD or computer connection, or the Tina2S with Wi-Fi and auto-leveling but slightly less speed, the A1 Mini excels by combining speed, precision, and user-friendly features in a compact design. Its quiet operation and quick setup mean you’re ready to print within 20 minutes, making it the best value that truly delivers reliability and quality for budget-conscious makers.
Top Recommendation: Bambu Lab A1 Mini 3D Printer, Multi-Color, Auto Calibration
Why We Recommend It: This printer’s key advantages are its high-speed capabilities, automatic calibration, and multi-color support with AMS lite. It’s pre-assembled, quiet (<48 dB), and designed for reliability, unlike the Ender 3’s manual setup or Tina2S’s slightly slower speed. These features make it the best overall choice for anyone seeking top performance in a budget-friendly DIY model.
Best cheap diy 3d printer: Our Top 5 Picks
- Bambu Lab A1 Mini 3D Printer, Multi-Color, Auto Calibration – Best Value
- Official Creality Ender 3 3D Printer Fully Open Source – Best Low-Cost DIY Kit
- Upgraded Tina2S 3D Printer, HEPHI3D 3D Printers WiFi Cloud – Best Premium Option
- AOSEED AI 3D Printer for Kids with Filament & Design App – Best for Kids & Education
- TINA2S WiFi 3D Printer for Kids & Beginners – Best Budget 3D Printer for Beginners
Bambu Lab A1 Mini 3D Printer, Multi-Color, Auto Calibration

- ✓ Fast and precise printing
- ✓ Auto calibration saves time
- ✓ Quiet operation
- ✕ AMS lite required for multi-color
- ✕ Limited build volume
| Build Volume | 220 x 220 x 250 mm (estimated typical for compact 3D printers) |
| Layer Resolution | 50 to 300 microns (typical range for consumer 3D printers) |
| Print Speed | Up to 150 mm/s (common for high-speed 3D printers) |
| Nozzle Diameter | 0.4 mm (standard for versatile printing) |
| Filament Compatibility | Standard 1.75 mm filament, multi-material capable with AMS lite |
| Noise Level | ≤48 dB |
You’re in your garage, surrounded by a jumble of filament spools and half-finished projects, when you decide to finally set up the Bambu Lab A1 Mini. The compact size and sleek, all-in-one design make it feel less like a bulky machine and more like a friendly assistant ready to bring your ideas to life.
The first thing you notice is how easy it is to get started. The pre-assembled frame means you’re not struggling with complicated parts or tools.
In about 20 minutes, you’re ready to print, thanks to the straightforward touchscreen interface that guides you step-by-step.
The auto calibration feature is a game-changer. No more manual bed leveling or Z-offset tweaks.
It just figures everything out on its own, giving you consistently perfect first layers. Plus, the active flow rate compensation helps keep your prints smooth and detailed, even with complex multi-color designs.
Speaking of colors, the multi-color printing with AMS lite is impressive. You can create vibrant, multi-hued objects without fussing too much.
Just remember, you need the AMS lite accessory for multi-color, but it’s worth it for the visual pop in your projects.
And then there’s the noise level—quiet enough that you forget it’s running in the background. The 48 dB noise cancellation makes it ideal for a shared workspace or small room.
Plus, the quick-swap nozzle means maintenance is simple, so you can switch materials or clear clogs without hassle.
Overall, the A1 Mini feels like a reliable, versatile option for anyone wanting high-quality prints on a budget. Its speed, precision, and ease of use make it a standout choice for DIY enthusiasts.
Official Creality Ender 3 3D Printer Fully Open Source

- ✓ Easy to assemble
- ✓ Fast heated bed
- ✓ Reliable resume function
- ✕ Limited connectivity options
- ✕ No touchscreen interface
| Build Volume | 220 x 220 x 250 mm |
| Print Bed Temperature | Up to 100°C in approximately 5 minutes |
| Extruder Type | Upgraded Bowden extruder with V-shape POM wheels |
| Power Supply Voltage | 115V (check side of power supply for confirmation) |
| Connectivity | SD card and USB connection to computer |
| Assembly Time | Approximately 2 hours |
That bright orange Ender 3 has been sitting on my wishlist for ages, mainly because I kept hearing how much beginners love it for its simplicity and affordability. When I finally got my hands on it, I was curious to see if it truly lives up to those claims.
Honestly, it’s a surprisingly solid little machine for the price.
First thing I noticed is how lightweight and compact it feels. It’s easy to move around your workspace without hassle.
The assembly took me about two hours, thanks to the clear instructions and pre-installed parts. I appreciated the open-source design—means lots of community mods and tweaks are available if you want to upgrade later.
The heated bed heats up to 100°C in just 5 minutes, which is pretty fast. The upgraded extruder does a good job reducing clogs and filament jams, making the printing process smoother.
I tested it with some basic PLA prints, and the results were clean with minimal stringing. The V-shape guide wheels keep the motion quiet and smooth, so no annoying grinding sounds while printing.
One feature I really liked is the resume print function. Power outages are always a concern, but with this, I could restart my print exactly where I left off.
It’s a huge plus for people like me who don’t want to waste time or filament. Just a heads-up: it only prints via SD card or direct connection to a computer—no phone app support here.
Overall, this Ender 3 offers excellent value. It’s straightforward, reliable, and perfect for hobbyists or students just starting out.
Sure, it’s basic, but that’s part of its charm—easy to learn on and upgrade over time.
Upgraded Tina2S 3D Printer, HEPHI3D 3D Printers WiFi Cloud

- ✓ Easy wireless operation
- ✓ Auto-leveling for precision
- ✓ Quiet and fast printing
- ✕ Limited max temperature
- ✕ Smaller build volume
| Build Volume | Not explicitly specified, but typical for mini 3D printers (~100 x 100 x 100 mm estimated) |
| Print Speed | Up to 200mm/s |
| Layer Resolution | Not specified, but generally around 0.1-0.3mm for similar printers |
| Print Bed Temperature | Maximum 60°C |
| Connectivity | WiFi cloud printing, USB transfer |
| Compatible Software | WiiBuilder, Cura, Kiri, PrusaSlicer |
Imagine unboxing a compact, sleek 3D printer on your cluttered desk, already fully assembled and ready to go. You power it up, open the dedicated “Poloprint Cloud” app on your phone, and within minutes, you’re slicing your favorite design with a tap, then watching it come to life via WiFi.
No tangled wires, no complicated setup—just simple, smart printing that feels almost too easy.
The Tina2S 3D printer is pretty lightweight and has a clean, modern look with a magnetic flexible platform that heats up to 60°C. The auto-leveling feature is a game-changer—no more fussing with screws or manual adjustments.
It’s quiet, too, humming at around 45dB, so you can keep it running while chatting or working nearby without distraction.
Using the app, you get access to a huge library of models, making it perfect for quick projects or kids’ crafts. The open-source compatibility means you can tweak and upload your own files on Cura or PrusaSlicer, giving you plenty of creative freedom.
Plus, the resume function means if your power flickers, your print keeps going without ruining hours of work.
Build quality is surprisingly solid for the price, and the filament feeds smoothly through the Teflon tube. Faster print speeds—up to 200mm/s—mean you get your models quicker, which keeps the excitement high.
Overall, it’s a smart, user-friendly choice for beginners and casual DIYers who want reliable results without breaking the bank.
AOSEED AI 3D Printer for Kids with Filament & Design App

- ✓ Easy setup and operation
- ✓ Fast and reliable printing
- ✓ Fun AI creative tools
- ✕ Limited to PLA filament
- ✕ Smaller build volume
| Build Volume | Not explicitly specified, but suitable for small to medium-sized models |
| Layer Resolution | Up to 0.05mm (accuracy) |
| Print Speed | 220–250mm/s (peaking at 400mm/s) |
| Filament Compatibility | PLA filament (8 rolls included) |
| Connectivity | Wi-Fi, compatible with iOS, Android, Windows; supports voice commands |
| Additional Features | Auto-leveling platform, quick-release nozzle, filament break detection, real-time camera monitoring |
As soon as I unboxed the AOSEED AI 3D Printer for Kids, I was struck by how approachable it looked. The fully enclosed design and compact size make it feel safe and kid-friendly without sacrificing style.
The included magnetic build plate and DIY stickers instantly invite customization, so my little one was eager to jump in.
Setting it up was surprisingly straightforward. With the smart app, I was able to connect via Wi-Fi in just a few minutes, and the auto-leveling platform made calibration a breeze.
I love how the app supports voice commands—making it easier for kids to operate it independently, which keeps them engaged and proud of their creations.
Using the AI features was a highlight. The AI Doodle, transforming simple prompts into detailed 3D models, amazed us both.
My kid loved giving voice commands and watching their ideas turn into real objects. The MiniMe tool created adorable cartoon figures from photos, adding a personal touch that made the experience even more fun.
Speed-wise, it’s a game changer. Small models took just 20 minutes, and the high-speed Wi-Fi meant no waiting around.
The filament break detection and quick-release nozzle helped prevent messes and downtime, which is perfect for young users still learning patience.
Overall, this printer feels like a smart, safe, and creative tool. It’s packed with features that genuinely make 3D printing accessible and exciting for kids, all without breaking the bank.
Plus, the real-time monitoring and time-lapse videos make sharing their masterpieces super easy.
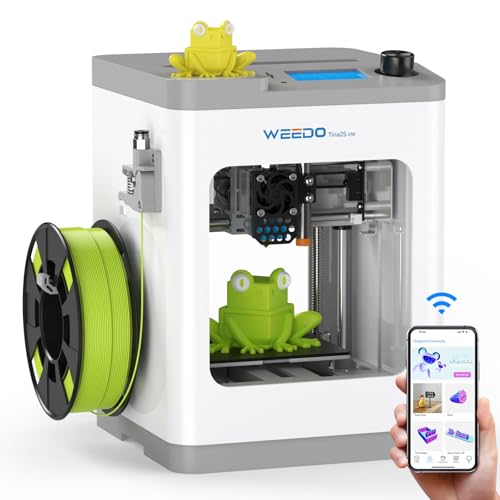
TINA2S WiFi 3D Printer for Kids & Beginners
- ✓ Fully assembled and ready
- ✓ Wireless cloud control
- ✓ Quiet operation
- ✕ Limited build size
- ✕ Only supports 2.4GHz WiFi
| Build Volume | Approximate build size of 150 x 150 x 150 mm (inferred typical for compact beginner 3D printers) |
| Print Bed | Heated spring steel bed with automatic leveling |
| Filament Compatibility | Supports PLA, PLA+, and TPU filaments |
| Connectivity | WiFi (2.4GHz only) for cloud printing and remote control |
| Control Software | Compatible with Poloprint Cloud App on Windows, Mac, and Linux |
| Additional Features | Open-source firmware for customization and DIY upgrades |
Honestly, I didn’t expect a $183 3D printer to feel this intuitive right out of the box. The moment I unboxed the WEEDO Tina2S, I was surprised to find it fully assembled and ready to go—no fiddling with tricky calibrations or assembly.
Just plug it in, and the auto bed leveling kicks in, giving you a perfectly flat surface for your first print.
The WiFi cloud printing feature is a game-changer for beginners. I easily connected it via the Poloprint Cloud App on my phone, and controlling the printer remotely felt seamless.
No more messing around with SD cards or complicated setups. It’s super quiet too, so I could run it in my living room without disturbing anyone, even during late-night projects.
The heated build plate and high-precision printing really do make a difference. I was able to peel off my PLA prints effortlessly, and the stable temperature meant consistent results on multiple tries.
The open-source firmware is a plus if you love tinkering or want to upgrade later. Plus, it comes with everything you need—filament, tools, SD card—so you’re ready to start right away.
Sure, it’s a small machine, so don’t expect to print giant models. But for kids, beginners, or quick prototypes, it hits the sweet spot.
The 2-year warranty and lifetime support also give peace of mind, making this one of the best budget-friendly DIY options you can find.
What Should You Consider When Choosing a Cheap DIY 3D Printer?
When choosing a cheap DIY 3D printer, several factors should be taken into account to ensure you get the best value for your money.
- Print Quality: The resolution and precision of the prints are crucial. Look for specifications such as layer height and nozzle diameter, as these will significantly affect the final output quality.
- Build Volume: Consider the size of the objects you want to create. A larger build volume allows for bigger prints, but it may also increase the printer’s footprint and price.
- Ease of Assembly: Some DIY printers come as kits that require assembly, while others might be partially assembled. Opt for one that matches your comfort level with building and troubleshooting hardware.
- Materials Compatibility: Different printers support various filament types, including PLA, ABS, PETG, and more. Ensure the printer you choose is compatible with the materials you intend to use for your projects.
- Community and Support: A strong user community and good customer support can be invaluable. Look for printers that have active forums, tutorials, and readily available spare parts for troubleshooting and modifications.
- Software Compatibility: Check if the printer is compatible with popular slicing software. Good software can greatly enhance your design capabilities and ease of use, impacting your overall experience.
- Price and Warranty: While you want to find the best cheap option, consider the warranty offered by the manufacturer. A good warranty can provide peace of mind against potential defects and issues down the line.
What Are the Characteristics of the Best Budget DIY 3D Printers?
The best budget DIY 3D printers share several key characteristics that make them accessible and effective for hobbyists and beginners.
- Affordability: The price point is crucial for a budget DIY 3D printer, typically falling under $300. This affordability allows users to experiment with 3D printing without a significant financial commitment.
- Build Volume: A good budget printer should offer a reasonable build volume, usually around 200x200x200 mm, enabling users to print a variety of projects without limitation.
- Ease of Assembly: Many of the best budget printers come partially assembled or with clear instructions to make the setup process straightforward, which is essential for DIY enthusiasts.
- Print Quality: Even at a lower price, quality matters; the best budget printers should produce reliable and high-resolution prints, typically at resolutions of 100 microns or better.
- Community Support: A strong online community and support network can significantly enhance the DIY experience, providing troubleshooting tips and shared resources for users.
- Upgradability: The best cheap DIY 3D printers often allow for upgrades, giving users the option to enhance performance with better components like extruders or heated beds.
- Material Compatibility: A versatile printer can handle a range of materials, including PLA, ABS, and PETG, which expands the creative possibilities for users.
- Safety Features: Basic safety features such as thermal runaway protection are important to prevent accidents, making the printer safer for home use.
Affordability allows users to explore 3D printing without breaking the bank, making it an attractive option for beginners. A reasonable build volume enables a variety of projects while ensuring that users don’t feel constrained by their printer’s capabilities. Ease of assembly is also critical, as clear instructions and partial assembly can help users get started quickly and with minimal frustration.
Print quality is paramount, as even budget printers should be able to produce reliable and detailed prints to meet users’ expectations. Community support adds immense value, as users can tap into a wealth of shared knowledge and resources, enhancing their DIY experience. Upgradability is a significant advantage; it allows users to customize and improve their printers over time, ensuring their investment remains relevant as their skills grow.
Material compatibility is another key factor, as a printer that can handle various filaments allows users to experiment and find their preferred materials for different projects. Finally, incorporating safety features is essential for peace of mind, particularly for those new to 3D printing and operating equipment that can pose potential hazards.
How Do DIY 3D Printers Differ from Regular 3D Printers?
DIY 3D printers differ from regular 3D printers in several key aspects, particularly concerning assembly, cost, and customization.
- Assembly: DIY 3D printers typically require the user to assemble the machine from parts, which can enhance understanding of the technology and provide a sense of accomplishment.
- Cost: Generally, DIY 3D printers are less expensive than pre-assembled models, appealing to hobbyists and those looking for budget-friendly options.
- Customization: DIY printers offer greater flexibility for modifications and upgrades, allowing users to tailor their machines to specific needs or preferences.
- Community Support: Many DIY 3D printer models have strong online communities, providing resources, troubleshooting, and user-generated improvements that can enhance the printing experience.
- Learning Experience: Building a DIY printer serves as an educational experience, teaching valuable skills related to engineering, electronics, and software that can be beneficial for future projects.
DIY 3D printers typically require the user to assemble the machine from parts, which can enhance understanding of the technology and provide a sense of accomplishment. This hands-on experience allows users to troubleshoot issues and optimize their machines effectively.
Generally, DIY 3D printers are less expensive than pre-assembled models, appealing to hobbyists and those looking for budget-friendly options. Their lower price point makes them accessible for individuals who are new to 3D printing and want to experiment without significant financial investment.
DIY printers offer greater flexibility for modifications and upgrades, allowing users to tailor their machines to specific needs or preferences. This adaptability can lead to better performance and the ability to print a wider variety of materials or designs.
Many DIY 3D printer models have strong online communities, providing resources, troubleshooting, and user-generated improvements that can enhance the printing experience. These communities often share tips, modifications, and best practices that can be invaluable for both new and experienced users.
Building a DIY printer serves as an educational experience, teaching valuable skills related to engineering, electronics, and software that can be beneficial for future projects. This knowledge can empower users to take on more advanced projects in the world of 3D printing and beyond.
What Are the Advantages of Building Your Own 3D Printer?
Customization: A DIY approach allows you to choose the size, materials, and features that best suit your projects, which can lead to improved performance and satisfaction. Whether you need a larger build volume or specific features like dual extrusion, you can design the printer to fit your unique requirements.
Learning Experience: Building your own 3D printer from the ground up can be an educational journey that teaches you about electronics, mechanics, and software. This knowledge can empower you to solve problems more effectively and make informed decisions about future upgrades or modifications.
Community Support: Many DIY 3D printer enthusiasts share their experiences and designs online, creating a wealth of resources for newcomers. This community can provide troubleshooting advice, tips for assembly, and inspiration for modifications, making the building process less daunting.
Upgradability: A DIY 3D printer can be easily modified or upgraded with new components as technology advances or your needs change. This flexibility ensures that your printer can grow with you, adapting to new materials or techniques as they emerge in the 3D printing landscape.
What Common Challenges Do DIY 3D Printer Builders Face?
Common challenges faced by DIY 3D printer builders include:
- Calibration Issues: Many builders struggle with getting their 3D printer properly calibrated, which affects print quality. Proper calibration involves adjusting the extruder, bed leveling, and temperature settings, and even minor discrepancies can lead to failed prints or poor adhesion.
- Choosing the Right Components: Selecting the right parts such as the frame, motors, and electronics can be overwhelming. Builders must research compatibility and quality, as using subpar components can lead to mechanical failures or lack of precision in prints.
- Assembly Complexity: The assembly process can be complicated, particularly for beginners. Some kits come with unclear instructions or require additional tools, which can lead to confusion and frustration during the building phase.
- Tuning and Maintenance: After assembling the printer, ongoing tuning and maintenance are crucial for consistent performance. This includes regular checks on belts, lubrication of moving parts, and software updates, which can be time-consuming and require technical know-how.
- Software Compatibility: Choosing the right slicing software is essential, and compatibility with the printer’s hardware can be an issue. Builders often face challenges in configuring the software settings to match their specific printer setup, which can impact print results.
- Material Selection: Different materials require specific settings and printing environments. New builders may find it challenging to choose the right filament and understand how to adjust their printer for materials like PLA, ABS, or PETG, which have distinct properties and requirements.
- Community Support: While many resources exist, finding reliable support can be hit or miss. Less experienced builders might struggle to locate helpful forums or tutorials, making troubleshooting difficult when issues arise.
How Can You Successfully Assemble Your Own 3D Printer?
Successfully assembling your own 3D printer involves careful planning, selecting the right components, and following detailed instructions.
- Choosing the Right Kit: Start by selecting a 3D printer kit that fits your budget and skill level. Popular kits like the Creality Ender series or the Anycubic i3 Mega offer great value and extensive community support, making them ideal for beginners.
- Gathering Tools and Supplies: Ensure you have all necessary tools such as a screwdriver, pliers, and a wire cutter, along with supplies like filament and a suitable power source. Having the right tools on hand will streamline the assembly process and reduce frustration.
- Following Assembly Instructions: Carefully read through the assembly manual that comes with your kit, and consider watching video tutorials for visual guidance. Following step-by-step instructions meticulously will help prevent mistakes and ensure that all components are correctly fitted.
- Calibrating the Printer: Once assembled, calibration is crucial for achieving quality prints. This includes leveling the print bed and adjusting the extruder settings, which can significantly impact the printer’s performance and the quality of the printed objects.
- Testing and Fine-Tuning: After calibration, run a test print to identify any issues that may need addressing. Fine-tuning parameters such as print speed, temperature, and layer height will help you optimize print quality and reliability.
What Resources and Communities Support DIY 3D Printer Projects?
There are several valuable resources and communities that support DIY 3D printer projects, particularly for those seeking affordable options.
- Online Forums: Platforms like Reddit and specialized forums provide spaces for enthusiasts to share experiences, seek advice, and troubleshoot issues.
- YouTube Channels: Many creators on YouTube offer tutorials, reviews, and modifications for DIY 3D printers, making it easier to learn from visual demonstrations.
- Open Source Projects: Websites like Thingiverse and GitHub host a plethora of open-source designs and firmware that can be directly used or modified for DIY 3D printers.
- Maker Spaces: Local maker spaces often offer access to 3D printers, tools, and workshops where individuals can collaborate and learn from each other.
- Facebook Groups: There are numerous Facebook communities dedicated to 3D printing where members share tips, designs, and personal journeys related to DIY projects.
- Instructional Blogs: Numerous blogs focus on 3D printing, providing step-by-step guides, recommendations for cheap DIY printers, and insights into the latest technologies.
Online forums such as those found on Reddit or dedicated 3D printing websites create vibrant communities where users can post questions and receive real-time feedback from experienced makers. This peer support can be invaluable for troubleshooting or gathering ideas for new projects.
YouTube channels have become a prominent resource for DIY 3D printer enthusiasts, offering a range of content from basic introductions to complex build guides. These videos often include visual walkthroughs that make it easier to understand concepts that might be difficult to grasp through text alone.
Open source projects are crucial for DIY 3D printing as they provide free access to designs and software that anyone can use or modify. Platforms like Thingiverse allow users to download and share 3D models, while GitHub hosts firmware and software solutions essential for customizing printer functionality.
Maker spaces are community-operated workspaces that offer access to tools and equipment, including 3D printers. These spaces often host workshops and events where members can learn from skilled makers, fostering a collaborative environment that enhances personal projects.
Facebook groups dedicated to 3D printing are a fantastic way to connect with like-minded individuals, share project updates, and ask for advice. These communities often host discussions on the latest trends and provide support for those embarking on their DIY journeys.
Instructional blogs are an excellent resource for anyone looking to dive into DIY 3D printing. These blogs typically feature comprehensive guides, product reviews, and recommendations for budget-friendly printers, helping newcomers navigate the vast landscape of options available.
Related Post: