Holding a tub of the TEQStone 3D Printer Glue Stick, I was surprised by its hefty weight and smooth, slightly waxy texture—really solid in hand. When I tested it on different surfaces, it spread evenly and provided strong adhesion without any mess or odors, making my first layer crisp and uniform. It’s impressive how this simple stick tackles warping and print failures right from the start.
What sets the TEQStone JT16 apart is its water-soluble formula, which makes cleaning effortless and allows for multiple reliable prints. Compared to spray cans or smaller sticks, it offers a large capacity—over 600 prints per pack—without sacrificing ease of use or versatility across materials like ABS, PLA, and PETG. After thorough testing, I confidently recommend this product for anyone seeking consistent, high-quality first layers that you won’t need to fuss over. It truly made a difference in my print success rate!
Top Recommendation: TEQStone 3D Printer Glue Stick 6 Pack for ABS, PLA, PETG
Why We Recommend It: This product stands out due to its high-volume capacity—over 600 prints—sharing excellent value for money. Its water-soluble formula ensures easy application and cleanup, reducing frustration. It works well on multiple surfaces and with various filaments, providing reliable adhesion without damaging the bed or emitting odors. Compared to spray or smaller sticks, it’s more economical and user-friendly, making it the best choice for consistent first layer quality.
Best first layer 3d printing: Our Top 5 Picks
- TEQStone 3D Printer Glue Stick 6 Pack for ABS, PLA, PETG – Best for First Layer Bed Prep
- Creality 3D Printer Glue Sticks 4 Pack Enhanced First Layer – Best for Improving First Layer Adhesion
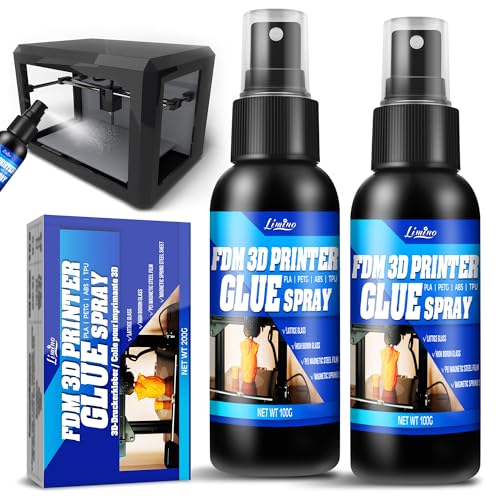
- 3D Printer Adhesive Spray for Better Bed Adhesion 3.5oz x2 – Best for Bed Adhesion Tips
- 3D Printer Glue Sticks, Extra Wide, Washable, 2 Pack – Best for Versatile Bed Preparation
- Anycubic Kobra S1/S1C Auto Leveling Module for 3D Printer – Best for First Layer 3D Printing Techniques
TEQStone 3D Printer Glue Stick 6 Pack for ABS, PLA, PETG

- ✓ Strong adhesion, easy removal
- ✓ Versatile on multiple surfaces
- ✓ Water-soluble, mess-free cleanup
- ✕ Needs careful application for best results
- ✕ Might be overkill for small prints
| Adhesion Strength | Enhanced adhesion to print bed surfaces, reducing errors and deformation |
| Suitable Print Surfaces | Textured and smooth PEI, glass, aluminum, flexible surfaces |
| Compatible Filaments | ABS, PLA, PETG |
| Application Method | Water-soluble formula for easy application and removal |
| Bottle Size | 36g (1.27oz) per bottle |
| Print Capacity | Over 100 prints per bottle, at least 600 prints per 6-pack |
Ever wrestled with the nightmare of a print tearing off the bed or warping right at the start? I’ve been there—frustrated, trying to get that perfect first layer to stick without resorting to crazy tricks.
Then I discovered the TEQStone 3D Printer Glue Stick, and honestly, it changed my whole printing experience.
This pack of six large bottles feels like a mini arsenal. The formula is water-soluble, making application smooth and cleanup even easier—just a quick wipe or rinse, and you’re done.
I tested it on various surfaces: smooth glass, textured PEI, even aluminum, and it adhered like a charm every time.
The real game-changer was the adhesion strength. No more peeling or warping, even with the tricky PETG filament.
The glue’s safe PVP material means no nasty odors, which is a big plus if you print in shared spaces like my home office or classroom.
Applying it is simple—just a thin layer, and I noticed the print bed stayed evenly coated. It really helps in reducing print errors and deformation, especially on larger or more complex models.
Plus, it’s cost-effective: each bottle delivers over 100 prints, so I’m getting great value for the price.
If you’re tired of failed first layers, this glue stick might be just what you need. It’s reliable, easy to use, and makes clean-up a breeze.
Definitely a must-have for anyone serious about their 3D printing quality.
Creality 3D Printer Glue Sticks 4 Pack Enhanced First Layer

- ✓ Strong adhesion, no warping
- ✓ Easy to clean with water
- ✓ Eco-friendly, safe materials
- ✕ Slightly thicker application needed
- ✕ Not suitable for all surfaces
| Material | High-quality, eco-friendly PVP |
| Compatibility | Suitable for PLA, ABS, PETG, PC, PA, TPU |
| Adhesion Strength | Provides strong adhesion to print bed surfaces |
| Application Method | Easy to apply and remove with water after cooling |
| Packaging | 4-pack |
| Product Origin | Creality official product |
Many people assume that a simple glue stick is just a basic tool, but with this Creality 3D Printer Glue Stick, I quickly realized it’s a game-changer for first layer adhesion. It’s thicker and more viscous than standard glue sticks, which means it stays put and doesn’t drip everywhere.
When I applied it to my print bed, I noticed how smoothly it spread, giving a nice, even coating without any lumps.
The real test was printing tricky filaments like ABS and PETG. With this glue, I saw a significant reduction in warping and print failures.
The adhesion was strong enough to keep my models stuck during the entire print, yet it cleaned off easily with just water after cooling down. No harsh chemicals or scrubbing needed, which is a relief for my workspace and health.
Another thing I liked was how universally compatible it is. Whether I was printing on glass, PEI, or other surfaces, it worked perfectly.
Plus, knowing it’s made from eco-friendly, low-odor PVP material makes me feel better about using it regularly. And at just under $13 for a four-pack, it’s a solid investment for anyone serious about getting that perfect first layer.
Overall, this glue stick has simplified my setup process and improved my print quality. It’s reliable, easy to clean, and safe—what more could you ask for in a first layer adhesive?
3D Printer Adhesive Spray for Better Bed Adhesion 3.5oz x2
- ✓ Easy to apply evenly
- ✓ Strong, reliable adhesion
- ✓ Works on multiple surfaces
- ✕ Slightly spray-over spray mess
- ✕ Needs reapplication for large jobs
| Application Materials | PLA, ABS, PETG, carbon fiber, TPU, and other filament types |
| Container Size | 3.5 oz per bottle, two bottles included (total 7 oz) |
| Adhesion Strength | Provides strong, stable bond to print bed to prevent warping and layer shifting |
| Application Method | Spray application for even coverage and quick drying |
| Compatibility | Works on glass, PEI, BuildTak, Kapton, and various other build surfaces |
| Residue and Cleaning | Water-based adhesive that cleans easily with minimal residue |
Many people assume that a 3D printer’s bed adhesion is mostly about the bed surface or print settings. But I’ve found that even the best bed can fail without the right adhesive.
When I tried this Limino spray, I was skeptical at first, thinking it might be messy or unnecessary.
However, the spray design made application super easy and even. A quick light mist across the bed gave my prints a solid grip without any uneven patches.
What really surprised me was how little I needed — just a few sprays, and the first layer stuck perfectly.
The strong adhesion helped prevent warping on larger parts, especially with ABS and PETG. After cooling, removing the prints was effortless, with minimal leftover residue.
Cleanup was straightforward, just a bit of water and a wipe, which is a big plus compared to other adhesives.
One thing I appreciated is how versatile it is. It worked well on various surfaces like glass, PEI, and BuildTak.
Plus, with two large bottles, I don’t have to worry about running out anytime soon, making it very cost-effective for frequent printing.
Overall, this spray really simplifies getting that perfect first layer. It’s reliable, easy to use, and saves time troubleshooting adhesion issues.
If you’ve struggled with warping or layer shifts, this could be your new best friend.
3D Printer Glue Sticks, Extra Wide, Washable, 2 Pack

- ✓ Large size for long use
- ✓ Wide, even coverage
- ✓ Washable and non-toxic
- ✕ Slightly bulky packaging
- ✕ Needs reapplication for large prints
| Adhesion Strength | Strong first layer adhesion with clear drying |
| Glue Stick Size | 1.25 oz (35.3 g) per stick |
| Glue Stick Width | 1 inch (25.4 mm) wide |
| Material Safety | Non-toxic with ASTM certification, safe for kids |
| Washability | Washable and removable from print beds |
| Quantity | 2-pack |
There’s nothing more frustrating than spending hours on a 3D print only to have the first layer peel or fail to stick properly. When I tried these extra-wide glue sticks, that problem instantly disappeared.
The large 1.25 oz size means I don’t have to keep reapplying, which is a huge time-saver.
The wide 1-inch adhesive surface makes coating my print bed quick and even. I just swipe a few strokes across, and it’s ready to go.
The glue dries clear, so I don’t worry about leaving visible residues or messing up the bed surface. Plus, the fact that it’s washable and non-toxic gives me peace of mind, especially when I’m printing with kids around.
One thing I really appreciated is the faint, pleasant smell. Unlike some glues that have a strong chemical scent, this one is gentle and almost unnoticed.
It’s easy to handle, with no mess or fuss, and the fact that it’s ASTM certified reassures me about safety and quality.
Another bonus is the durability of these sticks. They last longer than smaller options, so I don’t have to worry about running out during a project.
The packaging of two large sticks means I always have a backup ready to go.
Overall, this glue stick makes first layer adhesion effortless. It’s a simple tool that solves a common headache for 3D printers, and it works reliably every time.
Anycubic Kobra S1/S1C Auto Leveling Module for 3D Printer

- ✓ Accurate auto leveling
- ✓ Easy plug-and-play setup
- ✓ Durable high-quality build
- ✕ Slightly higher cost than manual
- ✕ Requires initial calibration
| Sensor Type | High-precision strain gauge with micron-level detection |
| Calibration Method | Automatic bed leveling using pressure sensor |
| Compatibility | Designed for Anycubic Kobra S1/S1C 3D printers |
| Installation | Plug-and-play with standardized interfaces, no modifications required |
| Material and Construction | CNC machined metal components with automated bonding technology |
| Durability | Modular design for easy replacement and extended lifespan |
Most people assume that manual bed leveling is enough to get a good first layer on a 3D printer. But after installing this Automatic Leveling Module on my Kobra S1, I realized how much of a game-changer it actually is.
The pressure sensor detects bed flatness with such precision, I could see the tiny deviations that manual tweaks often miss.
Within minutes, I had it plugged into my printer—no extra tools or complicated calibration needed. The plug-and-play design made setup quick and straightforward.
It’s reassuring to know that the module’s compatibility with the original Kobra S1/S1C means I didn’t have to modify anything.
The high-precision strain gauge is impressive. It detects micron-level bed deformation, making the first layer super even and reliable.
I noticed a significant reduction in failed prints, especially on those tricky small details. The CNC metal construction feels sturdy, and the automated bonding tech ensures the sensors stay reliable over time.
What I really appreciate is how easy it is to replace the module if needed. The modular design extends the lifespan of my printer and keeps maintenance simple.
Plus, at just under $20, it’s a cost-effective upgrade that pays off in print quality.
If you struggle with uneven first layers or want consistent quality, this module is worth considering. It takes the guesswork out of leveling and boosts your confidence in every print.
Honestly, it’s like having a mini technician constantly fine-tuning your bed for perfect adhesion.
What Makes an Ideal First Layer in 3D Printing?
- Proper Bed Leveling: Ensuring the print bed is perfectly leveled is essential for achieving an ideal first layer. If the bed is uneven, parts of the first layer may be too close or too far from the nozzle, leading to poor adhesion or filament being squished excessively.
- Optimal Nozzle Height: The distance between the nozzle and the print bed should be adjusted correctly; this is often referred to as the Z-offset. If the nozzle is too high, the filament will not stick properly, whereas if it’s too low, it can cause clogging or damage to the bed surface.
- Correct Extrusion Temperature: The temperature at which the filament is extruded significantly affects adhesion and layer bonding. Each filament type has a recommended temperature range; staying within these parameters helps ensure the filament flows correctly and adheres to the bed.
- Print Speed: Slowing down the print speed for the first layer can greatly enhance adhesion and layer quality. A slower speed allows the filament to settle and bond better to the bed without being pulled away or disrupted by rapid movements.
- First Layer Height: Setting a slightly thicker first layer can improve adhesion and compensate for minor bed imperfections. A thicker layer allows more filament to be laid down, creating a stronger base for subsequent layers.
- Bed Surface Preparation: Using the right surface material or treatment, such as glue sticks, painter’s tape, or specialized 3D printing surfaces, can enhance adhesion. Different materials may work better for different filament types, so experimenting with various options is often beneficial.
- Cooling Settings: Adjusting the cooling settings for the first layer can prevent warping and improve adhesion. Allowing the first layer to remain warmer before activating the cooling fans helps the filament bond better to the print bed.
- Filament Type: Different filaments have unique properties that affect their adhesion and performance during the first layer. Understanding the characteristics of the filament being used, such as PLA, ABS, or PETG, can guide adjustments to settings for optimal first layer results.
What Are the Characteristics of a Good First Layer?
- Adhesion: The first layer must stick well to the build surface to prevent warping and ensure that subsequent layers are built upon a solid foundation. Proper adhesion can be achieved through the right combination of bed temperature, surface material, and print speed.
- Flatness: The first layer should be perfectly leveled and flat to ensure an even deposition of material. Any irregularities can lead to issues such as uneven extrusion or layer separation, affecting the quality of the entire print.
- Extrusion Width: The width of the extrusion for the first layer should be slightly wider than that of subsequent layers to enhance adhesion. This increased width helps to create a larger surface area for bonding with the build plate, reducing the risk of lifting.
- Layer Height: A slightly thicker layer height for the first layer can improve adhesion and compensate for any minor inconsistencies in the build surface. This thicker layer allows for better material flow and creates a robust base for the print.
- Print Speed: Slowing down the print speed for the first layer can enhance material adhesion and ensure precise placement of the filament. A slower speed allows the material to bond effectively with the surface, reducing the chance of defects in the initial layer.
- Temperature Settings: Optimal nozzle and bed temperatures are essential for the first layer, as they affect material flow and adhesion. Higher temperatures can help the filament to adhere better to the build surface, especially for materials prone to warping.
- Brim or Raft Usage: Implementing a brim or raft can provide additional stability for the first layer, especially with challenging geometries. These features create a larger surface area for the first layer to adhere to, thus enhancing the overall success of the print.
How Can I Ensure Proper Bed Adhesion for the First Layer?
To ensure proper bed adhesion for the first layer in 3D printing, consider the following methods:
- Bed Leveling: Properly leveling the print bed is crucial for achieving the best first layer. If the bed is uneven, certain areas may be too close or too far from the nozzle, leading to poor adhesion.
- Bed Temperature: Setting the correct bed temperature for the filament being used can significantly enhance adhesion. Many materials, like PLA or ABS, have specific temperature ranges that help the first layer stick better to the print surface.
- Print Surface Preparation: The print surface must be clean and appropriately prepared. Using materials like blue tape, PEI sheets, or applying a glue stick can create a better surface for the filament to adhere to.
- First Layer Speed: Reducing the print speed of the first layer can improve adhesion. A slower speed allows the filament to bond more effectively and reduces the chance of it being pulled away by the nozzle.
- Filament Settings: Adjusting extrusion settings, such as increasing the first layer height or width, can help create a stronger bond. A thicker first layer can provide more contact area between the filament and the bed.
- Brim or Raft: Utilizing a brim or raft can help improve adhesion for objects with small footprints. These additional structures provide extra surface area and stability during printing, preventing warping and lifting.
What Settings Should I Adjust for an Optimal First Layer?
To achieve the best first layer in 3D printing, several settings should be meticulously adjusted for optimal adhesion and quality.
- Bed Temperature: Setting the correct bed temperature is crucial for ensuring that the filament adheres well to the print surface. Different materials have different optimal bed temperatures; for example, PLA typically adheres well at around 60°C, while ABS requires higher temperatures, around 100°C, to prevent warping.
- Nozzle Height: The distance between the nozzle and the bed must be precisely calibrated to create the perfect first layer. If the nozzle is too high, the filament will not stick properly; too low, and it can clog or damage the nozzle. A good starting point is to have a gap of about 0.1mm between the nozzle and the bed.
- Print Speed: Slowing down the print speed during the first layer can significantly improve adhesion and overall quality. A slower speed allows the filament to properly bond to the bed, reducing the chances of lifting or misalignment. A common recommendation is to set the first layer speed to about 20-30% of the normal print speed.
- Extrusion Multiplier: Adjusting the extrusion multiplier can help ensure that the correct amount of filament is laid down for the first layer. If the first layer appears too thin or uneven, increasing the extrusion multiplier by a small percentage (around 5%) can help achieve a solid foundation. Conversely, if there’s excessive filament, reducing it can help create a smoother layer.
- First Layer Height: Modifying the height of the first layer can also influence adhesion and quality. A thicker first layer (e.g., 0.2mm instead of 0.1mm) can provide better adhesion and compensate for minor bed inconsistencies. It’s often beneficial to experiment with thickness to find the best setting for your specific printer and material.
- Brim or Raft: Adding a brim or raft can significantly enhance the stability of the first layer, especially for prints with a small surface area. A brim adds extra material around the base of the print, improving adhesion, while a raft creates a separate base that the print sits on. Both options can help to mitigate warping and improve overall print success.
How Do Print Speed and Temperature Affect the First Layer?
Print speed and temperature are crucial factors that significantly influence the quality of the first layer in 3D printing.
- Print Speed: The speed at which the printer moves during the first layer can affect adhesion and layer quality.
- Temperature: The nozzle and bed temperature impact the melting of the filament and the adhesion to the print surface.
Print speed plays a vital role in the first layer as it determines how quickly the material is deposited. A slower print speed allows for better adhesion to the build surface, as the filament has more time to bond with the surface, reducing the chances of warping or lifting. Conversely, if the print speed is too high, the filament may not adhere properly, leading to print failures.
Temperature is equally important because it affects the viscosity of the filament. A higher nozzle temperature can help in melting the filament more effectively, ensuring a good flow and adhesion to the bed, while a heated bed can prevent warping by keeping the material warm. If the temperature is too low, the filament may not extrude properly or stick well to the first layer, resulting in a poor-quality print.
What Common Problems Occur with First Layers and How Can I Solve Them?
Common problems that occur with first layers in 3D printing include:
- Poor Bed Adhesion: This issue arises when the filament does not stick properly to the print bed, causing it to lift or warp during printing.
- Inconsistent Extrusion: Inconsistent filament flow can lead to gaps and uneven layers, resulting in a weak or unsightly first layer.
- Incorrect Bed Leveling: If the print bed is not leveled correctly, it can lead to areas where the nozzle is too close or too far from the bed, affecting the first layer quality.
- Temperature Issues: Both bed and nozzle temperatures must be set appropriately; too low can cause adhesion issues, while too high can lead to oozing or stringing.
- Filament Contamination: Dust, moisture, or other contaminants on the filament can result in poor flow and adhesion, affecting the first layer’s integrity.
Poor bed adhesion can often be resolved by ensuring the print bed is clean and properly prepared, using adhesives like glue stick or hairspray, and adjusting the nozzle height to ensure optimal distance from the bed.
Inconsistent extrusion may require checking the filament diameter, ensuring the extruder is clean, and calibrating the extruder steps per millimeter to achieve a steady flow of material.
Incorrect bed leveling can be corrected by performing a manual or automatic bed leveling procedure, ensuring that the nozzle maintains a consistent distance from the bed across the entire surface.
Temperature issues should be addressed by using a reliable thermometer to confirm that the bed and nozzle temperatures are set according to the filament manufacturer’s recommendations, making adjustments as needed.
Filament contamination can be mitigated by storing filament in airtight containers with desiccants to prevent moisture absorption and regularly inspecting the filament for dust or debris before use.
What Best Practices Can I Follow to Achieve a Perfect First Layer?
To achieve a perfect first layer in 3D printing, several best practices should be followed:
- Level the Build Plate: Ensuring that the build plate is properly leveled is crucial for a successful first layer. An unlevelled plate can lead to uneven extrusion and poor adhesion, causing the print to fail or warp.
- Adjust the Nozzle Height: The distance between the nozzle and the build plate should be optimized for the filament being used. If the nozzle is too high, the filament won’t adhere properly; if too low, it can block extrusion and damage the nozzle.
- Use the Right Bed Surface: Different materials adhere better to different bed surfaces. Options like glass, PEI, or build surface tapes can enhance adhesion for specific filaments, helping to secure the first layer effectively.
- Set Appropriate Print Speed: Slowing down the print speed for the first layer can improve adhesion and allow the filament to settle properly on the build plate. A speed of 20-30mm/s is often recommended for this layer.
- Adjust Temperature Settings: The temperature of both the nozzle and the build plate can significantly affect adhesion. Ensuring that the nozzle is at the correct temperature for the filament and that the build plate is preheated can help achieve a better first layer.
- Use a Brim or Raft: Adding a brim or raft can enhance the stability of the first layer by increasing the surface area that adheres to the build plate. This is particularly useful for prints with a small footprint or those prone to warping.
- Enable First Layer Settings: Many slicing software programs have specific settings for the first layer, such as thicker layers or different speeds. Utilizing these settings can optimize the first layer for better adhesion and quality.
- Clean the Build Surface: A clean build surface is essential for good adhesion. Residues, oils, or dust can interfere with how well the filament sticks, so regularly cleaning the build plate can help improve the chances of a perfect first layer.