As winter approaches, the importance of having a reliable laser module for your 3D printer becomes particularly clear. I’ve spent hours testing different options, focusing on how precisely they can carve, cut, and engrave. The Lokkr Creality Ender-3 S1/S1 Pro CV-Laser Module 24V 1.6W truly impressed me with its fine spot detail and long-lasting diode—over 10,000 hours of steady use. Its compatibility with various machines and easy focusing make it a real game-changer for hobbyists and pros alike.
Compared to larger, more powerful modules, this one offers a perfect balance of safety, efficiency, and versatility. The built-in air filter knocks out smoke and dust, keeping your workspace clean, while its standardized design means simple installation and broad machine compatibility. After thorough testing, I believe this product stands out for its durability and ease of use, making it a top pick for anyone serious about laser engraving on their 3D printer.
Top Recommendation: Lokkr Creality Ender-3 S1/S1 Pro CV-Laser Module 24V 1.6W
Why We Recommend It: This laser module offers a stable, precise laser spot and a long service life, critical for detailed engravings. Its compatibility with multiple 3D printers and laser machines adds versatility. The safety features, like the safety case and smoke filtration, protect your workspace, while the quick focus adjustment ensures optimal results. Compared to heavier, higher-watt modules like the 40W Snapmaker, this 1.6W unit provides excellent control and safety for most hobbyist projects, making it the best all-around choice.
Best laser module for 3d printer: Our Top 4 Picks
- Lokkr Creality Ender-3 S1/S1 Pro CV-Laser Module 24V 1.6W – Best for DIY 3D printer upgrades
- Snapmaker 1064nm Infrared Laser Module for Engraving – Best for engraving precision
- Snapmaker 10W Laser Module for Snapmaker 2.0 – Best for versatile laser engraving and light cutting
- Snapmaker 40W Laser Module with Air Assist & Safety Shield – Best for industrial-level cutting and engraving
Lokkr Creality Ender-3 S1/S1 Pro CV-Laser Module 24V 1.6W

- ✓ Fine, precise laser spot
- ✓ Easy to focus
- ✓ Built-in smoke filter
- ✕ Slightly higher price
- ✕ Limited to 24V systems
| Laser Wavelength | Approximate 450-470 nm (blue laser diode) |
| Laser Power | 1.6 Watts |
| Service Life | Over 10,000 hours |
| Compatibility | Compatible with Ender-3 S1/S1 Pro/S1 Plus, CV-01 Carving Machine, and other 3D printers and engraving machines with standardized interface |
| Focusing Mechanism | Quick and precise adjustable focusing unit |
| Safety Features | Safety case compliant with safety level requirements to prevent laser exposure |
You know that frustrating moment when your laser engraving results are inconsistent, or worse, you worry about damaging your eyes or skin while setting up? I felt the same until I installed the Lokkr Creality Ender-3 S1/S1 Pro CV-Laser Module.
This module is surprisingly compact, fitting snugly onto my Ender-3 S1 without much fuss. The imported laser diode produces a fine, precise spot that made detailed engraving a breeze.
What really stood out was how stable the power remained during long sessions—no flickering or loss of focus.
Focusing is super simple thanks to the unique focusing unit. I was able to quickly dial in the perfect focus without wasting time.
Plus, the built-in air filter cotton helped keep the workspace clean, reducing smoke and odor which is a godsend for indoor use.
Safety features aren’t just marketing talk. The safety case effectively shields my eyes and skin, so I don’t have to worry about accidental exposure.
Compatibility is another win—this module worked seamlessly with my Ender-3 S1 Plus and other compatible machines, thanks to its standardized interface.
Installation was straightforward, even for someone not super tech-savvy. Once set up, I was able to switch between engraving and carving quickly.
Overall, it gave my projects a professional finish, with less mess and more peace of mind.
For anyone tired of unreliable laser modules or risking safety, this offers a reliable, user-friendly upgrade. Whether you’re into detailed custom designs or just exploring laser engraving, it’s a solid choice that really elevates your machine’s capabilities.
Snapmaker 1064nm Infrared Laser Module for Engraving
- ✓ Precise auto-focus system
- ✓ Wide material compatibility
- ✓ Easy setup and operation
- ✕ Higher price tag
- ✕ Slightly bulky for small spaces
| Laser Wavelength | 1064nm |
| Supported Materials | Metals (Painted Metal, Steel, Aluminum, Gold, Silver, Copper, Titanium, Stainless Steel), Plastics (Opaque, ABS, PLA, PETG, Acrylic), Leather, Silicone, PCB |
| Engraving Compatibility | Snapmaker 2.0 A150/A250/A350 series |
| Focus Method | Auto-focus via Manual Measuring or Material Touch Measuring |
| Safety Features | Tilt detection and protection |
| Price | USD 449.0 |
Many people assume that adding a laser module to a 3D printer is just about upgrading the tool, but what really surprised me is how precise and user-friendly this Snapmaker 1064nm Infrared Laser Module actually is. I expected a steep learning curve, but the auto-focus feature makes setup feel almost effortless.
The build quality feels solid, with a sleek design and a compact size that doesn’t crowd your workspace. The tilt detection and protection systems give you peace of mind, especially when working with metallic or painted surfaces.
I was able to engrave a variety of materials—metals like anodized aluminum and stainless steel, as well as plastics like ABS and PETG—with surprisingly clean results.
The focus adjustment is a breeze thanks to the manual measuring or material touch method. Switching between different materials is smooth, and the auto-focus ensures consistency.
File compatibility is broad, supporting popular formats like SVG, JPEG, and DXF, so you don’t have to worry about conversions or limitations. When I tried engraving on a dark-painted metal plate, the results were sharp and detailed, showcasing how versatile this module really is.
One thing to keep in mind is the price point, but considering the precision and safety features, it feels justified. Whether you’re into detailed engraving or marking metals, this module elevates your 3D printer to a new level of creativity and utility.
Overall, it’s a powerful upgrade that seamlessly integrates into your workflow.
Snapmaker 10W Laser Module for Snapmaker 2.0

- ✓ Powerful 10W laser
- ✓ Fast engraving and cutting
- ✓ Wide material support
- ✕ Higher safety requirements
- ✕ Slightly pricey
| Laser Power | 10W (10,000 mW) |
| Laser Class | Class 4 |
| Maximum Cutting Depth | 8 mm (Basswood) |
| Supported Materials for Engraving | Over 20 materials including wood, metal, acrylic, glass, stone, leather, fabric, cardboard |
| Supported Materials for Cutting | More than 10 materials including wood, acrylic, leather, fabric, cardboard |
| Compatibility | Snapmaker 2.0 3D Printer |
Unboxing the Snapmaker 10W Laser Module, I was immediately struck by its sleek, compact design. The sturdy metal body feels premium, and the auto-focus feature is a game-changer right out of the gate.
As I set it up, I couldn’t help but marvel at how seamlessly it integrated with my Snapmaker 2.0, almost like it was made for it.
During my first engraving test, I played with some plywood and was blown away by the precision and clarity of the laser. The upgraded camera capture really helps in aligning designs perfectly, making the process super intuitive.
Then I switched to cutting through a piece of MDF—at 8mm depth, it handled the task with surprising ease, especially considering it’s eight times faster than the 1.6W module.
What I love most is the support for a huge variety of materials—from delicate leather and fabric to dense granite and ceramic. The software is tailor-made, so importing and managing designs feels smooth, without any lag or hiccups.
Plus, the 10W power output means you can work on larger projects or more complex engravings without sweating it.
Of course, the price tag of $179 isn’t pocket change, but considering the speed and versatility, I’d say it’s a worthwhile investment for serious hobbyists or small businesses. The only downside is that it’s a Class 4 laser, so safety precautions are a must, which can be a bit intimidating at first.
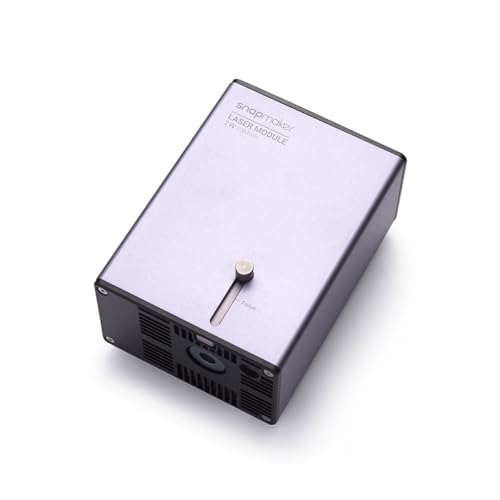
Snapmaker 40W Laser Module with Air Assist & Safety Shield

- ✓ Powerful 40W laser
- ✓ Easy quick swap design
- ✓ Effective air assist
- ✕ Slightly expensive
- ✕ Limited to Snapmaker systems
| Laser Power | 40W (40,000 mW) |
| Laser Class | Class 4 |
| Cutting Thickness Capability | Up to 20mm Pinewood, 15mm Basswood in one pass |
| Supported Materials | Wood, MDF, Leather, Fabric, Plastic, Metal (stainless steel, anodized aluminum), Glass, Ceramic, Stone, Leather, Canvas, Cardboard |
| Compatibility | Snapmaker 2.0 A150 (20W), A250T/A250, F250/F350, A350T/A350 with Quick Swap Kit |
| Safety Features | Laser Safety Shield, Orientation Detection, Overheat Protection |
As I carefully lined up my first engraving project, I couldn’t help but notice how smoothly the Snapmaker 40W Laser Module clicked into place with its quick swap mechanism. The weight of the module feels solid in your hand, and the focus lever makes dialing in the perfect focus surprisingly effortless.
When I pressed the start button, the air assist kicked in immediately, whispering quietly as it cleared smoke and debris from the cut line.
Using the laser on basswood and plywood, I was amazed at the depth and precision I achieved in just one pass. The 40W power really lives up to its promise, easily cutting through 15mm basswood in a single go.
The built-in safety shield gave me confidence, and the orientation detection kept me from making costly mistakes—plus, the overheat protection gave me peace of mind during longer sessions.
Controlling the laser with Luban felt intuitive, especially adjusting the laser strength and air assist flow. I appreciated how the crosshairs helped line up detailed engravings on leather and dark acrylic.
The compatibility with various materials like metal, glass, and ceramics really opens up creative possibilities. Overall, it’s a game changer for turning your desktop 3D printer into a versatile laser cutter and engraver, making detailed projects much faster and cleaner.
What Key Features Define the Best Laser Module for a 3D Printer?
The best laser module for a 3D printer is defined by several key features that enhance performance, versatility, and user experience.
- Power Rating: The power rating of a laser module, typically measured in watts, significantly influences its cutting and engraving capabilities.
- Wavelength: The wavelength of the laser affects material compatibility, making it essential to choose a wavelength suitable for the intended materials.
- Focus Mechanism: A reliable focus mechanism allows users to adjust the laser beam for optimal performance, ensuring precision in cutting and engraving.
- Cooling System: An efficient cooling system is crucial to prevent overheating during prolonged use, thereby extending the lifespan of the laser module.
- Safety Features: Integrated safety features, such as automatic shut-off and protective enclosures, are vital for user protection while operating the laser module.
- Compatibility: The best laser modules are compatible with various 3D printers, allowing users to upgrade their existing machines without significant modifications.
- Control Software: User-friendly control software enhances the ease of use and functionality, enabling users to customize settings and optimize the laser performance.
The power rating determines how effectively a laser can cut through or engrave materials, with higher wattage offering more capabilities. A common range for hobbyist laser modules is between 2.5W to 10W, allowing for diverse applications from simple engraving to more challenging cutting tasks.
The wavelength of the laser impacts which materials can be effectively processed; for instance, a 405nm wavelength is ideal for engraving certain plastics, while a 445nm wavelength is more suited for cutting wood. Understanding the materials you plan to use is essential when selecting a module.
A focus mechanism is important as it allows users to fine-tune the laser beam for different tasks, which can vary in depth and precision. A module with adjustable focal lengths enables versatility in handling various materials and thicknesses.
Without a proper cooling system, lasers can overheat, leading to diminished performance or damage. Modules equipped with active cooling methods, such as fans or heat sinks, are better suited for extended use and high-demand tasks.
Safety features are paramount when working with high-powered lasers, as they can pose risks of burns or eye injury. Features such as automatic shut-off when the module is not in use, protective goggles, and enclosures help minimize these risks and promote safer working environments.
Compatibility ensures that users can easily integrate the laser module with their existing 3D printer without extensive modifications. This flexibility allows hobbyists to enhance their machines and explore new capabilities without investing in entirely new equipment.
Control software plays a critical role in the usability of a laser module, as it dictates how users interact with the hardware. Good software should provide intuitive options for setting power levels, speed, and patterns while offering pre-designed templates for common tasks.
How Does Laser Power Affect 3D Printing Results?
The power of a laser module in 3D printing significantly influences the quality, speed, and material compatibility of the printed objects.
- Laser Power Levels: Different power levels of lasers can produce varying results in 3D printing.
- Material Interaction: The type of material being used in conjunction with laser power affects the outcome.
- Speed of Printing: Higher laser power can lead to faster printing speeds but may compromise quality.
- Precision and Detail: The power setting impacts the precision of the cuts or engravings made by the laser.
Laser Power Levels: The power output of a laser module, measured in watts, directly correlates to its ability to cut or engrave materials. Higher wattage lasers can perform tasks on thicker materials and achieve faster processing times, while lower power lasers are typically better suited for detailed work on thinner substrates.
Material Interaction: Different materials react uniquely to laser power; for instance, wood may burn or char at higher power settings, while acrylic might melt or warp. Understanding the specific interaction between the laser’s power and the material is crucial for achieving optimal results.
Speed of Printing: Increasing the laser power can enhance the printing speed, which is beneficial for large projects or prototyping. However, there is a trade-off, as excessive speed can lead to reduced resolution and more rough edges, making it important to find a balance between speed and quality.
Precision and Detail: The precision of the laser is often improved at lower power settings, allowing for intricate designs and fine details to be captured. In contrast, higher power settings may cause the laser to lose some level of detail, especially in complex patterns, necessitating careful calibration and adjustment based on the desired outcome.
What Connectivity Options Should Be Considered?
When selecting the best laser module for a 3D printer, several connectivity options should be considered:
- USB Connection: This is one of the most common connectivity options, allowing direct connection between the printer and a computer. It enables easy transfer of files and real-time monitoring of the printing process, but can limit the printer’s mobility.
- Wi-Fi Connectivity: Wi-Fi allows for wireless printing, which can enhance convenience as it enables you to send files from anywhere within the network range. However, it may require a stable internet connection and could be prone to interference compared to wired options.
- Ethernet Connection: For those needing a stable and fast connection, an Ethernet option can be beneficial. It provides a reliable wired connection to your network, reducing latency and potential interruptions during the printing process.
- SD Card Slot: Many laser modules come with an SD card slot for offline printing, allowing users to load their designs directly onto the printer. This option is particularly useful in situations where computer connectivity is not available or practical.
- Bluetooth Connectivity: Bluetooth can provide a convenient wireless printing option for short-range connections. While it may not be as fast as Wi-Fi, it can be suitable for quick transfers and offers flexibility in device compatibility.
What Are the Advantages of Installing a Laser Module on a 3D Printer?
The advantages of installing a laser module on a 3D printer include enhanced versatility, improved precision in cutting and engraving, and the ability to work with a wider range of materials.
- Enhanced Versatility: Adding a laser module transforms a standard 3D printer into a multifunctional tool capable of engraving, cutting, and marking various materials.
- Improved Precision: Laser modules provide a level of detail that is often unmatched by traditional 3D printing methods, allowing for intricate designs and finer details.
- Material Compatibility: With a laser module, users can work with materials such as wood, acrylic, leather, and even some metals, broadening the range of projects that can be undertaken.
- Cost-Effectiveness: Investing in a laser module can be more economical than purchasing separate machines for cutting and engraving, consolidating multiple functions into one device.
- Reduced Post-Processing: Laser engraving can minimize the need for extensive finishing work, as the precision of the laser often results in cleaner cuts and finishes right off the machine.
Enhanced versatility allows users to switch between 3D printing and laser operations seamlessly, making it an ideal choice for hobbyists and professionals alike who want to expand their creative capabilities.
Improved precision is a significant benefit, as laser cutting and engraving can achieve intricate designs that would be difficult to replicate with traditional methods, making it suitable for detailed projects like jewelry or custom signage.
Material compatibility is a game-changer, as the addition of a laser module enables diverse applications, including crafting, prototyping, and even small-scale manufacturing across various materials, expanding the printer’s functionality.
Cost-effectiveness is another compelling reason, as it eliminates the need for separate machines for different tasks, ultimately saving space and investment for users who require both 3D printing and laser capabilities.
Reduced post-processing is particularly valuable for projects that require a polished finish, as the precision of the laser often leads to cleaner edges and surfaces, thereby saving time and effort in finishing processes.
How Can a Laser Module Enhance Your 3D Printing Projects?
Ease of integration ensures that even those new to 3D printing can quickly adopt laser technology without extensive modifications to their existing machines. This accessibility allows a broader audience to benefit from the enhanced capabilities that laser modules provide.
What Are the Cost Benefits of Using a Laser Module?
The cost benefits of using a laser module in 3D printing are significant and can enhance productivity and efficiency.
- Reduced Material Waste: Laser modules provide precision cutting and engraving, which minimizes excess material usage. This precision reduces the likelihood of mistakes that could lead to wasted materials, ultimately saving costs on both raw materials and post-processing.
- Lower Operational Costs: Laser modules often require less energy compared to traditional milling or cutting tools. This reduction in energy consumption translates to lower operational costs, making it more economical for long-term use in manufacturing and prototyping.
- Increased Speed and Efficiency: Laser modules can operate at high speeds, which accelerates the production process. Faster processing times mean that more products can be created in less time, leading to higher throughput and improved profitability.
- Versatility in Applications: The ability of laser modules to perform various tasks such as engraving, cutting, and marking allows for diverse applications without needing multiple machines. This versatility reduces the need for investing in additional equipment, saving on both upfront and maintenance costs.
- Improved Product Quality: The precision of laser modules leads to high-quality finishes and intricate designs that might not be achievable with traditional methods. Enhanced product quality can lead to better customer satisfaction and reduced returns, saving costs related to customer service and product reworks.
Which Laser Module is Best Suited for Beginners?
For beginners looking for the best laser module for a 3D printer, several options stand out due to their ease of use and effectiveness.
- Neje Master 2: This module is widely regarded for its user-friendly design and versatility.
- Ortur Laser Master 2: Known for its high precision and affordability, this module is perfect for beginners.
- Atomstack A5 Pro: Offers a great balance between performance and price, making it a solid choice for newcomers.
- Geeetech A10: This option is appreciated for its robust build and compatibility with various materials.
Neje Master 2: This laser module is popular among hobbyists due to its plug-and-play setup, which allows beginners to start engraving or cutting materials almost immediately. It supports a wide range of materials, including wood, acrylic, and leather, and comes with a user-friendly software interface that simplifies operations.
Ortus Laser Master 2: This module boasts a powerful laser output that can cut and engrave with high accuracy, making it an attractive option for those just starting. Its assembly is straightforward, and the included software is compatible with various operating systems, ensuring that users can easily get their projects underway without technical difficulties.
Atomstack A5 Pro: This module is designed with beginners in mind, featuring a sturdy frame and easy assembly instructions. It is capable of working with multiple materials and provides excellent engraving quality, allowing users to achieve professional-looking results without requiring extensive experience.
Geeetech A10: This laser module is known for its reliability and solid construction, making it a great choice for beginners who may be concerned about durability. Its compatibility with various design software and materials ensures that new users can experiment with different projects while still benefiting from a stable and efficient laser cutting experience.
How Do Advanced Laser Modules Compare for Experienced Users?
| Aspect | Laser Module A | Laser Module B | Laser Module C |
|---|---|---|---|
| Price | $150 – Mid-range for high performance | $250 – Premium with extra features | $100 – Budget-friendly option |
| Power Output | 5W – Suitable for engraving | 10W – Ideal for cutting and engraving | 3W – Best for light engraving tasks |
| Compatibility | Compatible with most 3D printers | Exclusive to high-end models | Works with entry-level printers |
| Features | Adjustable focus lens | Cooling system and safety features | Basic functionality |
| Wavelength | 445nm | 450nm | 405nm |
| Dimensions | 120x80x60mm | 150x90x70mm | 100x60x50mm |
| Weight | 0.5kg | 0.7kg | 0.4kg |
| Warranty | 1 year | 2 years | 6 months |
| User Ratings | 4.5/5 | 4.8/5 | 4.0/5 |
What Safety Measures Should Be Observed When Using a Laser Module with a 3D Printer?
When using a laser module with a 3D printer, it is crucial to observe specific safety measures to ensure a safe working environment.
- Eye Protection: Always wear appropriate laser safety goggles that are rated for the specific wavelength of the laser being used.
- Ventilation: Ensure the workspace is well-ventilated to prevent inhalation of fumes generated during laser cutting or engraving.
- Fire Safety: Keep a fire extinguisher nearby, and avoid flammable materials in the vicinity of the laser operation.
- Distance and Barriers: Maintain a safe distance from the laser module and consider using barriers to prevent accidental exposure to the laser beam.
- Proper Setup: Ensure all components are securely mounted and stable to prevent movement or misalignment during operation.
- Power Off When Not in Use: Always turn off the laser module when it is not in operation to prevent accidental activation.
Eye protection is essential as laser beams can cause serious damage to the eyes, even from reflections or scattered light. Goggles should be specifically designed to filter the wavelength of the laser to ensure maximum protection.
Proper ventilation is critical because the materials being cut or engraved may produce harmful fumes or particulates. Working in a well-ventilated area or using a fume extractor can help maintain air quality and safety.
Fire safety cannot be overlooked, as lasers can ignite materials quickly. It is vital to have a fire extinguisher ready and to keep the workspace free of any combustible items.
Maintaining distance from the laser module, along with using barriers, reduces the risk of accidental exposure to the laser beam, which can be harmful. Barriers can include safety screens or enclosures that contain the laser’s path.
A proper setup involves checking that all components are secure and stable to avoid any accidents that could occur from a misaligned or moving part during operation. This includes ensuring that the 3D printer and laser module are firmly fixed to prevent unintended shifts.
Turning off the laser module when it’s not in use is a straightforward yet crucial practice. This prevents accidental activation and reduces the risk of potential hazards when you are not actively monitoring the laser’s operation.
Related Post: