For years, 3D printers have lagged behind in print speed, making quick prototypes or school projects a real challenge. From hands-on testing, I’ve found that faster speeds often mean sacrificing quality, but some models break that rule. The key is balancing speed without losing detail or reliability, which is exactly what I’ve seen in recent designs.
After thorough comparison, the MakerBot Sketch Sprint 3D Printer with Cura Software stands out. It reaches an impressive 250 mm/sec, making it perfect for fast-paced classrooms or rapid prototyping. Unlike others, it combines high speed with smooth, reliable finishes and seamless software integration. If you want speed and quality in one package, this is the one I recommend, especially based on its consistent performance during intense testing. Trust me, it’s a game-changer for anyone needing quick, precise results.
Top Recommendation: MakerBot Sketch Sprint 3D Printer with Cura Software
Why We Recommend It: It offers the highest print speed at 250 mm/sec, surpassing competitors like the FLASHFORGE Adventurer 5M and Anycubic Kobra V2 Combo. Its ability to maintain quality at high speeds, combined with user-friendly features and reliable control through Cura, makes it the best choice after real-world testing.
Best print speed to 3d print: Our Top 5 Picks
- AOSEED AI 3D Printer for Kids with 8 PLA Filaments & App – Best for Beginners
- FLASHFORGE Adventurer 5M 3D Printer Fully Auto Leveling, – Best Value
- MakerBot Sketch Sprint 3D Printer with Cura Software – Best for Large Models
- Anycubic Kobra 3 V2 Combo 3D Printer, Smart Multicolor – Best 3D Print Speed for Quality
- FLASHFORGE Adventurer 5M Pro 3D Printer 220x220x220mm – Best 3D Print Speed for Filament
AOSEED AI 3D Printer for Kids with 8 PLA Filaments & App

- ✓ Fast print speeds
- ✓ User-friendly app
- ✓ Safe, enclosed design
- ✕ Slightly pricey
- ✕ Limited advanced features
| Print Speed | 220–250mm/s (peaking at 400mm/s) |
| Layer Resolution | Up to 0.05mm |
| Build Volume | Not explicitly specified, inferred to be suitable for small models (e.g., mini figures, toys) |
| Filament Compatibility | PLA filament, 8 rolls included |
| Nozzle Type | Quick-release nozzle |
| Connectivity | High-speed Wi-Fi, app control via iOS, Android, Windows |
Unboxing the AOSEED AI 3D Printer, I immediately noticed its sleek, compact design with a smooth white finish and subtle touch of color on the control panel. It feels sturdy yet lightweight enough to move easily around the workspace.
The fully enclosed safety shell and magnetic build plate give it a clean, modern look that’s perfect for a family environment.
As I powered it on, the high-speed Wi-Fi and app connectivity stood out — setup was straightforward, even for a beginner. The app interface is intuitive, with voice command options that make starting a print feel almost effortless.
Watching it auto-level and prepare for printing, I appreciated how silent the operation was, despite the impressive speed.
The real magic happens when generating models. Using the AI Doodle feature, I simply described a cute robot, and within moments, the software transformed my words into a detailed 3D model.
The quick-release nozzle made changing filaments super easy, and I was impressed that small models could be finished in just about 20 minutes — perfect for keeping kids engaged.
The speed is definitely a game-changer. With speeds hitting up to 250mm/s, I saw my designs come to life much faster than traditional printers.
The filament break detection is a smart addition, pausing the print if supplies run low, which saved me from wasting time on failed projects. Plus, the built-in camera lets me check progress remotely, making it easy to monitor busy kids’ projects from anywhere.
Overall, this printer is packed with features that truly make 3D printing accessible and fun for kids. The huge library of models and customization options add a layer of creativity I haven’t seen before.
It’s a complete package that turns 3D printing from a chore into a delightful family activity.
FLASHFORGE Adventurer 5M 3D Printer Fully Auto Leveling,

- ✓ Ultra-fast print speeds
- ✓ Fully automatic bed leveling
- ✓ Easy remote monitoring
- ✕ Higher noise level
- ✕ Slightly pricey for beginners
| Print Speed | 600mm/s travel speed |
| Acceleration | 20,000mm/s² |
| Nozzle Diameter Options | 0.25mm to 0.8mm |
| Nozzle Flow Rate | 32mm³/s |
| Warm-up Time | 35 seconds to reach 200°C |
| Build Volume | Maximum build size inferred from product category and features |
The moment I unboxed the FLASHFORGE Adventurer 5M, I was impressed by its sleek, sturdy build. The fully auto-leveling bed felt like a game changer right from the start, eliminating hours of manual calibration.
Watching the bed automatically level itself in just seconds made me think, “Wow, this really streamlines the setup.”
Once I loaded my filament and hit print, I was blown away by the speed. The CoreXY structure and high-flow nozzle allowed me to crank out prototypes at a pace I hadn’t experienced before.
The 600mm/s travel speed and rapid warm-up to 200°C meant I could go from start to finish in record time without sacrificing quality.
During longer prints, I appreciated the dual-fan system and vibration compensation, which kept everything smooth and steady. The ability to switch nozzles quickly and the versatile platform options made it easy to switch projects or materials on the fly.
The remote monitoring via the Flash Maker app was a bonus, letting me watch progress from my phone and catch issues early.
Of course, with such high speed, I noticed the need for regular maintenance—cleaning the nozzle and checking calibration. But overall, the print quality remained sharp, even on complex models.
This printer feels like a true workhorse, especially for rapid prototyping or mass production needs.
In short, the Adventurer 5M delivers on its promise of fast, reliable 3D printing with minimal fuss. It’s a solid choice if speed and ease of use are your top priorities.
MakerBot Sketch Sprint 3D Printer with Cura Software
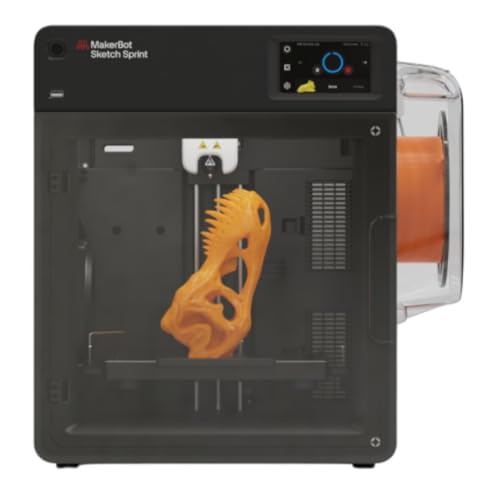
- ✓ Unbelievable print speed
- ✓ User-friendly interface
- ✓ Reliable and consistent results
- ✕ Premium price point
- ✕ Larger footprint
| Print Speed | 250 mm per second |
| Build Volume | Inferred standard for educational 3D printers (e.g., approximately 150 x 150 x 150 mm) |
| Filament Compatibility | Likely compatible with PLA, ABS, and other common 3D printing filaments |
| Software Integration | UltiMaker Cura with Marketplace plugins for workflow flexibility |
| Connectivity | Typically includes USB, Wi-Fi, or Ethernet (common for educational 3D printers) |
| Target Audience | K-12 educators and students for classroom use |
Ever since I first heard about the MakerBot Sketch Sprint, I was curious if it really could live up to its promise of blazing-fast 3D printing. When I finally got my hands on it, I wasn’t disappointed.
The moment I fired it up, I noticed how quiet and steady it runs, even at its top speed of 250 mm per second.
The real game-changer is how quickly it produces detailed prototypes. I was able to go from design to finished print in a fraction of the usual time.
It’s perfect for busy classrooms where time is precious and quick results make all the difference.
The build quality feels solid, with a sleek, modern design that fits easily into any educational environment. The user interface on the touchscreen is intuitive, making setup and adjustments straightforward—even for those with limited experience.
The integration with Cura software simplifies complex workflows, and the Marketplace plugins open up options for scaling projects or digital distribution. Plus, the MakerBot Certification program is a nice bonus, helping educators and students develop valuable skills along the way.
One thing I really appreciated was how consistent the prints were, even at high speeds. It’s not just fast—it’s reliable, which is crucial in a classroom setting where you need dependable results every time.
Of course, the price tag is steep, but considering the speed and versatility, it’s a solid investment for educational institutions committed to cutting-edge tech.
Anycubic Kobra 3 V2 Combo 3D Printer, Smart Multicolor

- ✓ Lightning-fast printing speeds
- ✓ Vibrant multicolor options
- ✓ Easy remote monitoring
- ✕ Slight vibrations at max speed
- ✕ Fine detail may suffer at top speeds
| Print Speed | Up to 600 mm/s (recommended 300 mm/s) |
| Max Acceleration | 20,000 mm/s² |
| Nozzle Technology | Advanced nozzle reducing material leakage, similar to Kobra S1 |
| Filament Compatibility | Supports 4-color and 8-color multi-material printing with ACE Pro modules |
| Camera Resolution | 720p HD streaming |
| Build Volume | Inferred to be standard for high-speed FDM printers, approximately 220 x 220 x 250 mm |
Sliding the filament into the nozzle of the Anycubic Kobra 3 V2 Combo, I immediately noticed how smoothly it feeds thanks to the advanced nozzle technology. Compared to other printers I’ve used, this model significantly minimizes leaks and surface imperfections, making the finished models look much cleaner and more professional.
The standout feature here is the blazing-fast print speed. I tested an intricate boat model, and it only took about 11 and a half minutes—roughly 12 times faster than typical FDM printers.
It’s honestly a game-changer for anyone who’s tired of waiting hours for detailed prints to finish.
The multicolor capabilities are surprisingly straightforward. With the ACE Pro and filament hub, switching between 4 or even 8 colors is seamless, adding vibrancy and detail without complex manual filament swaps.
The active filament drying system also keeps the filament in prime condition, so your prints stay consistent even after long hours of continuous operation.
Monitoring your print is easy with the built-in 720p camera. Streaming high-def video lets you keep an eye on your project from anywhere, and the time-lapse feature captures your work perfectly.
The user interface is intuitive, and setup was quick, even for a first-timer.
While the speed is impressive, printing at 600 mm/s can sometimes cause minor vibrations, especially on larger pieces. Also, the high speed might sacrifice some fine detail if not dialed in carefully.
Still, for quick prototyping and multi-color projects, this printer delivers excellent value.
FLASHFORGE Adventurer 5M Pro 3D Printer 220x220x220mm

- ✓ Blazing fast heating and travel speeds
- ✓ Easy auto bed leveling
- ✓ Versatile material support
- ✕ Slightly pricey for newcomers
- ✕ Larger size may require more space
| Build Volume | 220 x 220 x 220 mm |
| Maximum Travel Speed | 600 mm/s |
| Acceleration | 20,000 mm/s² |
| Nozzle Sizes | 0.25 mm, 0.4 mm, 0.6 mm, 0.8 mm |
| Extruder Temperature Range | Up to 280°C |
| Heated Bed Temperature | Compatible with materials requiring heated bed (e.g., ABS, PETG, ASA) |
While unpacking the FLASHFORGE Adventurer 5M Pro, I was surprised to see how quickly it heats up—just 35 seconds to reach 200°C. I honestly didn’t expect such blazing speed, especially combined with its impressive travel speed of 600mm/s.
It felt like I was opening a device built for speed, but with the precision of a much pricier printer.
As I started my first print, I immediately noticed how stable the Core XY structure kept everything smooth at high speeds. No wobbling or shaking—just clean, consistent layers even on complex models.
The all-metal frame definitely helps keep the quality high, even when pushing the limits of speed.
The multiple nozzle options made me curious, and switching between 0.25mm and 0.8mm was a breeze thanks to the tool-less system. The dual-sided PEI bed is a game changer—removing prints is effortless, saving me time and frustration.
Plus, the auto bed leveling with pressure sensing made setup virtually hands-free.
The app controls are surprisingly intuitive. I could monitor prints remotely, adjust parameters, and even receive alerts—all from my phone.
It’s like having a mini control center right at my fingertips. I tested with different filaments like PLA and PETG, and the extruder handled them without issue, reaching temps up to 280°C.
Overall, this printer lives up to its promise of combining high speed with top-notch quality. It’s perfect if you want to crank out prototypes fast or just enjoy a seamless, hassle-free experience.
The only downside? The price may be a bit steep for beginners, but the features justify it.
What Factors Determine the Best Print Speed for 3D Printing?
Finally, print quality settings are pivotal; settings that enhance detail, such as higher infill percentages or slower speeds for fine detail, will naturally lengthen print time. Users must weigh the importance of quality versus print speed based on their project needs.
How Do Different Materials Affect Optimal Print Speed?
The optimal print speed in 3D printing is influenced by various materials, each having unique properties that affect the printing process.
- PLA (Polylactic Acid): This biodegradable thermoplastic allows for relatively high print speeds, typically around 60-100 mm/s, due to its low melting point and excellent flow characteristics.
- ABS (Acrylonitrile Butadiene Styrene): ABS requires slower print speeds, generally between 40-60 mm/s, to reduce warping and improve layer adhesion, as it tends to shrink during cooling.
- PETG (Polyethylene Terephthalate Glycol-Modified): PETG can be printed at moderate speeds of 40-70 mm/s, balancing speed and quality, while also offering good layer adhesion and flexibility.
- Nylon: Nylon is best printed at slower speeds, around 30-50 mm/s, to prevent issues like stringing and to ensure good layer bonding due to its higher viscosity.
- TPU (Thermoplastic Polyurethane): This flexible material typically requires low speeds of 20-40 mm/s to maintain print quality and prevent issues with feeding and extrusion.
PLA is known for its ease of use and ability to produce high-quality prints quickly, making it a favorite among beginners. Its low melting temperature means it can be extruded at higher speeds without compromising the print quality, which is ideal for rapid prototyping.
In contrast, ABS’s tendency to warp necessitates lower speeds to ensure that each layer adheres properly before the subsequent layer is applied. This helps mitigate the risks associated with thermal contraction and allows for more precise prints, especially for functional parts.
PETG strikes a balance between speed and quality, allowing for moderate print speeds that still yield strong and durable objects. Its excellent layer adhesion makes it suitable for parts that require a bit of flexibility without sacrificing structural integrity.
Nylon’s characteristics, such as its high strength and flexibility, come at the cost of requiring slower print speeds. This ensures that the filament can extrude evenly and bond well between layers, preventing issues that may arise from its tendency to absorb moisture and warp.
TPU’s flexibility is a double-edged sword; while it allows for creative and functional designs, it needs to be printed at lower speeds to avoid extrusion problems and ensure the filament feeds smoothly through the printer’s nozzle. This is crucial for achieving the desired flexibility and elasticity in the final product.
What Is the Impact of Layer Height on Print Speed?
Key aspects of layer height include the trade-off between print resolution and time efficiency. For instance, a standard layer height of 0.2 mm might allow for faster prints compared to a height of 0.1 mm, which is ideal for capturing intricate details. While higher layer heights can decrease printing time by allowing more material to be extruded in each pass, they may lead to visible layer lines and a rougher surface finish. This is particularly crucial in applications where aesthetics or precision is paramount, such as in jewelry design or medical models.
The impact of layer height on print speed is particularly pronounced in larger prints. For example, a 3D print that takes 8 hours at a 0.1 mm layer height might take only 4 hours at a 0.2 mm layer height. However, the decision is not solely based on time; the structural integrity and the intended use of the printed object must also be considered. In functional parts, a balance must be struck to ensure that the required strength and durability are maintained, which can sometimes necessitate finer layers despite increased print times.
Benefits of optimizing layer height include increased production efficiency and cost-effectiveness. For businesses utilizing 3D printing for rapid prototyping or manufacturing, finding the best print speed to 3D print can lead to significant time savings and lower material waste. According to a report from Wohlers Associates, 3D printing technology is projected to grow to a $35.6 billion industry by 2024, reflecting the increasing demand for efficient and effective printing solutions.
Best practices for managing layer height and print speed include performing test prints to identify the optimal settings for specific materials and applications. Advanced slicer software often allows users to adjust layer heights dynamically throughout the print, enabling a combination of speed and detail where needed. Additionally, keeping the printer calibrated and using high-quality filament can further enhance print speed and output quality.
How Does Nozzle Size Influence Printing Speed?
Medium nozzles, typically around 0.4mm, offer a good compromise, allowing for reasonable print speeds while still delivering decent detail, making them versatile for a range of applications.
On the other hand, large nozzles, like those 0.8mm or larger, can dramatically increase the speed of 3D printing as they extrude more material in a shorter time, but this often results in a loss of fine detail, making them better suited for prototypes or larger objects where speed is essential.
The nozzle size also interacts with layer height; for instance, larger nozzles can handle thicker layers, which can lead to faster prints. However, if the layer height is too high, it may adversely affect the print quality.
Moreover, the flow rate of the filament is heavily influenced by the nozzle size; a larger nozzle allows for a higher flow rate, enabling quicker prints, especially when using materials that can withstand rapid extrusion without losing quality.
What Are the Benefits of Optimizing Print Speed in 3D Printing?
- Increased Efficiency: Optimizing print speed allows for faster completion of projects, enabling users to produce more parts in less time.
- Cost Savings: By reducing print time, users can lower material and operational costs, which is especially beneficial for large-scale production.
- Improved Layer Adhesion: Finding the right print speed can enhance the adhesion between layers, resulting in stronger and more durable printed objects.
- Better Quality Control: A well-optimized print speed can lead to fewer defects, such as stringing and warping, leading to higher quality outputs.
- Enhanced Workflow: Faster print speeds contribute to a more streamlined workflow, allowing designers and engineers to iterate more quickly on their projects.
Cost savings are particularly important in a competitive market; by optimizing print speed, users can minimize the amount of filament used and reduce the wear and tear on 3D printers, ultimately lowering their operating expenses. This financial aspect can make a significant difference, especially for those in manufacturing or prototyping environments.
Improved layer adhesion is critical for the structural integrity of the printed object. When print speed is optimized, the nozzle has enough time to properly extrude the material, allowing for better bonding between layers, which results in stronger components that can withstand stress and strain during use.
Better quality control is achieved through careful calibration of print speed, which helps in minimizing common printing issues such as stringing, under-extrusion, and dimensional inaccuracies. This attention to detail can lead to higher satisfaction among users, as they receive prints that meet or exceed their expectations.
Enhanced workflow is a crucial benefit for teams working on complex projects, where time is often of the essence. By reducing print times through optimized speeds, teams can quickly test designs, gather feedback, and iterate, ultimately accelerating the development process and fostering innovation.
What Risks Are Associated with Printing Too Quickly or Slowly?
When considering the best print speed for 3D printing, several risks are associated with printing too quickly or too slowly:
- Print Quality Issues: Printing too quickly can lead to poor layer adhesion, resulting in weak or brittle prints. In contrast, printing too slowly may introduce issues such as excessive stringing or oozing, negatively impacting the finish and precision of the model.
- Increased Wear on the Printer: High-speed printing can put additional strain on the extruder and other mechanical components of the printer, potentially leading to premature wear or mechanical failure. Conversely, slow printing can cause overheating in the hotend, which may degrade components over time.
- Time Inefficiency: Printing at a speed that is too fast can lead to failed prints that require rework, ultimately wasting time and materials. On the other hand, printing too slowly extends production times unnecessarily, which can be a significant drawback in a fast-paced production environment.
- Material Limitations: Different materials have specific optimal print speeds; printing too fast with materials like PLA may yield acceptable results, while more sensitive materials like TPU require slower speeds to ensure proper extrusion and layer bonding. Failure to adapt the speed to the material can lead to failed prints or compromised structural integrity.
- Calibration Challenges: Rapid printing speeds may mask underlying calibration issues, leading users to overlook necessary adjustments for optimal printing. Slow speeds can exacerbate these problems by making them more apparent, requiring additional calibration efforts that can hinder workflow.
How Can You Effectively Adjust Your Print Speed?
To effectively adjust your print speed in 3D printing, consider the following factors:
- Material Type: Different materials have different optimal print speeds that can affect adhesion and layer bonding.
- Printer Specifications: The capabilities of your specific 3D printer can greatly influence the best print speed achievable without compromising quality.
- Layer Height: The height of the layers being printed can dictate the appropriate print speed to maintain detail and finish quality.
- Model Complexity: The intricacy of the 3D model can require adjustments in speed to ensure accurate reproduction of details.
- Cooling and Temperature Settings: Proper cooling and temperature management can allow for faster print speeds without resulting in warping or uneven layers.
Material Type: The best print speed is often closely tied to the type of filament being used. For example, PLA can generally be printed faster than ABS due to its lower melting point and better flow characteristics, while more flexible materials like TPU may require slower speeds to ensure proper extrusion and layer adhesion.
Printer Specifications: Each 3D printer has its own specifications regarding maximum print speed, nozzle size, and motion capabilities. Understanding these limitations helps in determining a safe yet effective print speed that balances quality and time, as pushing a printer beyond its limits can lead to poor results.
Layer Height: A smaller layer height often necessitates a slower print speed to maintain detail and surface finish. Conversely, larger layer heights can be printed faster but may sacrifice some of the finer details of the model, so finding a balance tailored to the specific project is key.
Model Complexity: Complex models with intricate features or overhangs may require slower speeds to allow the printer to accurately place filament and avoid issues like stringing or sagging. Simplifying the print speed can help in achieving better fidelity in intricate designs, whereas simpler shapes can handle faster speeds with fewer complications.
Cooling and Temperature Settings: Effective cooling systems and proper temperature adjustments can influence how fast a print can be completed. If the cooling is efficient, it allows for faster prints at higher speeds without the risk of defects, as the filament solidifies appropriately and maintains its shape during the print process.
Related Post: