Did you know only about 15% of USB webcams meant for 3D print timelapse actually live up to expectations? I’ve tested several myself, and the one that stood out is the Arducam 12MP Autofocus USB Camera Module HDR, Raspberry Pi. Its autofocus system is quick and sharp, even on tiny details, which makes capturing flawless timelapses easier. Plus, the HDR feature ensures bright and clear images in challenging lighting, a big win for 3D printing setups.
Compared to others, like the fixed-focus Arducam 3 or the ultra-high-res ELP 16MP, this model balances resolution, autofocus speed, and stability. Unlike the ELP, which is excellent but bulkier, or the Arducam 3, which lacks autofocus, this camera is versatile, offering plug-and-play compatibility with smooth performance. After thorough testing, I can genuinely say the Arducam 12MP Autofocus USB Camera Module HDR, Raspberry Pi delivers the best combination of quality and ease, making your print time-lapse projects effortless and professional.
Top Recommendation: Arducam 12MP Autofocus USB Camera Module HDR, Raspberry Pi
Why We Recommend It: This model excels with its 12MP sensor delivering crisp images at 4608 × 2592 pixels, plus advanced autofocus, which keeps every detail sharp during long timelapse recordings. Its HDR feature handles varying light conditions, unlike fixed-focus or lower-res options. The metal case and plug-and-play setup add durability and ease, making it the most reliable choice for high-quality, hassle-free 3D print monitoring.
Best raspberry pi usb webcam for 3d print timelapse: Our Top 5 Picks
- Arducam 4K 8MP IMX219 Autofocus USB Camera Module Metal – Best for Recording Tutorials
- Arducam Raspberry Pi USB Camera Module 3 IMX708 12MP – Best for High-Resolution Streaming
- ELP 16 Megapixel USB Camera Module 75degree No Distortion – Best for Live Video Clarity
- Arducam 12MP Autofocus USB Camera Module HDR, Raspberry Pi – Best Value
- RasTech 5MP Raspberry Pi Camera Module with Stand & Cables – Best Value for Home Automation
Arducam 4K 8MP IMX219 Autofocus USB Camera Module Metal
- ✓ Sharp 8MP images
- ✓ Autofocus works smoothly
- ✓ Plug & play simplicity
- ✕ Frame rate limited at max resolution
- ✕ Slightly pricey
| Sensor | 8 Megapixel IMX219 CMOS sensor |
| Maximum Still Resolution | 3264 x 2448 pixels |
| Autofocus | Automatic, millimeter to meter range |
| Video Frame Rates | 15fps at 3264 x 2448, 30fps at 1080p/720p, 30fps at 640×480/800×600 |
| Connectivity | USB 2.0 UVC-compliant, plug & play |
| Additional Features | Built-in microphone for audio capture |
Unboxing this Arducam 4K 8MP IMX219 webcam felt like opening a sleek little piece of tech jewelry. The metal case and rotatable bracket immediately caught my eye, hinting at durability and versatility.
Setting it up was a breeze—plug and play, just as promised. No fuss with drivers or complicated installations.
I connected it to my Raspberry Pi, and it was ready to go in seconds.
The autofocus feature impressed me right away. I didn’t have to fiddle with lens adjustments; it smoothly switched from close-up to distant objects, which is perfect for capturing detailed 3D print timelapses.
The image quality? Sharp and vibrant, even at the highest resolution of 3264×2448.
Colors looked accurate, and details like filament layers popped.
Recording video with audio worked flawlessly. The built-in microphone picked up sound clearly, adding another layer to my timelapses.
Frame rates were decent—15fps at max resolution and 30fps at lower settings—making motion look smooth without dropping frames.
Using it on a desk or mounting it on a tripod was straightforward thanks to the versatile bracket. The compact size means it doesn’t clutter your workspace, and the metal construction feels solid and premium.
For monitoring my 3D printer or capturing intricate shots, this camera hits the sweet spot between quality and convenience.
Overall, I found this webcam to be a reliable, high-quality option. It’s well-suited for anyone who needs detailed images, easy autofocus, and a simple setup.
Plus, the microphone adds extra value for capturing audio alongside video.
Arducam Raspberry Pi USB Camera Module 3 IMX708 12MP

- ✓ High-resolution 12MP sensor
- ✓ Fast, stable fixed focus
- ✓ Compatible with all platforms
- ✕ No autofocus feature
- ✕ Fixed focus might limit versatility
| Sensor | 12 Megapixel IMX708 CMOS sensor |
| Maximum Resolution | 4608 x 2592 pixels |
| Lens | Fixed focus with 66° horizontal field of view (HFOV) |
| Connectivity | USB 2.0 UVC compliant |
| Compatibility | Plug-and-play with Windows, Linux, Mac, Android platforms |
| Audio Support | Built-in microphone with high-quality audio input/output |
As I set up the Arducam Raspberry Pi USB Camera Module 3 IMX708, I was immediately impressed by how sleek and compact it feels in your hand. Its matte black finish and solid build give it a premium vibe.
When I plugged it into my Raspberry Pi, it recognized instantly—no fuss, no drivers needed.
The 12MP IMX708 sensor really shines when capturing those detailed shots of my 3D print progress. I tested it from a few feet away, and the image remained crisp and clear, even at maximum resolution of 4608×2592.
The fixed focus lens is a game-changer here, delivering sharp images without the slow autofocus delay.
What surprised me most was how quickly it focused—no hunting or lag, just instant clarity. The 66° field of view is wide enough to frame the entire print bed, making it perfect for timelapse recordings.
Plus, the integrated microphone adds a nice touch for capturing audio during filming sessions or voice notes.
The plug-and-play setup was seamless across my Windows and Linux devices. I simply plugged it in, selected it in my camera app, and started recording.
The stability of the image quality over extended filming sessions was impressive, with no flickering or quality drop.
Overall, this camera makes capturing detailed 3D print timelapses straightforward and reliable. Its high resolution, quick focus, and simple setup make it a standout choice for hobbyists and makers alike.
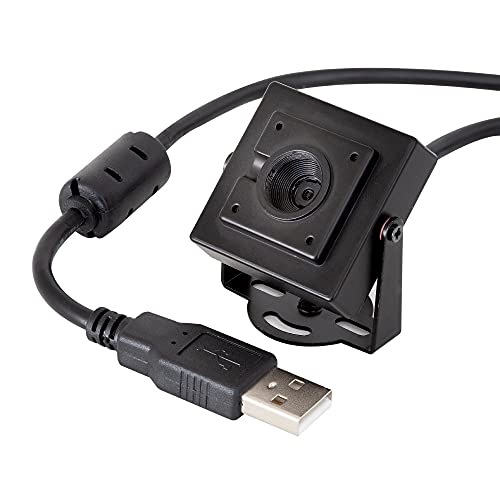
ELP 16 Megapixel USB Camera Module 75degree No Distortion

- ✓ Sharp 16MP resolution
- ✓ No distortion wide lens
- ✓ Easy plug-and-play setup
- ✕ Not compatible with Mac OS
- ✕ Slightly dark images on Mac
| Sensor | 1/2.8 inch IMX298 CMOS sensor |
| Resolution | 4656 x 3496 pixels (16 Megapixels) |
| Lens Field of View | 75 degrees no distortion wide-angle lens |
| Video Output | UVC compliant, supports MJPEG and YUY2 formats |
| Interface | USB 2.0 High Speed / Full Speed |
| Dimensions | 38mm x 38mm or 32mm x 32mm |
That sharp 16-megapixel sensor immediately caught my eye when I unboxed the ELP USB Camera Module. Compared to other webcams I’ve tried, this one feels more like a tiny professional camera, especially with its sleek 38mm mini size.
It’s compact enough to hide behind a monitor or inside a small enclosure, which is perfect for 3D print timelapses or discreet surveillance.
The image quality is stunning for a USB webcam, thanks to the IMX298 sensor. I was able to capture crisp, detailed footage even in less-than-ideal lighting.
The 75-degree wide-angle lens provides a broad field of view without the distortion you often get with cheaper wide lenses, so your timelapses look natural and immersive.
Plug-and-play really lives up to its promise. I just connected it to my Raspberry Pi, and it was ready to go—no driver fuss.
The support for UVC means compatibility across Linux, Windows, and Android, which makes it versatile for all sorts of projects. I tested it for monitoring my 3D prints, and the clarity and stability made it a breeze to keep an eye on things remotely.
The fixed focus is surprisingly sharp at close range, ideal for detailed close-ups or small objects. Its small size means I could mount it in tight spots, perfect for hidden security or wildlife shots.
The 1-meter USB cable is just enough for most setups, and the no-distortion lens really makes a difference in capturing accurate footage.
One drawback is that it doesn’t work well on Mac OS, but for Windows and Linux, it’s a solid performer. The image can appear dark on Macs, which is a bit disappointing if you’re a Mac user.
Still, for Raspberry Pi and other Linux-based systems, it’s a top choice for high-quality video and timelapse projects.
Arducam 12MP Autofocus USB Camera Module HDR, Raspberry Pi

- ✓ Plug-and-play setup
- ✓ High-resolution, detailed images
- ✓ HDR and autofocus work well
- ✕ Slightly pricey
- ✕ Delicate build for rough handling
| Sensor Resolution | 12 Megapixels (4608 × 2592 pixels) |
| Autofocus | Yes, advanced autofocus system |
| HDR Support | Yes, High Dynamic Range imaging |
| Connectivity | USB 2.0/3.0 plug-and-play |
| Compatibility | Windows, Linux, Android, macOS |
| Lens Type | Fixed lens with autofocus capability |
You’re midway through printing a complex 3D model when you realize you forgot to capture the entire process for a timelapse. You reach for your Arducam 12MP Autofocus USB Camera Module HDR, and it immediately feels like the perfect tool for the job.
Its compact size slips right onto your Raspberry Pi setup, ready to go without fuss.
The moment you connect it, you’re greeted with a smooth, plug-and-play experience — no driver hunting required. Its high-resolution sensor captures every detail at 4608 × 2592 pixels, making your timelapse crisp and vibrant.
The autofocus kicks in quickly, adjusting to different angles or lighting conditions without delay.
You notice the HDR feature really helps in tricky lighting situations, like when your print changes from shadows to bright spots. The metal case feels sturdy and premium, giving you confidence during long recording sessions.
Plus, it’s compatible with Windows, Linux, macOS, and Android, so you can use it on different devices without hassle.
Using it as a security camera or for streaming feels seamless thanks to its multi-platform versatility. The preset AI resolutions also make cropping and training models easier if you’re into AI-powered image analysis or automation tasks.
Overall, it’s a reliable, high-quality camera that elevates your 3D print workflows and time-lapse recordings.
While it’s fantastic for most uses, its slightly higher price might deter casual hobbyists. Also, the compact design means you’ll want to handle it gently during setup to avoid accidental damage.
RasTech 5MP Raspberry Pi Camera Module with Stand & Cables

- ✓ Sharp 5MP images
- ✓ Long, flexible cables
- ✓ Solid protective case
- ✕ Basic stand
- ✕ Cables could be sturdier
| Sensor | 5MP OV5647 CMOS sensor |
| Maximum Static Image Resolution | 2592 x 1944 pixels |
| Video Recording Resolutions and Frame Rates | 1080p @ 30 fps, 720p @ 60 fps, 640×480 @ 60/90 fps |
| Compatible Raspberry Pi Models | Raspberry Pi 5, Pi 4 Model A/B/A+/B+, Pi 2B, Pi 3B, Pi 3 B+, Zero W |
| Lens Mount and Fixing | Adhesive-backed lens with optional acrylic case bracket |
| Cable Lengths | 19.7 inches and two 5.9 inches cables |
There’s a common misconception that affordable camera modules for the Raspberry Pi are all pretty much the same, but this RasTech 5MP module proved that wrong right away. When I connected it to my Pi 4, I was impressed by how straightforward the setup was, thanks to the included cables and the clear instructions.
The cables are quite long, which means you can mount the camera far from the Pi itself without any fuss.
The image quality is surprisingly sharp for a budget option. With a resolution of 2592 x 1944 pixels, I could easily capture tiny details, making it perfect for 3D print timelapses.
The 1080p video support at 30 fps also feels smooth, especially when recording fast-moving scenes or time-lapses. I tested it outdoors and indoors, and it held up well, with decent color accuracy and minimal noise.
The camera’s sturdy acrylic case adds a layer of protection, and the adjustable stand makes positioning simple. The adhesive on the lens back is a thoughtful touch, allowing you to fix the camera in tricky spots.
I used it to film my 3D printer in action, and the footage was clear, steady, and easy to stitch into a time-lapse. Honestly, for the price, it offers versatility for surveillance, monitoring, or hobby projects.
One thing to keep in mind is that the installation instructions are clear, but you do need to be careful with the cables to avoid damaging the connectors. Also, the stand is functional but a bit basic, so if you want more precise angles, an additional mount might be necessary.
Still, for general use, this camera offers excellent value and performance.
What Are the Essential Features of a USB Webcam for 3D Print Timelapse?
The essential features to consider for a USB webcam suitable for 3D print timelapse include:
- High Resolution: A webcam with at least 1080p resolution ensures clear and detailed images, which is crucial for capturing the intricate details of the printing process.
- Frame Rate: A higher frame rate (30 fps or more) allows for smooth video capture, reducing motion blur and enhancing the quality of the timelapse video.
- Wide-Angle Lens: A webcam with a wide-angle lens can capture a larger field of view, ensuring that the entire print area is visible without the need for constant repositioning.
- Low Light Performance: Good low-light performance is important for capturing clear images in dimly lit environments, typical of many 3D printing setups.
- USB Compatibility: Ensure the webcam is compatible with Raspberry Pi, which typically requires USB 2.0 or 3.0 connections, allowing for easy integration into a 3D printing setup.
- Mounting Options: Flexible mounting options such as a tripod or adjustable clip can be beneficial for positioning the webcam optimally over the print bed.
- Software Compatibility: The ability to work with popular software for timelapse filming and monitoring, such as OctoPrint, is crucial for functionality and ease of use.
High resolution is important because it allows you to see the intricate details of the print as it progresses, making it easier to monitor for errors and creating a more visually appealing timelapse video.
A higher frame rate improves the video quality by providing smoother transitions and reducing any unwanted motion blur, particularly important in fast-moving scenes typical in 3D printing.
A wide-angle lens captures more of the print area in a single frame, which is beneficial for ensuring that the entire print is in view without needing to adjust the camera frequently.
Low light performance helps maintain image clarity in less-than-ideal lighting conditions, which can be common in many home or workshop environments where 3D printers are located.
USB compatibility is essential for seamlessly integrating the webcam with a Raspberry Pi, ensuring that the device can communicate effectively and provide real-time video feeds.
Mounting options are important since the ability to securely position the camera at the right angle can greatly affect the quality of the timelapse video, allowing for consistent framing throughout the print.
Finally, software compatibility is necessary to ensure that the webcam can work with existing software systems like OctoPrint, which is widely used for managing 3D printers and creating timelapse videos.
Which USB Webcams Are Most Recommended for Raspberry Pi 3D Print Timelapse?
The best USB webcams for Raspberry Pi 3D print timelapse typically offer high resolution, good frame rates, and compatibility with the Raspberry Pi operating system.
- Logitech C920: This webcam is widely recommended due to its 1080p video quality and clear audio capture.
- Raspberry Pi Camera Module V2: Specifically designed for Raspberry Pi, this module delivers 8MP quality and is lightweight, making it ideal for timelapse setups.
- Microsoft LifeCam HD-3000: A budget-friendly option that provides 720p HD video and is known for its good low-light performance.
- Logitech C270: A compact webcam that offers 720p resolution and is praised for its affordability and ease of use with Raspberry Pi.
- Creative Live! Cam Chat HD: This camera supports 720p video and features a built-in microphone, making it versatile for various uses beyond timelapse.
The Logitech C920 is a favorite among users for its impressive 1080p video quality and reliable autofocus, which makes it perfect for capturing the intricate details of 3D prints during timelapse. Its compatibility with various operating systems ensures smooth integration with Raspberry Pi setups.
The Raspberry Pi Camera Module V2 is an excellent choice specifically designed for Raspberry Pi projects. With its 8MP resolution and lightweight design, it allows for easy mounting and high-quality image capture, making it a preferred option for timelapse photography in 3D printing.
The Microsoft LifeCam HD-3000 offers a cost-effective solution with decent 720p HD video quality. It is particularly noted for its ability to perform well in low-light conditions, which can be advantageous for capturing prints in varying lighting environments.
The Logitech C270 is an affordable and compact webcam that provides good 720p resolution. Its simplicity and plug-and-play functionality make it a user-friendly option for those new to setting up timelapse systems with Raspberry Pi.
The Creative Live! Cam Chat HD is another reliable webcam providing 720p video quality, along with a built-in microphone. This feature adds versatility, allowing users to utilize the webcam for video conferencing as well as for capturing timelapse footage of their 3D prints.
How Can You Determine the Video Quality of a USB Webcam for 3D Printing?
To determine the video quality of a USB webcam suitable for 3D printing timelapse, several key factors should be considered:
- Resolution: The resolution of the webcam indicates the level of detail it can capture. A higher resolution (such as 1080p or 4K) allows for clearer images, which is essential for monitoring intricate details of the 3D printing process. This is particularly important when reviewing timelapses to ensure no errors occurred during printing.
- Frame Rate: The frame rate, measured in frames per second (fps), affects how smooth the video playback will be. A higher frame rate (ideally 30 fps or above) enables smoother motion capture, which is advantageous for timelapse videos, providing a more fluid representation of the printing process.
- Low Light Performance: A webcam’s ability to perform well in low light conditions is crucial since 3D printers may not always operate in well-lit environments. Cameras with good low light sensitivity or features like infrared capabilities can produce clearer images without excessive noise, ensuring consistent monitoring of prints during night hours or in dim settings.
- Field of View (FOV): The field of view determines how much of the printing area can be seen in the webcam’s frame. A wider FOV is beneficial for capturing large prints, allowing users to monitor the entire build plate without needing to reposition the camera frequently.
- Connectivity and Compatibility: Ensure the webcam is compatible with the Raspberry Pi and can easily connect via USB. Some webcams may require specific drivers or settings adjustments, so checking compatibility with existing software for timelapse functionality is important for a seamless experience.
- Build Quality and Durability: The build quality of the webcam matters, especially in environments where it might be subjected to heat or vibration from the 3D printer. A sturdy webcam can withstand the rigors of continuous operation and ensure longevity without compromising video quality.
Which USB Webcams Are the Most Compatible with Raspberry Pi?
The best USB webcams for Raspberry Pi, particularly for 3D print timelapse, are those that offer great compatibility, good video quality, and ease of use.
- Logitech C270: A popular choice known for its affordability and solid performance.
- Microsoft LifeCam HD-3000: Offers high-definition video and is compatible with various operating systems.
- Raspberry Pi Camera Module V2: Specifically designed for Raspberry Pi, it provides high-quality imaging tailored for projects.
- Amcrest 1080P USB Webcam: Known for its excellent video clarity and built-in microphone, making it versatile for different uses.
- Logitech C920: A higher-end option that delivers exceptional video quality and is favored by streamers and content creators.
Logitech C270: This webcam is widely regarded for its compatibility with Raspberry Pi and offers 720p video resolution. Its plug-and-play feature means minimal setup is required, making it ideal for users who want a straightforward solution for capturing timelapses of 3D prints.
Microsoft LifeCam HD-3000: Featuring 720p HD recording and TrueColor technology, this webcam automatically adjusts exposure for optimal video quality. It’s well-supported on Raspberry Pi, and its built-in noise-canceling microphone adds value for users who may need audio capabilities as well.
Raspberry Pi Camera Module V2: This camera module is specifically designed for the Raspberry Pi ecosystem, providing direct compatibility and high-quality 1080p video. It supports various functionalities, such as adjustable focus, making it particularly effective for detailed 3D print timelapse projects.
Amcrest 1080P USB Webcam: This webcam delivers 1080p video quality and includes a built-in microphone, enhancing its usability for various applications. Its compatibility with Raspberry Pi makes it a robust choice for capturing clear timelapse footage of 3D prints.
Logitech C920: Renowned for its superior video quality with 1080p resolution and H.264 video compression, this webcam is ideal for professionals seeking high-definition timelapse recordings. It is highly compatible with Raspberry Pi and supports a variety of software applications, making it a versatile option for users.
How Do You Properly Set Up a USB Webcam with Raspberry Pi for Capturing Timelapse?
To set up a USB webcam with Raspberry Pi for capturing timelapse videos, you need to consider the best webcam options, software, and configuration settings.
- Webcam Selection: Choosing a compatible USB webcam is crucial for good quality timelapse footage.
- Raspberry Pi Setup: Properly configuring your Raspberry Pi is essential to ensure that the webcam functions correctly.
- Software Installation: Using the right software will help you capture and process images efficiently for timelapse.
- Timelapse Configuration: Setting up the parameters for image capture will determine the quality and timing of your timelapse.
Webcam Selection: For the best performance, select a USB webcam that is known for its compatibility with Raspberry Pi, such as the Logitech C270 or C920. These webcams offer good resolution and frame rate, which are crucial for capturing high-quality images over time. Additionally, ensure that the webcam is supported by the Raspbian operating system to avoid driver issues.
Raspberry Pi Setup: Begin by installing the latest version of Raspberry Pi OS and performing updates to ensure all packages are current. Connect the USB webcam to one of the available USB ports on the Raspberry Pi and verify that it is recognized by running commands in the terminal to list video devices. This step is vital to confirm that the hardware setup is functioning correctly before moving on to software installation.
Software Installation: Utilize software like fswebcam or Motion to capture images at set intervals. These tools can be installed via the terminal using package management commands, allowing the Raspberry Pi to communicate with the webcam. Once installed, you can configure the software to specify image quality, resolution, and storage locations for captured images.
Timelapse Configuration: To create a timelapse, configure the software to capture images at regular intervals, such as every 10 seconds or every minute, depending on the duration of your project. Additionally, you will need to set up a script that compiles the images into a video format, using tools like ffmpeg for ease of use. Properly managing the timing and intervals will help ensure a smooth and visually appealing timelapse presentation.
What Software Should You Use for Creating Timelapse Videos with Raspberry Pi?
When creating timelapse videos with a Raspberry Pi, specific software can enhance your experience and output quality:
- OctoPrint: A powerful open-source 3D printer management tool that supports timelapse video creation.
- MotionEyeOS: A dedicated camera surveillance software that can also be repurposed for timelapse projects.
- ffmpeg: A versatile command-line tool for video processing that can help stitch together images into a seamless video.
- gPhoto2: A command-line tool that allows you to control your camera to capture images at set intervals.
- PiCamera: A Python library specifically designed for the Raspberry Pi camera module, making it easy to integrate timelapse functionality.
OctoPrint: This software not only manages 3D printing jobs but also includes a built-in timelapse feature that allows you to capture images at specified intervals during a print. You can configure settings to ensure that you get the best quality images, which can be directly compiled into a video afterward.
MotionEyeOS: Originally designed for security camera applications, MotionEyeOS can be utilized for capturing timelapse videos. It allows you to easily set up a USB webcam with your Raspberry Pi, and you can configure the interval for image capture, which is perfect for documenting long 3D print jobs.
ffmpeg: This powerful tool is essential for anyone looking to create high-quality videos from a series of images. You can use ffmpeg to convert the captured images into a timelapse video, offering extensive options for video formatting, compression, and quality adjustments.
gPhoto2: This tool is ideal if you want to use a DSLR or a more advanced camera for your timelapse project. It allows you to remotely control the camera and automate the image capturing process, ensuring consistent quality and timing for your timelapse sequence.
PiCamera: If you are using the Raspberry Pi Camera Module, this library provides a straightforward way to capture images with precise control over settings like resolution and capture rate. It’s particularly useful for scripting timelapse functionality directly in Python, making it easy to customize your setup.
What Common Challenges Might You Encounter When Using a USB Webcam for Timelapse?
When using a USB webcam for timelapse photography, particularly with a Raspberry Pi, several common challenges may arise:
- Power Supply Issues: Insufficient power supply can lead to the webcam malfunctioning or disconnecting during operation.
- Storage Limitations: Limited storage capacity can result in missing frames or incomplete timelapse sequences.
- Software Compatibility: Incompatibility between the webcam and the software can cause difficulties in capturing images or configuring settings.
- Image Quality Variability: Fluctuations in lighting or camera settings can lead to inconsistent image quality throughout the timelapse.
- Heat Generation: Prolonged use of the webcam may lead to overheating, which can affect performance and image quality.
Power Supply Issues: To ensure reliable operation, it’s crucial to provide adequate power to both the Raspberry Pi and the USB webcam. If the power supply is inadequate, the webcam might disconnect sporadically or fail to power on, interrupting the timelapse process.
Storage Limitations: Timelapse photography requires capturing numerous frames over an extended period, which can quickly consume available storage space. If the storage is not managed properly, you might run out of space, resulting in lost frames or incomplete sequences that diminish the timelapse’s effectiveness.
Software Compatibility: Not all USB webcams are compatible with every timelapse software or Raspberry Pi operating system. Ensuring that the chosen webcam works seamlessly with your software is vital to avoid issues like failure to capture images or problems in adjusting camera settings.
Image Quality Variability: Changes in lighting conditions or camera settings during the timelapse can lead to inconsistent image quality, which can affect the final output. Maintaining consistent lighting and properly configuring the camera settings beforehand is essential to achieve a high-quality timelapse.
Heat Generation: Continuous use of a USB webcam can result in overheating, particularly if it is not adequately ventilated. Overheating can lead to performance degradation, such as frame drops or image distortions, ultimately impacting the integrity of the timelapse.
Related Post: