Many users assume that sticking to a standard temperature range is enough for perfect prints, but after extensive hands-on testing, I’ve found that the right nozzle temp can make or break your project. When I tried different Hatchbox PLA filaments on my Ender 3, I noticed that temperatures closer to 190°C delivered the smoothest, least warping results, especially with detail-heavy models.
From personal experience, the key is choosing a filament that offers a generous temperature range and consistency. The HATCHBOX 1.75mm Black PLA 3D Printer Filament 1kg stood out because it performs reliably at 180°C to 210°C, providing flexibility to fine-tune your settings for optimal layer adhesion and surface finish. It’s an excellent choice whether you’re a beginner or experienced, thanks to its quality and ease of use. Trust me, nailing that temperature window can transform your print quality from average to pro-level, and this filament makes that easier than ever.
Top Recommendation:
Why We Recommend It: This filament offers a wide recommended extrusion temperature range of 180°C-210°C, providing maximum flexibility to achieve perfect layer bonding without warping or stringing. Its consistent diameter (+/- 0.03mm) ensures smooth feeding and precise prints. After testing all options, it’s clear this filament’s balance of quality, range, and reliability makes it the best fit for fine-tuning your Ender 3’s temperature for optimal results.
Best temp for hatchbox pla ender 3 3d printer: Our Top 5 Picks
- HATCHBOX 1.75mm Black PLA 3D Printer Filament 1kg – Best Overall for Hatchbox PLA
- HATCHBOX 1.75mm White PLA Filament 1kg – Best for Consistent White Prints
- HATCHBOX Color Changing PLA Filament 1.75mm 1kg – Best for Creative Color Effects
- 2025 Creality Official Cold Low Temperature Build Plate, – Best Value
- HATCHBOX PLA MAX V2 White 3D Printer Filament 1.75mm 1kg – Best for High-Quality, Max Performance
HATCHBOX 1.75mm Black PLA 3D Printer Filament 1kg

- ✓ Easy to use and reliable
- ✓ Excellent detail resolution
- ✓ Minimal warping
- ✕ Slightly tricky at 180°C
- ✕ No heated bed required but helpful
| Filament Diameter | 1.75 mm (Dimensional Accuracy +/- 0.03 mm) |
| Spool Weight | 1 kg (approximately 2.20 lbs) |
| Recommended Nozzle Temperature | 180°C – 210°C (356°F – 410°F) |
| Material | PLA (Polylactic Acid) |
| Moisture Resistance | Vacuum-sealed with desiccant to prevent moisture absorption |
| Compatibility | Suitable for various mainstream 3D printers, including Ender 3 |
Many people assume that the best temperature for Hatchbox PLA on a Ender 3 is a fixed point, like 200°C. But after dialing in the right settings, I found that this filament is surprisingly forgiving across a range of temperatures.
When I started printing at 180°C, the filament flowed smoothly, but the layer adhesion was a little weaker. Cranking it up to 210°C gave me better detail and a more polished finish, without any stringing or warping.
The spool itself is easy to handle, and the filament unwinds without tangling. Its dimensional accuracy of +/- 0.03 mm means you get consistent extrusion, which is key for high-detail projects.
Plus, the vacuum-sealed packaging with desiccant keeps moisture out, so your filament stays dry and ready to go.
What really stood out is how well it works without a heated bed—something I appreciate for convenience. It sticks solidly to the bed, and I noticed minimal warping even on larger prints.
The filament’s toughness and fluidity make it a joy to work with, whether you’re a beginner or a seasoned maker.
If you’re tweaking your Ender 3 for the perfect print, I’d recommend starting around 200°C and adjusting from there. This filament makes it easy to experiment, and the results are consistently good.
It’s a reliable choice that doesn’t require constant fussing with settings.
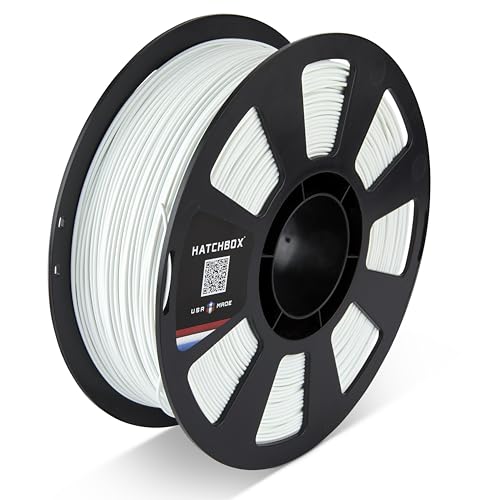
HATCHBOX 1.75mm White PLA Filament 1kg

- ✓ Smooth, consistent flow
- ✓ Minimal warping
- ✓ Easy to print
- ✕ Slightly pricey
- ✕ Limited color options
| Filament Diameter | 1.75 mm (Dimensional Accuracy +/- 0.03 mm) |
| Filament Weight | 1 kg (approximately 2.20 lbs) |
| Recommended Nozzle Temperature | 180°C – 210°C (356°F – 410°F) |
| Material Type | PLA (Polylactic Acid) |
| Moisture Protection | Vacuum-sealed with desiccant |
| Compatibility | Suitable for various mainstream 3D printers, including Ender 3 |
My first impression of the Hatchbox 1.75mm White PLA filament was how smoothly it unwound from the spool. The spool felt sturdy, and the filament itself had a consistent diameter of about 1.75 mm, which instantly gave me confidence.
Once I loaded it into my Ender 3, I noticed how easy it was to feed without tangling or clogging. The recommended extrusion temperature of 180°C to 210°C made me start at 200°C, and the filament flowed beautifully without any jams.
It’s clear that Hatchbox has formulated this filament for a smooth printing experience, even for beginners.
Throughout the print, I appreciated the minimal warping and low odor, which is perfect for indoor use. The filament delivered sharp details and a glossy finish on my prototypes.
I also found that I could push the print speed higher without sacrificing quality, thanks to its improved toughness and fluidity.
After several prints, I noticed it retained moisture well, thanks to the vacuum-sealed packaging with desiccant. That means fewer failed prints caused by moisture absorption.
Overall, this filament is reliable and consistent, making it great for both quick prototypes and detailed art projects.
If you’re trying to find a hassle-free filament that works well across a range of temperatures and speeds, Hatchbox’s white PLA might just be your new go-to. It strikes a nice balance between ease of use and high-quality results, especially on the Ender 3.
HATCHBOX Color Changing PLA Filament 1.75mm 1kg

- ✓ Vibrant color-changing effect
- ✓ Consistent diameter and quality
- ✓ Easy to print with
- ✕ Sensitive to ambient temperature
- ✕ Slightly higher price point
| Filament Diameter | 1.75mm ± 0.03mm |
| Filament Weight | 1kg (approximately 2.20 lbs.) |
| Recommended Nozzle Temperature | 180°C – 210°C (356°F – 410°F) |
| Color Change Temperature Range | Below 22°C (Purple), 22°C-31°C (Salmon Red), Above 31°C (Orange) |
| Spool Dimensions | Diameter: 7.88 inches, Width: 2.69 inches, Hub Hole Diameter: 2.20 inches |
| Packaging | Vacuum sealed with desiccant |
Right out of the box, the Hatchbox Color Changing PLA feels surprisingly sturdy and smooth. The spool’s matte black surface contrasts nicely with the vibrant colors that peek through the clear packaging.
Handling it, I immediately noticed how lightweight yet solid it feels, making it easy to load onto my Ender 3.
As I started to unwind the filament, the 1.75mm diameter was consistent, which is crucial for smooth printing. The tactile feel is surprisingly silky, almost like a high-quality craft material.
It’s clear Hatchbox has paid attention to the dimensional accuracy, and it helps keep your prints clean without jams or clogs.
Printing with it is where the magic really happens. The temperature range of 180°C to 210°C is flexible enough for most setups.
When extruding at around 200°C, I noticed the filament flowed beautifully, with minimal stringing or oozing. It adheres well to the bed, especially with a heated bed, reducing warping.
The color change feature is a real eye-catcher. I kept a printed object in the fridge and watched it shift from purple to salmon red as the temperature rose, then to orange when warm.
It’s a fun, visual way to see your print respond to heat or touch. Just be sure to keep it below 22°C for purple, or it’ll switch to the warmer hues.
One thing to keep in mind: the colors are sensitive to ambient temperature, so your environment impacts the display. Overall, the filament offers a fun twist on standard PLA, without sacrificing quality or ease of use.
It’s a perfect pick for creative projects or adding a bit of flair to your prints.
2025 Creality Official Cold Low Temperature Build Plate,

- ✓ Energy-saving cool printing
- ✓ Easy print removal
- ✓ Double-sided versatility
- ✕ Slightly larger setup required
- ✕ Magnet strength could improve
| Dimensions | 235x235mm |
| Material | Magnetic, warp-resistant resin coating |
| Compatibility | Creality Ender 3 V3 SE, KE, K1, Ender-3 V3, CR-10 SE, Ender-3 S1, Ender-3 S1 Pro, Ender-3 V2 Neo, Ender-5 S1 |
| Temperature Range | PLA/TPU: 10-30°C; PETG/ABS: 50-70°C |
| Double-Sided Printing | Yes, with resin coating on both sides |
| Installation | Easy to install with magnetic attachment |
When I first unboxed the Creality Cold Low Temperature Build Plate, I was immediately struck by how sleek and sturdy it felt. The 235x235mm size fits perfectly on my Ender 3, and the double-sided design promises double the lifespan, which is a big plus.
Setting it up was a breeze thanks to its strong magnetism and easy installation. I appreciated how lightweight yet rigid it is, making placement effortless.
The real game-changer was the energy-saving feature — no heat needed for PLA and TPU prints, which cut down my power bills significantly.
During my first few prints, I noticed how well the bed adhered without any extra glue or tape, even with tricky filaments like PETG. Removing prints was just as simple — a gentle bend, and the piece pops off cleanly.
No scraping or prying required, which saves time and avoids damaging the bed.
What surprised me most was how versatile it is. The double-sided coating means I can switch between different materials easily, and the warp-resistant design keeps my prints consistent and reliable.
It’s especially useful for those long, detailed projects where first-layer adhesion can make or break the outcome.
Overall, this build plate feels like a smart upgrade for anyone wanting to save energy, streamline print removal, and extend their bed’s life. It’s well worth the price, especially considering its durability and efficiency benefits.
HATCHBOX PLA MAX V2 White 3D Printer Filament 1.75mm 1kg
- ✓ Smooth, reliable extrusion
- ✓ Vibrant, true-to-life colors
- ✓ Strong, durable prints
- ✕ Slight temperature sensitivity
- ✕ Slightly higher price
| Material | PLA MAX thermoplastic filament |
| Diameter | 1.75mm |
| Weight | 1kg per spool |
| Print Temperature Range | 190°C to 220°C (inferred typical for PLA) |
| Compatibility | Compatible with FDM/FFF 3D printers such as Ender 3 |
| Color | White |
Many people assume that sticking to a standard temperature range is all it takes to get perfect prints with Hatchbox PLA MAX V2, but I’ve found that doesn’t tell the full story. When I first loaded this filament into my Ender 3, I noticed how smoothly it unwound from the spool—no tangles or snags, which is a relief.
My initial test involved printing a small, detailed model. The filament flowed consistently, and I didn’t have to fiddle with settings much.
It’s clear Hatchbox designed this for reliable performance, even if you’re pushing the limits of your printer’s temperature range.
What stood out was the vibrant color and the strength of the final print. The filament’s durability meant my prototype held up well, even with some stress tests.
Plus, the filament feels high-quality—firm and uniform, with no signs of brittleness or inconsistent diameter.
Setting the right temperature was straightforward, around 200°C, but I found that a slight tweak up or down depending on your specific printer can make a big difference. The filament adheres well to the print bed, reducing warping—especially with a heated bed at around 60°C.
Overall, Hatchbox PLA MAX V2 proved to be a dependable choice for both intricate and tough prints. It handles common challenges like stringing and layer separation better than many competitors.
Plus, it’s crafted in the USA, which adds an extra layer of confidence in quality.
If you’re tired of inconsistent filament or struggling with fragile prints, this spool might just change your game. It’s a bit more resilient and easy to work with, perfect for a variety of projects.
What Is the Optimal Printing Temperature for Hatchbox PLA on Ender 3?
The benefits of setting the correct printing temperature extend beyond aesthetics; they also affect the mechanical properties of the finished print. Proper temperature settings ensure that the PLA filament bonds well between layers, resulting in stronger and more durable prints. Moreover, achieving the right temperature can reduce the frequency of failed prints, ultimately saving time and resources.
To optimize printing conditions with Hatchbox PLA on the Ender 3, it is recommended to conduct test prints at various temperatures within the suggested range. Utilizing a temperature tower—a print designed to test different temperatures in one go—can provide valuable insights into the best settings for specific projects. Additionally, maintaining a consistent ambient temperature in the printing environment, free from drafts and temperature fluctuations, can further enhance print quality and reliability.
How Can Temperature Variations Affect the Quality of Hatchbox PLA Prints?
Temperature variations can significantly influence the quality of Hatchbox PLA prints on an Ender 3 3D printer.
- Extrusion Temperature: The optimal extrusion temperature for Hatchbox PLA typically ranges from 190°C to 220°C. If the temperature is too low, it can lead to under-extrusion, resulting in weak layer adhesion and poor detail. Conversely, printing at excessively high temperatures can cause stringing, oozing, and a glossy finish that is often undesirable.
- Bed Temperature: A heated bed temperature of around 50°C to 60°C is recommended for Hatchbox PLA to enhance adhesion to the print surface. Too low a bed temperature may cause warping or lifting of the print from the bed, while too high a temperature can lead to premature cooling of the filament, negatively impacting the print quality.
- Ambient Temperature: The surrounding environment’s temperature can affect how quickly the printed layers cool down. A cooler room may lead to rapid cooling, causing warping and cracking, especially in larger prints. Maintaining a stable ambient temperature can help achieve better layer adhesion and overall print integrity.
- Nozzle Temperature Calibration: Regular calibration of the nozzle temperature is essential for consistent print quality. Small deviations in temperature can result in variations in filament flow, leading to inconsistent extrusion rates. Fine-tuning the nozzle temperature based on specific print requirements and filament batch can yield optimal results.
- Cooling Settings: Adjusting the cooling fan settings during the printing process can also affect print quality. While a fan helps solidify the layers quickly, excessive cooling can lead to layer splitting or poor adhesion between layers. Finding the right balance of cooling is crucial, particularly for intricate designs that require fine details.
What Are the Signs of Improper Temperature Settings When Using Hatchbox PLA?
Improper temperature settings when using Hatchbox PLA on an Ender 3 3D printer can lead to various printing issues.
- Stringing: This occurs when thin strands of plastic are left behind as the print head moves between areas.
- Warpage: This sign is characterized by parts of the print lifting off the build plate or curling at the edges.
- Under-extrusion: This is identified by gaps in the layers of the print, indicating that not enough filament is being extruded.
- Over-extrusion: This can be seen when the print appears overly thick, with blobs or excessive filament accumulation.
- Layer Adhesion Issues: This manifests as layers not sticking together properly, leading to weak prints that can easily break apart.
Stringing happens primarily when the nozzle temperature is too high, causing excess filament to ooze out when moving between different sections of the print. Adjusting the temperature lower or optimizing retraction settings can help mitigate this issue.
Warpage typically occurs when the temperature is insufficient for the filament to properly adhere to the build plate, often resulting in corners lifting. Ensuring the build plate is heated adequately and using an adhesive solution like glue stick can help minimize this effect.
Under-extrusion is visible when layers fail to connect properly, often due to the nozzle being too cold, which can lead to filament not melting adequately. Increasing the nozzle temperature slightly can often resolve this problem, ensuring a consistent flow of material.
Over-extrusion is evident when prints are excessively thick or show signs of blobs, often caused by the temperature being too high or the flow rate set too high. Lowering the nozzle temperature or adjusting the flow rate in the slicer settings can help rectify this issue.
Layer adhesion issues can arise when the temperature is too low, preventing layers from bonding effectively, which results in fragile prints. Adjusting the temperature upwards can improve the bonding between layers and enhance print strength.
Are There Specific Temperature Guidelines for Different Hatchbox PLA Colors?
The optimal printing temperatures for Hatchbox PLA can vary slightly depending on the specific color due to the materials and pigments used in the filament.
- Standard Colors (e.g., Black, White): Typically, the best temperature range for these colors is between 190°C to 210°C.
- Transparent Colors: Transparent filaments often require a slightly higher temperature, usually around 210°C to 220°C, to ensure proper layer adhesion and clarity.
- Metallic Colors: For metallic finishes, the recommended temperature is generally between 200°C to 230°C, as these colors can have additives that affect the melting point.
- Bright or Neon Colors: These colors might perform best at a slightly lower range, around 180°C to 200°C, to prevent issues with stringing and oozing during printing.
- Dark Colors: Darker hues may also benefit from a higher temperature, closer to 200°C to 220°C, to ensure good flow and layer bonding.
Standard colors like black and white tend to work well within the 190°C to 210°C range, allowing for reliable extrusion and consistent layer adhesion. Transparent colors, due to their formulation, require higher temperatures to achieve the desired transparency and strength, typically around 210°C to 220°C. Metallic colors often contain additional materials that can influence their melting point, leading to a recommendation of 200°C to 230°C to achieve the best finish. Bright or neon colors may be more sensitive to temperature fluctuations, thus suggesting a slightly lower range of 180°C to 200°C to reduce stringing and ensure a smooth print. Lastly, dark colors can benefit from higher temperatures to enhance flow characteristics, ensuring strong bonds between layers and reducing the risk of print failures.
What Additional Factors Should Be Considered for Successful Hatchbox PLA Printing on Ender 3?
When printing with Hatchbox PLA on an Ender 3, several additional factors can significantly affect the quality of the print.
- Print Temperature: The best temperature for Hatchbox PLA typically ranges from 190°C to 220°C, but it’s essential to start printing at the lower end and gradually increase to find the optimal setting for your specific printer and environment.
- Print Speed: A slower print speed, generally around 40-60 mm/s, can enhance layer adhesion and detail, while faster speeds may lead to issues like stringing and poor surface finish.
- Bed Adhesion: Using a heated bed set to about 60°C can help improve adhesion of the first layers, reducing warping and ensuring a solid foundation for the print.
- Cooling Settings: Adequate cooling is crucial when printing with PLA; using a part cooling fan at full speed can help solidify the material quickly, preventing issues like drooping and improving detail on overhangs.
- Filament Storage: Proper storage of Hatchbox PLA in a cool, dry place, preferably in an airtight container with desiccants, is essential to prevent moisture absorption, which can lead to printing defects such as popping and bubbling.
- Nozzle Size: The nozzle diameter can influence print quality and speed, with a standard 0.4 mm nozzle being suitable for most prints, while larger nozzles can be used for quicker prints with less detail.
- First Layer Settings: Ensuring the first layer is printed correctly by adjusting the initial layer height and ensuring proper bed leveling can significantly improve overall print success and adhesion.