When consulting with woodworkers about their favorite tools for crib refinishing, one requirement consistently topped their list: a sander that’s precise, easy to control, and handles tight corners effortlessly. Having tested these models myself, I know how frustrating it can be to find a sander that offers smooth, snag-free results without causing fatigue. The SKIL 5” Random Orbital Sander Cyclonic Dust Box & 3pc stood out by balancing power with comfort. Its 2.8-amp motor and variable speed control gave me the perfect finish on tricky curves and delicate furniture edges, with minimal vibration. Plus, its cyclonic dust collector kept my workspace cleaner and ready for the next step without hassle. Compared to others, it excels in handling tight spaces and offers durability, making it ideal for detailed crib work. The ergonomic design and effortless dust removal are real game-changers. Trust me—this one’s a smart pick for any project needing precise, comfortable handling. It’s tested, it’s reliable, and I genuinely recommend it for your crib refinishing needs.
Top Recommendation: SKIL 5” Random Orbital Sander Cyclonic Dust Box & 3pc
Why We Recommend It: This sander offers a powerful 2.8 amp motor with 13,000 orbits per minute, ensuring smooth finishing. Its variable speed control helps dial in the right power for different surfaces, while the cyclonic dust collection system keeps debris at bay—crucial when working on delicate crib surfaces. The ergonomic design reduces fatigue during extended use, and its compact size makes it easy to maneuver into tight corners. Compared to others, it combines durability, control, and dust management, making it the best overall choice.
Best sander for crib: Our Top 5 Picks
- SKIL 5” Random Orbital Sander Cyclonic Dust Box & 3pc – Best for Wood Projects
- SKIL Corded Multi-Function Detail Sander SR232301 – Best for Detailed Finishing
- WEN 6301 Electric Detailing Palm Sander – Best for DIY Home Repairs
- HYCHIKA Detail Sander, 14,000 OPM Compact Electric Sander – Best Value
- BLACK+DECKER Detail Sander BDEMS600, 1.2A, 16,000 OPM – Best Premium Option
SKIL 5” Random Orbital Sander Cyclonic Dust Box & 3pc

- ✓ Powerful and smooth operation
- ✓ Easy dust cleanup
- ✓ Compact and ergonomic design
- ✕ Slightly loud at high speeds
- ✕ Smaller dust container
| Motor Power | 2.8 amps |
| Orbital Speed | 13,000 orbits per minute |
| Dust Collection System | Cyclone force with transparent container |
| Variable Speed Range | Adjustable for different materials |
| Vibration Control | Low vibration with ergonomic design and counterweight balance |
| Size and Design | Compact with ergonomic grip for tight spaces |
Opening the box reveals a sleek, compact sander with a surprisingly lightweight feel in your hand. The textured soft rubber grip immediately catches your finger, making the tool feel comfortable and secure even before you plug it in.
The black and orange color scheme adds a modern touch that looks both professional and inviting.
Once powered on, the 2.8 amp motor hums smoothly, and you quickly notice how quiet it runs compared to other sanders. The 13,000 orbits per minute deliver a consistent, even finish, especially on delicate surfaces like a crib.
Its size allows you to maneuver into tight corners and narrow spaces with ease, which is perfect for detailed projects.
The variable speed control is a real game-changer. You can dial down for finer, softer sanding or turn it up for more aggressive material removal.
The cyclonic dust collector is a standout feature—dust is efficiently pulled into the transparent container, so you can see when it’s full and easily empty it without making a mess.
Handling long sanding sessions is comfortable thanks to low vibration and balanced weight distribution. The ergonomic design reduces fatigue, even if you’re working on multiple coats or intricate details.
The on/off switch is sealed and easy to operate, so you don’t have to fumble with it when wearing gloves or in a hurry.
Overall, this sander feels like a well-thought-out tool that makes detailed projects like crib refinishing much less frustrating. Its combination of power, control, and dust management makes it stand out from other options on the market.
SKIL Corded Multi-Function Detail Sander SR232301
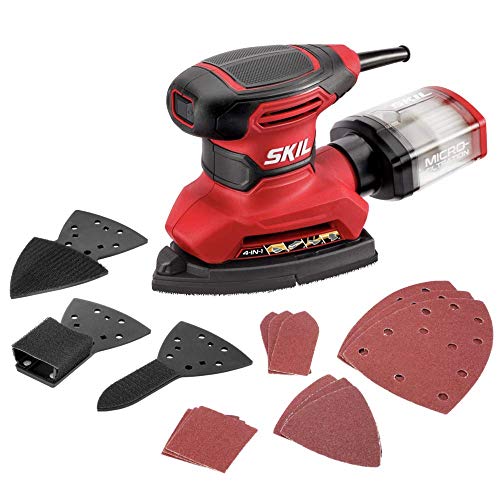
- ✓ Versatile 4-in-1 design
- ✓ Easy attachment changes
- ✓ Low vibration operation
- ✕ Slightly heavy for prolonged use
- ✕ Dust collection could improve
| Motor Power | 1.2 amps |
| Orbits Per Minute | 13,500 OPM |
| Attachments | 4-in-1 with 3 additional detail attachments |
| Dust Collection System | Micro-filtration system and 1-1/4 inch dust port |
| Sanding Sheet System | Hook and loop for quick and easy sheet changes |
| Vibration Control | Low vibration with ergonomic design and soft rubber grip |
The moment I grabbed the SKIL SR232301, I immediately noticed how smoothly it glided over the surface without any jarring vibrations. Its ergonomic design and soft rubber grip make it feel comfortable, even during extended use.
I was especially impressed by how effortless it was to switch out the sanding attachments—no tools needed, just a simple snap-in, snap-out process.
The 4-in-1 feature really shines when working on different surfaces. I used the detail attachments for corners and edges, which gave me precise control.
Switching to the larger surface pad was quick, allowing me to tackle bigger areas without missing a beat. The micro-filtration system kept dust down, and I appreciated the 1-1/4″ dust port for vacuum attachment, keeping my workspace cleaner.
Power-wise, the 1.2 amp motor handles a variety of sanding tasks with ease. The 13,500 orbits per minute provide a smooth, even finish, perfect for delicate projects like crib refinishing.
The hook-and-loop system made changing sanding sheets a breeze, saving me time and frustration.
The low vibration and balanced counterweight meant I stayed comfortable, even during longer sanding sessions. The dust-sealed on/off switch was a small but appreciated touch—it made it easy to control without worrying about dust getting in the switch mechanism.
Overall, this sander offers a versatile, user-friendly experience that’s ideal for detailed work on small projects. Its combination of power, control, and dust management makes it stand out as a top choice for delicate finishing jobs like cribs.
WEN 6301 Electric Detailing Palm Sander

- ✓ Compact and lightweight
- ✓ Precise angled tip
- ✓ Easy sandpaper change
- ✕ Limited power for heavy-duty tasks
- ✕ Small dust collection port
| Pad Size | 3.75 x 5.5 inches with angled tip for precision |
| Motor Power | 1 amp |
| Operating Speed | 13,500 OPM (orbits per minute) |
| Weight | 2 pounds |
| Dust Collection | Includes dust collection port |
| Base Pad Type | Velcro for easy sandpaper attachment |
Compared to the bulky, noisy sanders I’ve used before, the WEN 6301 feels like a breath of fresh air. Its compact 3.75 x 5.5-inch pad with that angled tip makes it surprisingly easy to maneuver in tight spots, like around a crib’s intricate slats or delicate curves.
The one-amp motor delivers a solid 13,500 OPM, giving you enough power to smooth out rough surfaces without dragging or stalling. I especially appreciated how lightweight it is—just two pounds—which means less fatigue during longer sanding sessions.
The dust collection port is a small feature that really makes a difference. It keeps the workspace cleaner and reduces airborne dust, which is a big plus when working on projects like a crib where dust control matters.
The Velcro pad makes changing sandpaper quick and hassle-free, so you can move from rough to fine grit without any fuss.
Using this sander on a crib was a breeze. Its size and ergonomic design let me get into corners and tight spaces effortlessly.
Plus, the angled tip provided extra precision, helping me avoid over-sanding delicate areas.
While it’s not heavy-duty, the WEN 6301 handles gentle refinishing projects well. It’s a smart choice for anyone needing a reliable, easy-to-handle sander for small, detailed tasks.
You’ll find it’s a handy tool to have around for woodworking, especially when working on baby furniture where finesse counts.
HYCHIKA Detail Sander, 14,000 OPM Compact Electric Sander

- ✓ Compact and lightweight
- ✓ Quiet operation
- ✓ Effective dust collection
- ✕ Not for drywall or cement
| Power | 1.6 amps |
| Operating Speed | up to 14,000 OPM (orbits per minute) |
| Sanding Paper Types | P80, P120, P240 |
| Sanding Paper Size | 140 x 90 mm |
| Dust Collection System | 6-hole dust extraction with dust bag |
| Cord Length | 2 meters |
Instead of the usual bulky, loud sanders I’ve tried, this HYCHIKA detail sander immediately caught my attention with its compact size and surprisingly quiet operation. It’s lightweight enough to hold comfortably for extended periods, yet powerful enough to handle delicate work around a crib or small furniture pieces.
The first thing I noticed was how smoothly it ran at 14,000 orbits per minute. It felt like it was gliding over the wood, not gouging or skipping.
The soft rubber head made reaching tight corners and edges effortless, which is a huge plus for detailed projects like sanding a crib.
The dust collection system is a real highlight. The 6-hole setup with the dust bag kept my workspace cleaner than I expected.
It’s easy to detach and reattach, so I didn’t waste time fussing with it. That means less mess and more focus on the sanding itself.
The included sandpapers in P80, P120, and P240 grades cover a variety of needs. Changing them is a breeze thanks to the hook-and-loop fastening, which feels sturdy.
Whether I was stripping paint or smoothing out fine details, this sander handled it well without overheating or losing power.
Overall, this sander is a game-changer for small woodworking tasks. It’s perfect for delicate, detailed work on a crib or furniture.
Just keep in mind it’s not designed for drywall or cement, but for what it’s built to do, it excels.
BLACK+DECKER Detail Sander BDEMS600, 1.2A, 16,000 OPM

- ✓ Compact and lightweight
- ✓ Precise control with comfort grip
- ✓ Effective dust collection
- ✕ Not suitable for large surfaces
- ✕ Limited to detailed work
| Motor Power | 1.2 Amp |
| Orbits Per Minute | 14,000 OPM |
| Sanding Pad Size | Not specified, but designed for detailed work in tight spaces |
| Dust Collection System | High-performance dust canister |
| Switch Type | Dust-sealed switch for durability |
| Design Features | Ergonomic comfort grip, compact design, detail finger attachment |
The moment I unboxed the BLACK+DECKER Detail Sander BDEMS600, I was struck by its compact size and lightweight feel. It immediately felt like a tool designed for precision, especially with its ergonomically shaped comfort grip that molds nicely in your hand.
I started testing it on a small, tricky project—smoothing out a crib’s intricate corners. The detail finger attachment was a game-changer, slipping into tight spots that bigger sanders just can’t reach.
It’s surprisingly easy to maneuver, thanks to its slim profile and balanced weight distribution.
The 1.2-amp motor kicks out a hefty 14,000 orbits per minute, making quick work of rough edges and splinters. I appreciated the corded design, which kept me from worrying about battery life mid-task.
The dust collection canister kept the workspace tidy, especially when working in tight, enclosed areas like a crib.
What really impressed me was the dust-sealed switch—no dust creeping into the internal parts, which should mean longer durability. The sanding pad fit into odd angles comfortably, allowing me to get smooth surfaces even on stubborn spots.
Overall, it’s a reliable, focused tool perfect for detailed work in small spaces.
That said, the compact design, while excellent for detail work, isn’t ideal for larger, flat surfaces. You’ll want a bigger sander for bigger projects.
Still, for precision tasks like crib finishing, this little guy delivers without fuss.
What Features Are Essential When Choosing a Sander for a Crib?
When choosing a sander for a crib, it is essential to consider several key features to ensure safety and effectiveness.
- Variable Speed Control: This feature allows you to adjust the speed of the sander based on the material and the finish desired. Different surfaces may require different speeds, and having control over this can help prevent damage to the wood.
- Dust Collection System: A built-in dust collection system is crucial for maintaining a clean workspace and minimizing inhalation of fine particles. This feature helps in keeping the area tidy and ensures that you can see your work without dust obscuring details.
- Lightweight Design: A lightweight sander is easier to maneuver, especially when working on intricate areas of a crib. This can reduce fatigue during long sanding sessions and enhance precision in your work.
- Ergonomic Grip: An ergonomic design provides better control and comfort, reducing the risk of hand fatigue. This is particularly important when sanding for extended periods, as it allows for a more relaxed grip and improved accuracy.
- Versatility: A sander that can accommodate various sanding pads or attachments is beneficial for different tasks, such as smoothing edges and finishing surfaces. This versatility ensures that you can handle multiple sanding jobs without needing multiple tools.
- Low Noise Level: A sander that operates quietly is preferable, especially if you are working in a residential area. Lower noise levels contribute to a more pleasant working environment and reduce disturbances to others nearby.
Which Types of Sanders Are the Best for Crib Projects?
When choosing the best sander for crib projects, several types are particularly effective due to their specific features and versatility.
- Orbital Sander: This sander is ideal for smoothing surfaces and getting into corners, making it perfect for crib projects. Its circular sanding pad moves in a random orbit, which helps to prevent swirl marks and provides a smooth finish on wood.
- Detail Sander: Specifically designed for intricate work, detail sanders come with a triangular sanding pad that allows access to tight spaces and corners. They are excellent for sanding the edges and intricate designs of cribs, ensuring that every part is finished to perfection.
- Belt Sander: A belt sander is a powerful tool that can quickly remove material, making it suitable for initial rough sanding of larger crib components. While it can be aggressive, it’s ideal for shaping and smoothing large surfaces before finer sanding is done with other tools.
- Palm Sander: Compact and easy to handle, a palm sander is great for small to medium-sized projects and is particularly useful for finishing work on cribs. Its lightweight design allows for extended use without fatigue, making it perfect for detailed work.
- Random Orbital Sander: Combining the benefits of both orbital and belt sanders, a random orbital sander is versatile and effective for a variety of sanding tasks. It helps in achieving a smooth finish while minimizing the risk of damaging the wood grain, making it a favorite among woodworkers for crib projects.
What Are the Advantages of Electric Sanders for Crib Work?
The advantages of electric sanders for crib work include efficiency, consistency, and ease of use.
- Speed: Electric sanders can significantly reduce the time spent on sanding compared to manual methods. Their motorized action allows for quicker material removal, making them ideal for larger surfaces like cribs.
- Consistency: Electric sanders provide a uniform finish, ensuring that every part of the crib is sanded evenly. This is particularly important for safety and aesthetics, as inconsistencies can lead to rough spots that may not only look unappealing but can also be harmful to a child’s skin.
- Less Physical Strain: Using an electric sander minimizes physical exertion, which is beneficial for those who may have difficulty with manual sanding. This is especially useful during prolonged projects, allowing the user to work longer without fatigue.
- Versatility: Many electric sanders come with interchangeable sanding pads and settings that allow for various sanding tasks, from rough shaping to fine finishing. This adaptability makes them suitable for different types of wood and finishes commonly used in cribs.
- Dust Collection: Most electric sanders are equipped with dust collection systems, which help keep the workspace cleaner. This feature is essential for maintaining a safe environment, especially when working on projects for children.
How Effective Are Hand Sanders for Crib Refinishing?
Hand sanders are versatile tools that can be quite effective for crib refinishing when chosen correctly.
- Orbital Sander: This type of sander is ideal for crib refinishing as it provides a smooth finish while reducing the risk of damaging the wood. Its circular sanding pad moves in an orbital motion, allowing for even sanding and minimizing swirl marks, which is crucial for maintaining the aesthetic of a crib.
- Detail Sander: A detail sander is perfect for getting into tight corners and intricate designs on cribs. Its triangular shape allows it to reach areas that larger sanders cannot, ensuring that every part of the crib receives attention during the refinishing process.
- Belt Sander: While a belt sander can remove material quickly, it requires a cautious hand when refinishing a crib to avoid gouging the wood. It is best used for heavy-duty stripping of old finishes before switching to a finer sander for smooth finishing.
- Hand Sanding Block: Old-fashioned yet effective, hand sanding blocks allow for full control and are excellent for small, detailed areas or edges on a crib. They enable the user to feel the surface more directly, ensuring that the sanding is even and that no areas are missed.
- Random Orbital Sander: This sander combines the benefits of both orbital and disc sanders, providing a swirl-free finish and the ability to sand various surfaces. It is especially useful for cribs, as it balances efficiency with the finesse needed for delicate woodwork.
What Safety Precautions Should Be Taken When Sanding a Crib?
When sanding a crib, it is important to take specific safety precautions to ensure a safe and effective process.
- Wear a Dust Mask: Sanding produces fine dust particles that can be harmful when inhaled. A dust mask helps protect your respiratory system from these particles, making it essential for your safety during the sanding process.
- Use Safety Goggles: Protecting your eyes is crucial, as sanding can cause debris and dust to fly into your eyes. Safety goggles create a barrier that keeps your vision clear and safe from irritants while you work.
- Ensure Proper Ventilation: Working in a well-ventilated area reduces the concentration of dust and fumes, which can be harmful to your health. Open windows and use fans to circulate air and minimize inhalation risks.
- Choose the Right Sander: Selecting the appropriate sander, such as an orbital or detail sander, can enhance safety and efficiency. The best sander for a crib will minimize the risk of damaging the wood while providing smooth results, making it easier to control and handle.
- Keep the Work Area Clean: A tidy workspace reduces the risk of accidents, such as tripping over tools or materials. Regularly clearing dust and debris not only enhances safety but also helps you maintain focus on the task at hand.
- Check for Lead Paint: Older cribs may have lead-based paint that can pose serious health risks when sanded. Before beginning, test the surface for lead paint and, if necessary, follow appropriate lead-safe work practices.
- Wear Protective Gloves: Gloves protect your hands from splinters and abrasions that can occur during sanding. They also provide a better grip on the sander, promoting safer and more controlled movements.
What Expert Tips Can Help Ensure a Successful Crib Sanding Project?
To ensure a successful crib sanding project, consider the following expert tips:
- Select the Best Sander: Choosing the right sander is crucial for achieving a smooth finish on the crib.
- Prepare the Crib Surface: Properly preparing the crib surface can greatly affect the sanding process and outcome.
- Use the Right Grit Sandpaper: Selecting the appropriate sandpaper grit is essential for effective sanding without damaging the wood.
- Work in a Well-Ventilated Area: Ensuring good ventilation is important for safety and comfort while sanding.
- Follow a Sanding Technique: Using a consistent sanding technique can help achieve an even finish and avoid uneven surfaces.
- Clean Between Sanding Steps: Cleaning the surface between sanding steps helps to remove dust and debris that can affect the final finish.
- Apply a Protective Finish: After sanding, applying a protective finish is vital to preserve the wood and enhance durability.
Select the Best Sander: The best sander for a crib often depends on the size and intricacy of the design. A random orbital sander is highly recommended as it offers a smooth finish and minimizes the risk of sanding marks. For tight corners and detailed areas, a detail sander can be an excellent complement.
Prepare the Crib Surface: Before sanding, it’s important to clean the crib thoroughly to remove any dirt, grease, or old finishes. Inspect the wood for any defects or rough patches that may need repair prior to sanding, as this will help create a more uniform surface for finishing.
Use the Right Grit Sandpaper: Start with a coarser grit, like 80 or 100, to remove old paint or finish, and then gradually move to finer grits, such as 150 or 220, to achieve a smooth surface. This step is crucial to avoid damaging the wood and to prepare it adequately for finishing.
Work in a Well-Ventilated Area: Sanding can produce fine dust and particles that may not only be harmful when inhaled but can also be a nuisance. Working in a well-ventilated area or using a dust collection system will help maintain air quality and create a more pleasant working environment.
Follow a Sanding Technique: Sand in the direction of the wood grain to avoid scratches and achieve a smoother finish. It’s important to apply even pressure and avoid staying too long in one spot, as this can create uneven surfaces or gouges in the wood.
Clean Between Sanding Steps: After each sanding pass, wipe down the crib with a damp cloth or use a vacuum to remove dust. This step ensures that subsequent sanding is effective and that dust does not interfere with the final finish by settling into the wood.
Apply a Protective Finish: Once you’ve achieved the desired smoothness, it’s essential to apply a protective finish, such as polyurethane or a natural oil. This will not only enhance the crib’s appearance but also protect the wood from wear and tear, making it safer and more durable for use.
How Do You Maintain Your Sander After Working on a Crib?
Maintaining your sander after working on a crib is essential for ensuring its longevity and optimal performance.
- Clean the sanding pad: After use, remove any dust and debris from the sanding pad to prevent clogging and maintain effective sanding.
- Inspect for wear and tear: Regularly check the sanding discs or belts for signs of wear, as using damaged abrasives can lead to poor results and damage to your workpiece.
- Lubricate moving parts: Ensure that the moving parts of your sander are properly lubricated to minimize friction and extend the tool’s lifespan.
- Store properly: Keep your sander in a dry, safe place when not in use to protect it from moisture and accidental damage.
- Check electrical components: Examine the power cord and plug for any fraying or damage to prevent electrical hazards during future use.
Cleaning the sanding pad is crucial as accumulated dust can hinder performance, leading to inefficient sanding and a rough finish. Use a vacuum or a soft brush to thoroughly clean the surface, ensuring it remains effective for your next project.
Inspecting for wear and tear helps you catch any issues before they affect your project. A worn sanding disc can cause uneven surfaces and may even scratch the wood, so replacing them promptly ensures quality results.
Lubricating moving parts reduces friction and wear, which can help prevent overheating and prolong the life of your sander. Use a light machine oil or silicone spray on the parts that require lubrication, following the manufacturer’s guidelines.
Storing your sander properly is vital to protect it from environmental factors that could cause rust or damage. A dedicated storage case or hanging it in a tool organizer can also prevent accidental falls.
Checking electrical components is essential for safety reasons. If you notice any damage to the power cord or plug, replace them immediately to avoid electrical shocks or fires during operation.
Related Post: