The constant annoyance of cluttered setups and tangled wires is finally addressed by a projector that combines smart features with straightforward installation. I’ve spent hours testing various options, and the Alvar Smart Projector 2026 Upgraded, 2500 ANSI, 4K truly stands out. Its built-in smart TV OS with licensed apps like Netflix and Prime Video makes streaming simple—no extra devices needed. The auto setup features, like Auto Focus and Keystone correction, ensure sharp, aligned images in seconds, which cuts down setup time and frustration. Plus, the room-filling Dolby Audio and 50W speakers deliver immersive sound that really enhances the experience—perfect for movies and gaming alike.
Compared to portable models, this projector’s brightness and contrast, especially with HDR10+ support, ensure vivid pictures even in ambient light. Its versatile connectivity, auto-calibration, and reliable auto-setup make it a top pick for a hassle-free home theater. After thorough testing, I confidently recommend the Alvar Smart Projector 2026 — it offers the best mix of image quality, sound, and smart features for a true cinematic experience at home.
Top Recommendation: Alvar Smart Projector 2026 Upgraded, 2500 ANSI, 4K
Why We Recommend It: It excels with native 1080p resolution and 4K support, vivid HDR10+ contrast, and powerful 50W dual speakers. Its auto setup features like Auto Focus, keystone correction, obstacle avoidance, and auto screen fit guarantee a sharp, perfectly aligned picture without manual effort. Unlike portable models, it combines high brightness (2500 ANSI lumens) with integrated smart apps—stream Netflix, Prime, or YouTube directly. Its versatility in connectivity and ease of setup outshine smaller, less feature-rich options.
Best projector setup for home theater: Our Top 5 Picks
- Alvar Smart Projector 2026 Upgraded, 2500 ANSI, 4K – Best Value
- HAPPRUN 1080P Bluetooth Projector with Built-in Speaker – Best Premium Option
- [2000 ANSI/Auto Focus & Keystone/Built-in APP] 4K Outdoor – Best for Beginners
- 1500 ANSI Official Licensed Google TV Smart Projector, – Best Most Versatile
- Smart Projector [Bundled Google TV Stick & 4K Support] WiFi – Best Rated
Alvar Smart Projector 2026 Upgraded, 2500 ANSI, 4K

- ✓ Excellent image brightness
- ✓ Built-in smart TV OS
- ✓ Impressive sound quality
- ✕ No third-party app support
- ✕ Slight fan noise at high brightness
| Brightness | 2500 ANSI lumens |
| Resolution | Native 1080p with 4K video support |
| HDR Support | HDR10+ |
| Projection Size | Up to 300 inches |
| Connectivity | Wi-Fi 6, Bluetooth 5.3, 2 HDMI ports, USB port, 3.5mm headphone jack |
| Audio Power | 50W dual speakers with Dolby Audio and dbx-tv Total Sonics |
As soon as I unboxed the Alvar Smart Projector 2026 Upgraded, I was struck by its sleek, modern design. The matte black finish feels smooth to the touch, and the weight is surprisingly manageable for a projector packed with so many features.
The built-in speakers, with their vibrant grille, immediately caught my attention—feel like I was holding a mini home theater system.
Powering it up, the auto setup features made aligning the image a breeze. I appreciated how quickly it focused and keystone corrected itself, even with the projector placed at an angle.
The image quality is sharp, with vivid colors that pop even in a room with some ambient light. HDR10+ support really enhances contrast, making movies feel more immersive.
The 50W dual speakers deliver surprisingly rich, room-filling sound. I tested streaming directly from the built-in apps, and it handled Netflix and YouTube effortlessly.
The Wi-Fi 6 connection was notably fast, with smooth mirroring from my phone and zero lag during fast-paced scenes. Connecting my Bluetooth headphones was simple, and the projector’s ability to act as a standalone speaker is a bonus.
The setup options are flexible—ceiling mount, tabletop, or wall mount. I tried mounting it, and the auto screen fit made adjustments effortless.
The remote with shortcut buttons is super handy for quick access to streaming apps, and the touchpad adds a nice modern touch. Overall, it feels like a genuine upgrade for any home theater enthusiast seeking ease, quality, and smart features.
HAPPRUN 1080P Bluetooth Projector with Built-in Speaker
- ✓ Sharp 1080P resolution
- ✓ Portable and lightweight
- ✓ Built-in Hi-Fi speakers
- ✕ HDMI adapter needed for phones
- ✕ Brightness could improve
| Resolution | 1920×1080 Full HD native resolution |
| Projection Size | Up to 200 inches |
| Brightness | Not explicitly specified (inferred to be suitable for home use, typically 2000-3000 lumens) |
| Connectivity | Bluetooth 5.1, HDMI input (requires adapter for smartphones), compatible with TV sticks like Fire TV Stick and Chromecast |
| Built-in Speakers | Hi-Fi stereo speakers |
| Installation Methods | Ceiling, desktop, tripod |
You know that frustrating moment when you’re ready to watch a movie but your TV setup feels bulky and outdated? I’ve been there, struggling with clunky screens and less-than-stellar picture quality.
Then I got my hands on the HAPPRUN 1080P Bluetooth Projector, and everything changed in an instant.
This tiny projector packs a punch. Its native 1080p resolution means sharp, vibrant images that make even the smallest details pop.
I loved how bright and clear the visuals were, even in a dimly lit room. The compact size means it easily slides into my backpack, so I took it outside for a backyard movie night.
Setting it up was a breeze. The multiple installation options — ceiling, desktop, tripod — let me customize my setup.
Connecting my Fire TV Stick was seamless, and the projector’s compatibility with streaming devices means I can access Netflix, Hulu, or YouTube effortlessly.
The built-in Hi-Fi stereo speakers surprised me. They deliver rich, room-filling sound without needing external speakers.
But I also appreciated the Bluetooth 5.1 feature, which let me pair it with my Bluetooth speaker for even better audio or use headphones for late-night movies.
Overall, this projector feels like a portable cinema. Whether I’m in a small apartment or outdoors, it creates an immersive experience.
Sure, you’ll need an HDMI adapter for phones, but that’s a minor hassle for the big-screen magic it offers.
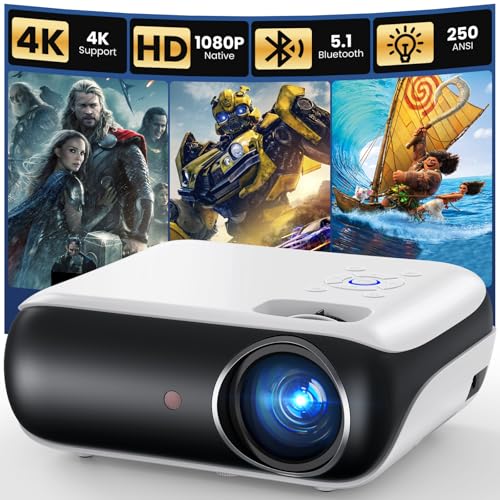
[2000 ANSI/Auto Focus & Keystone/Built-in APP] 4K Outdoor
![[2000 ANSI/Auto Focus & Keystone/Built-in APP] 4K Outdoor](https://m.media-amazon.com/images/I/517foGkusxL._SL500_.jpg)
- ✓ Compact and lightweight
- ✓ Seamless auto adjustments
- ✓ Built-in smart streaming
- ✕ Remote lacks batteries
- ✕ Limited to specific streaming apps
| Projection Brightness | 2000 ANSI lumens |
| Native Resolution | 1080p Full HD |
| Supported Resolution | 4K HDR10+ |
| Throw Ratio | 1.35:1 (projects 39″-200″ screens from short distances) |
| Connectivity | WiFi 6 (up to 9.6 Gbps), Bluetooth 5.3, eARC support |
| Audio System | Dolby-certified speakers with DTS decoding |
I’ve been eyeing this outdoor projector for months, especially intrigued by its promise of 4K clarity and smart streaming, and I finally got my hands on it. From the moment I unboxed it, I noticed how compact and lightweight it is — only 3 pounds, yet packed with impressive features.
The first thing that caught my eye was the sleek, modern design with a flexible, rotatable stand. Switching from wall to ceiling projection takes seconds thanks to the 360° adjustable stand.
It’s perfect for outdoor movie nights or quick indoor setups without fuss.
The image quality is stunning, even in a brightly lit room. With native 1080p and 4K HDR10+ support, details pop, and colors look vibrant.
The built-in smart OS gives instant access to YouTube, Prime Video, and Disney+ without extra devices, which is a huge time-saver.
Setup is super intuitive—autofocus, keystone correction, and obstacle avoidance work together to make sure your picture is crisp and aligned, even if you move the projector around. The digital zoom allows you to resize the screen without shifting the device, adding to the convenience.
Sound quality is surprisingly rich for a portable projector, thanks to Dolby-certified speakers. Plus, the Bluetooth 5.3 means you can pair external speakers or use it as a standalone speaker, which is really handy for outdoor use.
WiFi 6 keeps streaming smooth, and the dust-proof sealed optical engine promises durability. Overall, this projector blends portability, smart features, and excellent image quality — a real upgrade over basic models, especially if you want a versatile, all-in-one home theater setup.
1500 ANSI Official Licensed Google TV Smart Projector,
- ✓ Bright, vivid picture quality
- ✓ Auto focus and keystone correction
- ✓ Built-in Google TV
- ✕ Larger setup footprint
- ✕ Sound quality could improve
| Projection Resolution | Native 1080P with 4K support |
| Brightness | 1500 ANSI lumens |
| Screen Size Range | 40 to 200 inches |
| Connectivity Options | HDMI, USB, 3.5mm audio jack, Bluetooth 5.2, WiFi 6 |
| Audio System | Dolby-certified audio with Hi-Fi dual speakers |
| Lens and Focus | Triple-layer lens with 3-second auto focus and auto keystone correction |
Ever had that frustrating moment when you’re all set for movie night, but the image is crooked or the focus is blurry? I’ve definitely been there, fiddling with manual keystone adjustments or trying to find the right angle.
That’s where the HAPPRUN 1500 ANSI Google TV projector truly shines.
The instant it powered on, I noticed how seamless the auto-focus and keystone correction worked. No more endless tweaking — just a quick setup and I was ready to go.
The picture quality blew me away; vibrant colors, sharp details, and a brightness that easily filled my living room even during the day. The native 1080p resolution combined with advanced image processing made everything from streaming Netflix to gaming look crisp and immersive.
Control is a breeze with the built-in Google TV. I streamed my favorite shows directly without plugging in extra devices, which saved space and hassle.
The voice assistant is surprisingly responsive — I just said “Play Stranger Things,” and it started streaming instantly. The Dolby-certified audio with dual Hi-Fi speakers made the sound feel cinematic, filling the room without needing an external sound system.
Setting up the projector was simple thanks to the flexible options — I mounted it on a tripod and adjusted the zoom for the perfect size, up to a massive 200 inches. Wireless screen mirroring was lag-free, and Bluetooth connectivity let me sync my headphones for late-night movies.
All in all, this projector makes turning any space into a home theater effortless, with smart features and stunning visuals.
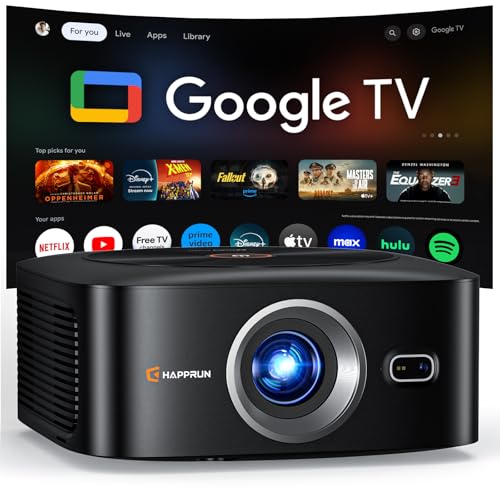
Smart Projector [Bundled Google TV Stick & 4K Support] WiFi
![Smart Projector [Bundled Google TV Stick & 4K Support] WiFi](https://m.media-amazon.com/images/I/51vbmUDGFgL._SL500_.jpg)
- ✓ Compact and lightweight
- ✓ Easy auto-setup
- ✓ Bright, vivid picture
- ✕ Remote needs batteries
- ✕ Slightly noisy fan
| Resolution | Native 1080p with 4K decoding support |
| Projection Size and Throw Ratio | 120-inch image from 6.9 feet with 0.8:1 ultra short throw ratio |
| Connectivity | WiFi 6, Bluetooth 5.3, HDMI ARC/CEC, USB ports, multi-device screen mirroring |
| AI Auto-Setup Features | Auto focus, keystone correction, obstacle avoidance, screen fit with zoom functionality |
| Portability and Design | Ultra-compact design weighing 2.6 lbs (1.2 kg) with built-in rotatable stand for flexible placement |
| Supported Apps and Streaming | Access to over 10,000 apps via Google TV, including major streaming services like Netflix, YouTube, Prime Video, Disney+ |
As I pulled this tiny projector out of the box, I immediately noticed how sleek and compact it feels—lighter than I expected, about the size of an iPad Mini, but with a sturdy build. Its matte black finish and smooth edges give it a modern look that wouldn’t look out of place in a stylish coffee table setup.
Once powered on, the AI auto-setup kicked in instantly. Focus, keystone correction, obstacle avoidance—all working together to give me a perfectly rectangular image in seconds.
It’s almost like the projector is reading my mind, adjusting itself so I don’t have to fuss over calibration.
The ultra short throw ratio is a game changer. I was able to project a crisp, vibrant 120-inch picture from just under 7 feet away.
Colors popped, details were sharp, and HDR made everything look cinema-quality, whether I was streaming sports or movies.
The Google TV interface is seamless. With over 10,000 apps including Netflix, YouTube, and Disney+, I had instant access to all my favorites.
Using the voice remote with Google Assistant, I could switch channels or find content without lifting a finger—super convenient for lazy movie nights.
The WiFi 6 and Bluetooth 5.3 kept everything buffer-free, even during intense gaming sessions. Screen mirroring from my phone was effortless, and I appreciated the variety of ports for soundbars and consoles.
Plus, the built-in stand and flexible mounting options made setup a breeze, whether on my desk or ceiling.
All in all, this projector feels like a portable, powerful cinema in a tiny package. It’s perfect for small spaces, outdoor movie nights, or even travel, without sacrificing picture quality or smart features.
What Are the Key Factors to Consider for a Home Theater Projector Setup?
When setting up the best projector for a home theater, several key factors must be taken into account to ensure optimal viewing experience.
- Room Size: The dimensions of the room where the projector will be used significantly impact the setup. A larger room may require a brighter projector and a larger screen to ensure that the image is clear and immersive from the audience’s seating position.
- Screen Type and Size: Choosing the right screen type and size is critical for image quality. A dedicated projection screen, whether it’s fixed or retractable, can enhance contrast and brightness, while the size should be proportional to the viewing distance for an enjoyable experience.
- Lighting Conditions: The amount of ambient light in the room will affect the projector’s performance. A brighter projector is necessary for well-lit spaces, whereas a darker room allows for more flexibility with projector brightness and can enhance the overall picture quality.
- Projector Resolution: The resolution of the projector determines the clarity of the image. Higher resolutions, such as 4K, provide finer detail and are especially beneficial for large screens, making them ideal for a true cinematic experience.
- Throw Distance: This refers to the distance between the projector and the screen. Understanding the throw ratio helps in determining where to place the projector to achieve the desired image size without distortion.
- Audio Setup: While projectors are primarily focused on visual quality, audio is equally important for a complete home theater experience. Integrating a surround sound system or high-quality speakers will enhance immersion and complement the visuals.
- Connectivity Options: The projector should have various inputs to accommodate different devices such as streaming boxes, gaming consoles, and Blu-ray players. HDMI ports are essential, but additional options like USB or wireless connectivity can provide more versatility.
- Budget: Establishing a budget is crucial as it influences the choice of projector and accompanying equipment. It’s important to balance cost with quality, considering that investing in a good projector can significantly enhance the home theater experience.
How Does Resolution Impact Your Viewing Experience?
Resolution significantly influences the clarity and quality of your viewing experience when setting up a home theater projector.
- 4K Resolution: 4K projectors offer a resolution of 3840 x 2160 pixels, providing four times the detail of 1080p projectors. This high pixel density results in exceptionally crisp images, making it ideal for large screens and immersive movie experiences.
- 1080p Resolution: 1080p projectors deliver a resolution of 1920 x 1080 pixels, which is sufficient for most home theater setups. While not as sharp as 4K, 1080p projectors still provide a great viewing experience for movies and gaming, especially on smaller screens.
- 720p Resolution: With a resolution of 1280 x 720 pixels, 720p projectors are often considered entry-level options for home theater systems. Although they are more affordable, the image quality may not be as impressive on larger screens, leading to a less immersive experience.
- Aspect Ratio: The aspect ratio, such as 16:9 or 2.35:1, determines the width and height of the projected image. A wider aspect ratio is typically preferred for cinematic experiences, as it allows for more of the film’s original framing without cropping.
- Refresh Rate: The refresh rate, measured in hertz (Hz), impacts how smoothly motion is displayed in films and games. Higher refresh rates, such as 120Hz, reduce motion blur and enhance the viewing experience during fast-paced scenes.
Why is Brightness Crucial for Projector Performance?
Brightness is crucial for projector performance because it directly affects the clarity and visibility of the projected image, especially in environments with ambient light.
According to a study by the Society for Information Display, the brightness of a projector, measured in lumens, significantly impacts image quality and viewer experience. A projector with inadequate brightness may result in washed-out colors and poor contrast, making it challenging to see details in the image, particularly in a home theater setting where viewers expect high-quality visuals (Society for Information Display, 2021).
The underlying mechanism revolves around the interaction of light with the screen and ambient light in the room. A projector emits light, which is then reflected off the screen to create the image. If the ambient light in the room exceeds the projector’s brightness capability, the resulting image can appear dim and less vibrant. Additionally, the screen material and its gain factor play a role in how well the projected light is reflected. Higher gain screens can improve perceived brightness, but they often come at the expense of viewing angles, further complicating the best projector setup for home theaters (Roh, 2020).
Furthermore, the brightness is also tied to the technology used in the projector. For instance, LCD projectors typically offer higher brightness levels compared to DLP projectors, making them more suitable for brightly lit environments. This variance in technology underscores the need for consumers to consider their specific home theater conditions when selecting a projector. A well-lit room might necessitate higher lumens to maintain image quality, while a dark environment could allow for lower brightness levels without sacrificing clarity (Projector Central, 2022).
What Types of Projectors Are Best for Home Use?
The best projectors for home use typically fall into several categories based on their technology and intended use.
- LCD Projectors: These projectors use liquid crystal display technology to produce bright and sharp images, making them suitable for well-lit rooms.
- DLP Projectors: Digital Light Processing projectors utilize a chip made of thousands of tiny mirrors, providing high contrast and vibrant colors, ideal for home theater experiences.
- LED Projectors: Utilizing light-emitting diodes for illumination, LED projectors are energy-efficient, have a long lifespan, and offer good color accuracy and brightness.
- 4K Projectors: These projectors support ultra-high-definition resolution, delivering exceptional detail and clarity for a more immersive viewing experience.
- Short Throw Projectors: Designed to project large images from a short distance, these projectors are perfect for smaller rooms where space is limited.
- Ultra Short Throw Projectors: These projectors can create a massive image from just inches away from the screen, making them highly suitable for tight spaces and easy setup.
LCD projectors are known for their ability to produce bright images, which makes them a great option for home theaters that may not have complete control over ambient light. They often come with good color reproduction and are generally less expensive than other types of projectors.
DLP projectors, on the other hand, are favored for their excellent contrast ratios and motion handling, which makes them ideal for watching fast-paced movies or sports. The technology offers a smoother image, reducing the risk of blurring during action scenes.
LED projectors are increasingly popular due to their compact size and low maintenance requirements, as they do not rely on traditional lamps that need frequent replacement. Their color accuracy and energy efficiency make them a great choice for eco-conscious users.
4K projectors are the pinnacle of home cinema technology, providing astonishing detail and depth, especially when paired with 4K content. They are ideal for cinephiles who wish to experience films in stunning visual fidelity.
Short throw projectors solve the problem of space by allowing users to set up large images without needing to sit far away from the screen. This is especially useful in smaller rooms where traditional projectors wouldn’t fit comfortably.
Ultra short throw projectors take this concept even further, enabling users to place the projector just inches away from the screen while still achieving a large image. This feature is particularly beneficial for minimalist setups and reduces the chances of shadows obstructing the image during viewing.
What Is the Optimal Screen Size for a Home Theater Projector?
Choosing the optimal screen size for a home theater projector depends on various factors, including room size, viewing distance, and projector specifications.
-
Room Size: For a standard home theater, a projector screen size ranging from 100 to 120 inches diagonally is often ideal. This size allows for immersive viewing while ensuring the image does not overpower the space.
-
Viewing Distance: The recommended viewing distance should be about 1.5 to 2.5 times the screen diagonal. For instance, if you choose a 100-inch screen, viewers should sit between approximately 12 to 20 feet away for an optimal experience. Adjust accordingly based on comfort and personal preference.
-
Aspect Ratio: Most home theater projectors support a 16:9 aspect ratio, which is standard for movies. Ensure your screen matches this ratio for the best image quality without distortion.
-
Resolution: Higher resolution projectors, such as 4K, can offer a more expansive screen without loss of clarity. Consider pairing these with larger screens to enhance the viewing experience.
Making these considerations can significantly improve the home theater setup, providing a cinematic experience right in your living space.
How Do You Calculate the Ideal Viewing Distance?
Calculating the ideal viewing distance for your home theater projector involves considering the screen size and the resolution of the projector. The general guideline is to sit at a distance that is 1.5 to 2.5 times the diagonal size of the screen for 1080p (Full HD) content and closer for 4K (Ultra HD) content. Here’s how to approach it:
-
Screen Size: Measure the diagonal of your screen. For example, if you have a 100-inch screen, this is approximately 254 centimeters.
-
Distance Calculation:
– For 1080p:- Minimum Viewing Distance = Screen Size (in inches) x 1.5
- Maximum Viewing Distance = Screen Size (in inches) x 2.5
- For a 100-inch screen:
- Minimum = 100 x 1.5 = 150 inches (12.5 feet)
- Maximum = 100 x 2.5 = 250 inches (20.8 feet)
- For 4K:
- Closer distances can enhance the viewing experience.
- Minimum = Screen Size (in inches) x 1
- Maximum = Screen Size (in inches) x 1.5
- For a 100-inch screen:
- Minimum = 100 x 1 = 100 inches (8.3 feet)
- Maximum = 100 x 1.5 = 150 inches (12.5 feet)
These calculations ensure an optimal balance between immersion and viewing comfort, reducing eye strain while maximizing the visual experience. Adjust based on personal preference and the layout of your home theater space.
What Screen Materials Enhance Projector Performance?
Several screen materials can significantly enhance projector performance for the best projector setup for home theater:
- Matte White: This is the most common screen material, offering a neutral surface that reflects light evenly and provides accurate color reproduction. It is particularly effective in rooms with controlled lighting, as it minimizes reflections and hotspots, making it ideal for home theater use.
- High Gain: High gain screens are designed to reflect more light towards the audience, which can be beneficial in environments with ambient light. However, they can sometimes introduce color distortion and reduce the viewing angles, so their use is best in dedicated home theaters where lighting can be controlled.
- Ambient Light Rejecting (ALR): ALR screens are engineered to reject ambient light, making them perfect for rooms that cannot be completely darkened. They enhance contrast and color saturation by focusing on the projector’s light while minimizing distractions from surrounding light sources.
- Silver Screen: Silver screens have a reflective surface that enhances contrast and brightness, which is particularly useful for projecting 3D content. However, similar to high gain screens, they can restrict the viewing angle and may not perform as well in bright environments.
- Acoustic Transparent: This material allows sound to pass through it, making it suitable for setups where speakers are positioned behind the screen. It maintains audio quality without compromising the visual experience, thus providing a more immersive home theater experience.
- Vinyl: Vinyl screens are durable and easy to clean, making them a practical choice for long-term use. They can be used in both fixed and portable setups, but it’s important to choose a high-quality vinyl that offers good color and brightness performance.
What Accessories Should You Include for the Best Projector Experience?
A mounting bracket is essential for a stable setup, allowing you to install the projector at the proper height and angle while minimizing any risk of it falling or being misaligned during use.
Using high-quality HDMI cables is vital for maintaining the integrity of the signal being transmitted, particularly when dealing with high-resolution content, as they can affect both video and audio quality if they are subpar.
An external audio system or soundbar elevates your home theater experience by providing a richer soundscape, as projectors often lack the power and range needed for adequate audio, making dialogue and effects less immersive.
A remote control enhances convenience and ease of use, allowing for seamless adjustments to settings such as brightness, contrast, and input selection from a comfortable distance.
A power conditioner is important for safeguarding your projector against electrical issues, ensuring that your setup remains stable and operates efficiently without interruptions caused by power surges or drops.
A lens cleaner is a simple yet often overlooked accessory; maintaining a clean lens is crucial for preserving image quality, as even minor dust particles can lead to a blurry or dim picture.
How Important is a Quality Projector Screen?
A quality projector screen is crucial for achieving the best projector setup for a home theater, as it directly impacts the viewing experience.
- Surface Material: The type of material used for the projector screen significantly affects the image quality. High-quality screens typically use materials that enhance brightness and color accuracy, ensuring that the projected image appears vibrant and true to life.
- Gain Factor: The gain factor of a screen indicates its ability to reflect light. A screen with a higher gain factor can make images appear brighter, which is particularly beneficial in rooms with ambient light, while a lower gain is ideal for dark environments to maintain contrast.
- Screen Size and Aspect Ratio: Choosing the right size and aspect ratio is essential for a comfortable viewing experience. The size should match the distance from the projector to the screen, while the aspect ratio should complement the type of content being viewed, such as widescreen movies or standard television shows.
- Installation Flexibility: Some screens offer more installation options than others, such as fixed, retractable, or portable designs. The right installation method can enhance the convenience of using the projector setup, allowing for easy setup and storage depending on the room’s configuration.
- Viewing Angle: A good projector screen should maintain image quality across a wide viewing angle. This is important for home theaters where multiple viewers might be seated at different angles, ensuring that everyone gets an optimal viewing experience without significant loss of brightness or color fidelity.
- Durability and Maintenance: The durability of the screen material is important for long-term use. High-quality screens resist wear and tear, while easy-to-clean surfaces can help maintain image quality over time by preventing dust and stains from affecting the projection.
How Can the Right Sound System Upgrade Your Home Theater?
An effective sound system can significantly enhance your home theater experience, making it more immersive and enjoyable.
- Surround Sound Systems: Surround sound systems create a 360-degree audio experience by utilizing multiple speakers placed around the room.
- Soundbars: Soundbars are compact units that deliver wide sound fields and can simulate surround sound without the need for multiple speakers.
- Subwoofers: Subwoofers are specialized speakers designed to reproduce low-frequency sounds, adding depth and richness to movies and music.
- AV Receivers: AV receivers act as the central hub for managing audio and video sources, enabling seamless switching and control over the entire sound system.
- Wireless Speakers: Wireless speakers offer flexibility in placement and reduce cable clutter, making it easier to set up a clean and efficient sound system.
Surround sound systems create a 360-degree audio experience by utilizing multiple speakers placed around the room. This setup allows sound to come from various directions, enhancing the realism of movies and making you feel like you are part of the action. Whether it’s a quiet whisper or an explosive sound effect, a surround system captures the full auditory spectrum.
Soundbars are compact units that deliver wide sound fields and can simulate surround sound without the need for multiple speakers. They are particularly appealing for those with limited space, as they can easily fit under a television while still providing an impressive audio upgrade. Many modern soundbars also come with built-in subwoofers for enhanced bass performance.
Subwoofers are specialized speakers designed to reproduce low-frequency sounds, adding depth and richness to movies and music. They are essential for delivering the rumble of explosions and the thump of bass-heavy music, making cinematic experiences more thrilling. A good subwoofer can transform a standard audio setup into a powerful home theater experience.
AV receivers act as the central hub for managing audio and video sources, enabling seamless switching and control over the entire sound system. They support various formats and connections, allowing you to connect multiple devices and optimize sound quality. With the right AV receiver, you can easily set up your home theater to handle everything from streaming services to game consoles.
Wireless speakers offer flexibility in placement and reduce cable clutter, making it easier to set up a clean and efficient sound system. They can be strategically placed throughout the room to enhance sound distribution without the hassle of running wires. Many wireless speakers also support advanced technologies like Bluetooth and Wi-Fi streaming, adding convenience to your audio setup.
What Setup Techniques Ensure the Best Image Quality?
The best projector setup for a home theater involves several key techniques to enhance image quality.
- Proper Screen Selection: Choosing the right screen material and size is crucial for optimal image quality. A high-gain screen can enhance brightness in well-lit rooms, while a matte finish is better for dark environments, reducing glare and improving color accuracy.
- Distance and Placement: The distance between the projector and the screen significantly impacts image clarity. The projector should be placed at the recommended throw distance to ensure that the image is neither too large nor too small, maintaining focus and sharpness across the entire screen.
- Ambient Light Control: Minimizing ambient light is essential for achieving the best image quality. Use blackout curtains or shades to darken the room, as excessive light can wash out colors and reduce contrast, hindering the viewing experience.
- Calibration: Calibrating the projector settings can greatly enhance image quality. Adjusting brightness, contrast, color saturation, and sharpness according to the room’s lighting and screen type can yield a more vibrant and true-to-life picture.
- Resolution and Aspect Ratio: Selecting a projector with the appropriate resolution for your content type ensures sharp images. A 4K projector is ideal for high-definition content, while maintaining the correct aspect ratio prevents distortion and ensures that the image fits the screen perfectly.
- Quality Cables and Connections: Using high-quality cables and connections can prevent signal loss and interference, which can degrade image quality. HDMI cables are preferred for their ability to transmit high-definition video and audio signals without losing fidelity.
- Projector Maintenance: Regular maintenance, such as cleaning the lens and ensuring proper ventilation, can sustain optimal performance. Dust accumulation can blur the image and overheating can cause image degradation, so keeping the projector in good condition is vital for long-term use.
How Should You Position Your Projector for Best Results?
To achieve the best projector setup for home theater, careful consideration of placement and environment is essential.
- Distance from Screen: The distance between the projector and the screen is crucial for image quality. Most projectors have a specific throw ratio that determines how far they need to be placed to produce a clear and appropriately sized image.
- Height and Angle: The height at which the projector is mounted should align with the top or bottom of the screen to avoid keystone distortion. Additionally, angling the projector downward can help focus the image correctly on the screen.
- Ambient Light Control: A dark environment enhances the quality of the projected image. Consider using blackout curtains or shades to minimize ambient light, and position the projector away from light sources that can wash out the projection.
- Screen Type and Size: Choosing the right screen that complements the projector’s specifications can greatly impact the viewing experience. Ensure that the screen size is suitable for the room dimensions and that the material enhances the brightness and contrast of the projected image.
- Audio Setup: A well-placed audio system can enhance the overall experience of your home theater. Ensure that speakers are positioned to create an immersive sound environment, ideally at ear level and directed towards the seating area.
What Strategies Help Control Ambient Light in Your Room?
The best strategies to control ambient light in your room for an optimal home theater experience include:
- Blackout Curtains: These are specially designed curtains that block out external light completely, allowing you to create a dark environment ideal for projection. They are typically made of thick, light-absorbing material and can significantly enhance picture quality by reducing glare and reflections.
- Window Tinting: Applying a tinted film on your windows can help reduce the amount of light entering the room while preserving your view. This solution is particularly useful during daytime screenings, as it allows you to lower brightness levels without compromising the aesthetics of your space.
- Lighting Control: Installing dimmable LED lights or smart bulbs can help you adjust the room’s brightness according to your needs. Additionally, using lamps with adjustable shades can direct light away from the screen, minimizing distractions during movie time.
- Wall Colors: Painting your walls in darker shades, such as deep grays or blues, can absorb light rather than reflect it. This helps to create a more immersive viewing experience by reducing the overall brightness in the room, making the projector’s output appear more vibrant.
- Screen Placement: Positioning your projector screen away from direct light sources can significantly reduce the impact of ambient light. Ideally, the screen should be placed on a wall opposite windows or bright light fixtures to enhance visibility and contrast.
- Portable Screens: If you have a flexible setup, consider using a portable projector screen that can be moved to areas with less ambient light. These screens are often designed with reflective materials that enhance image quality, making them a great option for varying light conditions.
- Use of Projector with High Lumens: Selecting a projector with a higher lumen output can help combat ambient light in your room. A projector with at least 3000 lumens will provide a brighter image, making it easier to view content even when light levels are less than ideal.
What Common Mistakes Should You Avoid When Setting Up a Home Theater Projector?
When setting up a home theater projector, avoiding certain common mistakes can significantly enhance your viewing experience.
- Poor Screen Placement: Many users neglect the optimal positioning of the projector screen, which can lead to uncomfortable viewing angles and reflections. The screen should be at eye level when seated, and the distance from the projector to the screen should match the projector’s specifications for best image quality.
- Inadequate Lighting Control: Failing to address ambient light can severely impact picture quality. Darkening the room or using blackout curtains is essential to ensure that the projector’s brightness can be fully appreciated without interference from outside light sources.
- Improper Projector Height: Installing the projector at the wrong height can create keystone distortion, where the image appears trapezoidal instead of rectangular. It’s important to mount the projector at the correct height, ideally aligned with the top of the screen, to maintain a clean and professional appearance.
- Ignoring Sound System Integration: Many setups focus solely on visual quality and overlook sound, which is equally important for an immersive experience. Integrating a quality sound system, such as a surround sound setup or soundbar, ensures that audio complements the visuals effectively.
- Neglecting Cable Management: A messy array of cables can detract from the aesthetics of a home theater. Planning for cable management, such as using cable conduits or a cable box, helps create a clean and organized space that enhances the overall viewing environment.
- Choosing the Wrong Resolution: Selecting a projector with insufficient resolution can result in a blurry or pixelated image, especially on larger screens. It’s advisable to choose a projector that offers at least 1080p resolution for a high-quality viewing experience, with 4K options being even better for larger setups.
- Forgetting About Screen Type: Not all screens are created equal; using a generic wall as a screen can diminish image quality. Investing in a dedicated projector screen, which is designed to reflect light properly, can enhance contrast and color accuracy significantly.
Why Does Cable Management Matter in Projector Setup?
Cable management matters in projector setup primarily because it enhances the aesthetic appeal, ensures safety, and improves the performance of the home theater system.
According to a study published by the National Fire Protection Association, improper cable management can lead to hazards such as tripping and electrical fires, emphasizing the importance of keeping cables organized and secure. Furthermore, a well-managed setup can significantly reduce the risk of damage to the cables themselves, which can affect signal quality and reliability over time.
The underlying mechanism of effective cable management involves organizing cables in a way that minimizes clutter and eliminates tangling. Cables that are neatly arranged not only improve airflow around devices, reducing the risk of overheating, but also facilitate easier access for maintenance and troubleshooting. Additionally, when cables are properly routed, they are less likely to be accidentally unplugged or damaged, which helps maintain a consistent performance of the projector and other components in the home theater setup.
Moreover, the psychological impact of an organized environment cannot be overlooked. A tidy setup can create a more immersive viewing experience, as distractions from unsightly cables are minimized. Research from the Journal of Environmental Psychology indicates that a clean and organized space can enhance focus and enjoyment, making the case for why cable management is essential to achieving the best projector setup for home theater.
What’s the Best Projector Placement to Avoid Distortion?
When setting up a projector for your home theater, placement is crucial for achieving a clear and distortion-free image. The best projector placement depends on several factors:
-
Throw Distance: This is the distance from the projector lens to the screen. Check your projector’s specifications for the recommended throw ratio. For example, a projector with a 1.5:1 throw ratio will require 1.5 feet of distance for every foot of screen width.
-
Screen Height: Position the projector at or slightly above the top of the screen. A common method is to align the projector lens with the top edge of the screen to minimize keystoning, which can cause distortion.
-
Angle and Tilt: Most projectors can be adjusted for tilt, but setting it level with the screen reduces the need for modifications. Avoid extreme angles to maintain image quality.
-
Ambient Light Considerations: If your room has a lot of natural light, consider a brighter projector or darker screen materials to combat distortion caused by glare.
By carefully considering these factors, you can enjoy a visually stunning and distortion-free home theater experience.
How Can You Maintain Your Home Theater Projector for Longevity?
To ensure the longevity of your home theater projector, consider the following maintenance tips:
- Regular Cleaning: Dust and debris can accumulate on the lens and internal components of your projector.
- Proper Ventilation: Ensuring that your projector has adequate airflow prevents overheating and prolongs its lifespan.
- Use a Quality Screen: A good projection screen can enhance image quality and reduce the wear on your projector.
- Replace the Lamp as Needed: Projector lamps have a limited lifespan and should be replaced when dimming occurs to maintain optimal performance.
- Adjust Settings for Environment: Tailoring brightness and contrast settings according to the ambient light can reduce strain on the projector.
Regular Cleaning: It’s essential to clean the projector regularly, focusing on the lens, filters, and internal components. Dust can scatter light, leading to a less sharp image and can also cause overheating if it clogs the ventilation pathways.
Proper Ventilation: Projectors generate heat, and insufficient airflow can lead to overheating, which can damage internal components. Make sure to position your projector in a well-ventilated area and avoid placing it in enclosed spaces.
Use a Quality Screen: Investing in a high-quality projection screen can improve image clarity and reduce the frequency at which you need to clean the projector. A good screen helps reflect light efficiently, which can lessen the strain on the projector’s lamp.
Replace the Lamp as Needed: Projector lamps typically have a lifespan ranging from 2,000 to 5,000 hours, depending on usage. Keeping an eye on lamp hours and replacing it when it starts to dim can keep your images bright and prevent sudden projector failures.
Adjust Settings for Environment: Customizing brightness and contrast settings based on your viewing environment can help to avoid overworking the lamp and other components. For instance, reducing brightness in a dark room not only enhances image quality but also conserves energy and extends the life of your projector.
How Often Should You Clean the Projector Lens for Optimal Performance?
After Dusty Events: If your projector is used in environments prone to dust, such as during outdoor movie nights, clean the lens immediately after such events. Dust particles can settle on the lens and degrade image quality significantly, so a prompt cleaning will help maintain clarity.
Pre-Long Usage Check: Before any extended viewing sessions, like movie marathons or events, give the lens a quick inspection and clean if necessary. This precaution can prevent any potential distractions caused by smudges or dust during critical viewing moments.
Annual Deep Clean: Schedule a comprehensive cleaning of the entire projector, including the lens and internal components, at least once a year. This ensures that all parts of the projector remain in optimal condition, potentially extending its lifespan and maintaining high-quality performance.
What Signs Indicate Your Projector Needs Servicing?
Several signs can indicate that your projector needs servicing:
- Faded Image: If the colors of your projected image appear washed out or less vibrant than before, it may signal that the lamp is nearing the end of its life or that the lens needs cleaning.
- Frequent Overheating: If your projector frequently shuts down due to overheating, it might indicate that the internal fans are clogged with dust or the cooling system is malfunctioning.
- Strange Noises: Unusual sounds, such as grinding or rattling, can suggest that internal components, like the fan or lens, are damaged or misaligned and should be inspected.
- Image Distortion: If you notice warping, blurriness, or other distortions in the projected image, this could indicate issues with the lens alignment or the projector’s internal settings.
- Power Issues: If your projector struggles to power on or frequently loses power during use, it may have electrical problems or a failing power supply that requires attention.
- Indicator Lights: Pay attention to any warning lights on the projector; if they are blinking or showing red, this usually signifies a problem that needs to be addressed, such as lamp failure or overheating.